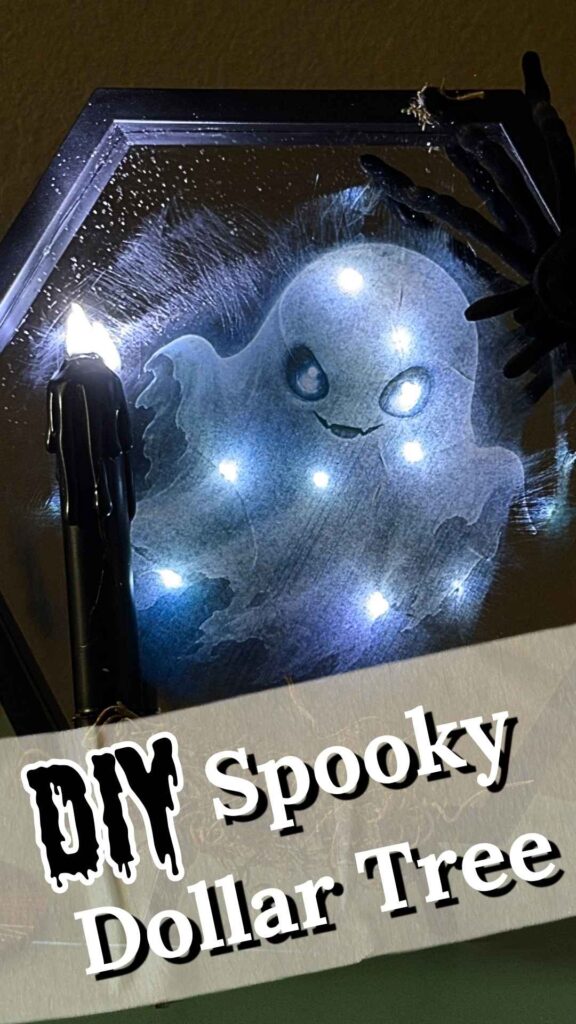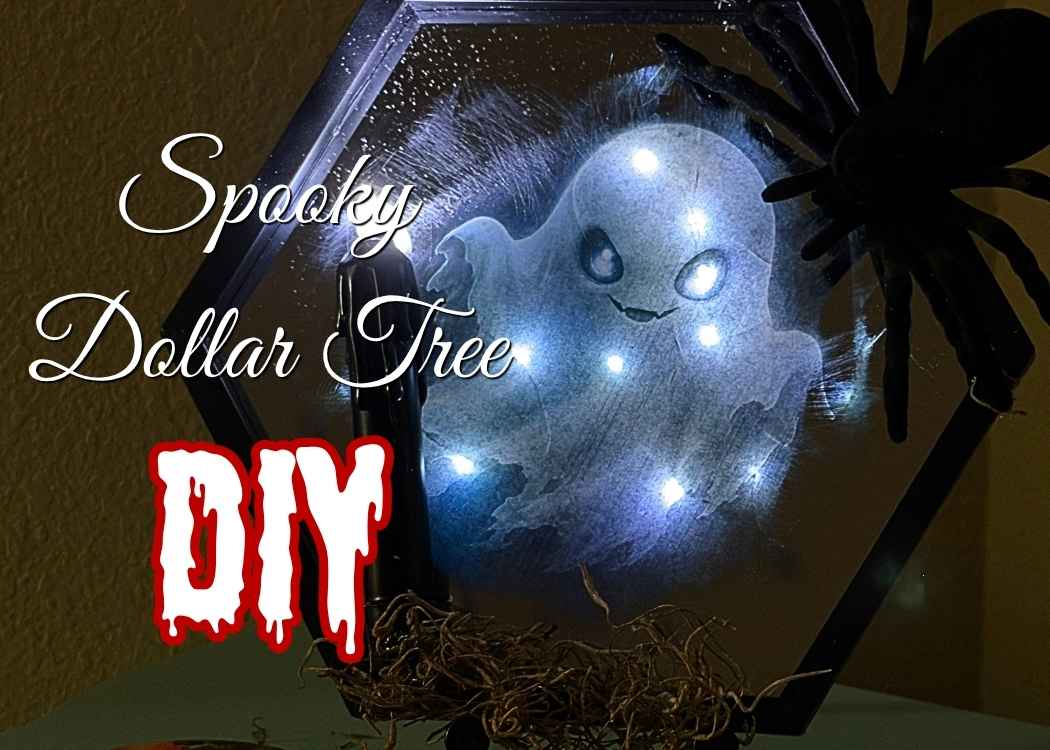
Make an easy Halloween craft with a Dollar Tree mirror, glowing ghost, fairy lights, black candle, moss, and a creepy statement spider.
If you are looking for an easy Halloween craft that is cute, creepy, inexpensive, and just a little unexpected…have I got the project for you!
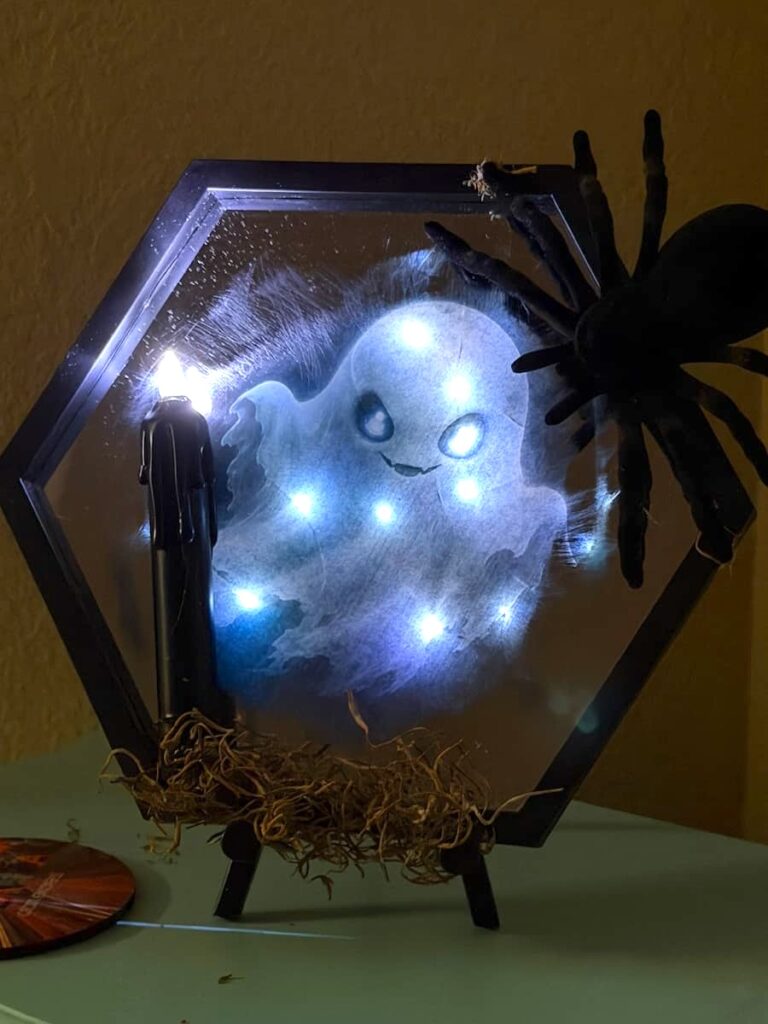
This Dollar Tree light up ghost mirror checks all the boxes!
I started with a simple hexagon mirror from Dollar Tree (super cheap!) and transformed it into a haunted scene using a printed ghost, fairy lights, a black dripping candle, spanish moss, and one very large spider.
I like to call him my statement spider.
This easy Halloween craft is perfect for traditional Halloween decorating, but it also works beautifully for Summerween…full disclosure…I just learned that Summerween is a thing.
Let’s be honest, when you love spooky season, October is simply not long enough.
This glowing ghost looks like it is hiding inside the mirror, while the black candle , moss and spider add texture and dimension.
This would look great displayed anywhere! Think: mantel, shelf, entryway table, or anywhere that could use a cute and creepy surprise.
BOO!
Why You’ll Love This Easy Halloween Craft
Aside from being cute, this Dollar Tree ghost mirror is inexpensive to make, it’s easy to customize, and I bet your wheels are turning already…how about a decaying zombie, or an evil witch instead?
If those aren’t enough spooky ideas for this easy Halloween craft, think skull, skeleton, black cat, haunted house, or one of those creepy vintage portraits.
Watch the Easy Halloween Craft Video
See exactly how I transformed a Dollar Tree mirror into a glowing ghost decoration in the video below!
Be sure to Follow Me on YouTube!
Materials for this Easy Halloween Craft
*Disclosure: This blog uses affiliate links from Amazon and other retailers. I earn a small amount from qualifying purchases at no additional cost to you.
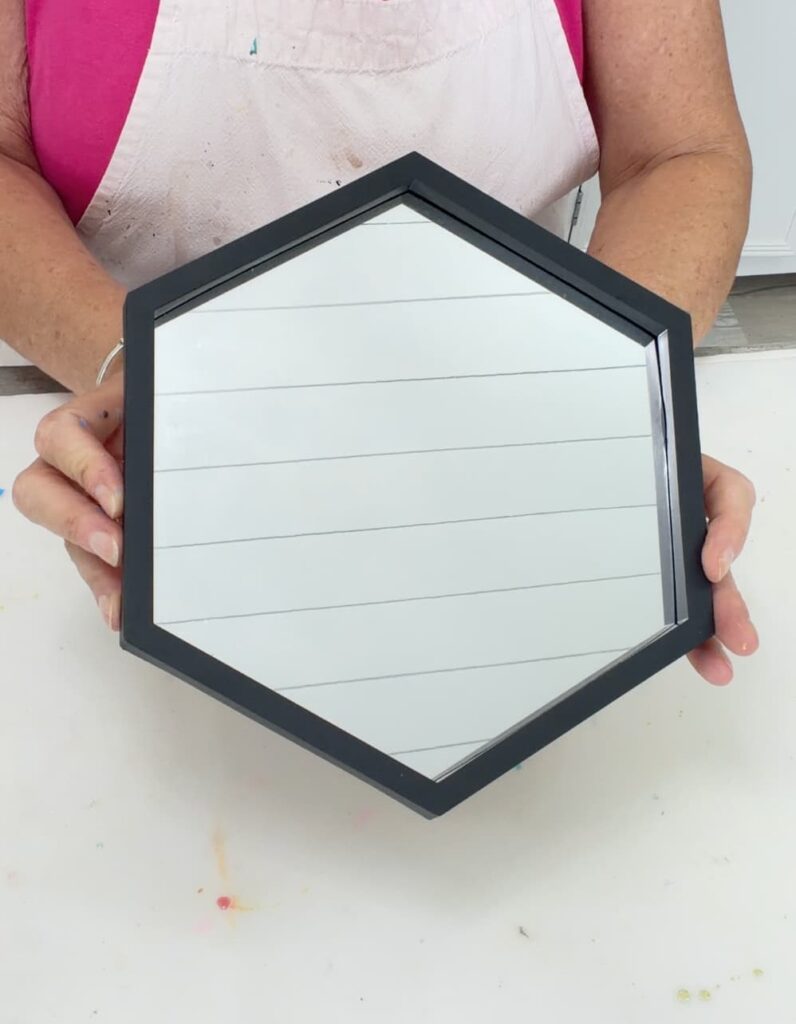
- Hexagon mirror (I don’t think you’ll find it anywhere cheaper than Dollar Tree)
- Hot glue
- Razor blade or glass scraper
- Clear tape
- Ghost image printed on paper with a black background
- Battery-operated pillar candle from Dollar Tree
- Spanish moss
- Large plastic fuzzy spider
- String of fairy lights
- Matte black acrylic paint
- Plate stand
How to Make This Easy Halloween Craft
Step 1: Prepare the Dollar Tree Mirror
Begin by carefully taking apart the hexagon mirror. I want to make sure you know it is a very thin mirror, so be aware of that as you take it apart.
Place the mirror face down on a protected work surface. Using a razor blade or glass scraper, carefully scrape away part of the reflective backing in the center of the mirror.
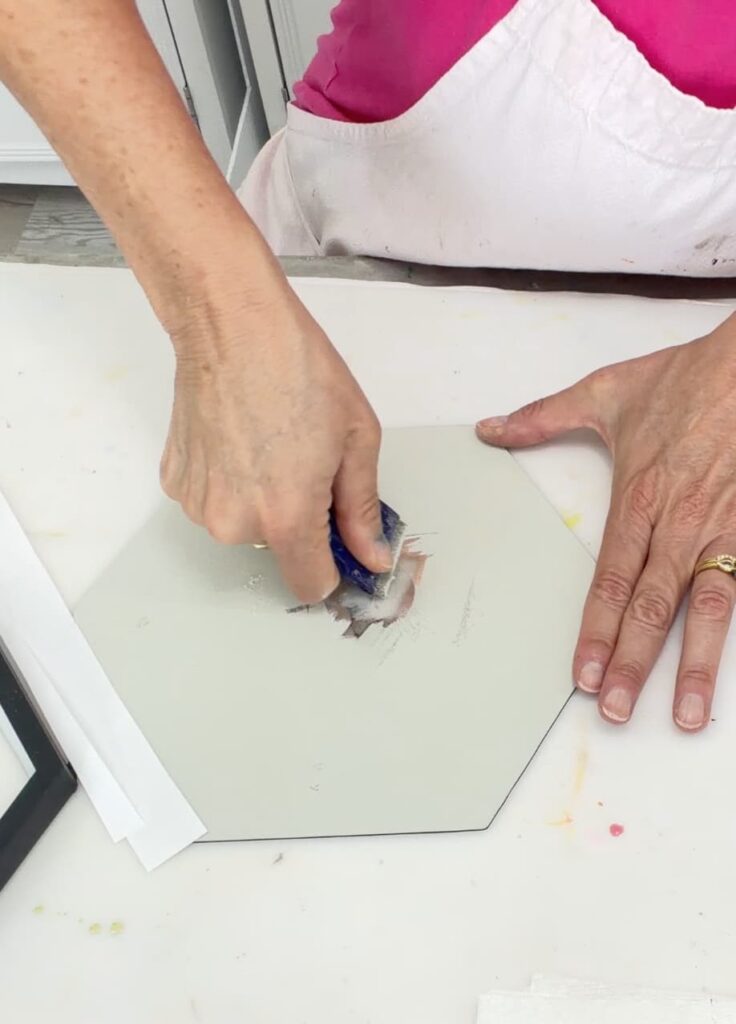
I kept the opening irregular instead of making it a perfect oval. The uneven shape makes the mirror look older and more mysterious, almost as though something has broken through it.
You do not need to remove all of the reflective backing. You only need an opening large enough for the ghost image to show through.
Be very careful when working with the razor blade and the mirror. It’s best to use gloves, eye protection and a mask for the dust wouldn’t hurt either.
Tip: Always keep your fingers away from the blade and always scrape away from yourself.
Step 2: Add the Ghost and the Fairy Lights
Print a cute but ghoulish ghost on paper with a black background.
I used a laser printer, but an inkjet printer will work just fine.
The black background helps disappear into the darkness behind the mirror, making the illuminated ghost look like it’s floating inside the glass.
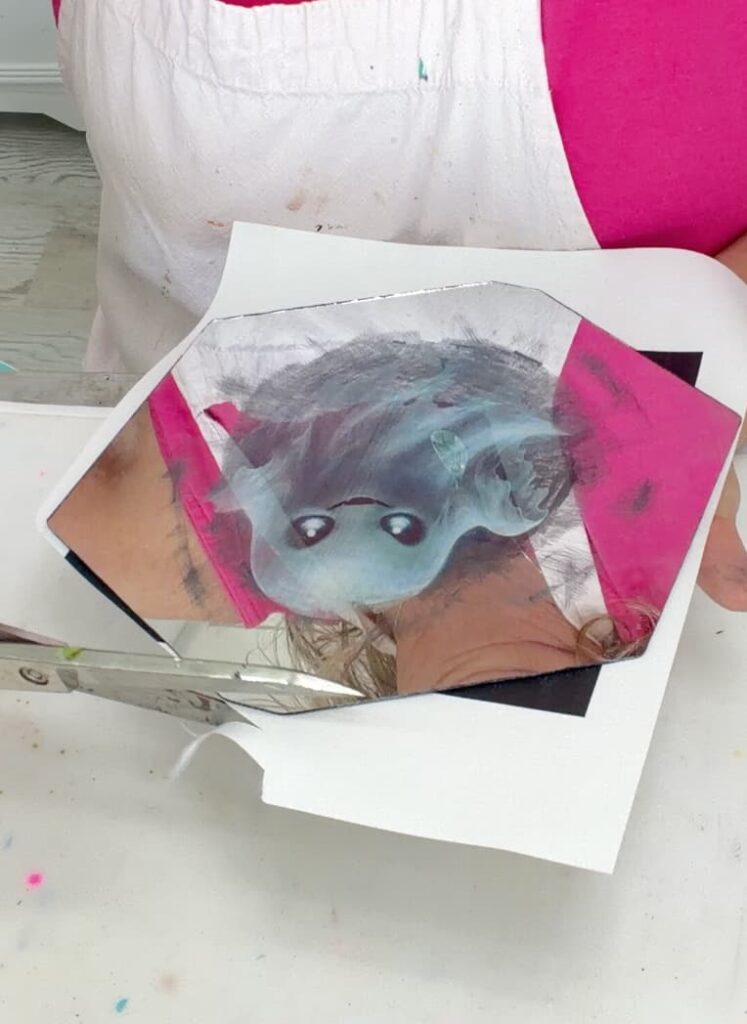
Position the image behind the scraped section of the mirror. Check the placement from the front and adjust it until the ghost is centered where you want it.
Tape the image securely to the back of the mirror.
Next, arrange a string of battery-operated fairy lights behind the paper. the lights do not need to be evenly spaced. a slightly uneven glow adds to the spooky effect.
Keep the battery pack for the fairy lights near an outside edge and glue it on, so it’s easy to reach, but hidden from the front.
Step 3: Make the Dripping Black Candle
The battery operated pillar candle also needed a spooky makeover.
White plastic doesn’t scream SCARY!
Take your hot glue and make sure it’s good and drippy. From the top of the candle, put the hot glue so it drips down the side of the candle.
Add drips around the whole candle.
The drips should be varying lengths. Random drips look creepier.
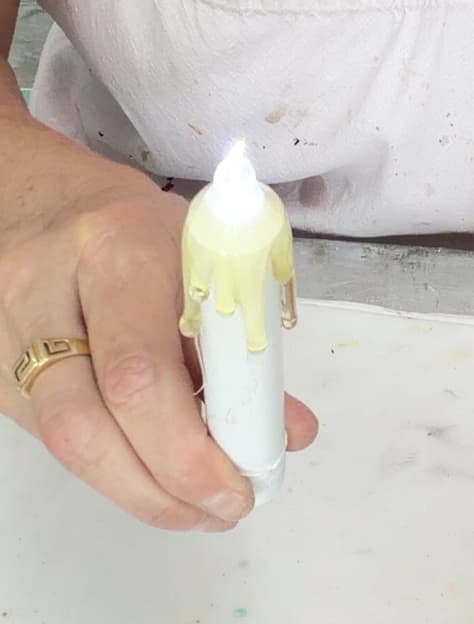
Once the hot glue has completely cooled and hardened, add a piece of painter’s tape over the flame to protect it. Paint the candle and glue drips with matte black spray paint.
*Always use a battery-operated candle for a project like this. Never use a real candle or an open flame near paper, moss, or plastic decorations.
Step 4: Add the Candle Moss and Statement Spider
Position the black candle on the lower left side of the mirror frame. Your positioning might be different depending on your image and the placement, so be flexible.
When you find your spot, secure it with hot glue. The candle I used twists to turn on and off. Just be careful that you don’t glue where it twists.
On a side note…doesn’t the candle painted black make such a huge difference?!?!
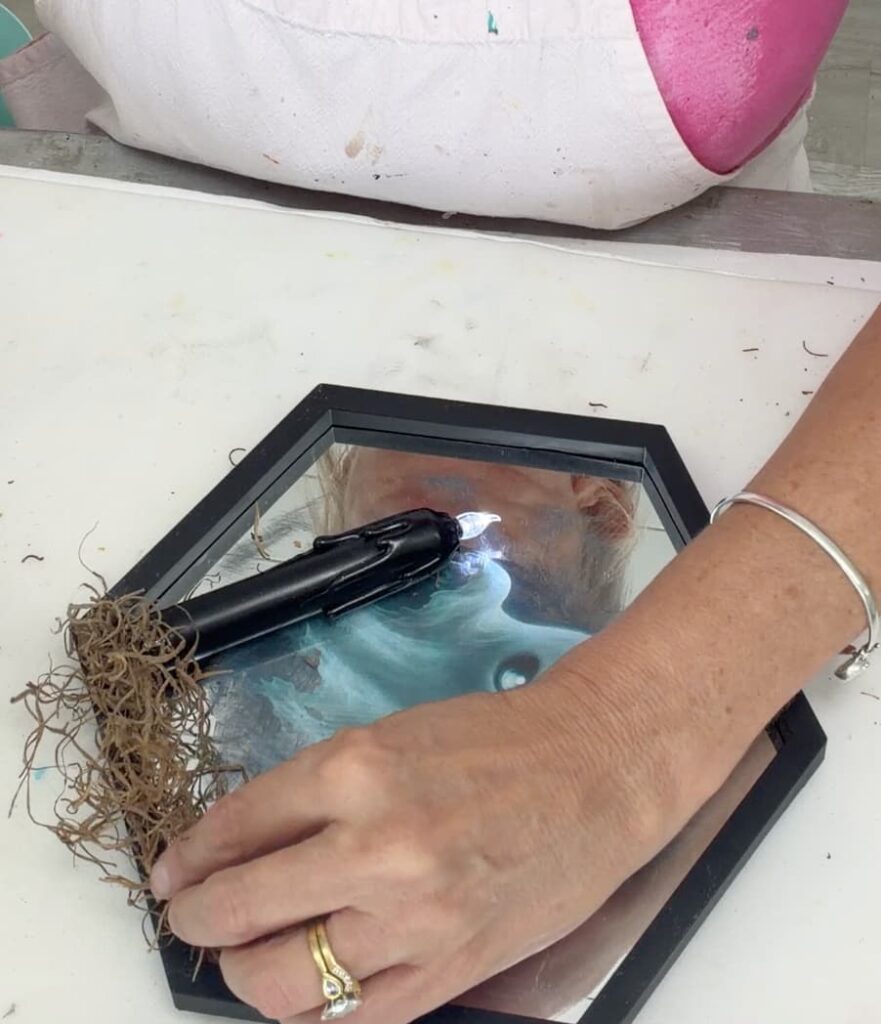
Next, glue the spanish moss around the bottom of the candle and continue the moss along the bottom edge of the mirror frame.
The moss hides the base of the candle, adds dimension, and gives this easy Halloween craft an old, abandoned look.
To finish the design, hot glue the large spider to the upper right of the frame. I put the spider opposite from the candle because I felt like it helped balance it and it was like it was crawling down onto it.
I thought about going with smaller spiders, but sometimes Halloween decor calls for a statement piece…or a statement spider.
Go big or go home!
Step 5: Put the Ghost Mirror on Display
Once all of the hot glue has cooled and everything is secure, place the finished mirror on a display or plate stand.
Turn on the fairy lights and the battery-operated candle.
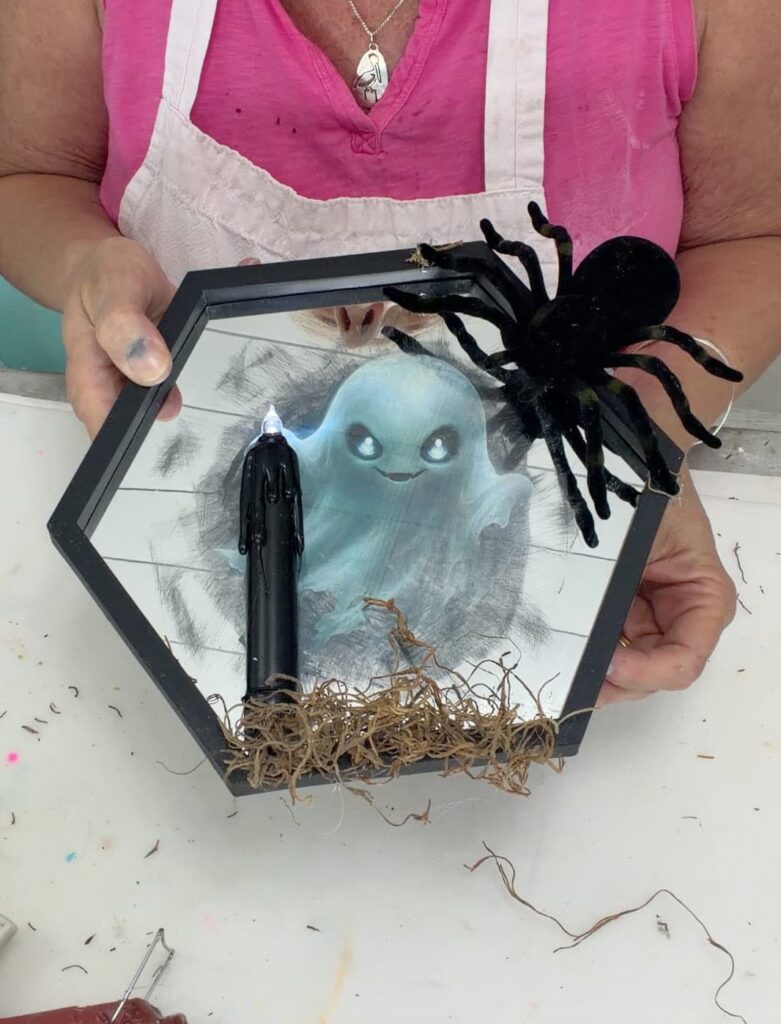
The ghost will glow through the scraped section of the mirror, while the black background seems to disappear.
The dripping candle, moss and statement spider complete the spooky little scene.
In regular lighting, it looks like a creepy decorated mirror.
In the dark, the ghost comes alive!
An Easy Halloween Craft for Summerween
This project is an easy Halloween craft for Halloween but also does double duty for Summerween. Because it doesn’t rely on pumpkins, fall leaves, or traditional Halloween colors it doesn’t scream autumn.

Take it a step further. Pair the mirror with black seashells, a skull wearing sunglasses, tropical leaves painted black, or a spooky beach sign for a fun Summerween display.
More Easy Halloween Craft Ideas
Ready to keep crafting? Here are moe cute, creepy, and creative Halloween projects you don’t want to miss.
- Dollar Tree Halloween Mummy
- Spooky Ghost Halloween Decoration
- Glitter Spider Votives
- Creepy Skeleton Candleholders
- Brain Candleholder
- Dollar Store Skull Wall Hanging
A Cute and Creepy Dollar Tree Transformation
I love taking an ordinary Dollar Tree item and transforming it into something completely unexpected.
Next time you are at Dollar Tree, look around at things a little differently!
What item at Dollar Tree would you like me to transform for Halloween next?
Thanks for stopping by! Remember: Life’s too short not to shimmer, so grab your glue gun and your glitter!
Mona
Be sure to Pin It for later!