
Learn how to make Fireworks Coasters for the 4th of July! It’s a fun and easy Cricut craft and resin project. I made a 4th of July Sign project using the same image and thought I would apply it to a coaster project.
You will need:
Mold: https://amzn.to/2FcRd7J
Lighter: https://amzn.to/2MmATJp
Fine glitter: https://amzn.to/2XzDeF7
Black paint: https://amzn.to/2RGsCPs
Cricut on Amazon: https://amzn.to/2GV6zki
Cricut from Cricut: https://shrsl.com/1kzdi
Removable vinyl: https://amzn.to/2Tf4p1A
Transfer tape: https://amzn.to/2Y49FJ9
Fireworks image (royalty free): https://www.clker.com/clipart-black-and-white-fireworks.html
Resin (use whatever resin brand you like):
Easy Cast: https://amzn.to/2yjYmBC
Art Resin: https://amzn.to/2yk9X3z
Clear Cast: https://amzn.to/2z4rxGw
This is the resin I used for this project:
FX Poxy: https://amzn.to/2AF3Pkk ~ According to the manufacturer, this one is heat resistant to 500 degrees F.
Creating with Craft Klatch Facebook Group: https://www.facebook.com/groups/2374635959255275/
Here is a video tutorial, so you can see exactly how I made them:
Directions:
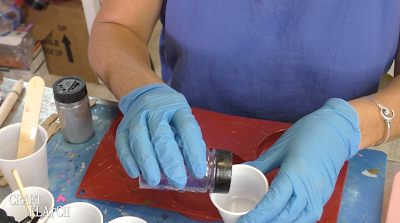
1. I mixed my resin, according to the package directions.

2. I separated the resin into five different cups.

3. I mixed fine glitter into each of the cups. I used a silver, gold, red, white and blue.

5. I then poured the white inside the blue.

6. I then poured the red into the middle of the coaster.

7. Working on the red and silver coaster, I poured in the silver.

8. I poured the gold into the middle.

9. I used my lighter to pop the bubbles.

10. I used my Cricut to cut out the fireworks image.

11. I applied the Cricut vinyl to the coaster.

12. I burnished it down, to make sure the vinyl stuck to the resin.

13. I remove the transfer tape and burnished it down again.

14. I used my Mod Podge to seal the vinyl, so when I add the black paint, it would not seep under.

15. Once dry, I painted over the whole thing with black acrylic paint – 2 coats.

16. Once dry, I carefully removed the vinyl…

…and it exposed the beautiful glitter beneath!


17. Here is how it looks so far! Time to shine it up with a layer of resin!

18. I mixed more resin and carefully poured it over the coasters, making sure it didn’t run over the edges.

19. I popped the bubbles with my lighter and let them cure minimum of 12 hours before handling them.

20. Here is the red, white and blue, with just a hint of the blue on the tips of the fireworks burst.

Here is the silver and gold.

Thanks for stopping by! Remember: Life’s too short not to shimmer, so grab your glue gun and your glitter!™ Stay safe!
Mona


