Discover DIY nail polish washer necklaces! A fun jewelry making for beginners using nail polish, washers, and creativity. Perfect for all ages!
When you want to DIY some jewelry, it’s time to raid the workshop or garage or take a trip to the hardware store! This is an excellent craft for kids and adults! It would be a great birthday party activity or a sleepover activity! I’ll show you how to make these easy DIY Nail Polish washer necklaces!
Before We Get Started making the Nail Polish Washer Necklaces
If you are looking for some jewelry making for beginners, I have some fun projects for you!
You will be sure to find something you like!
- Donut Necklaces
- Amazing Alcohol Ink Pendants
- Easy Chick Charms
- Resin Glitter Charms
- Black Walnut Heart Pendant
Supplies You Will Need To Make the Nail Polish Washer Necklaces
*This blog uses affiliate links. As an Amazon Associate I earn from qualifying purchases, at no additional cost to you.
- Flat washers – whatever sizes you want
- Nail polish – whatever colors you want and it can be cheap!
- Clear top coat nail polish
- Cord – I used braiding cord and bamboo cord
- 16 gauge galvanized wire
- Glue – optional and only needed if you want to stack
Here is the Jewelry Making for Beginners Video Tutorial
Here is the video tutorial where I show you exactly how to make these easy pendants which is an easy beginner jewelry project.
Jewelry Making for Beginners Directions
Step 1: Cleaning the Washers
Clean the washers – you can wipe them down with rubbing alcohol or glass cleaner. Cleaning them allows the nail polish to stick to the washers better. You don’t want the polish peeling off.

Step 2: Coloring the Washers
Start applying nail polish. You might want to wait between coats for the solid colors. More coats gives it even coverage.

You might want to mix the colors on others. Just experiment. Let your creativity run wild. Do different designs. Squiggles and dots are fun!
Step 3: Top Coat
Once you have them decorated, be sure to apply a topcoat and allow it to completely dry. The topcoat will help protect the polish from chipping. a

Step 4: Add a Cord
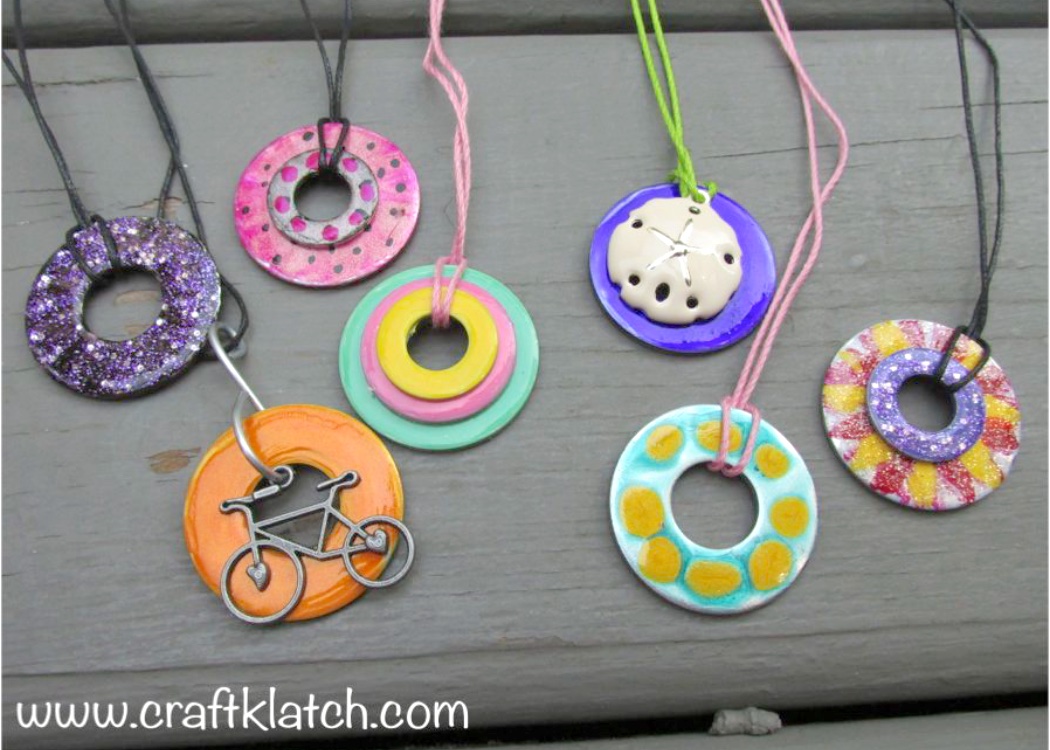
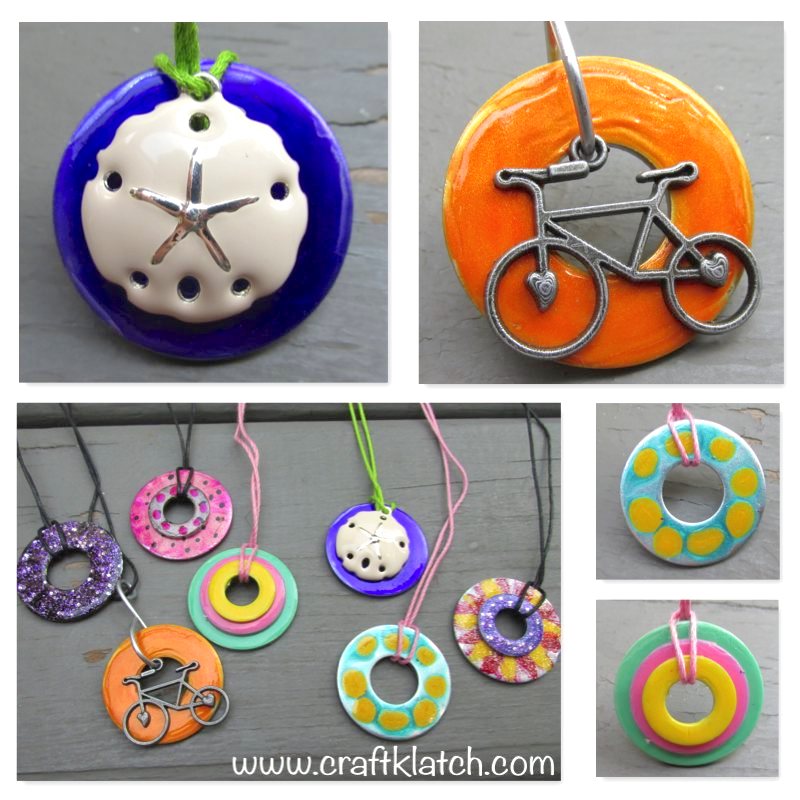
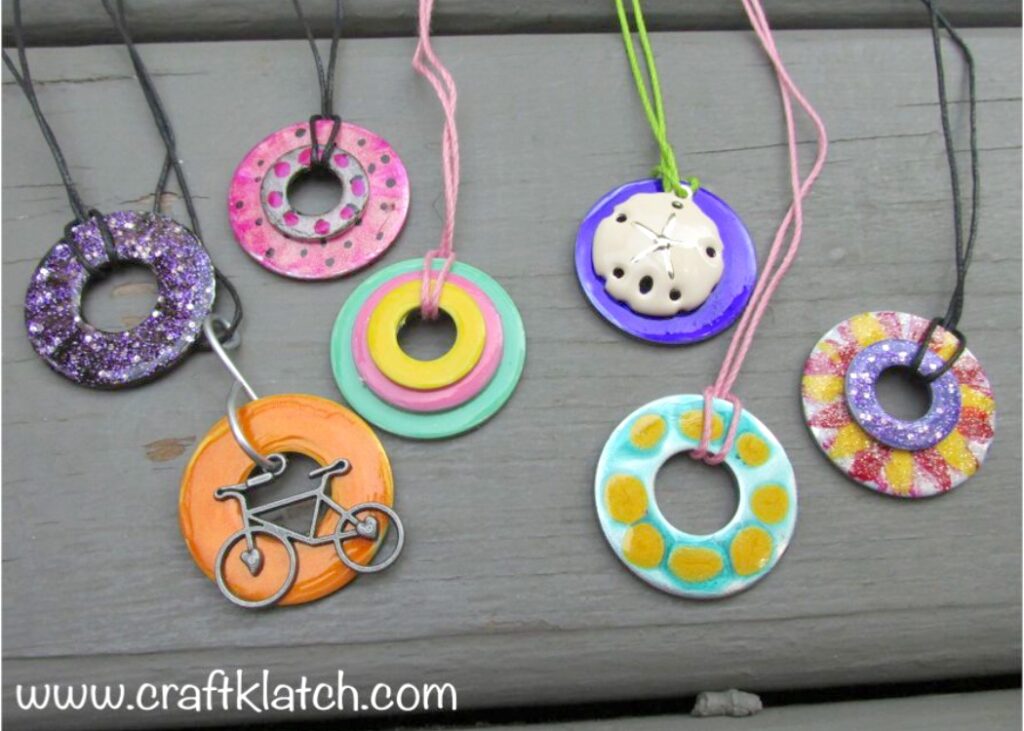
When they have dried, it’s time to add a cord. The first one I made, the orange one with the bike, I took the wire and created a sort of “S” hook, added the washer, and the bead. I closed up the “S” hook and added a cord to hang it from.

For the others, I used the technique of cutting off a length of cording and tying the ends into a knot. Feed the tied end through the front of the washer, loop it through the cord, and you have an instant pendant!

Step 5: Glue Washers Together
You can add beads as I did. You can also choose to stack multiple washers and add the cord like above. When I stacked them, after applying the nail polish and letting them dry, I glued them together, let them dry, and then added the cords.

That’s it! Go make some hardware store jewelry!! Personalize them with different charms to reflect hobbies and interests. From flowers to bikes to sand dollars, you can customize them for anyone.
Be sure to PIN IT for later!
In case you don’t have time to make them…
If you like washer jewelry but just aren’t up to making any, here are some great alternatives!

Thanks for stopping by!
Remember: Life’s too short not to shimmer, so grab your glue gun and your glitter!™ Stay safe!
Mona
These are so darn cute. My granddaughters would have a blast making these. Thank you for the tutorial.. found you through The Friday Link Party.
Thanks Cathy! I found you blog and just started following you on Facebook!
Mona
So cute! I've pinned it! These would be super cute for a girl crafting party. 😀
Thanks Bethany! Glad you like them!
Mona
These are great! I've been using washers hung on cord as a necklace/eyeglasses holder. Just make sure the washer hole is wide enough to accommodate your glasses arms. I think I'll gussy mine up with nail polish now.
What a fun 'busy time' project for these last few weeks of summer vacation. Thank you for sharing with the Clever Chicks Blog Hop! I hope you’ll join us again next week!
Cheers,
Kathy Shea Mormino
The Chicken Chick
The-Chicken-Chick.com
Is there a print out of directions to make washer necklaces and bracelets?
Can this be a craft that is done and dries quickly for a group of kids?
Thanks