SUBSCRIBE to my YouTube Channel!
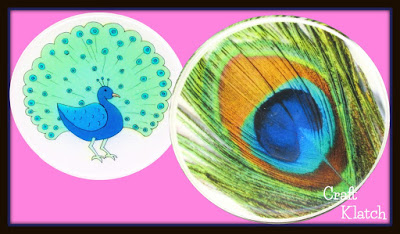
It’s time for some peacock coasters! I was going for a high impact on color and look with the feather and a whimsical look with the drawing.

You will need:
Coaster mold: http://amzn.to/1Wgf3D2
Resin: http://amzn.to/1YJxBL1
Transparency film: http://amzn.to/1YJxG1g
White pigment: http://amzn.to/1Nn67tV
Circle cutter: http://amzn.to/23MJIOe
Link to free Peacock Images: http://www.gumroad.com/craftklatch
Here is the video tutorial:
Directions:
1. Mix two ounces of resin and add some white pigment. Mix well.
2. Pour into coaster mold (one ounce into each of two cavities).
3. Use your lighter to pop the bubbles. Allow to cure at least 12 hours.
4. Print your images on transparency film. Be sure to buy the transparency film that works with your printer. FYI: I am giving the peacock images I used away for FREE at my Image Store!! Go get ’em!!!
5. Cut out your images – I used a circle cutter and it makes it EASY!
6. Prepare two more ounces of resin. Pour one ounce into each of the coasters. Slide the transparency film into the resin and press it down with your stir stick. Press until all the bubbles come out from underneath.
7. Pop bubbles with your lighter.
8. Allow to cure a minimum of 12 hours.
Now you can unmold it and you have two fabulous coasters!
Thanks for stopping by! Remember: Life’s too short not to shimmer, so grab your glue gun and your glitter! Stay safe!
Mona

