
Create a frosty snowflake craft with Dollar Tree ornaments! This budget-friendly DIY adds sparkle to your holiday decor with paint, glitter, and creativity.
Transform budget-friendly Dollar Tree ornaments into dazzling snowflake decorations perfect for your holiday decor. This easy tutorial adds a frosty, festive charm to your Christmas without breaking the bank.
Before getting into this project, here is a quick recap. I found four of these unfinished ornaments and decided to give each of them four distinct looks and styles. If you haven’t seen them, be sure to check them out.
Ornament Makeover #1 was a Rustic Farmhouse Snowman Ornament and Ornament Makeover #2 was a Merry and Bright Ornament.
Now it’s time for #3!
Supplies You Will Need for the Frosty Snowflake Craft
*Disclosure: This blog uses affiliate links from Amazon and other retailers. I earn a small amount from qualifying purchases at no additional cost to you.
- Wood ornament: check your local Dollar Tree
- Snowflake ornament: check your local Dollar Tree
- White paint
- Purple glitter
- Blue glitter
- Silver ribbon
- Resin:
- When deciding on which resin to use, there are a lot of qualities that might be appealing, UV resistant, price, heat resistance, etc. Just make sure to select a resin that fits your needs.
- Use whatever brand you like:
- Easy Cast
- Art Resin
- Let’s Resin
- Promise Epoxy
- These are heat resistant resins:
- FX Poxy
- Stone Coat
Frosty Snowflake Craft Video Tutorial
How to Make a Frosty Snowflake Craft
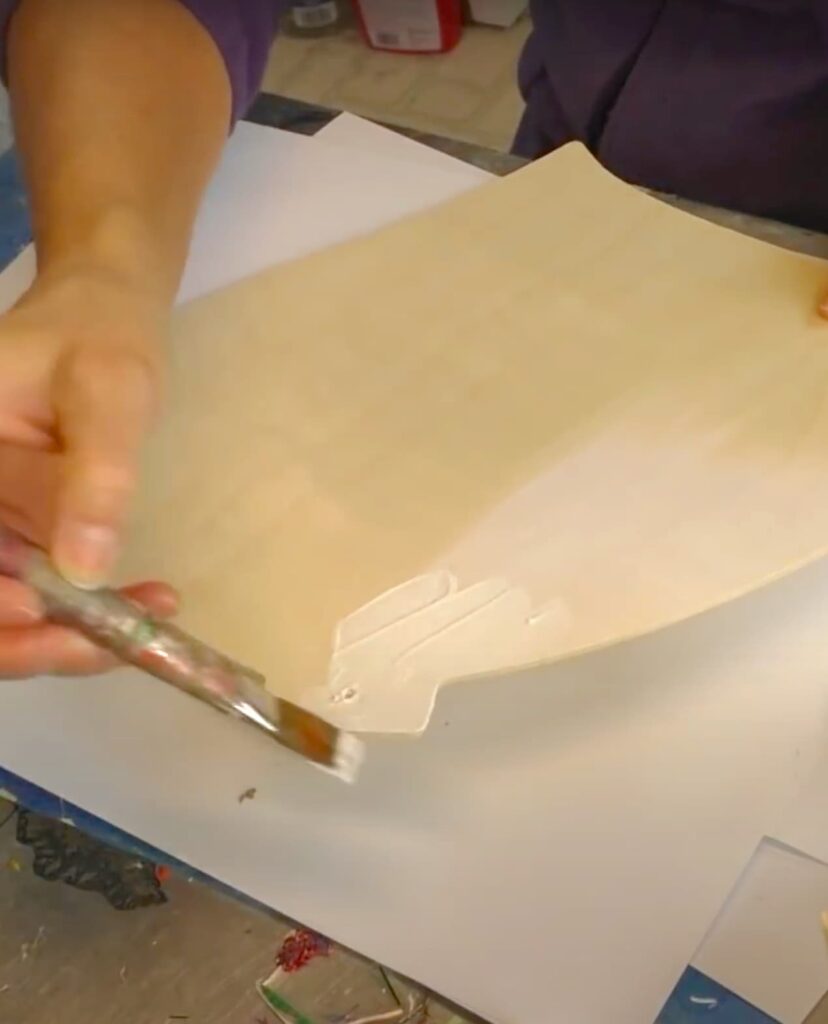
Step 1: Prep and Paint the Ornament
Start with a Dollar Tree ornament as your base. Paint it white on both sides, ensuring the edges are covered as well. Allow the paint to dry completely. Painting both sides will help prevent the wood from warping, so don’t skip this step.
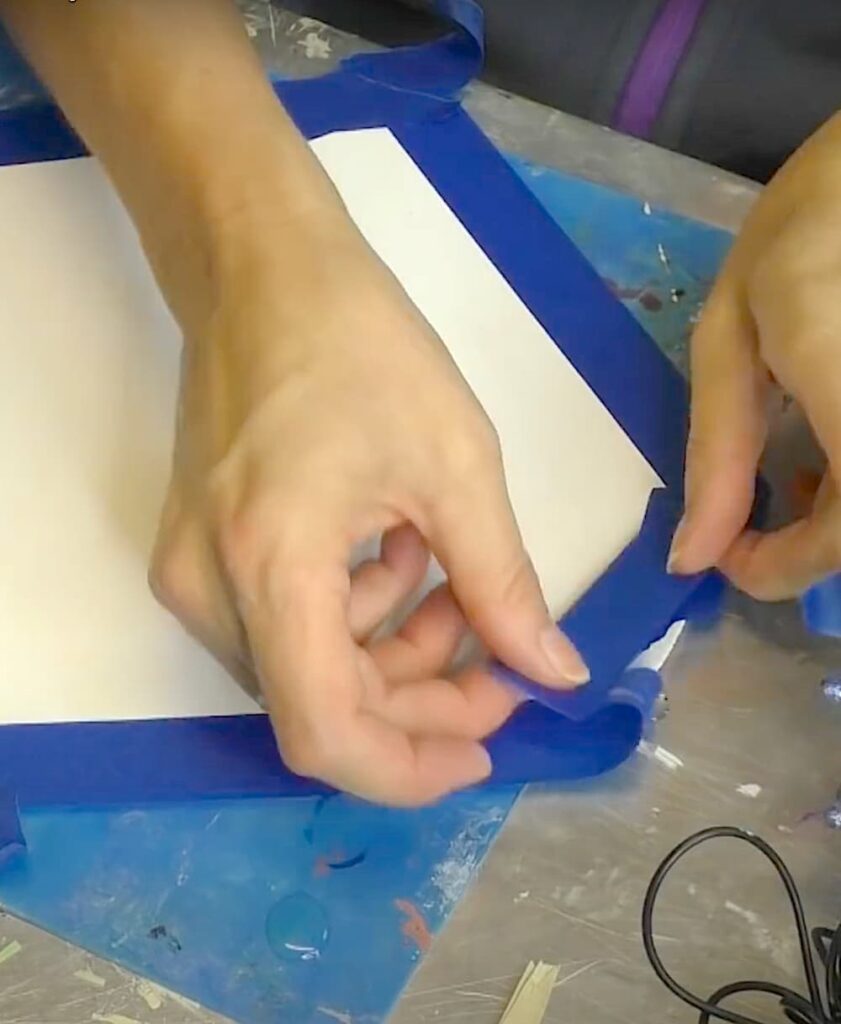
Step 2: Protect the Back with Painter’s Tape
Once the paint is dry, cover the back of the ornament with painter’s tape. Press down firmly to seal the edges and use a craft knife to carefully trim off any excess tape. This will protect the back from resin spills and make cleanup easier. Also, if you put a very thin layer of Vaseline on the painter’s tape, the resin will remove easily.
Step 3: Prepare the Snowflake Embellishments
Take additional Dollar Tree ornaments or snowflake decorations and carefully remove any unwanted 3D elements. I had to remove one layer of the large ornament so the snowflake would lay flat. Also, remove anything like loops or nubs with scissors or light sanding.
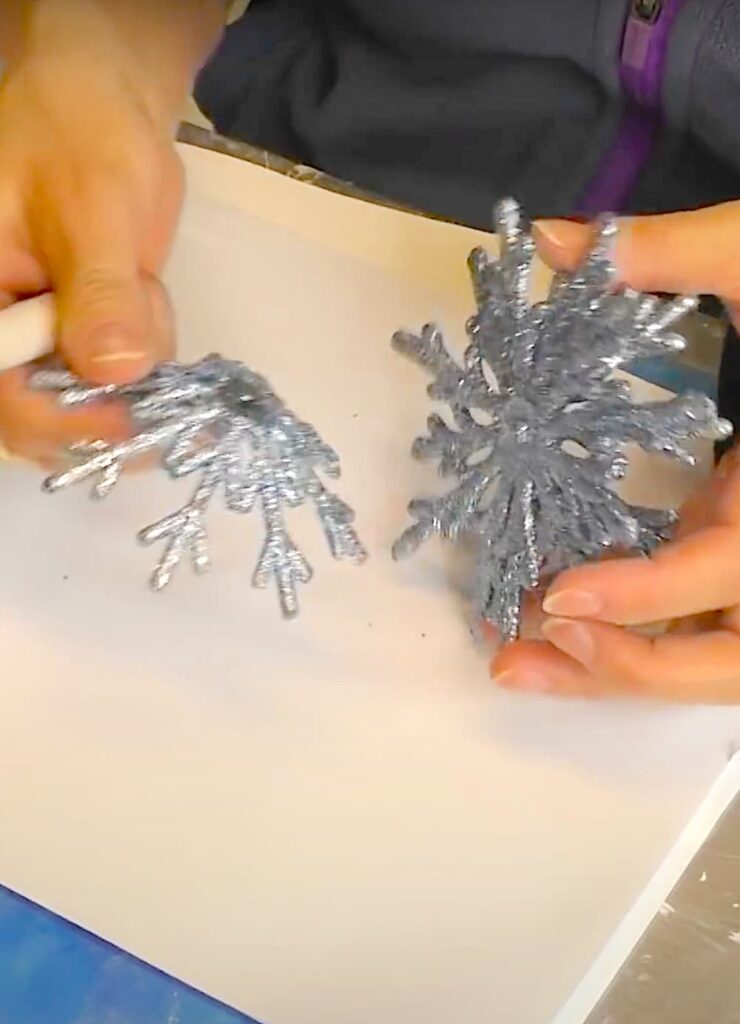
These pieces will be placed into resin later, so you want to make sure they will lie flat.
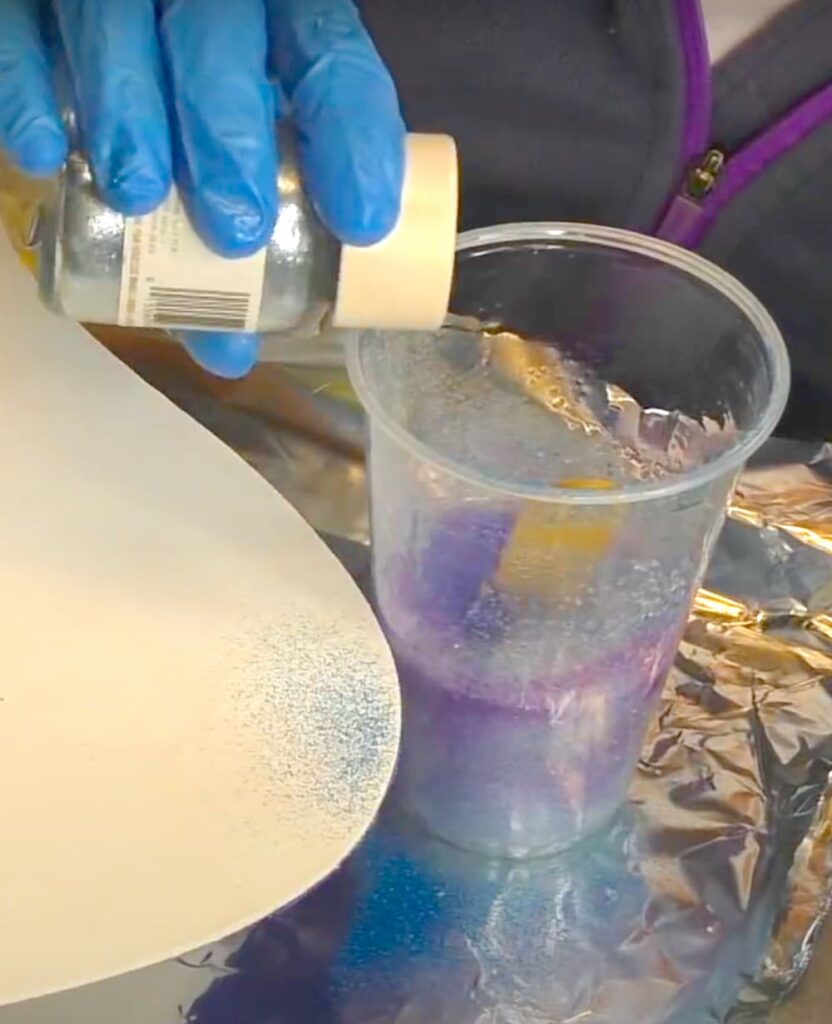
Step 4: Create Your Glitter Resin Mix
Mix five ounces of resin in a disposable cup. Start mixing different glitters. Start with white glitter, add various shades of blue, and a hint of purple for depth. Use both chunky and fine glitters to achieve a sparkling, multi-dimensional look.
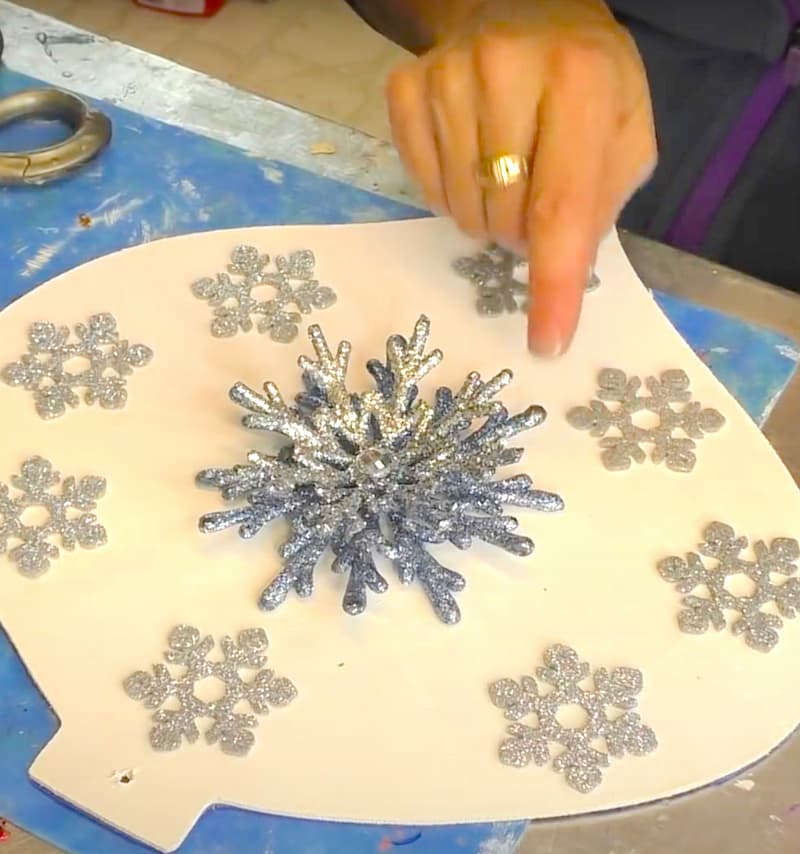
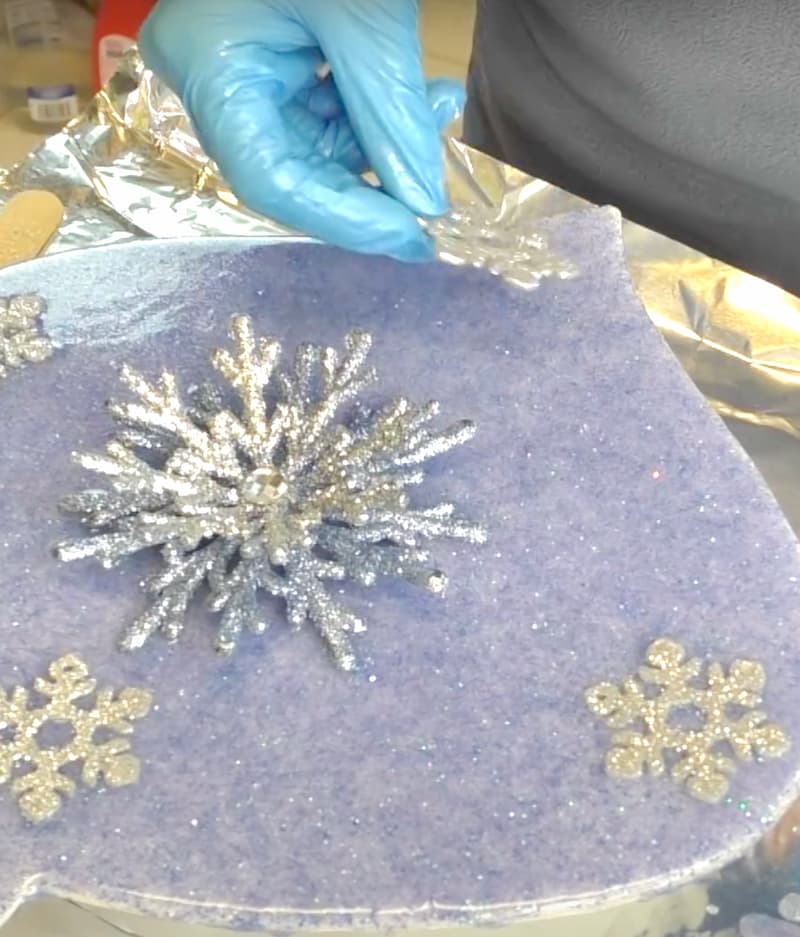
Step 5: Pour and Design Your Ornament
Pour the glitter resin over the painted and taped ornament, spreading it evenly to the edges. Let some resin slightly overflow to ensure smooth edges.

Use a lighter, torch, or heat gun to pop the bubbles.
Arrange your snowflake embellishments and the main centerpiece ornament in the resin, while it’s still wet.
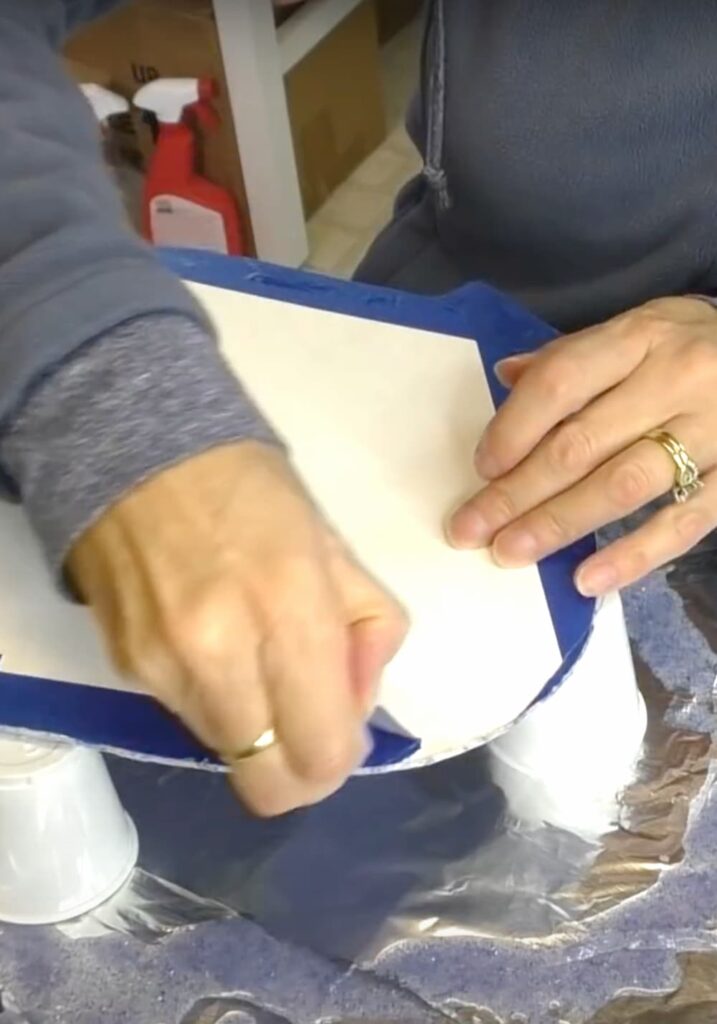
Step 6: Cure, Clean and Finish
Allow the resin to cure completely. Once cured, remove the painter’s tape from the back. The tape will peel off easily, if you applied the thin layer of Vaseline.
Clean up any rough edges, drill a hole at the top, and attach a ribbon or hanger. Enjoy your sparkling frosty snowflake ornament.

Snowflake Craft Ornament Alternatives
If you enjoyed the snowflake craft, you will enjoy these too!
- Snowflake Coasters | Another Coaster Friday
- How to Make Snowflake Votives [Video]
- How to Make a Snowflake Ornament
- How To Make A Button Snowflake Holiday Decoration
Remember, Life’s too short not to shimmer, so grab your glue gun and your glitter!™ Stay safe!
Mona
Find me on INSTAGRAM!