
Who doesn’t like penguins? Penguins are so darn cute! Maybe we ought to start a penguin club…not for the Penguin from Batman, but for cute fuzzy penguins. Well, since a penguin club probably won’t happen, I’ll show you how to make the most adorable Christmas penguin craft instead!
This project is a great Christmas craft idea, a beautiful home decor set for the holidays, and it has super cute Christmas penguins in Santa hats!
Win! Win! And Big Win!
Be sure to follow me on Instagram for behind-the-scenes stories!
Before we get started on the penguin craft, I have 5 Fun Facts About Penguins!
5 Fun Facts About Penguins
- Penguins cannot fly, but they have flippers and are excellent swimmers.
- Penguins lose all their feathers once a year – ALL OF THEM – it takes about 2-3 weeks! It’s called a catastrophic molt. Every time I look at the drain of my shower, I think I’m going through a catastrophic molt.
- They are dedicated parents. Both mom and dad stick around for several months to raise the baby penguin and make sure it is strong enough to hunt for food on its own.
- Emperor penguins are the tallest and can be four feet tall. Think for a minute how tall four feet actually is. That would go up to my chest…that’s one big bird!
- Adult penguins have slick feathers, but the babies are fuzzy and fluffy. They look so soft and cute, I just want to give a baby penguin a big snuggly hug!
Now let’s get back on track with how to make the holiday penguin craft, so you can start decorating for the holidays!
*This blog uses affiliate links. As an Amazon Associate I earn from qualifying purchases, at no additional cost to you.
Supplies You Will Need To Make The Christmas Penguin Craft
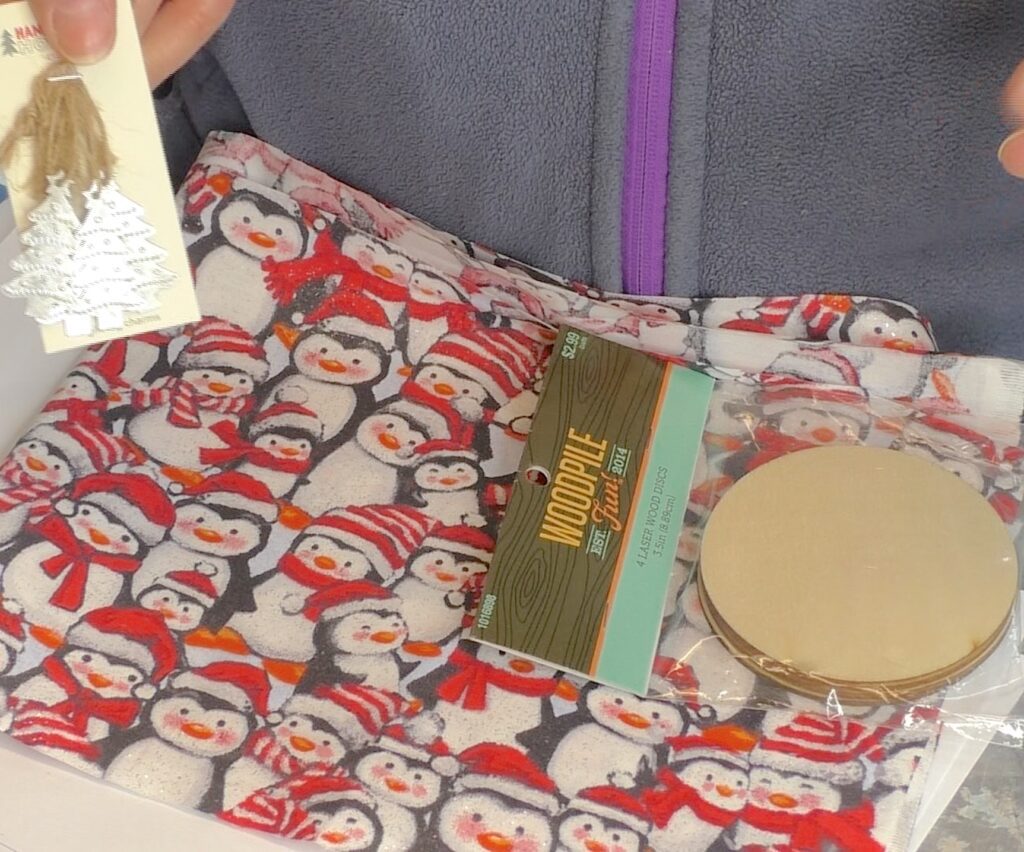
- Wood discs
- Mod Podge
- Fabric: Joanns
- White paint
- Black paint
- Metal trees: Joanns
- Red glitter
- Black glitter
- Silver glitter
- Coaster mold
Christmas Penguin Craft Video Tutorial
Here is the video tutorial, so you can see exactly how I made the whole set:
Directions On How To Make The Penguin Craft
Step 1: Go Shopping for Christmas penguin craft supplies!
I went shopping and found this super cute Christmas penguin fabric, little metal Christmas trees, and 3.5″ wood discs.
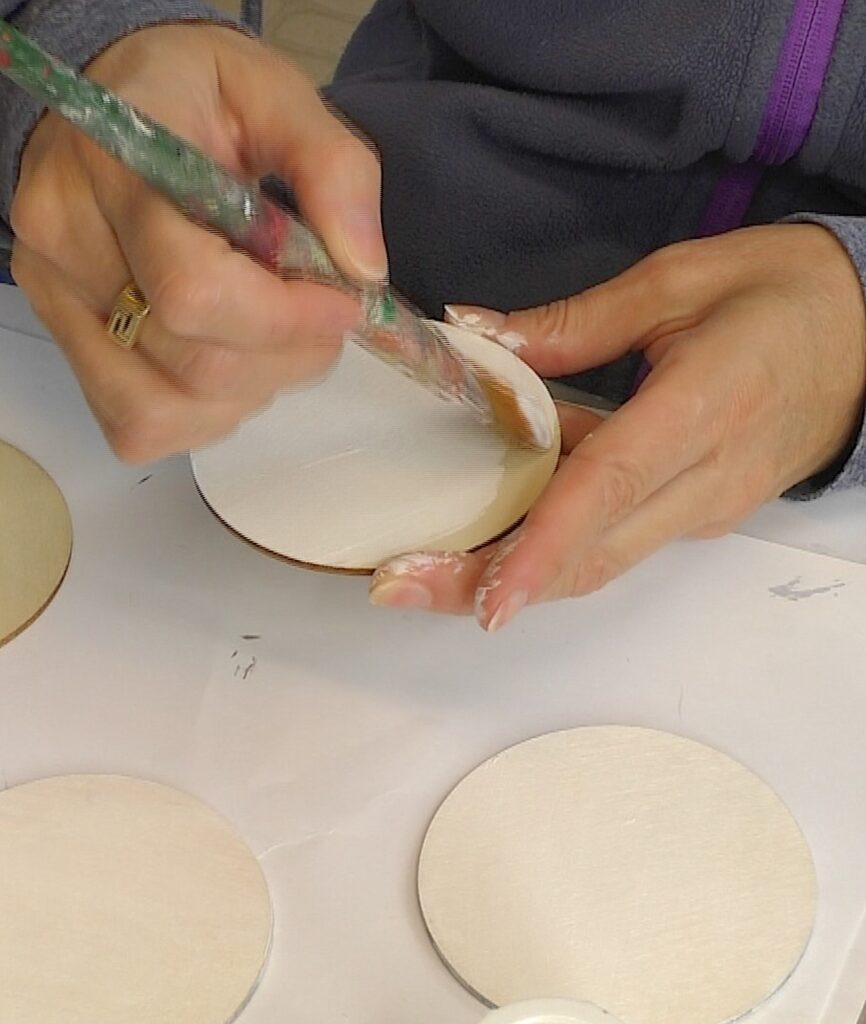
Step 2: Start Painting
I painted the discs white – front and back.
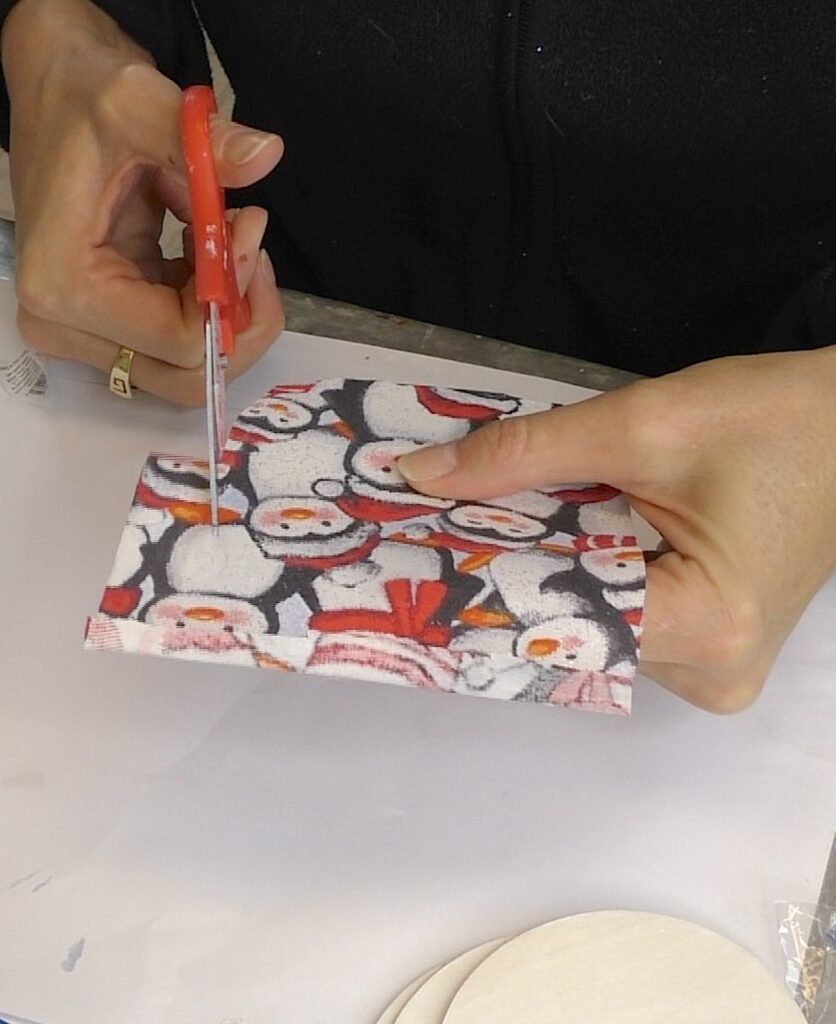
Step 3: Do A Little Trimmin’
I trimmed a piece of fabric, a little bit larger than the disc. You can always trim it down later, but you can’t put it back on, if it’s too short.
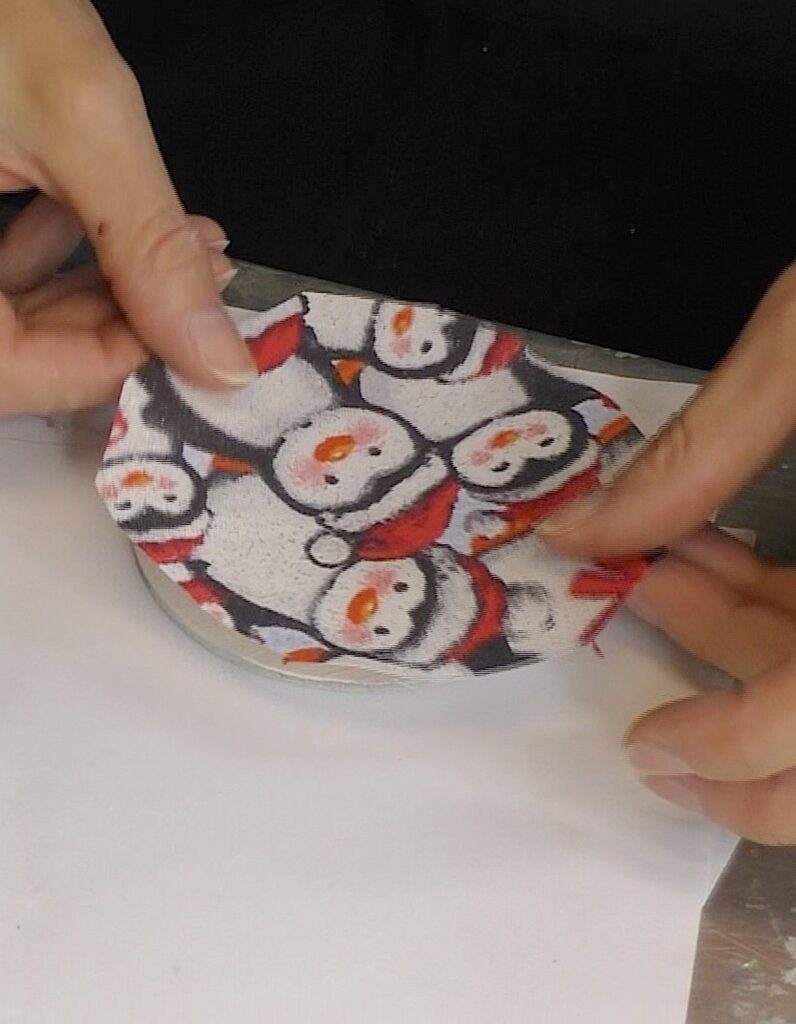
Step 4: Here is Where the Christmas Penguin Fabric Comes In…
I brushed the Mod Podge onto one side of the disc, placed the fabric onto the disc, and smoothed it down.
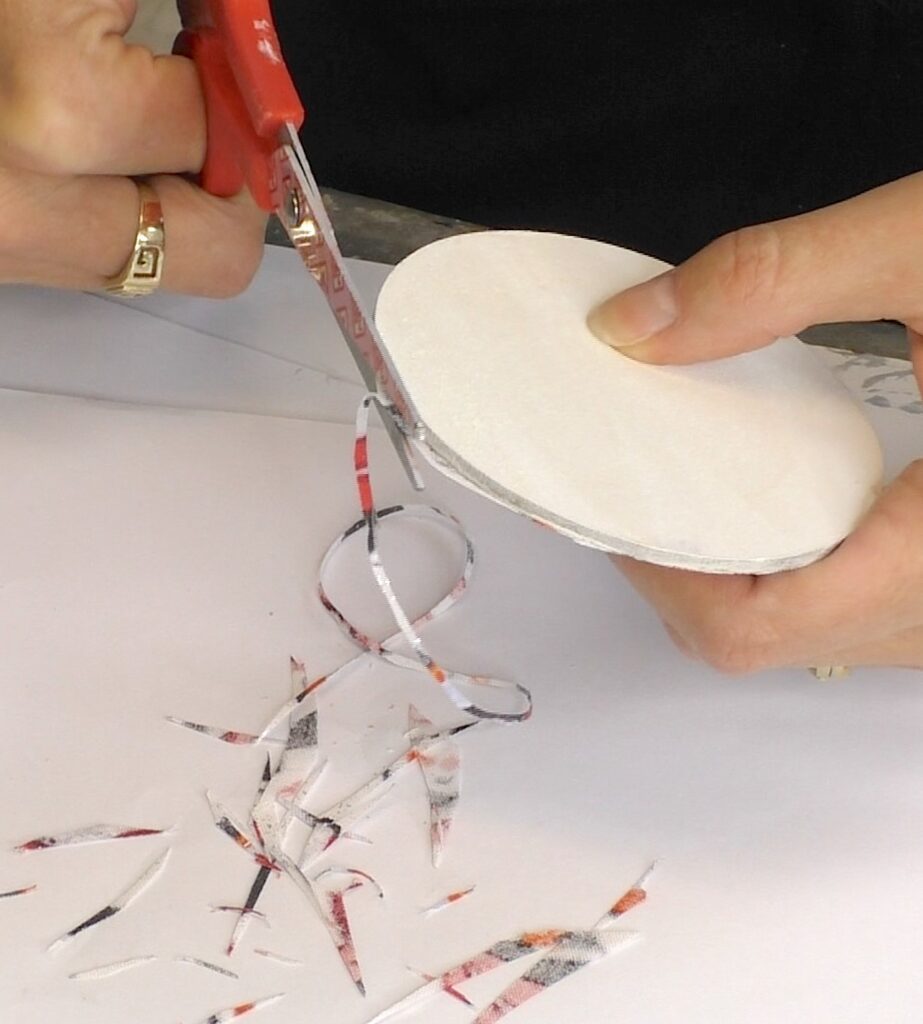
Step 5: Trim It
I trimmed the excess, right up to the edge of the disc.
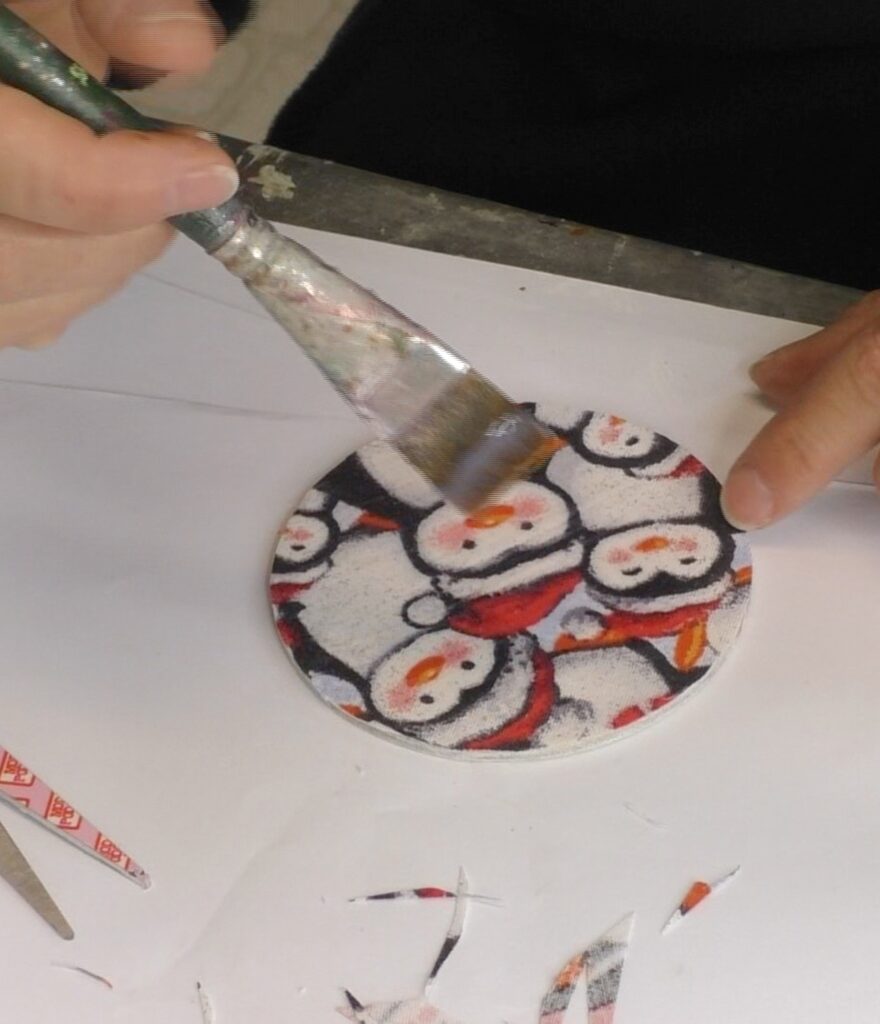
Step 6: Seal the fabric
I brushed the Mod Podge on the penguin fabric. Once it dried, I did two more coats, to make sure it was really sealed. Be sure to check and make sure the edges are well sealed and down too.
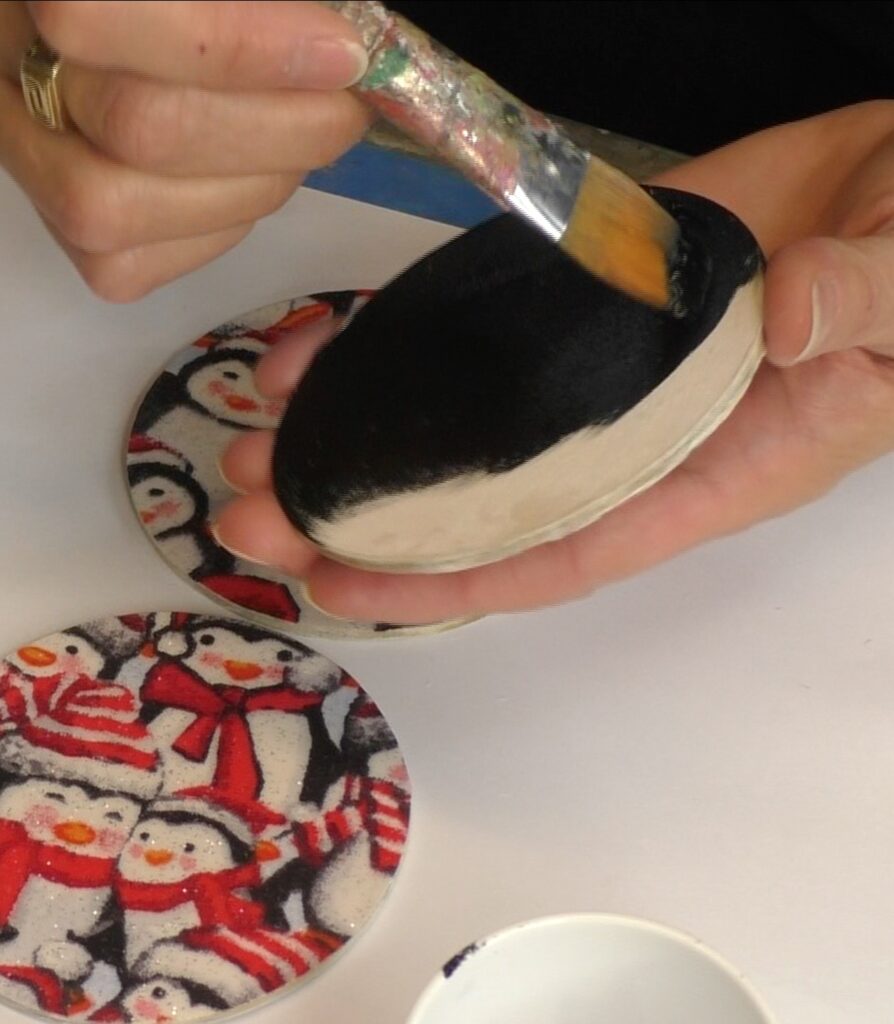
Step 7: Paint The Back, Jack!
Once dry, I painted the backs and edges with a multi-surface black paint.
Step 8: Avoid The Drips
Once dry, I used painter’s tape and lined the back of the coasters, so resin drips could be removed. I used my craft knife to cut off the excess tape.
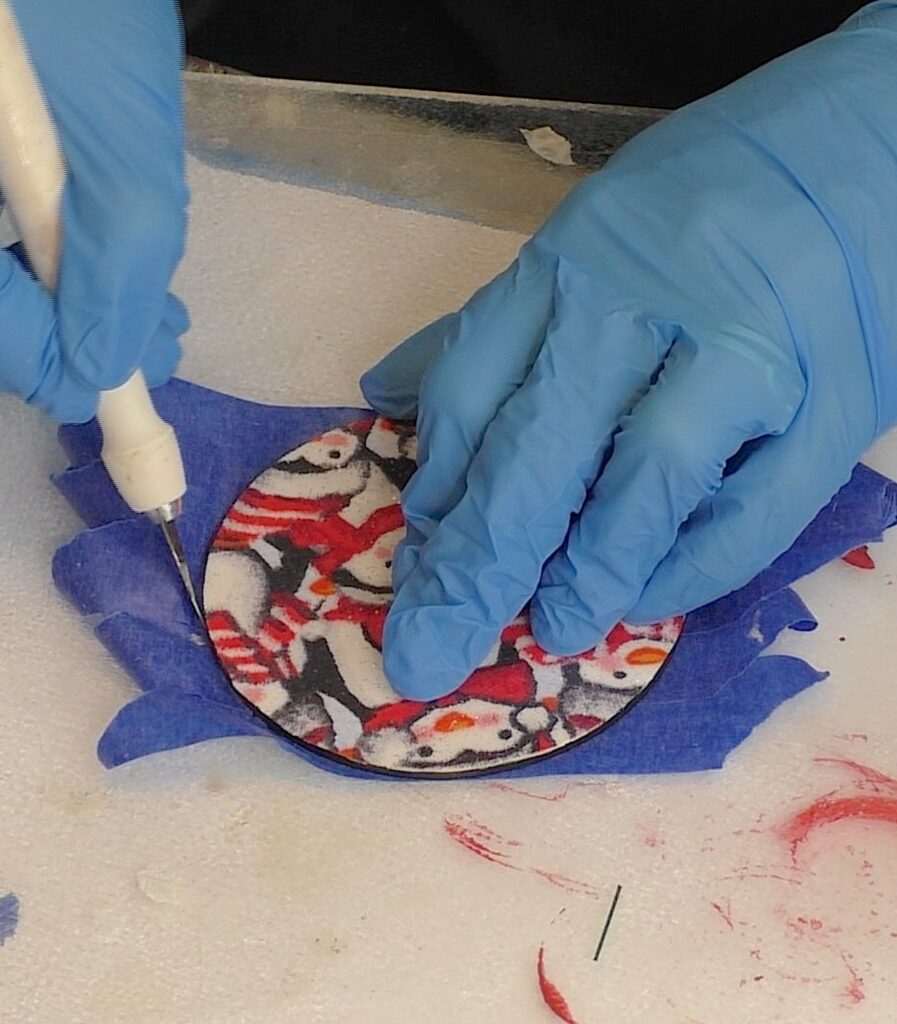
TIP: I put a thin coat of Vaseline on the bottom edge of the tape, so the resin will release much easier.
You will have drips under the coasters. They can be very difficult to remove and can require sanding. If you do this tip now, it will save you the hassle of sanding later.
Just be careful that you ONLY get the Vaseline on the bottom, not the sides or the top. We actually want resin to stick there!
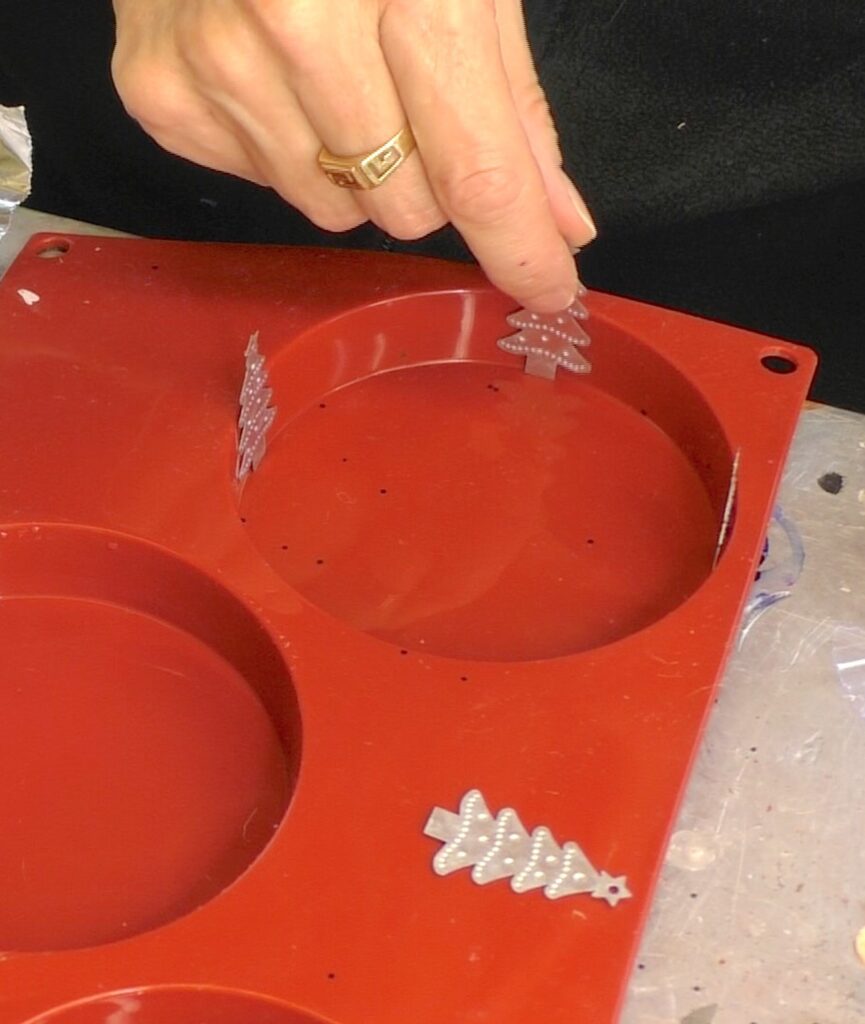
Step 9: The Christmas Penguin Craft Holder
Since I was making a set, I wanted it to have a holder. That way, the penguin coasters could sit out and look nice.
To set up the holder for the coasters, I put the little metal Christmas trees in the mold. I just leaned them up on the edge of the mold.
Step 10: The Resin Runneth Over the Penguin Craft
I mixed three ounces of resin, which is enough to coat the coasters and make the holder. I poured the resin on the coaters and used my stir stick to get the resin to the edges.
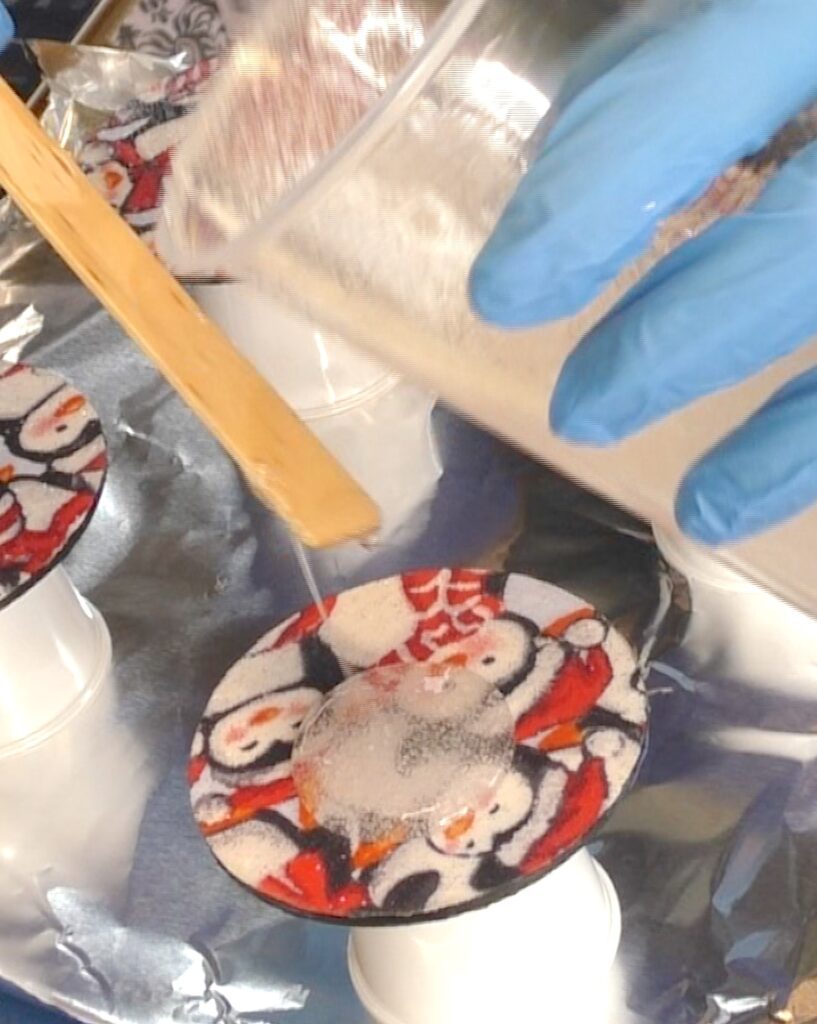
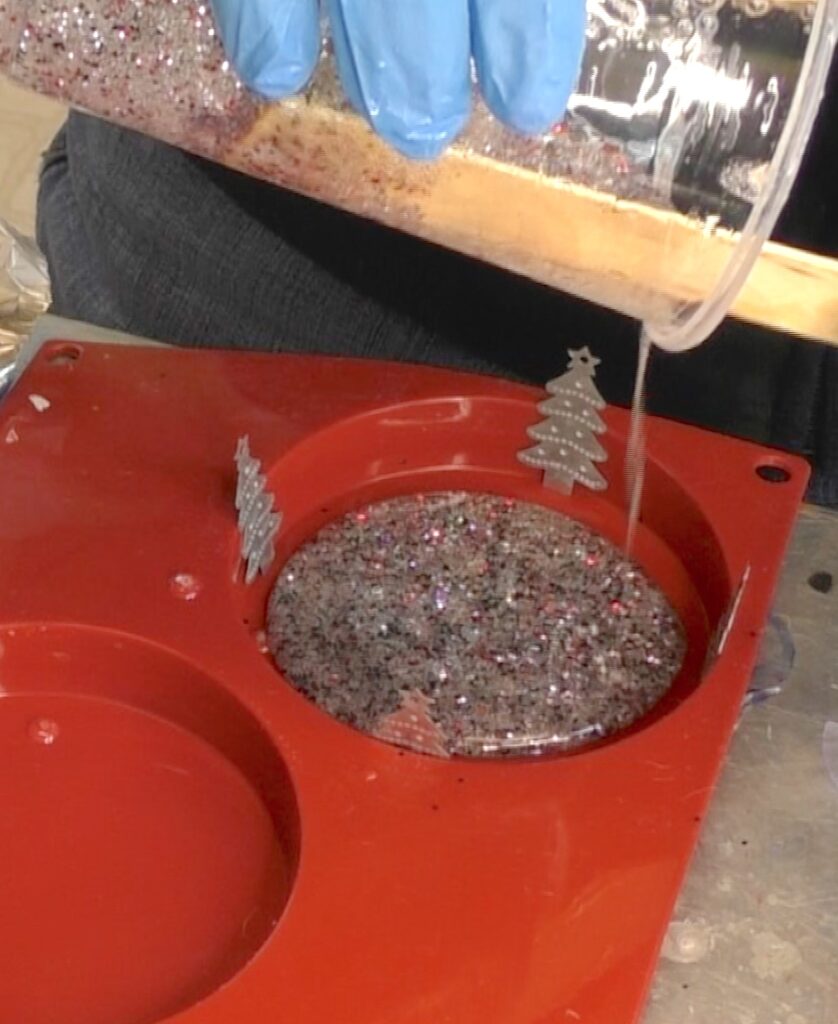
Step 11: Show Me The Glitter!
I had about one ounce of resin left over and added chunky red, chunky black, and fine silver glitter.
I mixed it and poured it into the coaster mold, being careful not to pour too quickly, because I didn’t want the trees to fall over.
Then, I popped the bubbles with a lighter and let it all sit for at least 12 hours.

Step 12: A Drip By Any Other Name Is Still A Drip
Can you see the drips on the bottom of the coasters? With the tape and the Vaseline, it’s easy to pop the drips right off!
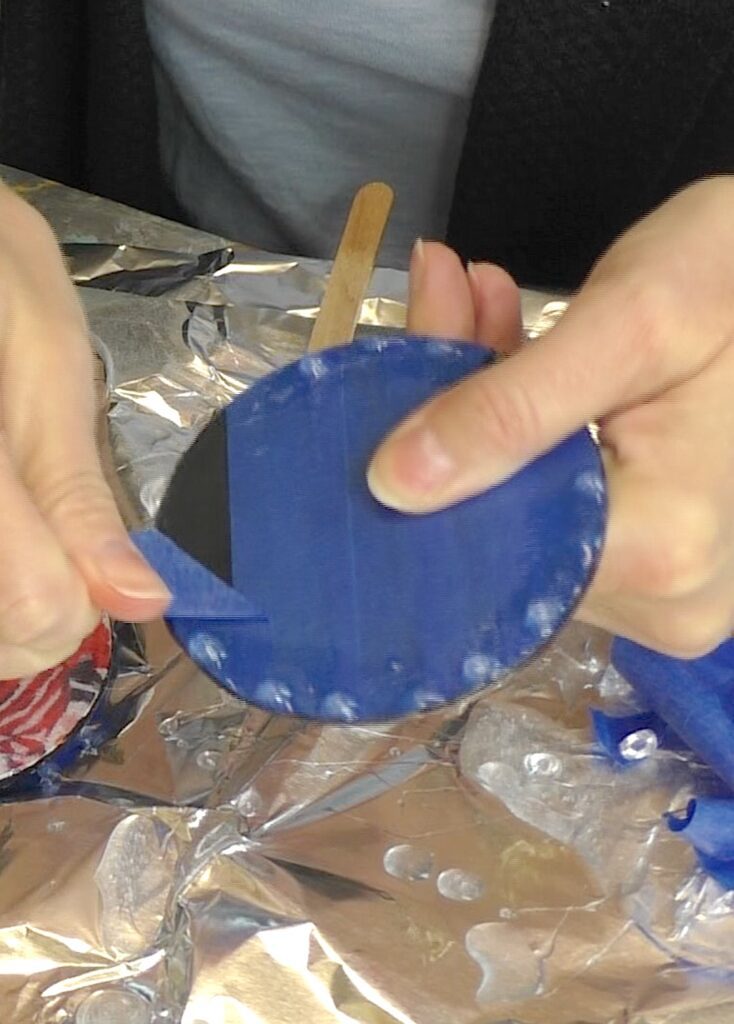
Step 13: Put A Cork On It!
I used a roll of cork, which is actually a sticky shelf liner. I cut a piece a little larger than the coaster.
Just like the fabric, you can trim the excess later, but you can’t add it back once you’ve cut it off.
I added a little glue to the edge of the coaster.
The shelf liner is already sticky, but I don’t know what the shelf life (get it?) for the adhesive on the shelf liner is.
So, I add a good, clear drying glue, to help lengthen the life of the coaster and the cork.
I removed the backing from the shelf liner and put the penguin coaster down onto the sticky side of the cork.
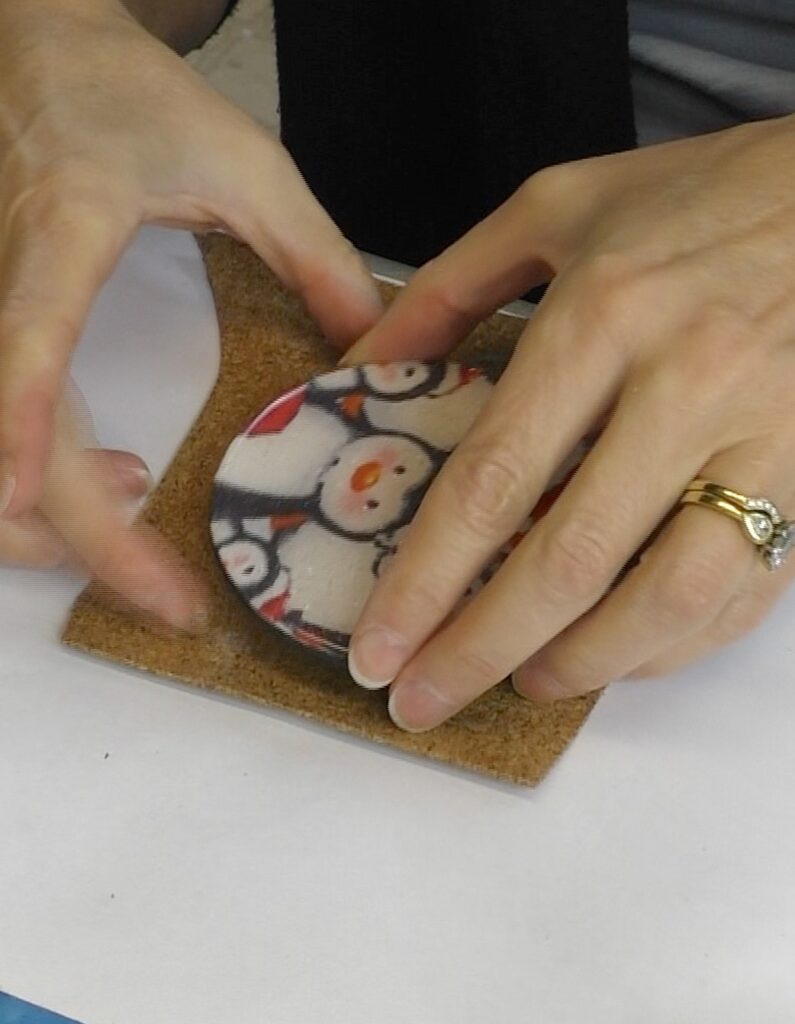
Then, I rubbed it down and used my craft knife to trim off the excess.
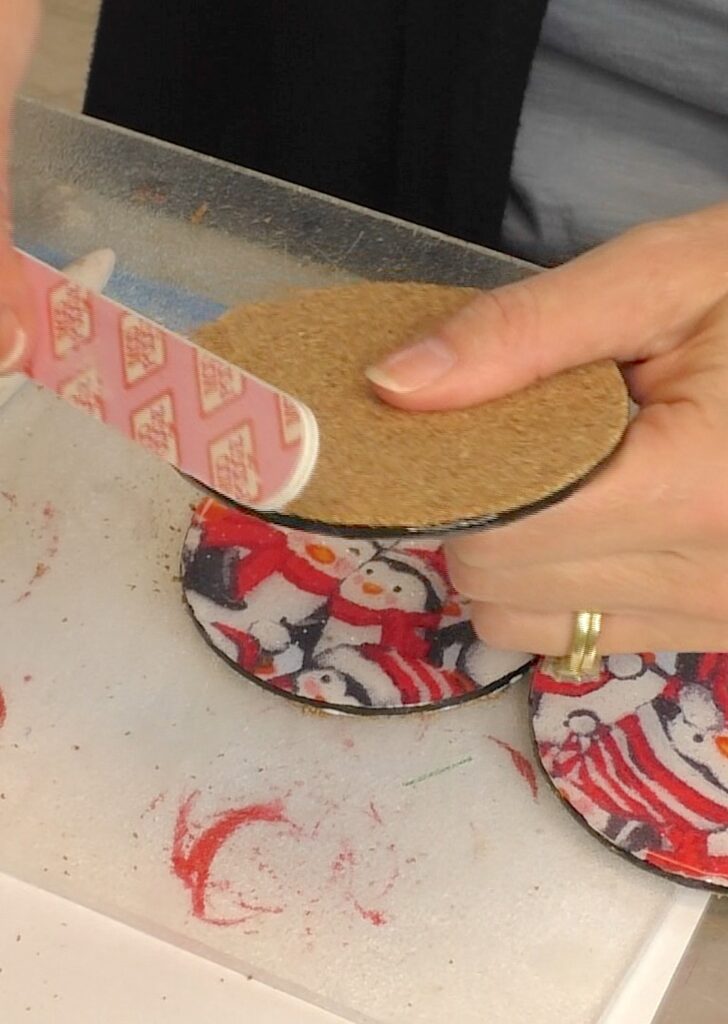
Step on 14: Rough Around The Edges
I used a file to smooth any rough edges on the cork, so it’s nice and finished.
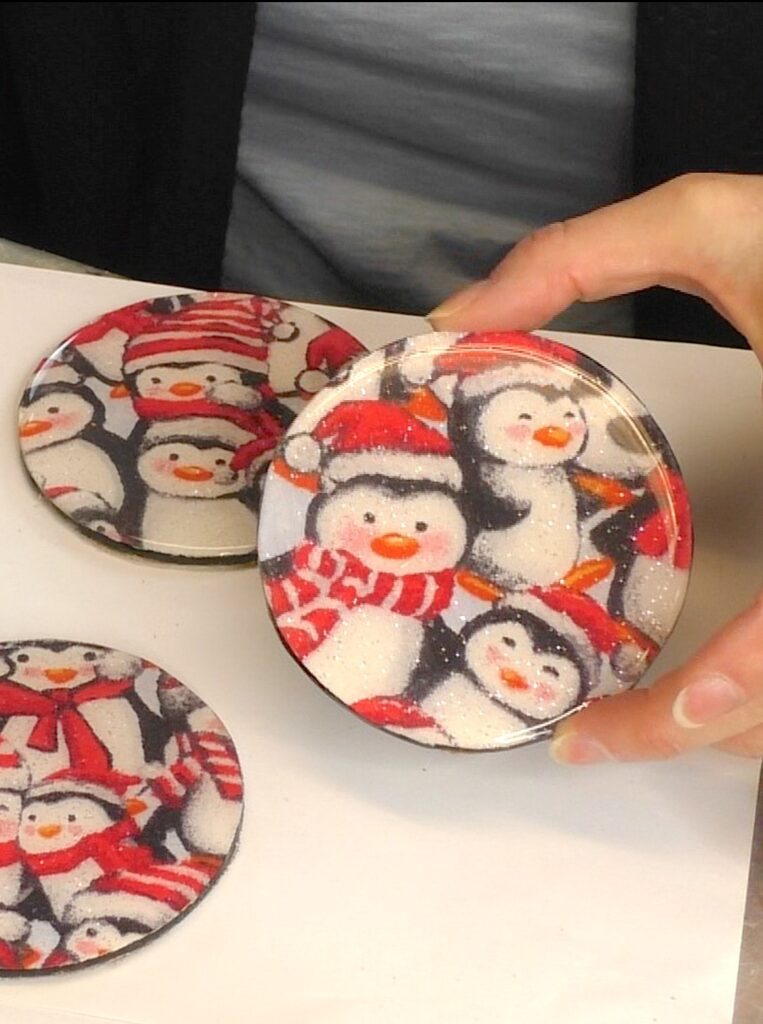
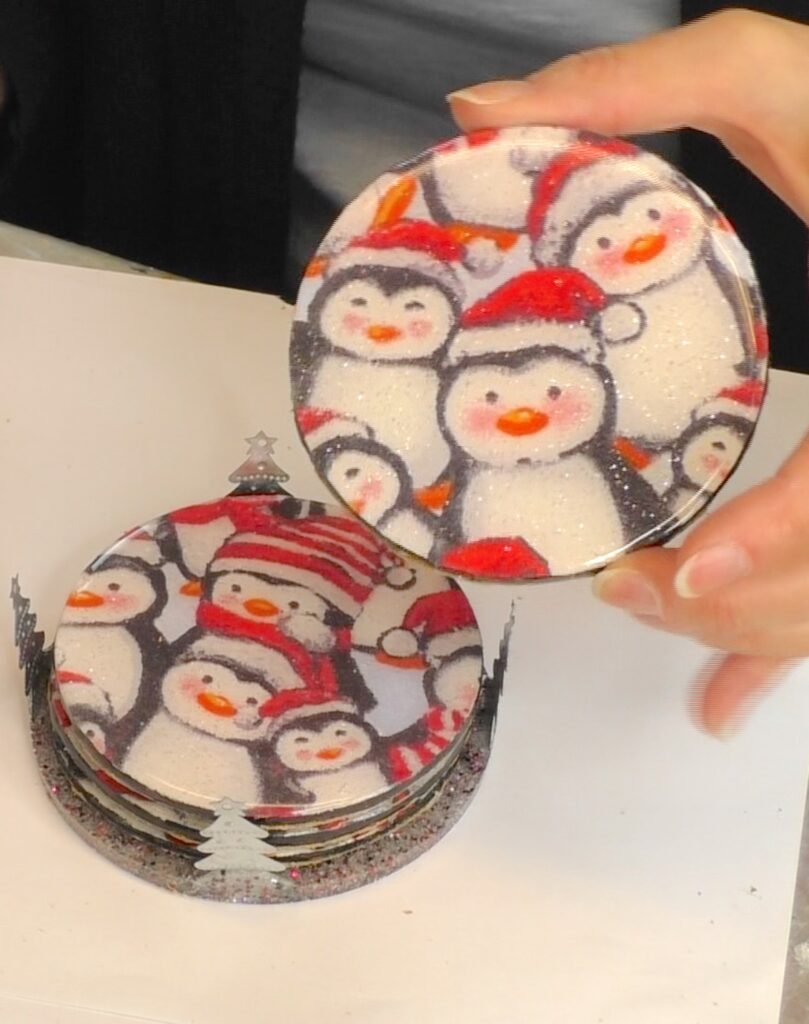
Here they are all finished and those penguins are so cute!!! Now let’s finish the holder!
Step 15: Pull Out That Christmas Penguin Coaster Holder!
The holder cured and I removed it from the mold, in all its glittered glory!
It makes the cutest set for Christmas or as a hostess gift!
Now you know how to make penguin fabric coasters and I could not love them more!
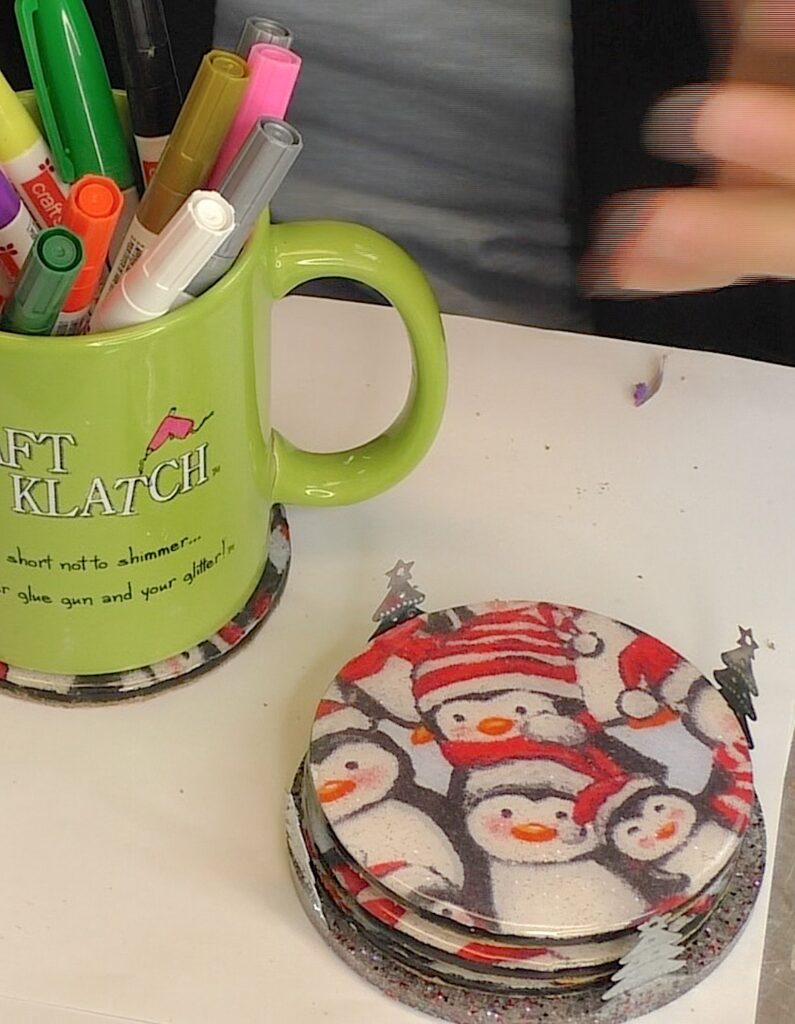
Thanks so much for stopping by!
More Christmas Crafts!
Before you go, check out these fun Christmas crafts!
- Christmas Coasters
- Bird Christmas Ornament
- Wood and Resin Merry Christmas Coasters
- Light Up Snowman Sign
Fun Penguin Stuff!
If you or someone you know have a penguin addiction…then you gotta check this stuff out!!!

Remember: Life’s too short not to shimmer, so grab your glue gun and your glitter!™ Stay safe!
Mona
Be sure to Share and PIN IT!


Love these, but cant find the metal trees!
Need some info on what type of resin, never used it before