
Make magical layered resin snowman decor with fairy lights, silhouettes, and a glowing night sky. It’s a cozy winter snowman decoration!
This project is sponsored by Let’s Resin. The ideas and opinions are all my own.
I’m trying to figure out the right word to describe this project…
magical…enchanting…charming…
I’m not sure which best describes it. Maybe you can let me know what you think!
I love winter crafts, especially when they include a little sparkle and glow. This snowman decor project quickly became one of my favorites because it creates a winter scene inside a coaster mold.
With layered resin, simple wood silhouettes, and fairy lights, it turns into a charming piece you can display anywhere.
If you are looking for a fun holiday project or you want a unique snowman decoration for your home, this one is easy and looks absolutely magical when finished!
Materials for Snowman Decor
*Disclosure: This blog uses affiliate links from Amazon and other retailers. I earn a small amount from qualifying purchases at no additional cost to you.
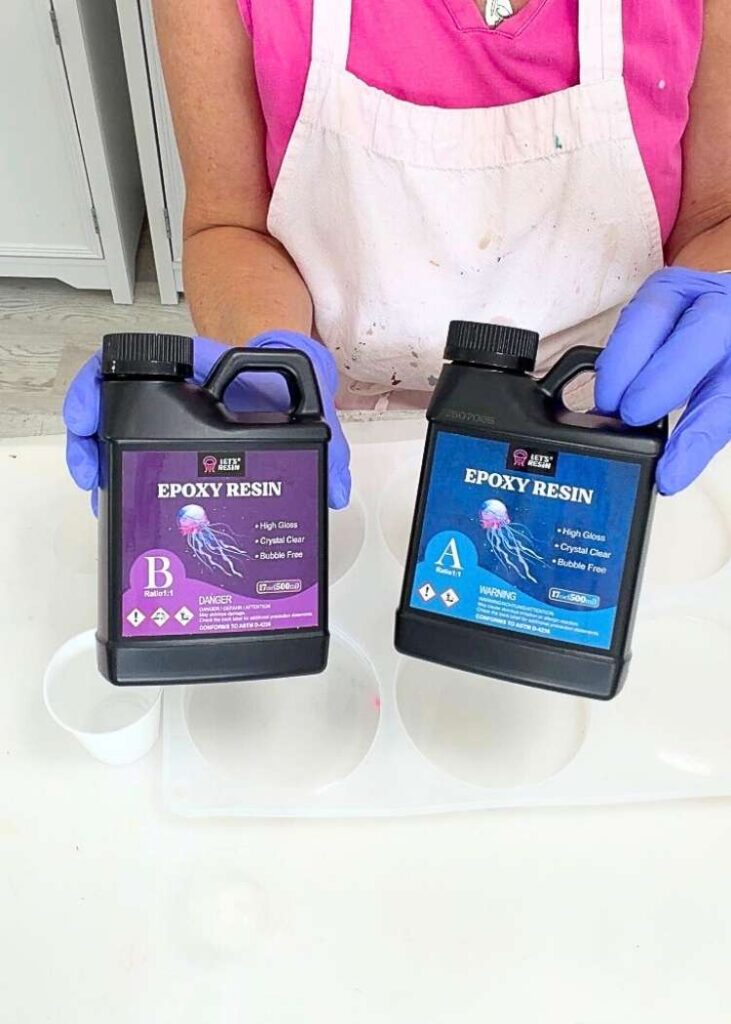
- Let’s Resin coaster mold
- Let’s Resin epoxy resin
- Wood cutouts (snowman silhouette, moon, and treeline) – I cut mine with my laser engraver
- 3mm basswood
- White paint (acrylic or spray paint)
- Blue alcohol ink
- Fairy lights
- Hot glue gun
Easy Resin Snowman Decor Video Tutorial
It’s a quick video, so you can see how I made it!
You can find all my videos on the Craft Klatch Youtube Channel
Create Your Snowman Silhouettes
Before we get started on the snowman decor, we want to make and prep our pieces. Cut our your snowman, moon, and tree shapes.
I use Canva and PicMonkey. Either is great for editing, sizing and isolating shapes before cutting.
* I used my laser engraver and 3mm basswood. However, you can make a different version using cardstock or use your Cricut Maker to cut out wood shapes.
Once your pieces are cut, paint them white, so they stand out beautifully in the resin layers.
Let them dry completely.
How to Make Layered Resin Snowman Decor
This project uses five resin layers, each adding depth and visual interest.
It looks complicated, but it definitely is not!
The layers do all the work. You just need to tap into your patience because you are going to be excited to see the final project while you are working on it!
Layer 1: Clear Base
Pour one ounce of clear resin into your mold.
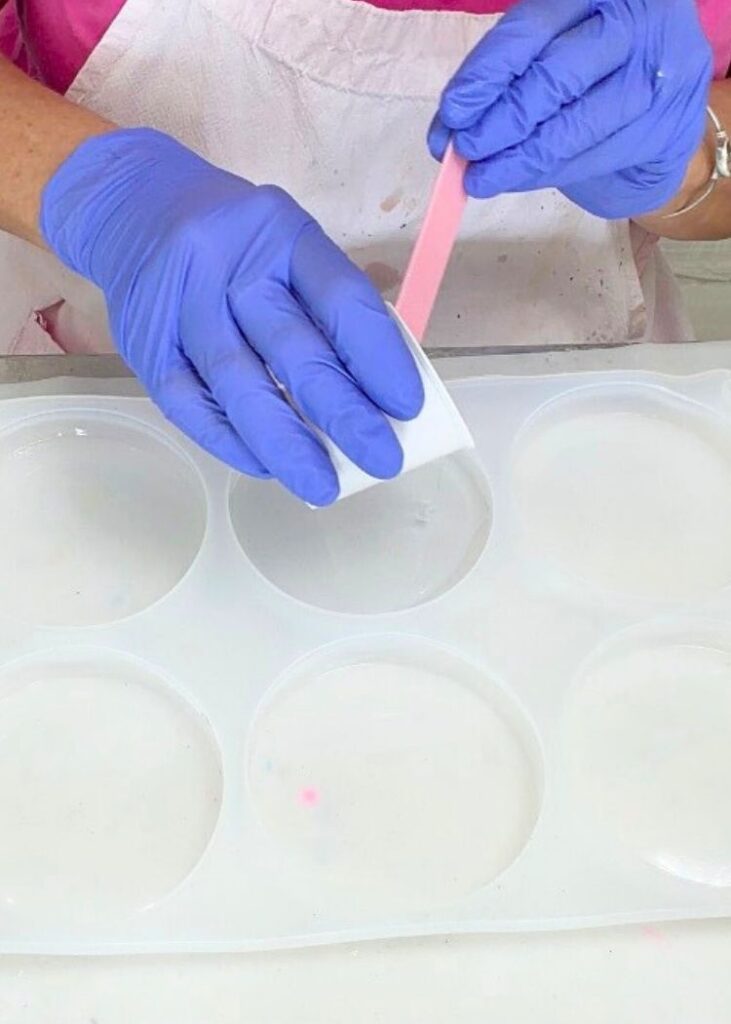
This gives your piece a clean base, which will actually be the front of your piece.
You want the front to look its best.
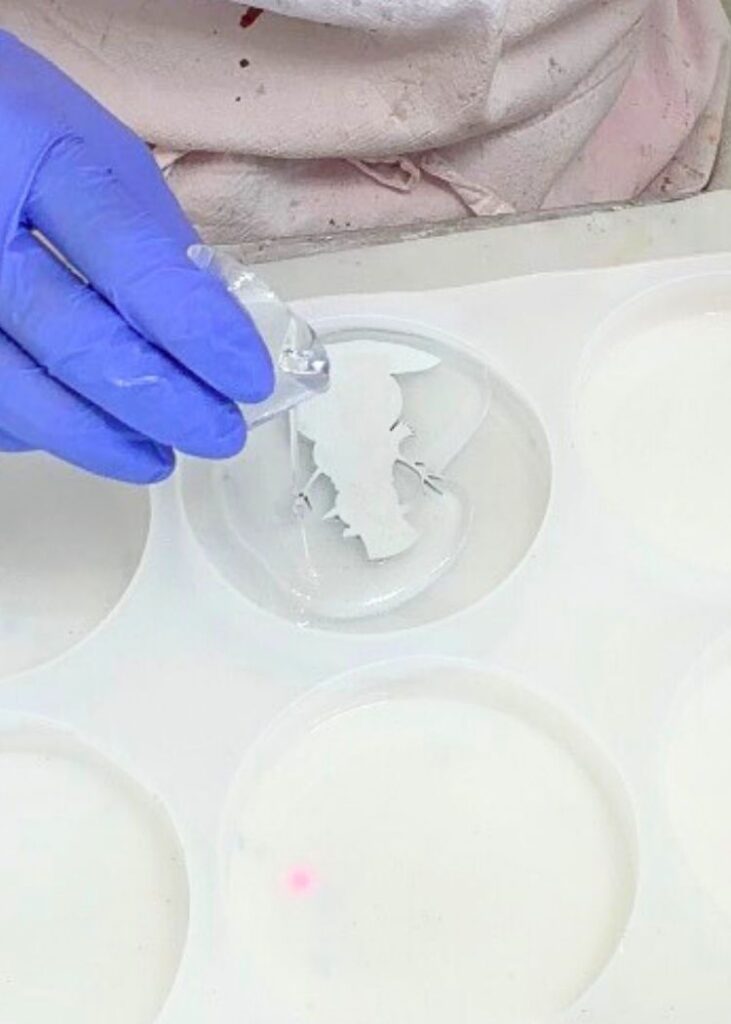
Layer 2: Snowman Layer
Pour your next thin layer of clear resin and gently place your snowman silhouette into it. Use a heat gun or a lighter to remove any bubbles that sneak underneath.
*Sometimes you don’t get all of them out. I think it just adds character to the piece. Remember, it’s handmade. Each piece is unique!
Let this layer cure until the surface is firm enough for hot glue to stick.
It’s your choice; it can be fully cured or just cured enough for the hot glue to stick. It depends on how anxious you are to pour the next layer. Just remember, if the resin is still too liquid or sticky, the glue won’t bond.
Once it’s ready, hot glue part of your fairy light strand to the back of the snowman. This creates the most beautiful glow around the silhouette when lit.
Layer 3: Clear Resin
Pour a thin layer of clear resin over the snowman.

This creates a little “breathing room” before adding the next scenery pieces and enhances the overall depth of your snowman decor.
Let this layer cure completely.
Layer 4: Moon and Tree Layer
Pour another thin layer of clear resin and set your moon and tree silhouettes into place.
Again, allow this layer to cure until fully firm or firm enough that the hot glue will stick.
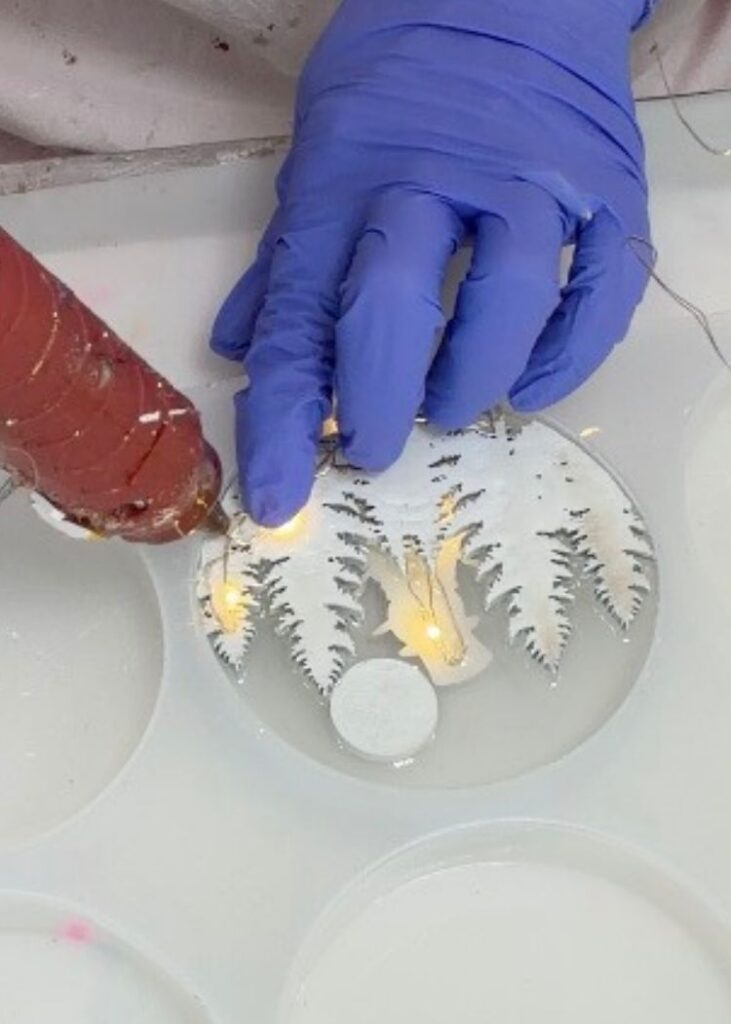
Once cured enough, hot glue the rest of the fairy light strand behind the moon and trees.
This makes the moon glow softly and adds subtle lighting behind the trees, like a wintry evening scene.
Layer 5: The Night Sky
Mix clear resin with a small amount of blue alcohol ink. Pour this layer over the top to create a rich night sky that frames everything underneath.
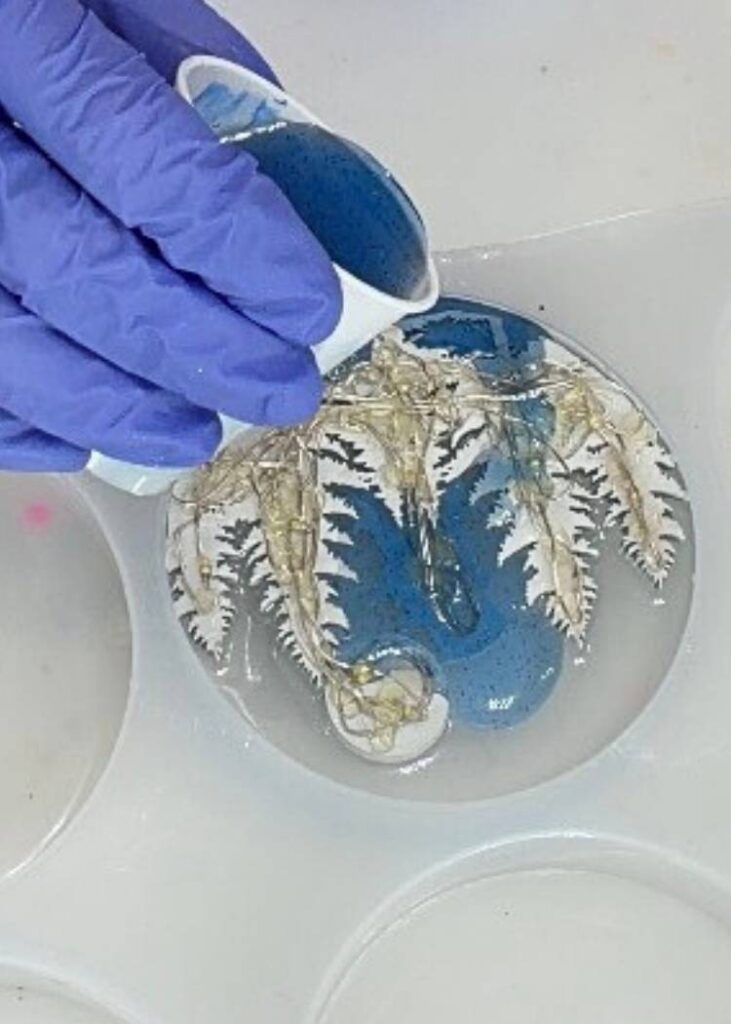
Let your piece cure completely.
Pull It Out of the Mold and Display
Once everything is fully cured, gently remove your project from the mold. Turn on the fairy lights and watch your winter scene come to life!
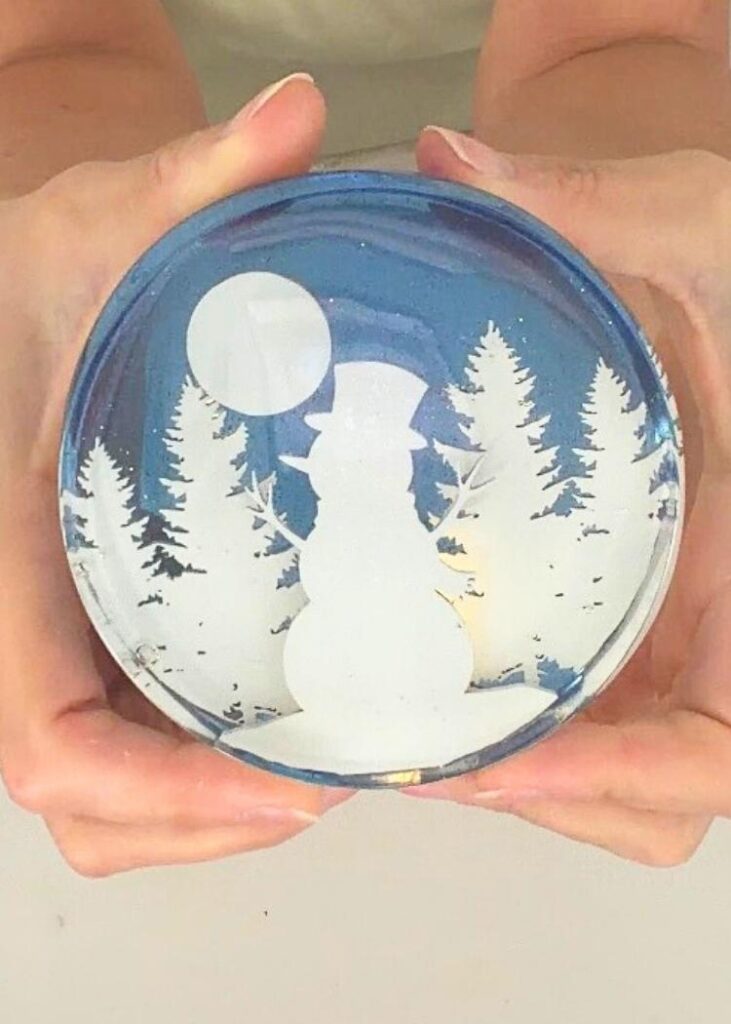
I put mine on a small stand, and it is perfect on a bookshelf, nestled into holiday decor, or sitting in a powder room as a soft nightlight for guests. The warm glow from the fairy lights makes this snowman decoration feel cozy and welcoming.
*You can glue the small battery pack onto the back of the piece, behind the wood pieces.
Whether you’re decorating your home for winter or creating handmade gifts, these snowman decorations are a beautiful addition to any space.
Quick Tips
I have a few quick tips to make the snowman decor a success.
Tip #1: When you are adding the lights to the snowman layer, be sure to end the lights at the bottom of the scene so you can easily add the next layer.
Tip #2: Be sure to make sure all of the lights and wires and hidden behind the wood pieces and not sticking out. That would ruin the illusion.
Type #3: If you are using wood, as I did, wood will expel bubbles into the resin. Be sure to seal it to minimize that.
More Snowman DIYs
Are you ready for more fun snowman crafts? Check out these, I know you will love them!
- Decorating a Snowman Terrarium
- Dollar Tree Snowman Ornament Makeover
- Light Up Snowman Sign
- Sparkly Snowman Ornament
- Painted Snowman Coaster
This layered resin snowman decor project is simple but packed with charm. The silhouettes, the lights, the depth…they all work together to create a magical piece that looks great anywhere!
If you make one, be sure to tag me so I can see your winter wonderland creations!
Thanks for stopping by!
Remember: Life’s too short not to shimmer, so grab your glue gun and your glitter!™
Mona