
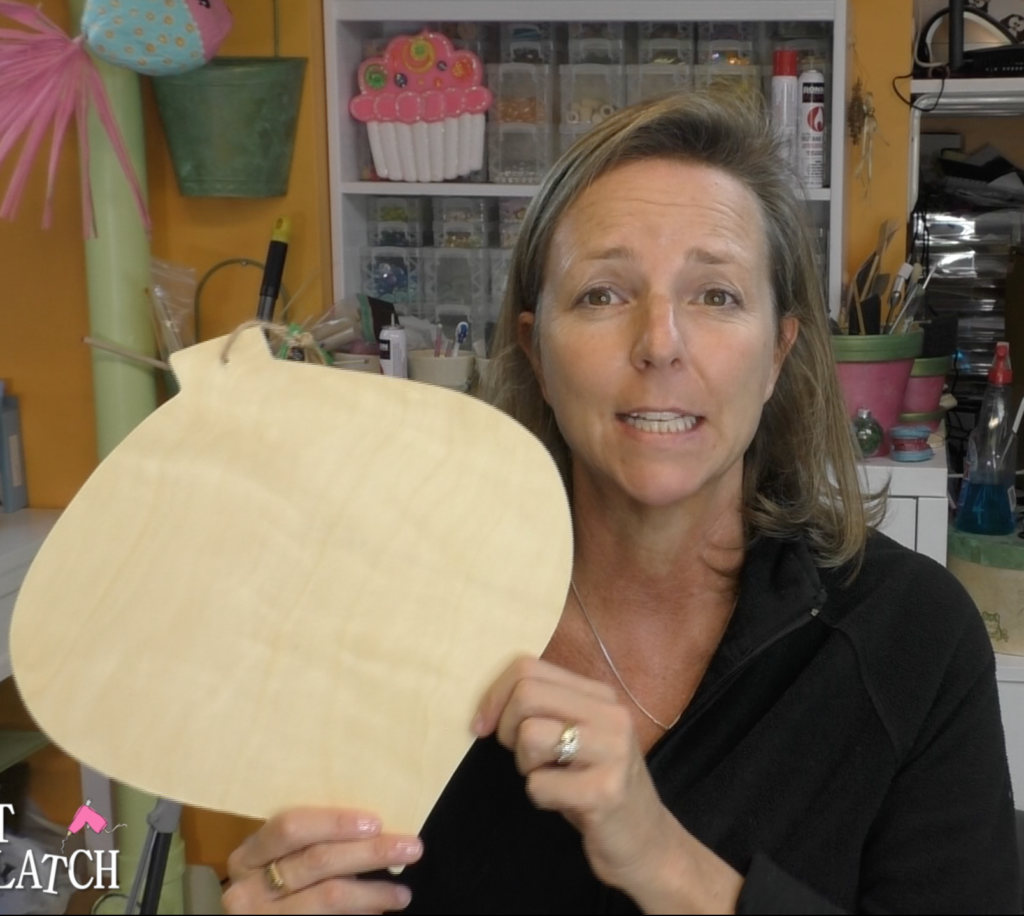
When I was wandering around the Dollar Tree, I found this unfinished wood Christmas ornament…in fact, I found four! I could not believe how lucky I was! Whoohoo! Score!
When I am lucky enough to come across a find like this, my brain has been known to shift into overdrive.
Oh Boy!
In this case, I immediately started thinking of a million different ideas, and my mind was all over the place.
Usually, I can reign it in and limit it to one version, however, this time I gave in and bought all four ornaments!
It’s going to be a Christmas Ornament Palooza in my craft room!
Though it might be a little nutty, I thought it would be fun to challenge myself and do four different versions, all starting with the same unfinished Christmas ornament!
I was thinking of different materials, mediums, colors, and different styles ranging from traditional to contemporary.
The things I liked about this Christmas ornament:
- The large size – it has the potential to be a show stopper
- It was a blank canvas and could go in ANY direction I decided to take it!
Christmas Ornament #1
This is the first one and I thought I’d go more traditional. Therefore, I am making a Rustic Snowman Christmas Ornament DIY!
Remember, dollar store crafts are a great way to decorate on a budget and customize your Christmas decorations to reflect your personal style and home decor ideas!
Also remember that when you are going to make something, if you have some Christmas ornaments or decorations you don’t use anymore dissect them and repurpose the parts and pieces and give them new life on a new, fresh decoration!
I think you will be surprised at what you have on hand if you really look.
Christmas Ornament Video Tutorial
Here is the video tutorial, so you can see exactly how I made it:
*This blog uses affiliate links. As an Amazon Associate I earn from qualifying purchases
Materials:
- Snowman ornament (Dollar Tree): https://shrsl.com/1xsxy
- Snowman ornament (Amazon): https://amzn.to/32xKzmR
- Ivory paint: https://amzn.to/34NKGMK
- Green paint: https://amzn.to/2qG7Tlm
- Crackle medium: https://amzn.to/2NWjnZS
- Berries (Dollar tree): https://shrsl.com/1xsyi
- Berries (Amazon): https://amzn.to/2X2yeGg
- Jingle bells: https://amzn.to/2X2pqjy
- Glue: https://amzn.to/33EIRRZ
- Hot glue: https://amzn.to/2K8O1hs
- Raffia (Amazon): https://amzn.to/2KcznWF
- Raffia (Dollar Tree): https://shrsl.com/1xt0g
- Wood ornament: Check your local Dollar Tree or Hobby Lobby
Rustic Snowman Christmas Ornament Directions:
Step 1
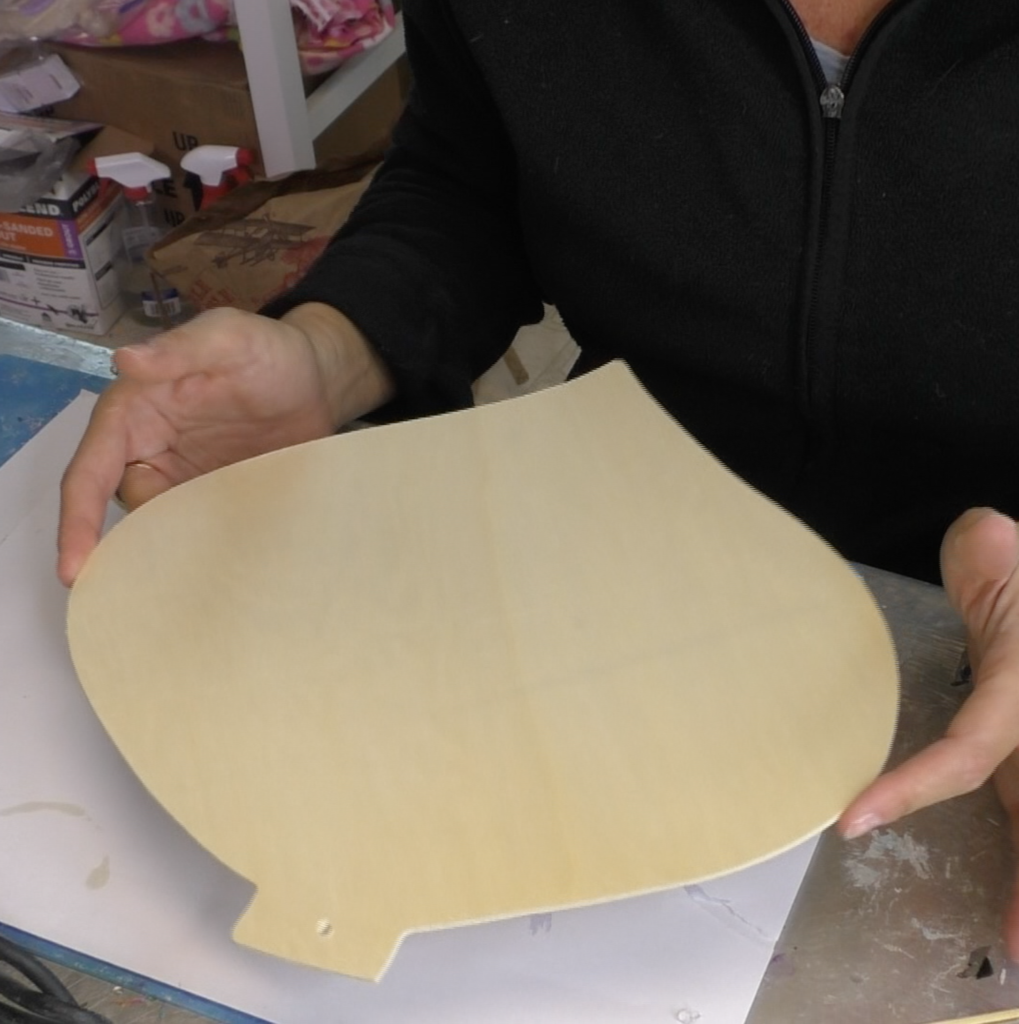
I started with a blank Christmas ornament. I am calling it a Christmas ornament and it is the traditional shape of one, but if it were not the holidays, you could go with any theme and it would not look like a holiday decoration.
Step 2
Then, I removed the string because I plan on reusing it later. You don’t have to reuse it. You can go with a ribbon or a different string as an alternative.

Step 3
I painted the ornament – front and back.
Tip: You may notice that after you paint the first side, the wood will begin to bow. Don’t Freak Out! Rest assured, when you paint the backside, it will straighten out. I have had this happen on a number of different wood projects and as long as I paint the backside, it always straightens out.

Step 4
I painted on the crackle medium and it goes on clear. When you are applying it, hold the ornament at an angle, so you can see if you missed any spots. You may not think it’s a big deal if you miss a spot, but you will see it when the project is complete.


Step 5
Once dry, paint on your topcoat color. I used Christmas Green, wanting it to have a strong contrast with the cream from the basecoat.
Tip: When are painting on the top color, be sure not to overpaint, or you will ruin the crackling.

The cracks start pretty quickly! If you spend too much time and over painting, you will ruin the crackles.

Step 6
When dry, you will have a beautiful crackle finish on your soon-to-be Christmas ornament.
I wanted to seal the finish. Trying to stay with the rustic theme, I used a matte varnish because I felt satin or gloss would be too shiny for the rustic feel I was going for.
Again, I painted it on the front and back. Assuming you are using a water-based varnish, should you get too many brush strokes, you can add some water to your brush and lightly paint over it. It should take care of most of the brush strokes.


Step 7
By this step, you have four coats of stuff on your Christmas ornament and you may well have painted the hole shut (I did). You can use your craft knife to poke it back open.

Step 8
The next thing I did was attach the Let It Snow snowman ornament I found, at the dollar store. I applied hot glue and white glue to the back, to attach it. This is how I glue stuff all the time and let me tell you why:
Tip: This project may not be the best example of this awesome gluing technique, but I used his is what I do.
Often times, you are gluing things that need either to stand upright or might be at an angle. You cannot let lie flat. It makes it very difficult to glue.
It’s not practical, reasonable, and sometimes not physically possible to stand holding something until the glue dries. Therefore, I use a glue combo. I use a combination of a clear-drying glue and my hot glue. The hot glue holds it in place, while the white glue dries and gives it a stronger bond.

Step 9
I placed my little jingle bells all around the Christmas ornament for spacing. I glued on each of them individually.


Step 10
I tied a bow with raffia – a supernatural and rustic material!

Step 11
I glued it on.

Step 12
I trimmed the raffia. You can keep the ends of your raffia bow as long as you like. I wanted them shorter because it gave the overall piece a little cleaner look.

Here it is so far, but it’s missing…something.

Step 13
I went looking for a little filler. Luckily, I had some white berries and painted them a complementary color. I’m telling you, look around your house and probably have a treasure trove of supplies and materials and you just don’t realize it!

Step 14
I glued them on. The spaces next to the sled looked a little bare, like they needed a little something. Turns out, the berries were perfect!

Step 15
Time to finish off the bow! I used thin wire and added three little jingle bells and twisted the wire together.

Step 16
I glued the bell cluster onto the raffia bow.


Step 17
I reattached the string. Again, you don’t have to reuse the string, but in this case, it kept with the rustic feel.

Here it is! For under $10 you have a big Christmas ornament decoration. The size makes it perfect to put on the front door as an alternative to a traditional wreath.

Be sure to check out the other versions:
The second version went a little glam with red, silver, and some beautiful glitter!
Dollar Tree Ornament Makeover #2: Glam Merry and Bright
The third version went more contemporary in the blue cool colors and with a snowflake vibe!
Dollar Tree Ornament Makeover #3: Frosty Snowflake
Finally, the fourth version went back to traditional and cute with gingerbread men!
Dollar Tree Ornament Makeover #4: Gingerbread Ornament
If you are looking for other Christmas decoration ideas and holiday inspiration, you can find it HERE!
FUN SNOWMAN FINDS!
If you want to add a little frosty to your holiday decor by adding snowman decor, check out these decorations!

Thanks for stopping by! Remember: Life’s too short not to shimmer, so grab your glue gun and your glitter!™ Stay safe!
Mona
Be sure to Share and PIN IT!


Awesome article! Thank you for this article.
Thank you!