It’s time for Christmas crafting! If you are looking for Christmas craft ideas, this is a holiday Christmas tree coaster! It’s an easy craft!
If you have a bunch of buttons, as I do, you’ll need a place to store them! Check out How To Repurpose Candle Jars into stylish craft room storage!
Materials:
- Wood tree: https://amzn.to/2pSR2M1
- Green paint: https://amzn.to/2NSEImV
- Green buttons: https://amzn.to/2NVLRmj
- Seed beads: https://amzn.to/2Nt7qvv
- Green glitter: https://amzn.to/2NQFgK9
- Glue: https://amzn.to/33v6yfG
Here is the video tutorial, so you can see exactly how I made it:
Directions:
1. I found this tree at the craft store. It was in a kit, with little markers, which I did not need. I found similar trees – MUCH CHEAPER – on Amazon and I listed them above.

2. I painted it green, using acrylic paint. I made sure to paint the edges and the back.

3. Once the paint has dried, I painted on the glue. Make sure not to go too thin!

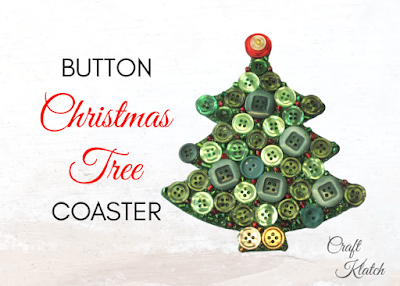
4. I added a red button to the top of the tree and layered it with two smaller buttons.


5. Then, I added green buttons, in a random pattern. While you are doing this, realize that they are round and you will not be able to fully cover the tree.


6. I added two brown buttons to the bottom, for the trunk.

7. I pulled out my glass seed beads and pulled out green and red beads and a few brown.

8. I added the seed beads between the buttons. I tried to have the sides up, so you see the colors. They make a good filler in between and the red looks like little decorations.

9. I added green glitter and let it dry.

Once dry, I tapped off the excess glitter and it is finished!

I think it makes a super cute coaster. You can put silicone dots on the back, or you can add cork to the back.
That’s it! Thanks for stopping by!
Remember: Life’s too short not to shimmer, so grab your glue gun and your glitter!™ Stay safe!
Mona
Be sure to Share and PIN IT!


