Here’s a craft for all you wine lovers and I know you are out there!! I wanted to create a jewelry stand, but I wanted it to be different, so I made it a wine themed jewelry holder.
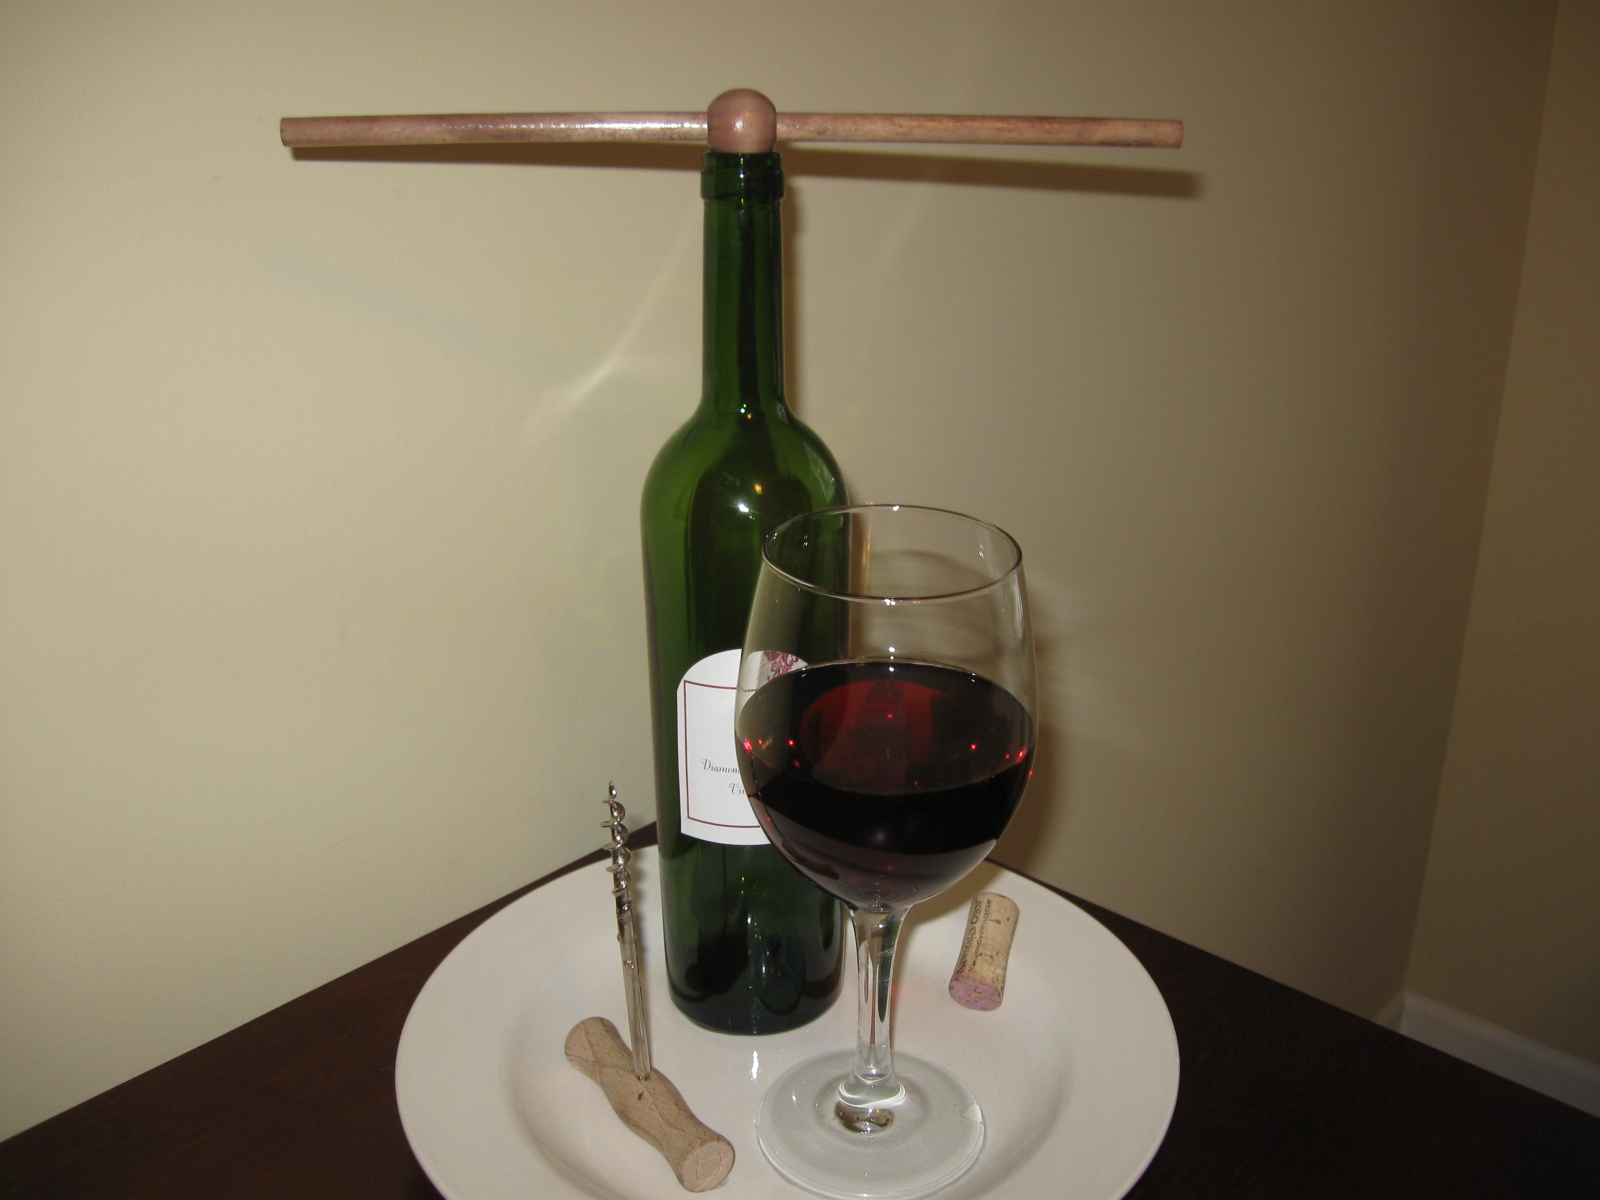
Here it is without the jewelry:
And here it is all dressed up with the jewelry:

Directions:
1. Clean and dry everything.
2. Take the dowel rod and put on the bead so it is in the middle. If you want, I took red wine and dyed the dowel and bead. I just brushed it on multiple times and allowed it to dry. Once dry, I varnished it with a satin finish to protect it.
3. To create the wine in the wine glass, you will be using resin. I used Easy Cast and did 8 ounces. The package clearly states that it is not recommended to do a large pour like that, but I work in an area that is not well ventilated, so for me it seemed like the only choice. ETI (Castin Craft) also make a polyester resin and that would be the ideal material to use, but it has a very strong odor. Beware. I did the casting and it was not quite smooth on top. I did add a thin clear layer on top, which leveled everything out perfectly. I show you the layer in the video above. I did add a transparent resin dye in red because I was going for red wine. If you are going for a white wine, skip the dye.
4. Allow resin to cure 12 hours.
5. Using a strong and transparent glue, like E6000, put it neatly on the bottom of the glass and glue it on the plate. Do the same with the bottle and the corkscrew. Add a cork for accent. Allow to dry.
6. Glue on the dowel rod with the bead on the mouth of the wine bottle. Allow to dry.
7. The corkscrew is for rings – if the corkscrew you have is sharp and pointy, file it until it isn’t, or cut the tip off.
8. Now you get to decorate!!
Use the dowel rod to hang necklaces and bracelets. Use the corkscrew for rings. Use the wine glass for earrings. Use the plate for change or other miscellaneous items!
If nothing else, it gives you an excuse to drink a bottle of wine!!
Thanks for stopping by and Happy Crafting!!
Mona