
Easy Christmas ornaments DIY: Make wood resin and glitter ornaments for festive sparkle! This step-by-step guide is perfect for adding holiday cheer to your tree!
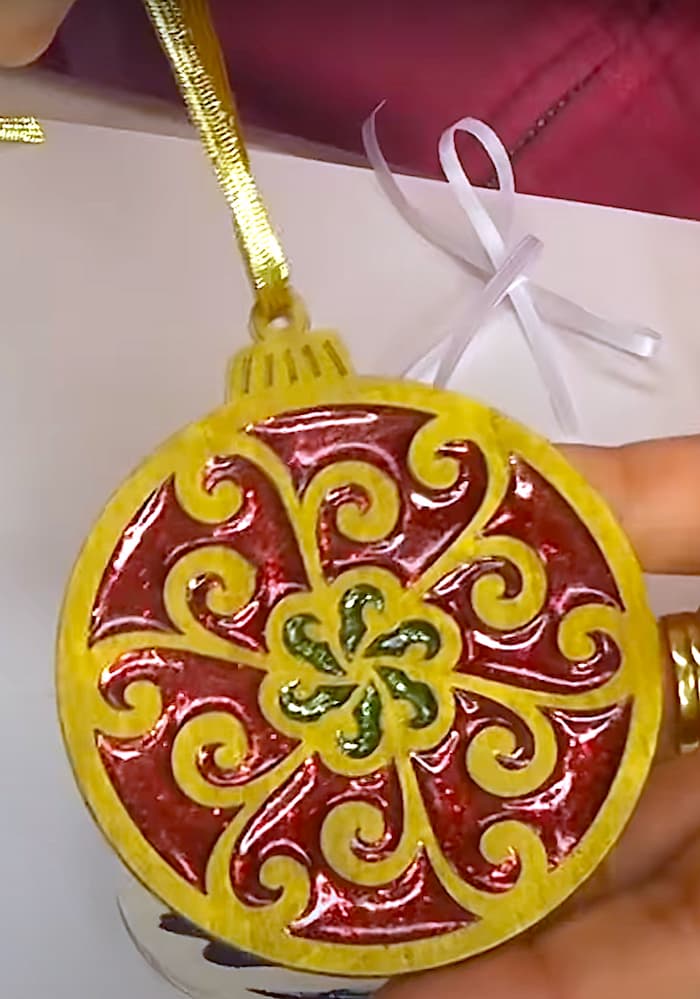
I found these amazing laser-cut wood ornaments and immediately thought…RESIN!
Be sure to find me on Instagram HERE!
Making your own Christmas ornaments can be a beautiful way to add a personal touch to your tree. This tutorial will show you how to craft easy Christmas ornaments DIY style, using wood, resin, and glitter. Perfect for beginners and experienced crafters alike, these ornaments will bring sparkle and warmth to your holiday setup.

Materials Needed for the Easy Christmas Ornaments DIY
*This blog uses affiliate links. As an Amazon Associate I earn from qualifying purchases.
You will need:
- Wood ornaments: I found them at Michaels, but here are some fun Christmas trees that might work
- Fine glitter
- Chunky purple glitter
- White acrylic paint
- Gold acrylic paint
- Packing tape
- Dremel
- Ribbon
- Resin:
- When deciding on which resin to use, there are a lot of qualities that might be appealing, UV resistant, price, heat resistance, etc. Just make sure to select a resin that fits your needs.
- Use whatever brand you like:
- Easy Cast
- Art Resin
- Let’s Resin
- Promise Epoxy
- These are heat resistant resins:
- FX Poxy
- Stone Coat
Easy Christmas Ornaments DIY Video Tutorial
Easy Christmas Ornaments DIY Directions
Set up your workspace and gather your materials. If you want additional information on resin, grab my FREE RESIN GUIDE HERE!
Step 1: Paint and Packing Tape
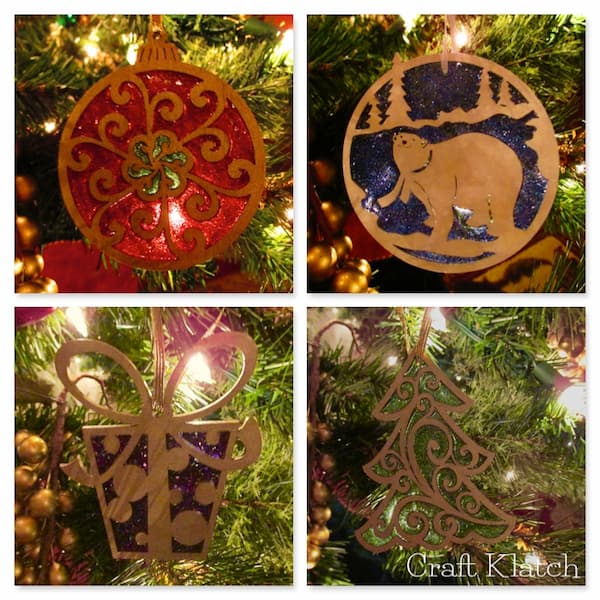
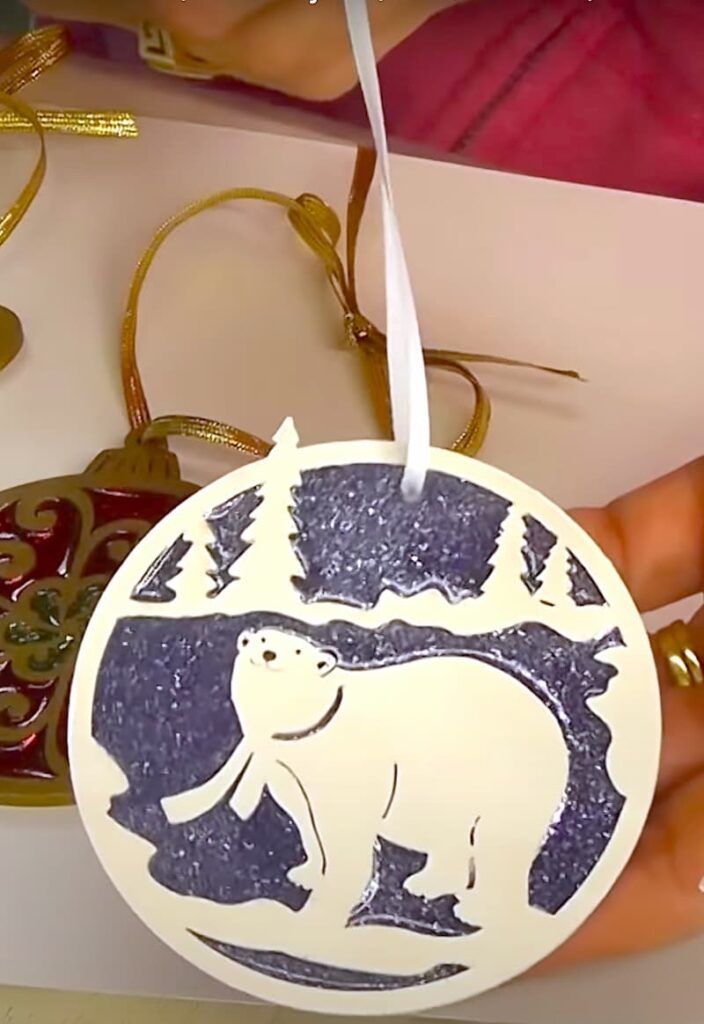
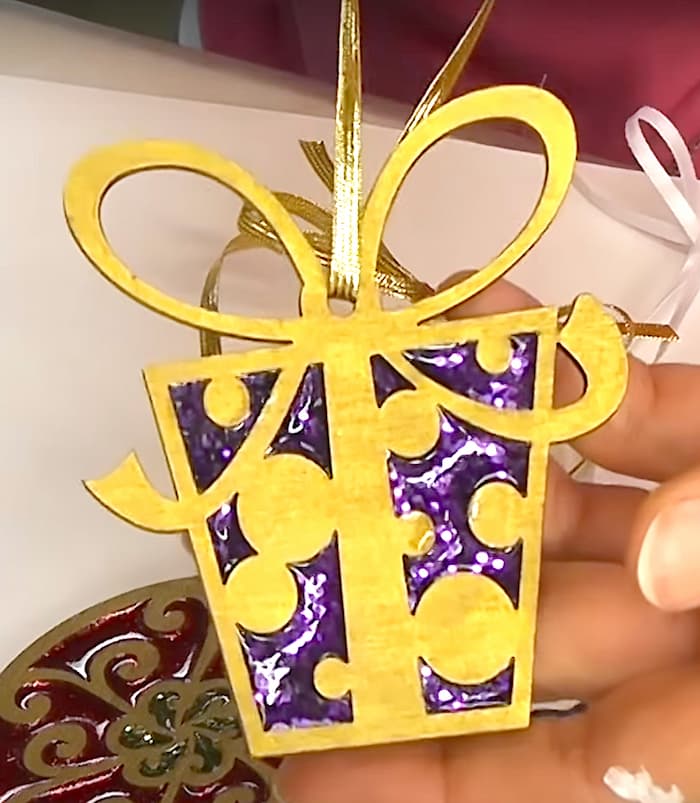
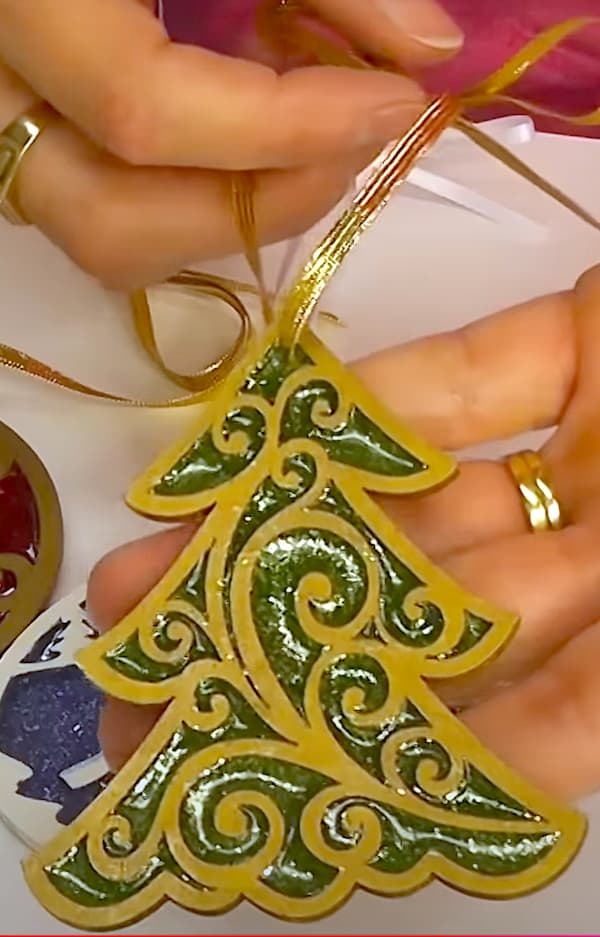
Paint the wood cutouts. I painted three of them gold and one white. Once completely dry, add packing on the backside. You want to burnish it down to ensure the resin will stay in place when you pour it.
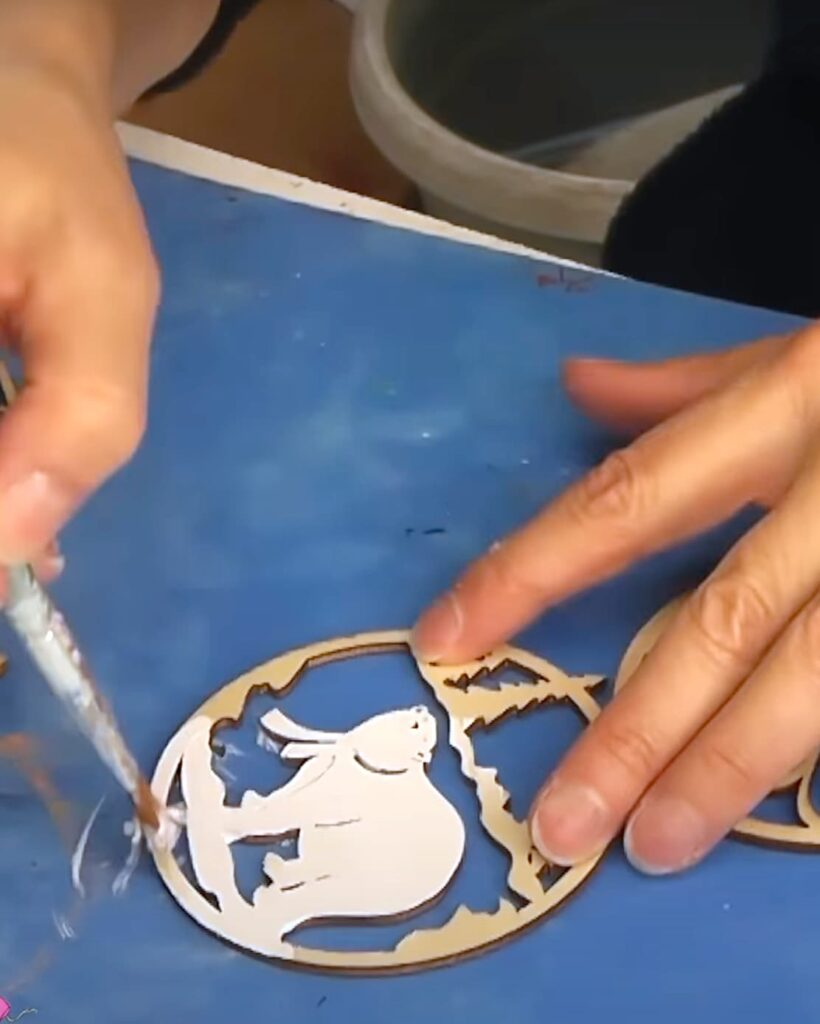
Trim off the excess so it doesn’t stick to you while you are trying to pour your resin!
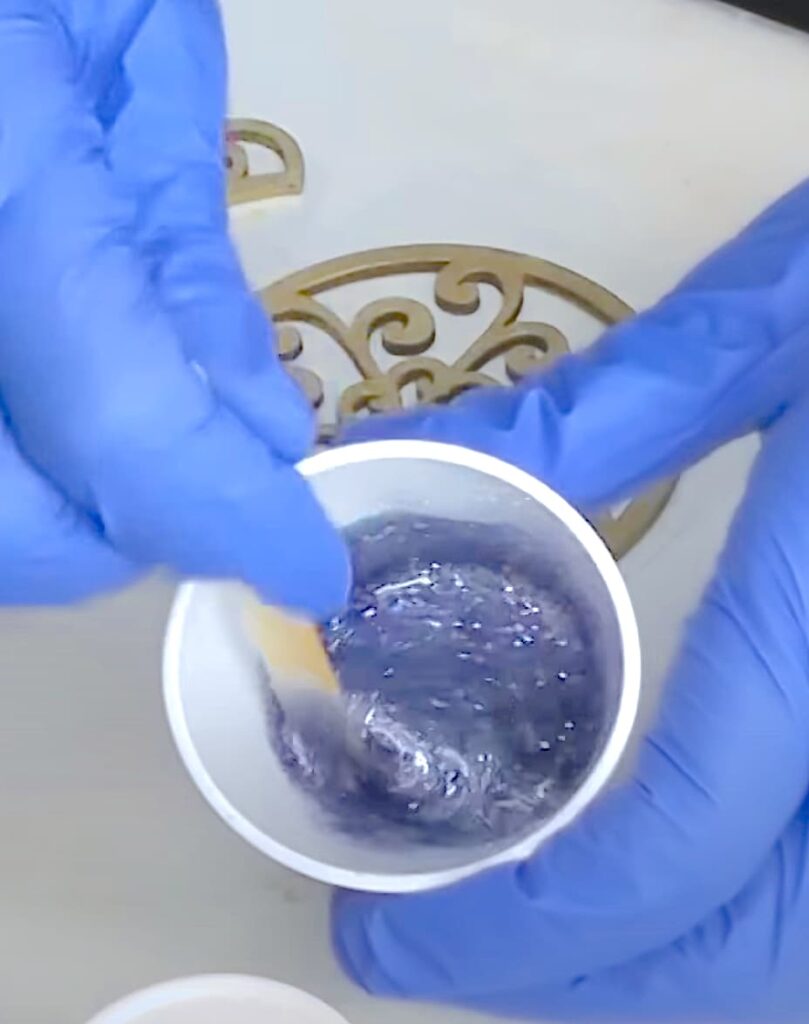
STEP 2: Add Glitter to the Resin
Mix two ounces of resin, according to the specific product instructions.
Once the resin is ready, add a generous amount of glitter. You want it to mix in and be smooth, not clumpy. For a festive touch, try layering different colors of glitter. Stir the glitter in until it’s completely mixed in.
This is crucial for a smooth finish on your easy Christmas ornaments DIY project.
Two ounces should be plenty. Separate into four different cups. Mix blue glitter into one, red glitter into another, green glitter into another, and chunky purple glitter into the last one.
Step 3: Drip Resin onto Wood Ornaments
Carefully drip the glitter resin mixtures into the wood pieces. If you accidentally drip it onto the painted area, quickly wipe it up. A wet wipe works well.
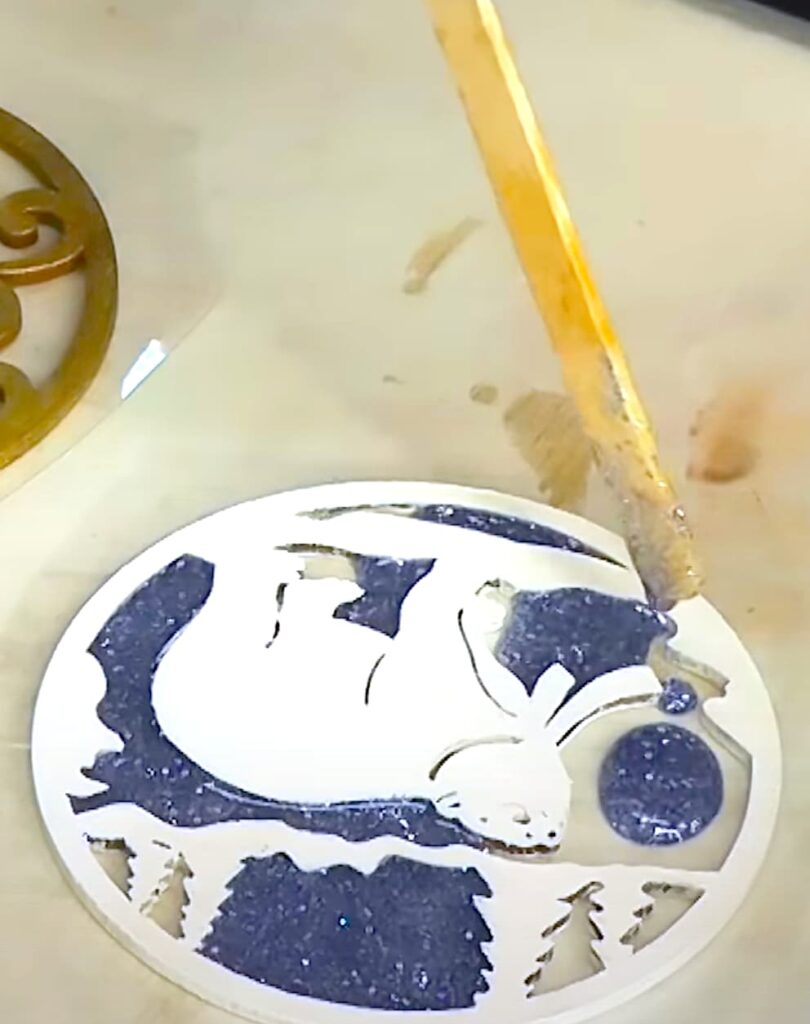
Use a heat gun, lighter, or torch to pop the bubbles. If you use a flame, work quickly because remember, they are wood.
Allow it to cure for a minimum of 12 hours.
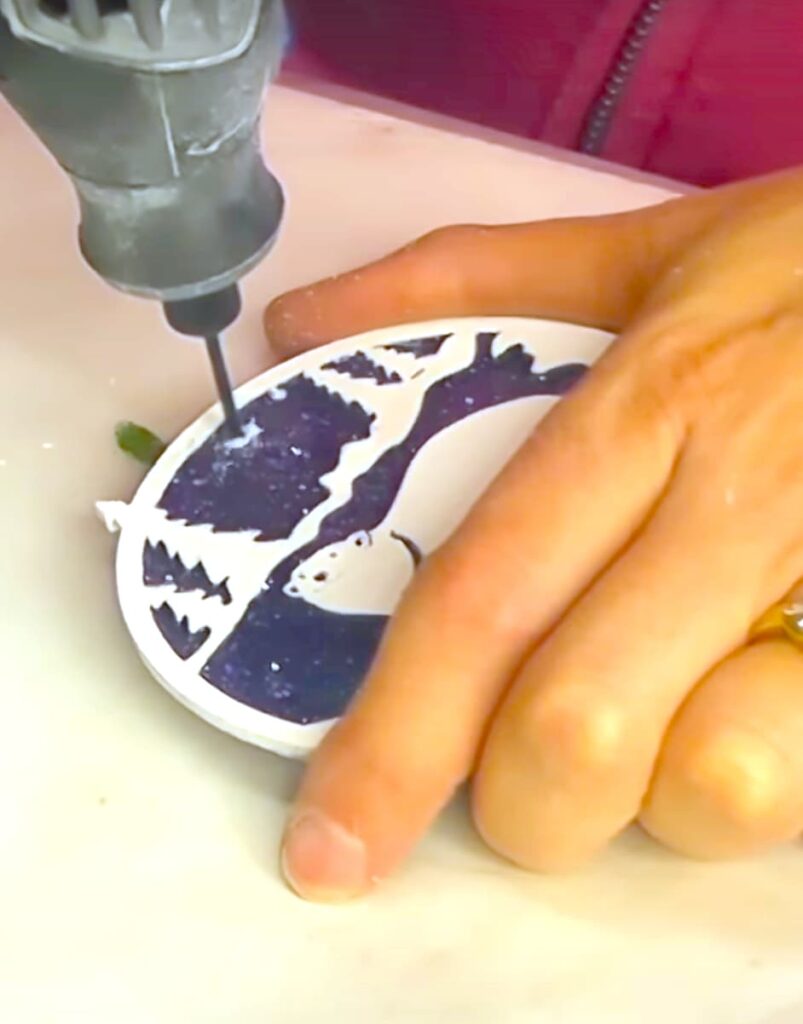
Step 4: Finish It Up!
We are almost done with our easy Christmas ornaments DIY!
If necessary, drill a hole. Then, add a ribbon or string to be able to hang the ornaments.
Now decorate your tree!
Other Christmas Ornament Projects
Here are some other projects for holiday inspiration:
- Gingerbread Ornament
- Merry Christmas Wood & Resin Ornament Coasters
- Christmas Ornament Coasters
- DIY Easy Glitter Ornaments
Easy Christmas Ornaments DIY or Use As Is
Here are some beautiful ornaments that look great as is or you can add resin and bring them up a notch!

Thanks for stopping by! Remember: Life’s too short not to shimmer, so grab your glue gun and your glitter!™ Stay safe and Happy Holidays!
Mona
Be sure to PIN IT for later!

