Life’s too short not to shimmer, so grab your glue gun and your glitter!™
Resin Pigment Powder Heart Craft Tutorial
I always wanted to use my plastic candy molds for resin projects, but I couldn’t…..or could I?
Turns out I could, but didn’t know it! A world of possibilities just opened up for me! With a little Vaseline, I could use any mold I wanted! Wooohooo!
You will need:
The links below help support this channel, as I may earn a small commission at no extra cost to you.
– Plastic mold – I bought this mold at Michaels in the chocolate/candy section
1. Prepare your resin according to package directions.
2. Prepare your mold by rubbing a thin layer of Vaseline inside the cavity and I like to go over the edges to the flat part, in the event I drip or overfill.
3. Pour in resin.
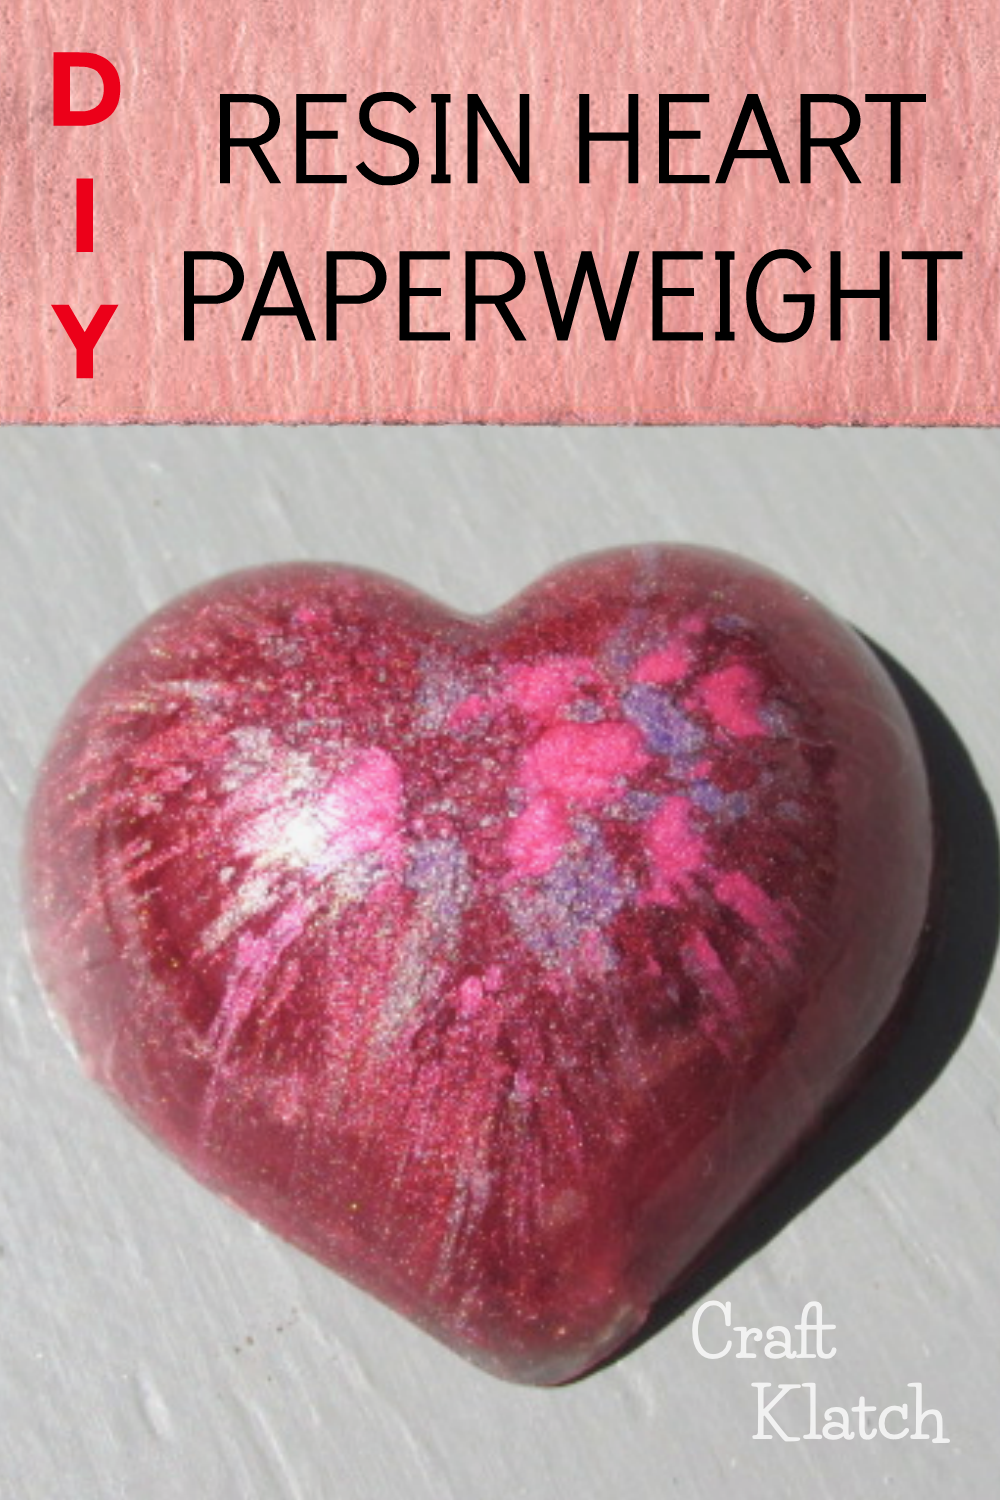
4. Take different pigment powders and drop them into the resin in globs. Taking a toothpick or skewer, start to move the pigment powders around. Keep doing that until you get the look you want.
5. Allow to sit for at least 12 hours.
6. Remove from mold. Wipe off any excess Vaseline and then either brush on a thin layer or resin, or clear nail polish/topcoat.
That’s it! Thanks for stopping by and Happy Crafting!
Mona
1 thought on “Resin Pigment Powder Heart Craft Tutorial”
I love it. I actually bought a wilton small candy mold thinking maybe it would be possible but I haven't done it yet. Now I know I can!!!!! Yay!!!!!! Thank you so much.


I love it. I actually bought a wilton small candy mold thinking maybe it would be possible but I haven't done it yet. Now I know I can!!!!! Yay!!!!!! Thank you so much.