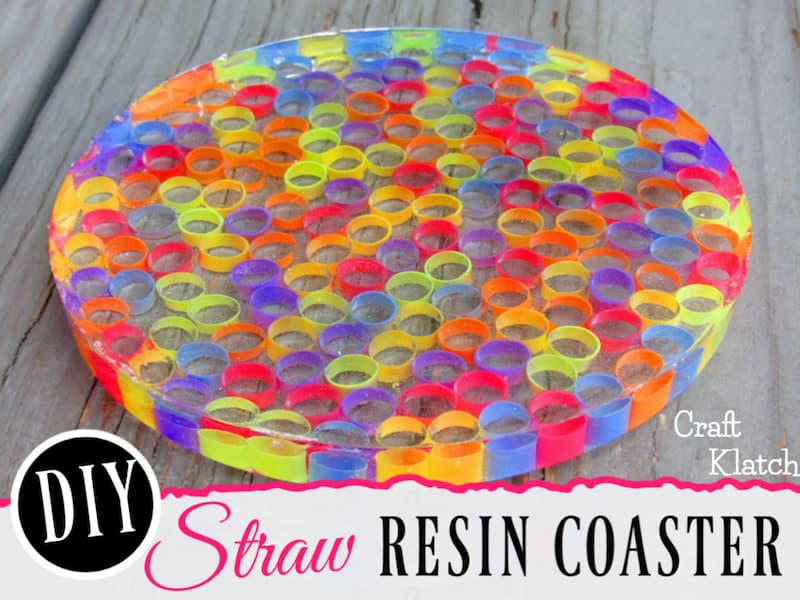
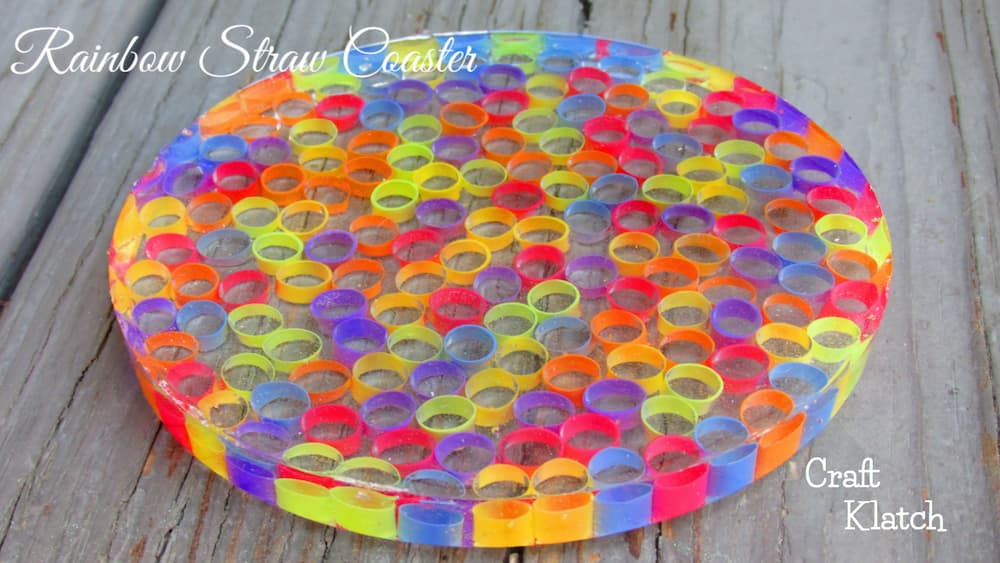
Have you ever looked at a colorful pack of straws and thought, “Wow! These are pretty?” Well, that’s exactly how this drinking straw craft came to be!
This is going to be fun because I’m turning simple straws into a bright and functional resin coaster. If you’ve been searching for crafts from straws, this one’s as easy as it is eye-catching.
If you love resin projects, you might also enjoy my Wood and Resin Fall Napkin Rings or my Liquid Rainbow Coaster, where I actually trap liquid in resin!
Watch the Drinking Straw Craft Video Tutorial
Supplies You Will Need
*Disclosure: This blog uses affiliate links from Amazon and other retailers. I earn a small amount from qualifying purchases at no additional cost to you.
- Resin
- When deciding on which resin to use for your coasters, you need to keep in mind whether you want it just for cold cups or for hot ones as well.
- If only for cold drinks, you can be flexible and use whatever brand you like:
- If you want it to work for both hot and cold drinks, you need to look for a heat-resistant resin, like these:
- Stone Coat (Quick coat)
- Stone Coat (Heat resistant)
- FX Poxy ~ According to the manufacturer, this one is heat resistant to 500° F.
Step-by-Step: How to Make a Resin Drinking Straw Craft
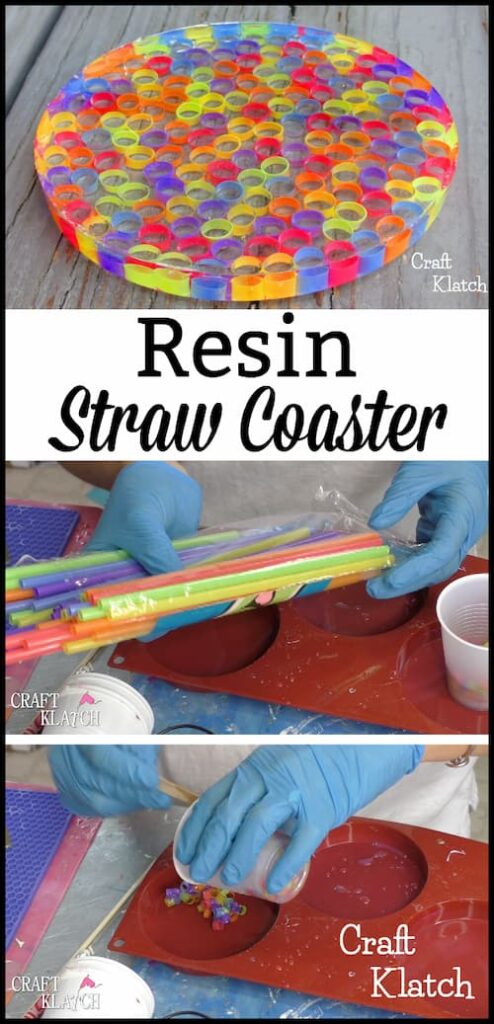
Step 1: Cut Your Straws for the Coaster
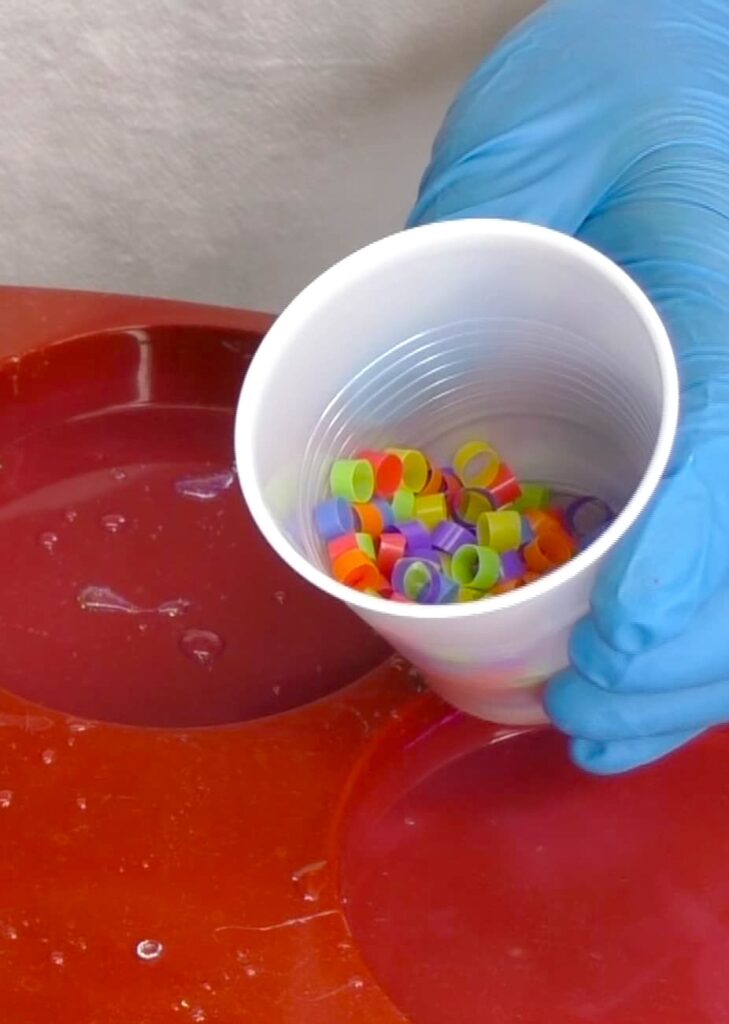
I found these bright and colorful drinking straws and instantly knew they’d make a great craft from straws project. I grabbed my scissors and snipped them into small pieces…messy but fun!
If you like arranging colorful materials, you might also want to try my Pearl Resin Coaster, with all the pretty colors!
Step 2: Mix Resin and Pour the First Layer of Your Drinking Straw Craft
Mix about 1 ounce of resin, then stir in your straw pieces.
I love seeing the little bursts of color floating in the clear resin.
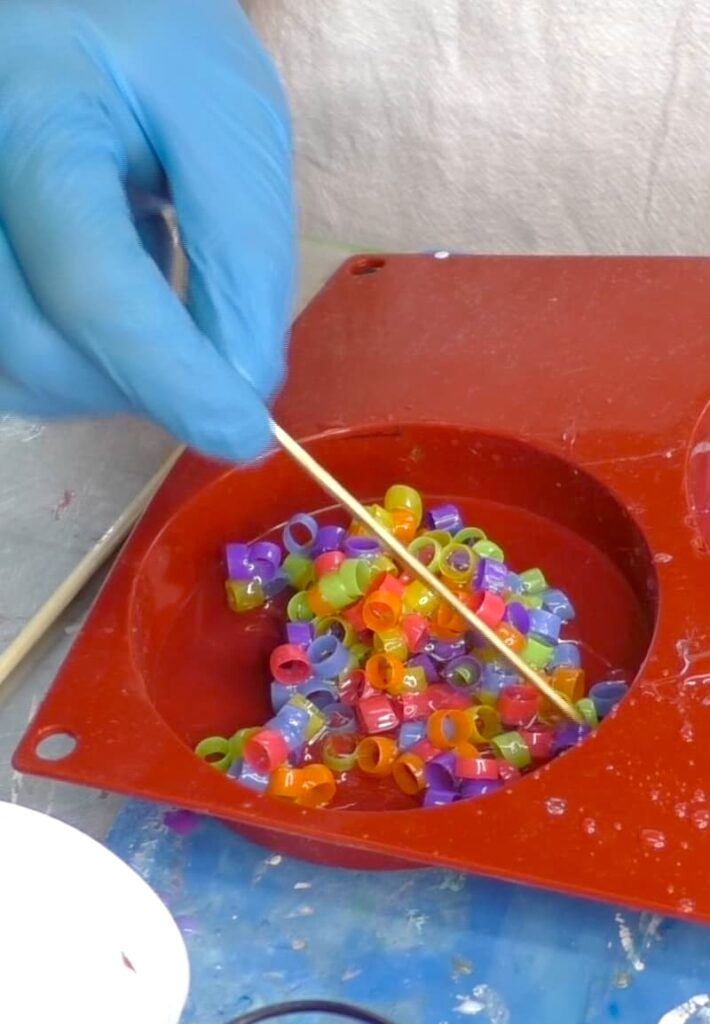
Pour the resin-and-straw mixture into the coaster mold. Spread the straw bits evenly, use a lighter to pop bubbles, and let it cure for at least 5 hours so they don’t float up in the next layer.
Want another layered resin project? Check out my Halloween Art Decor DIY for spooky inspiration.
Step 3: Add the Second Resin Layer
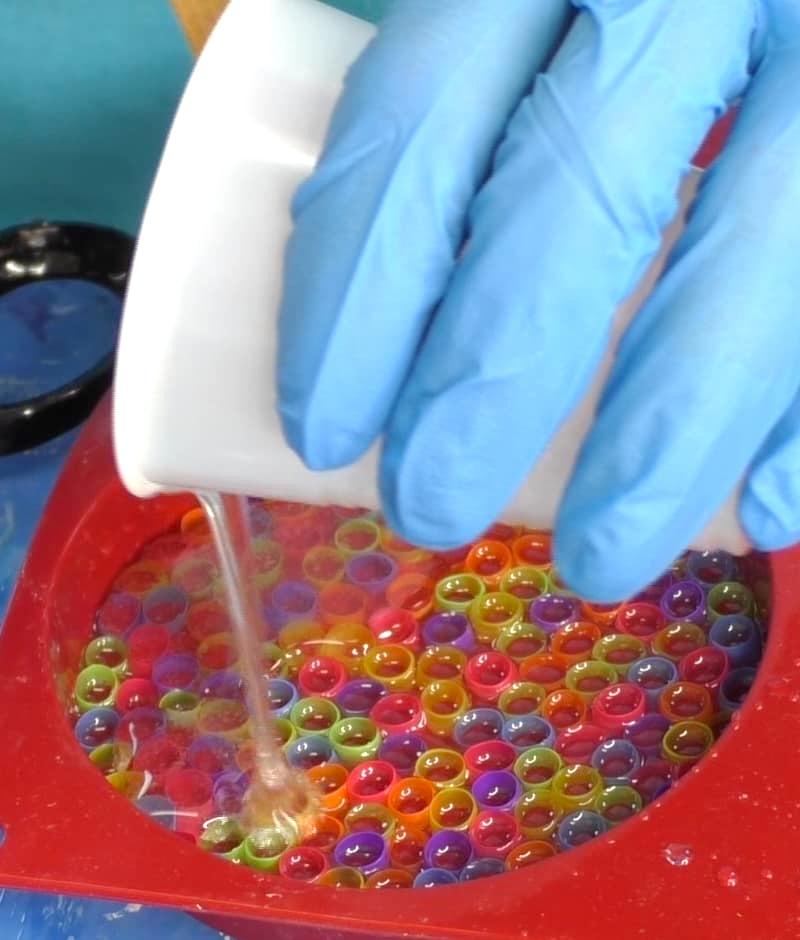
Mix another ounce of resin and pour it on top. Pop bubbles again and let it cure for at least 12 hours.
The Reveal: Remove Your Finished Drinking Straw Craft Coaster
Once fully cured, pop your coaster out of the mold. The colors peek through beautifully, and you now have a craft from straws that’s functional and fun.
Why This Drinking Straw Craft is Worth Trying
I love projects that surprise me, and this one did. Who knew a pack of drinking straws could turn into a coaster that I use almost daily?
For more playful fun ideas, take a peek at my Seashell Pendant, which includes resin, or my Easy Bead Coaster, which to date is still my most popular coaster.
Thanks for crafting with me today! Remember: Life’s too short not to shimmer, so grab your glue gun and your glitter!™
Mona
Be sure to PIN IT for later!
Don’t you hate it when you can’t find a project you saw and thought for sure you’d be able to find it again? Well, save yourself the trouble of searching by pinning it now!
The Video is on YouTube too!
In case you prefer to watch the video on YouTube, here it is!
Love this site!
Thank you so much, Judy! ❤️❤️❤️