
Today we are making a polar bear with a sparkling personality! It’s a twist on resin art! It is a fun home decor idea and neutral enough to go with any room decor!
Typically, polar bears live in the arctic, but it doesn’t mean they can’t spend a little time at your house!
I have made two other polar bear projects that you might enjoy. They were made as ornaments, but ornaments aren’t just for the holidays anymore!
Polar Bear Resin Ornament (would look amazing hanging in a window)
Polar Bear Polymer Clay Ornament
*This blog uses affiliate links. As an Amazon Associate I earn from qualifying purchases, at no additional cost to you.
Materials you will need:
- Polar bear cut out: https://amzn.to/39GhwCz
- White paint: https://amzn.to/2QqxqJH
- Gray paint: https://amzn.to/2FnBrIE
- Black paint marker: https://amzn.to/2rYothl
- White glitter (chunky): https://amzn.to/2FkFFk4
- White glitter (fine): https://amzn.to/2ZQ4zl8
- Painters tape: https://amzn.to/2SSG8Sq
- Vaseline: https://amzn.to/2SUTvSd
- Resin:
- When deciding on which resin to use, there are a lot of qualities that might be appealing, UV resistant, price, heat resistance, etc. Just make sure to select a resin that fits your needs.
- Use whatever brand you like:
- Easy Cast
- Art Resin
- Let’s Resin
- Promise Epoxy
- These are heat resistant resins:
- FX Poxy
- Stone Coat
Video Tutorial
Here is the quickie video tutorial, you can find the longer, detailed one on YouTube HERE!
Directions:
Step 1: The Polar Bear
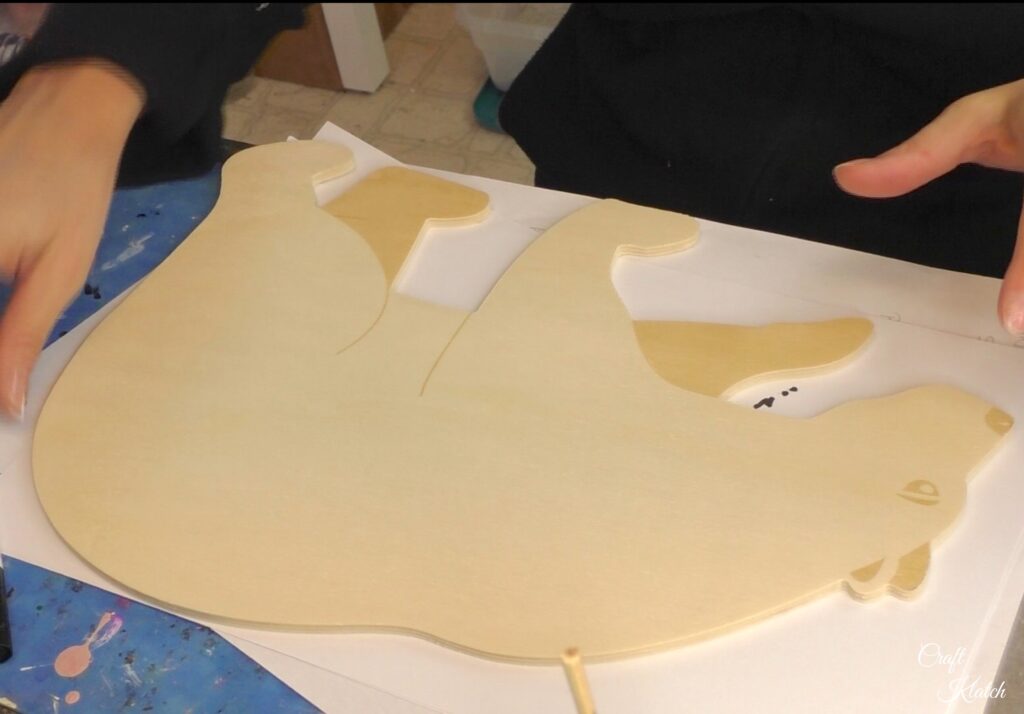
Find your wood bear.
I found this polar bear cutout and thought it would be perfect for a resin art project! You can find one (hint: check material list above) or if you are a creative woodworker, you can easily make one!
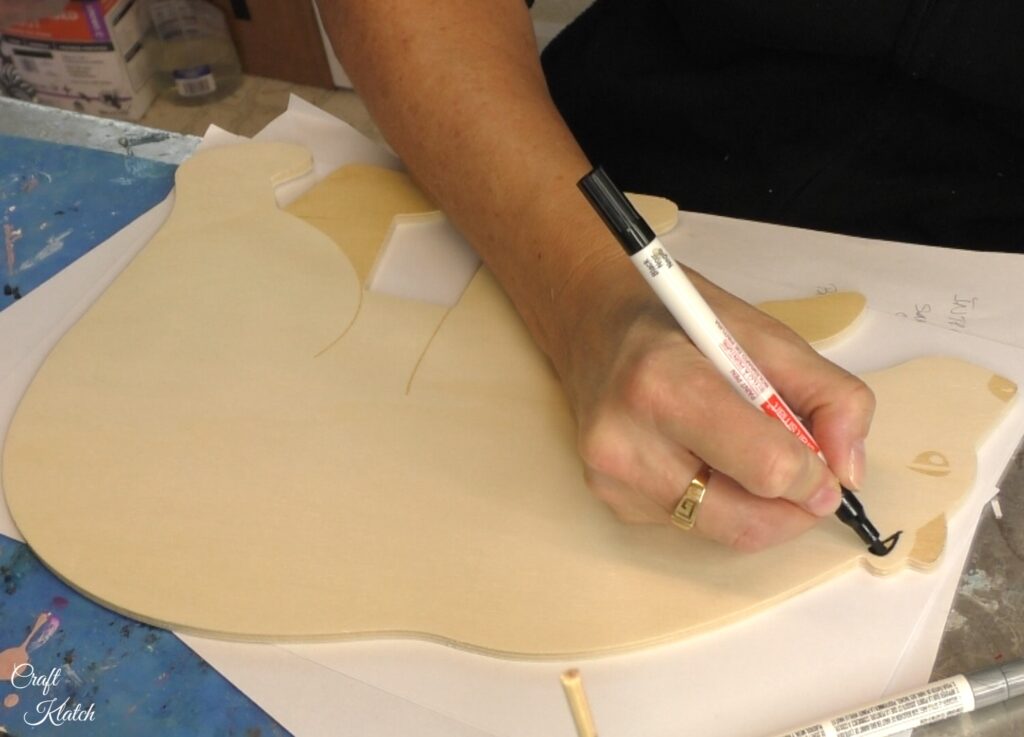
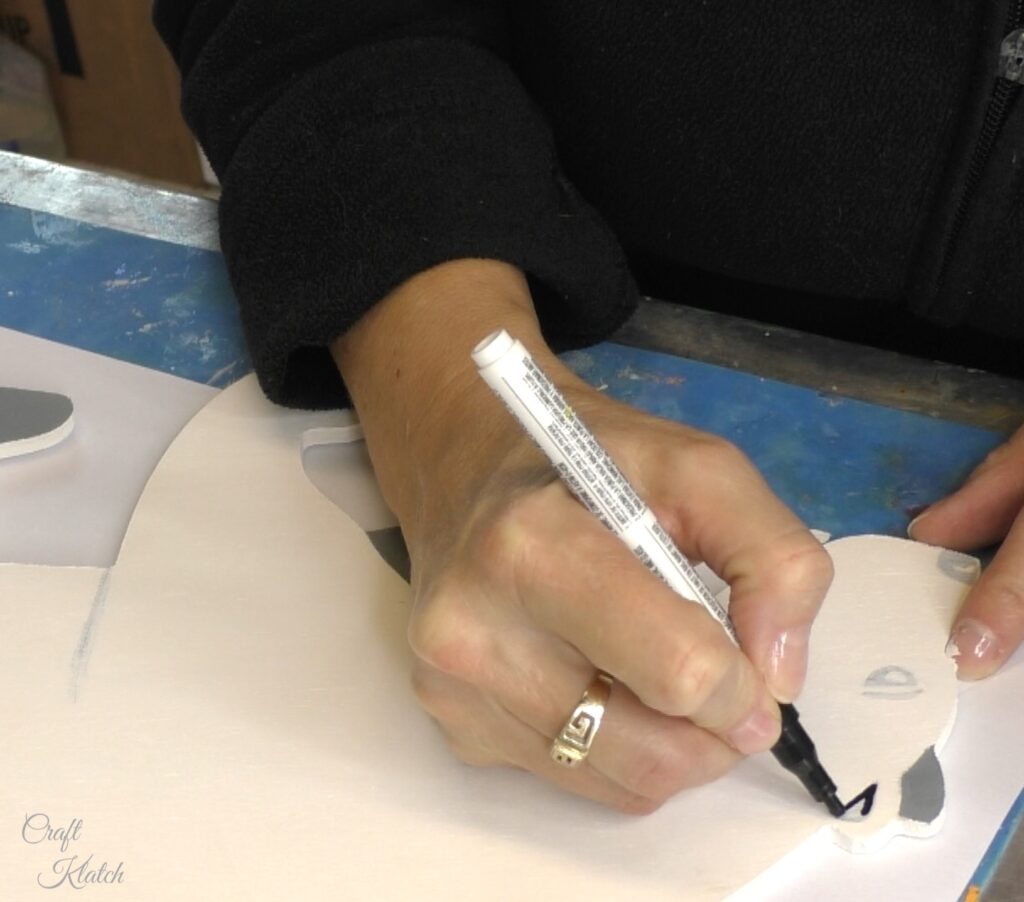
Step 2: Features
Use a black paint marker to distinguish the features.
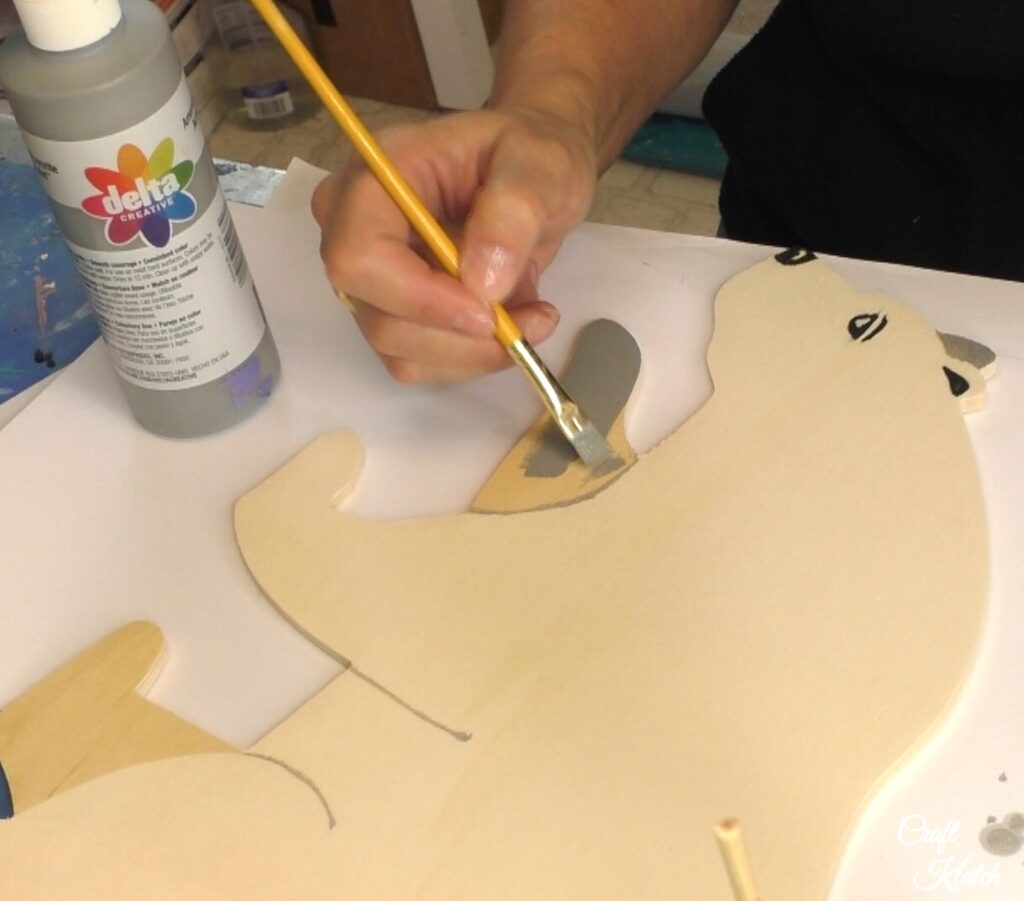
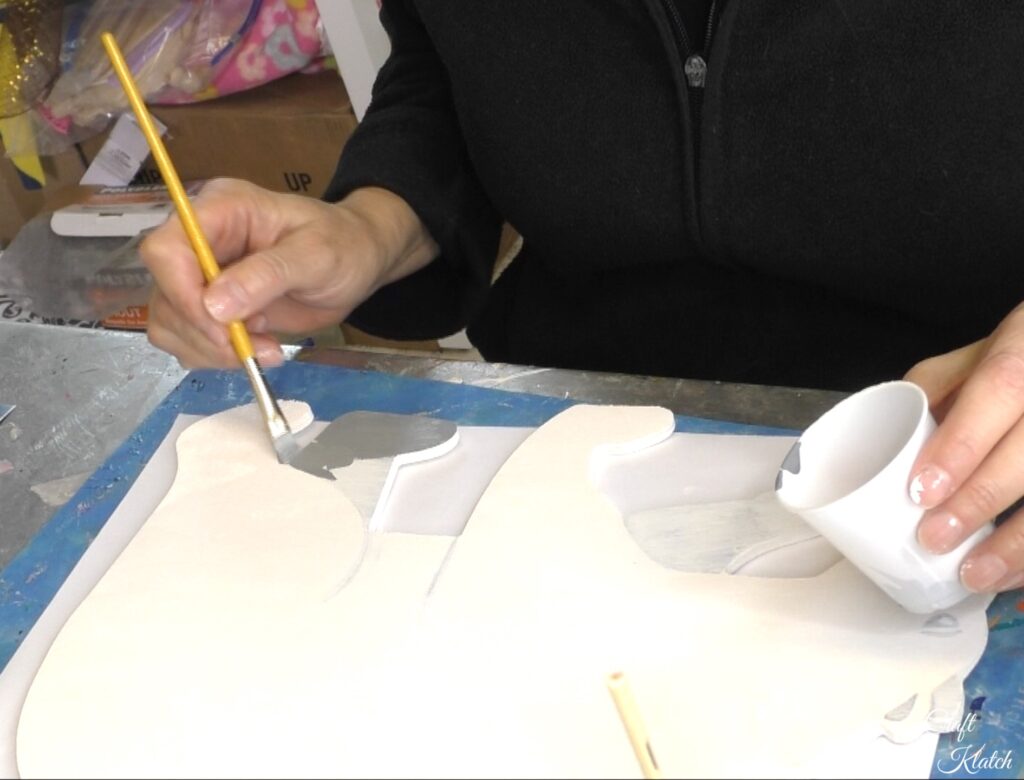
Step 3: Shadowing
Use gray paint to give the back legs and back ear a shaded quality, so it doesn’t look flat.
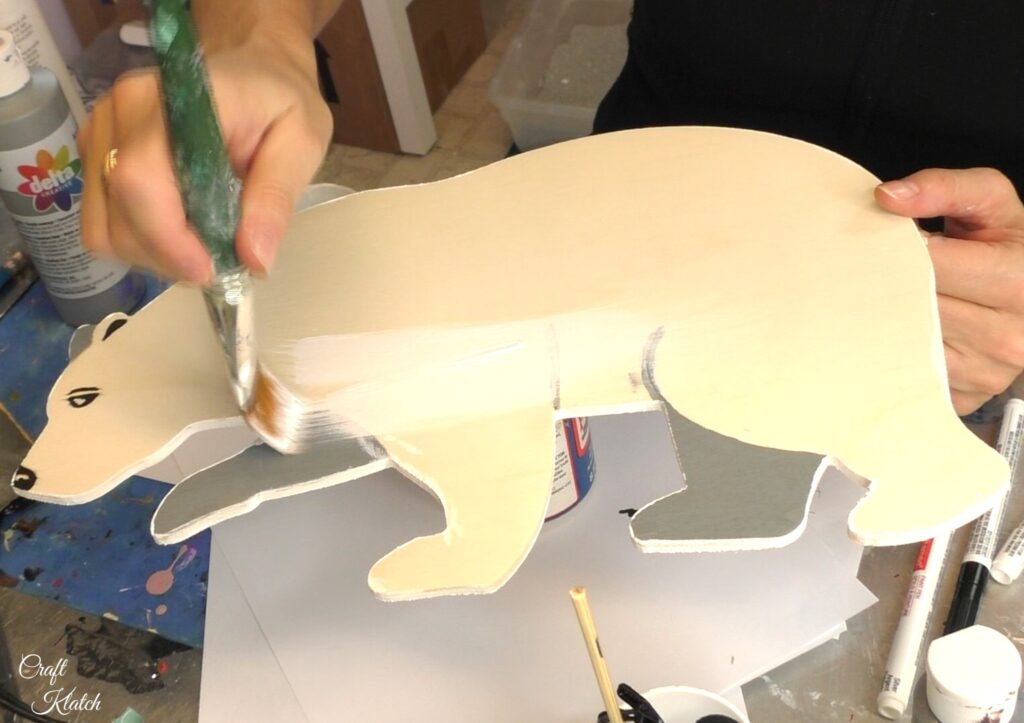
Step 4: Arctic White
Once dry, paint the front and backsides white. I went over everything.
Step 5: Repeat
You want to do the features and the shadowing again. Then, paint it all white. Then, add the features and shadowing one last time.
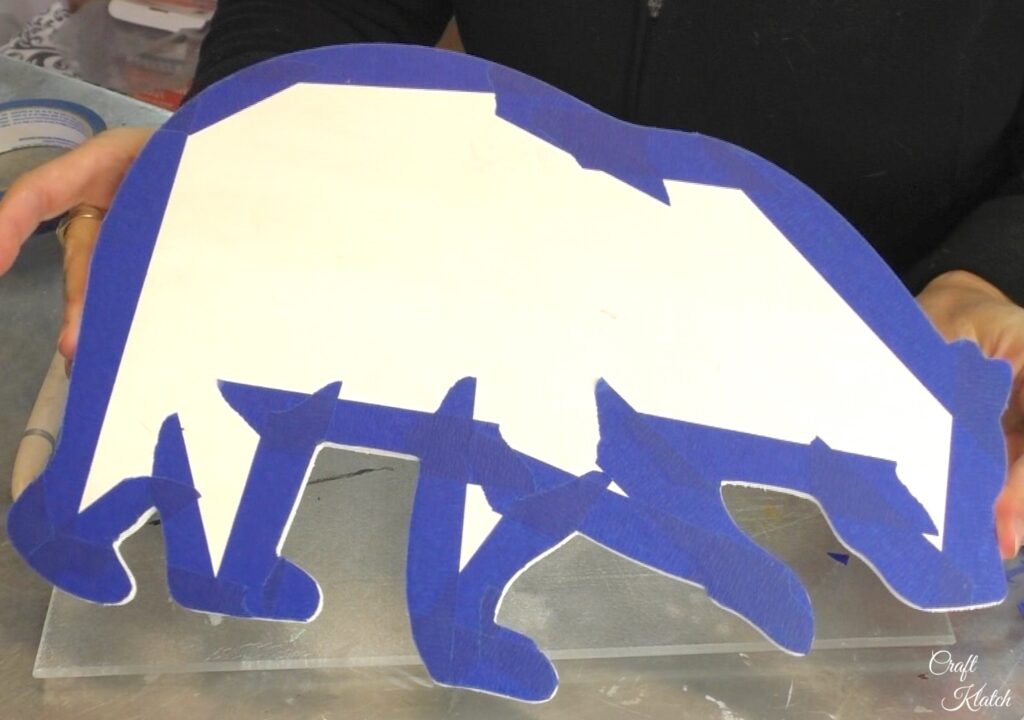
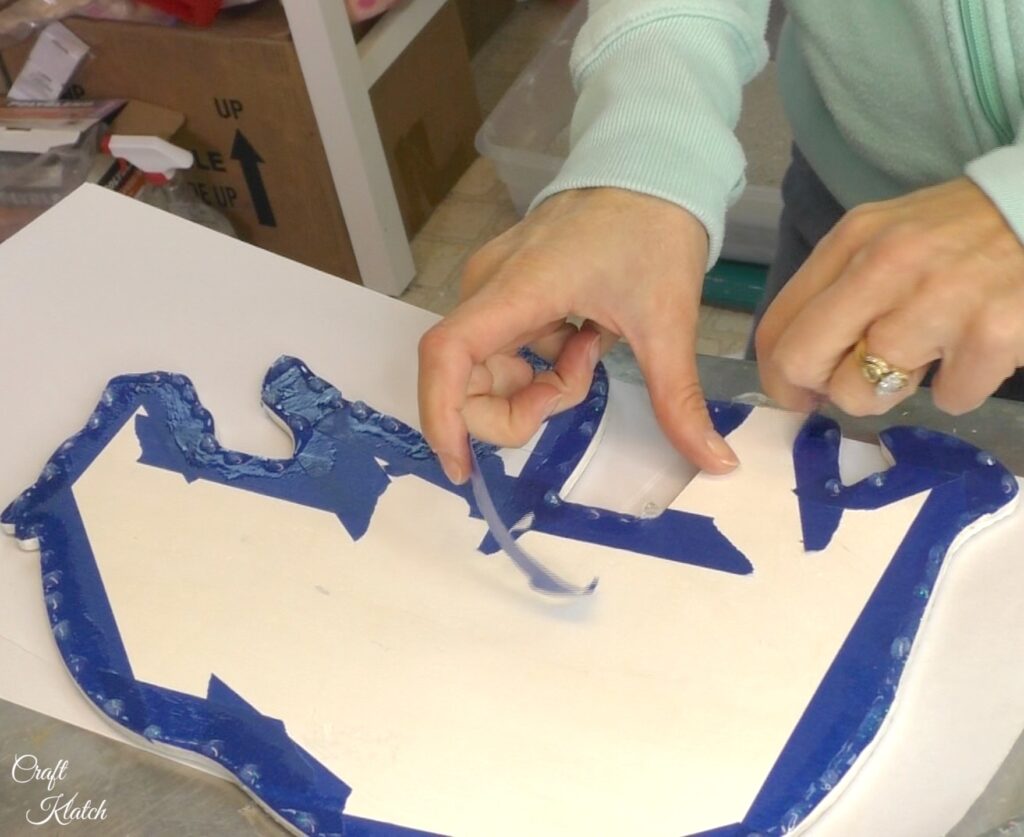
Step 6: Tape
Use tape to line the bottom edge of the back of the polar bear. Be sure to burnish it down, so there is a good seal.

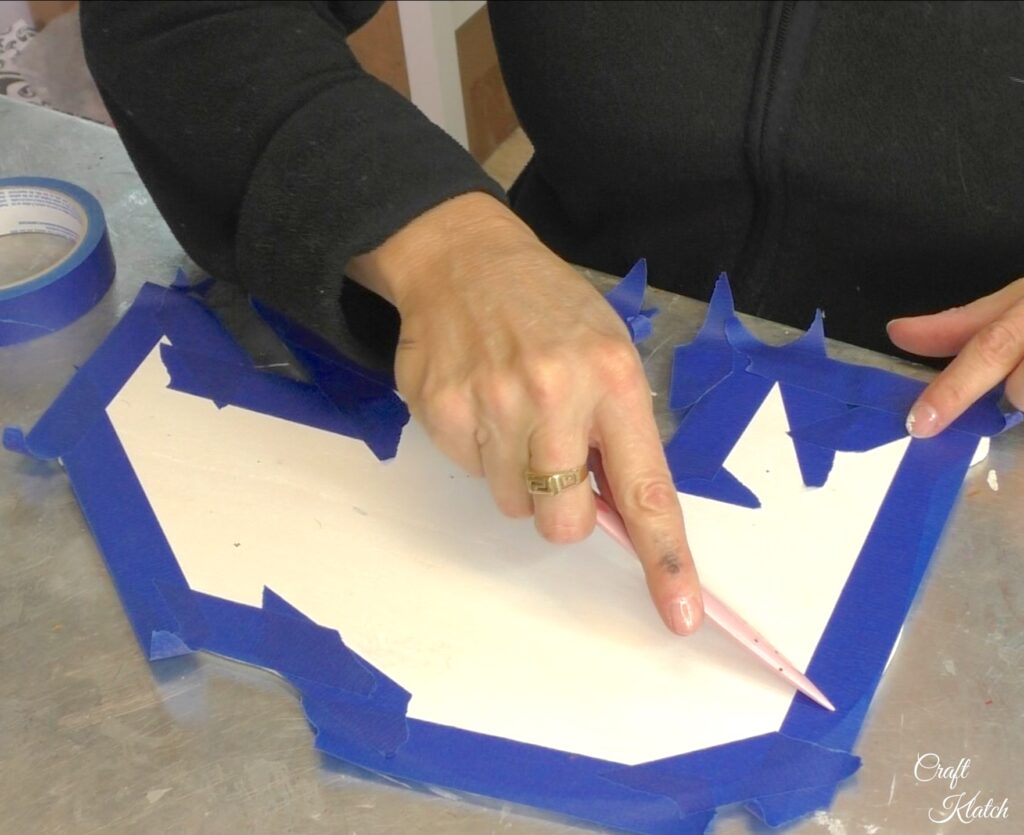
Step 7: Excess
With a craft knife, cut off excess tape from around the bear.
It should look something like this…
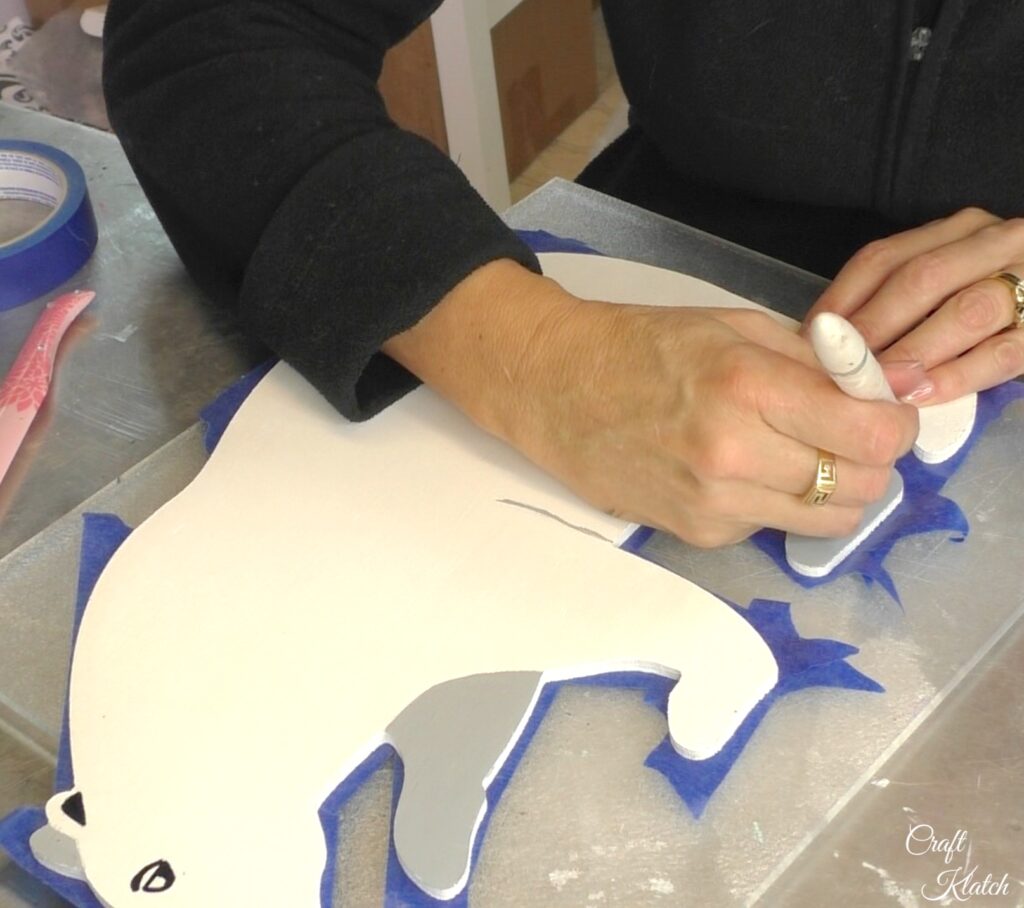
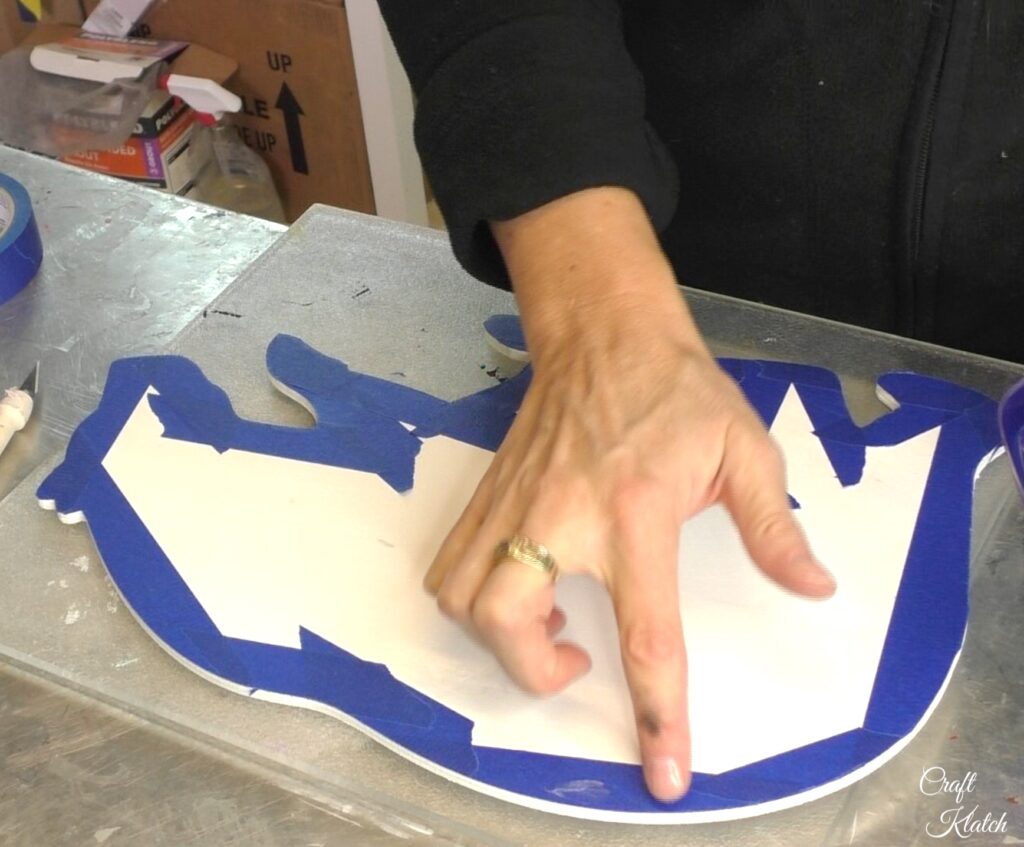
Step 8: Tip Time
Tip: Use petroleum jelly on the edge of the tape, so the resin drips on the bottom are easily removed once cured. You just need a very thin layer.
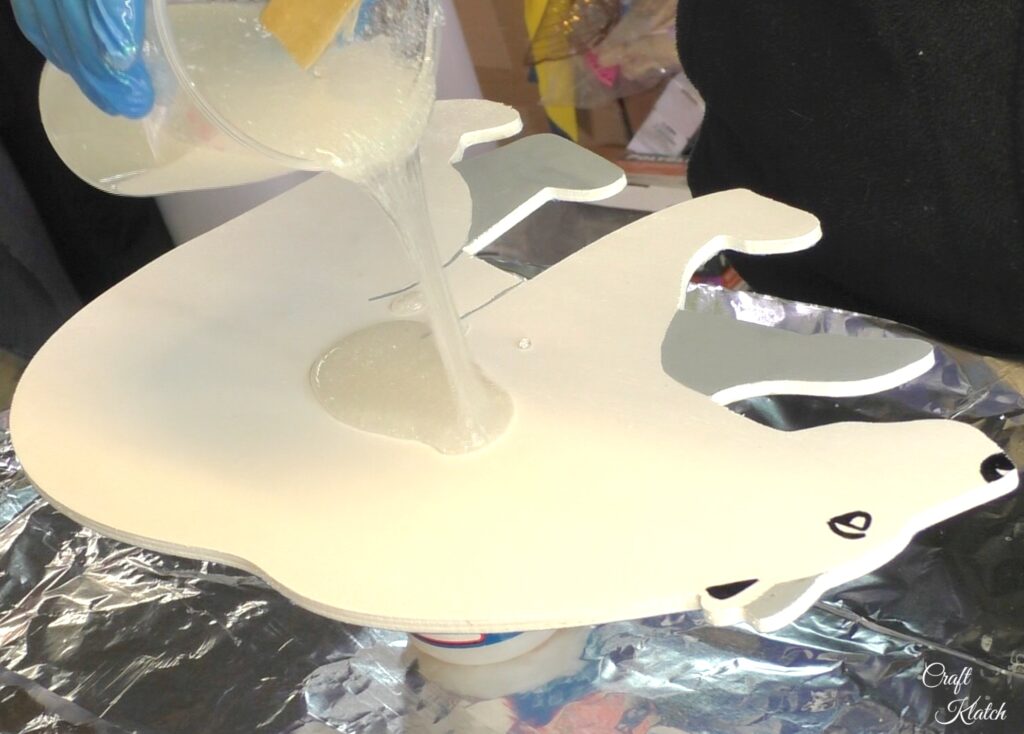
Step 9: Resin
Mix your resin according to the package directions. Then, add a white and/or clear glitter. Mix it really well. Use your stir stick to move it around and make sure the edges are covered.
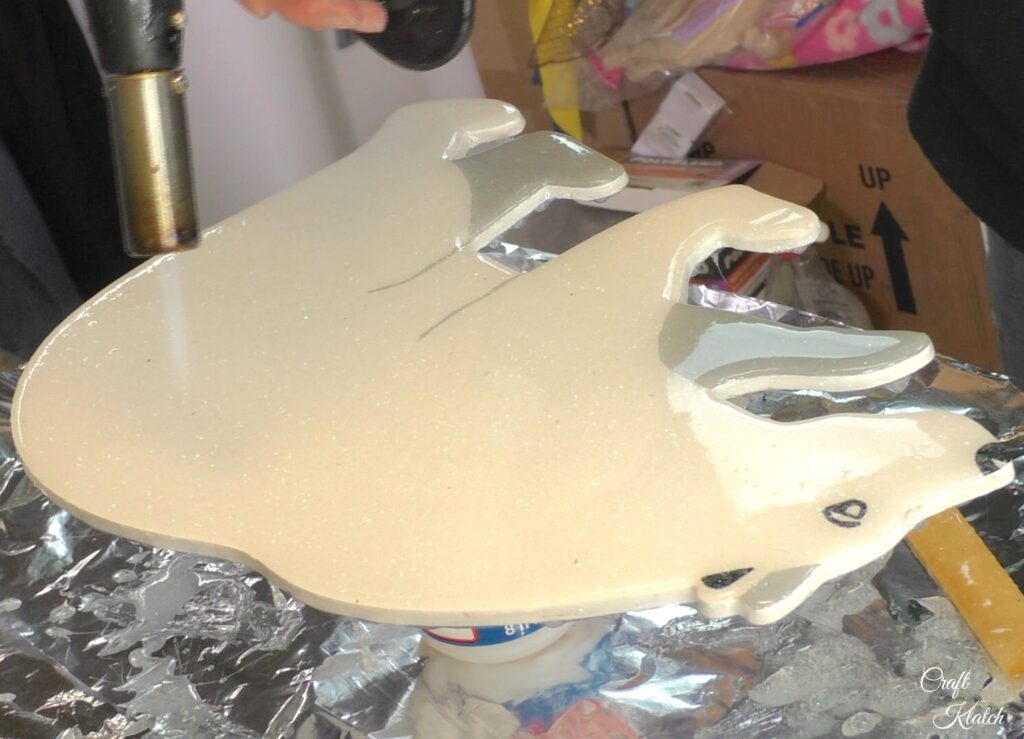
Step 10: Torch it
Use a torch or a lighter to pop the bubbles in the resin. Let it cure a minimum of 12 hours before touching and handling.
Step 11: Tape
Once cured, remove the tape from the backside.
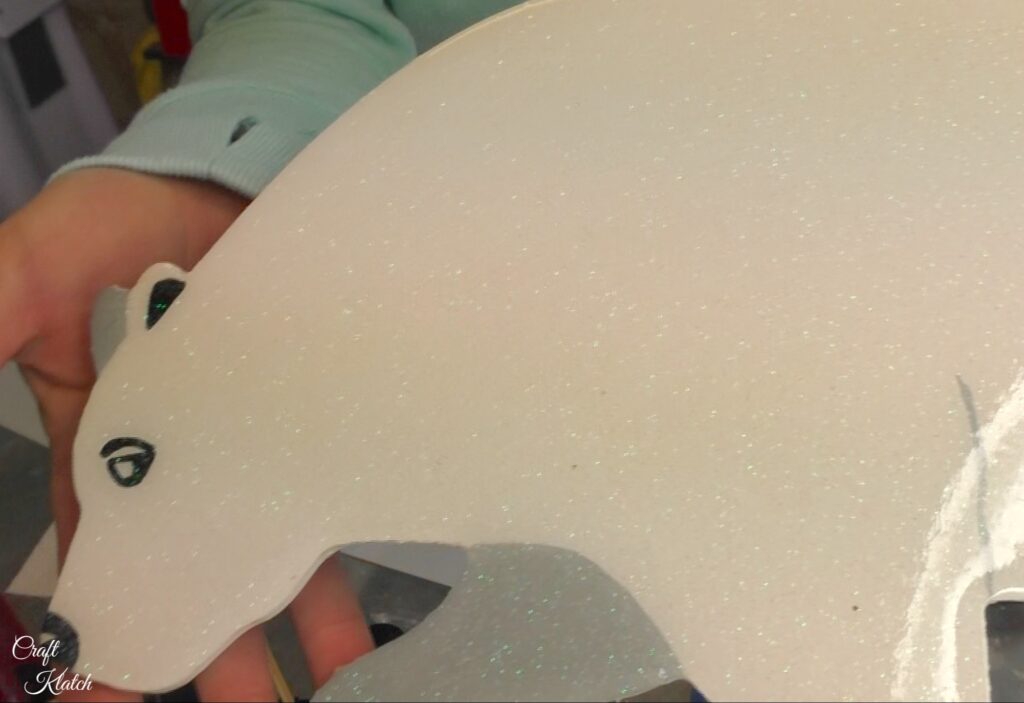
The Reveal
Once finished, you can put the polar bear on the a shelf, mantel, or hang it on the wall using the removable sticky pads!
Up close, you can see the sparkle!

Polar Bear Decor Alternatives
If you love polar bears, but this isn’t the project for you, there are still great ways to bring the arctic to your room decor with the mighty white bear!
From polar bear sheets, to a considerate bear to hold your phone are a few ideas:

Thanks for stopping by! Remember: Life’s too short not to shimmer, so grab your glue gun and your glitter!™ Stay safe!
Mona