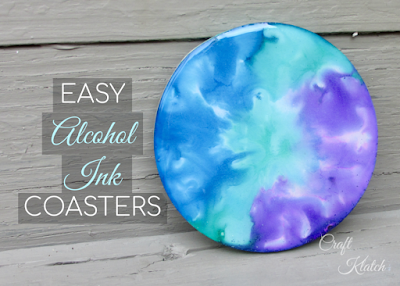
If you are looking for alcohol ink projects, you are in the right place! Look at these easy alcohol ink resin coasters! Don’t you just love the colors? It reminds me of summer and the beach…my favorite place ever! This is such an easy resin craft tutorial! It will add a splash of color to your home decor! It will save your tables from those nasty water rings! And they just make you happy…okay…maybe they only make me happy…but I think if you give them a chance, they could make you happy too! Become one with the coaster.
I have been known to quietly sneak a coaster under guests’ cups when they are not looking. When my granddaughter asked what a coaster was, I was happy to get into a long drawn out explanation of their great importance. No question she really appreciated it. Really, what five year old wouldn’t?

Coasters are great resin crafts for beginners and experienced resin crafters. I say this all the time: If you are intimidated to try resin, start with something small like a coaster. It’s hard to mess up! Also, don’t think coasters are only for beginners. You can get crazy creative with resin coasters!
For this coaster, I was asked to do a color combo of blue, purple, and green. I was also asked to try blowing the alcohol ink around with a straw. So, I did!
Supplies you will need to make alcohol ink resin coasters
*This blog uses affiliate links. As an Amazon Associate I earn from qualifying purchases.
- Coaster mold: https://amzn.to/2KQ9wUY
- Mixing cups: https://amzn.to/31RZ7xU
- Stir sticks: https://amzn.to/323Av59
- Alcohol ink: https://amzn.to/2KzX3Vf
- Pigment powders: https://amzn.to/2RL523A
- Lighter: https://amzn.to/2NQusts
- Wet Ones: https://amzn.to/2pXbqrQ
- Fast Cast (optional for white background): https://amzn.to/2wTZ6wc
- White pigment (optional to tint clear resin for background): https://amzn.to/2QbPRiU
- Resin:
- When deciding on which resin to use for your coasters, you need to keep in mind whether you want it just for cold cups or for hot as well.
- If only for cold drinks, you can be flexible and use whatever brand you like:
- Easy Cast: https://amzn.to/2yjYmBC
- Art Resin: https://amzn.to/2yk9X3z
- Clear Cast: https://amzn.to/2z4rxGw
- If you want it to work for both hot and cold drinks, you need to look for a heat resistant resin, like these:
- FX Poxy: https://amzn.to/2AF3Pkk ~ According to the manufacturer, this one is heat resistant to 500 degrees F.
- Stone Coat: https://amzn.to/2FZoWX8
- If only for cold drinks, you can be flexible and use whatever brand you like:
- When deciding on which resin to use for your coasters, you need to keep in mind whether you want it just for cold cups or for hot as well.
Here is the video tutorial, so you can see exactly how I made them:
Directions:
Step 1: Dust the Mold
I started by brushing pigment powder in the mold. That allows the resin to adhere to the powder and color the outer edge, while the top stays white. The pigment powder and resin will meld into one.

Step 2: Prepare the background
I mixed my fast curing resin and poured it into the mold. You need one ounce for each coaster. I did the fast curing resin because it’s fast and convenient. As an alternative, I could have mixed my regular resin and added white pigment. You would have the same basic outcome, but you’d just have to wait until the other resin cured before moving onto the next step.

Step 3: To make the alcohol ink resin coasters pop, you need to start with white
Once cured, I added white alcohol ink. My theory on white alcohol ink is that it is pure white but also allows for a softer blending than just straight alcohol ink. the colors are more muted. You’ll see what I mean in a minute.

Step 4: Now you can start with the color!
I then added the alcohol ink colors. I did purple, green, and blue. Look how strong the colors are. Alcohol inks are very concentrated colors. I wanted something softer and that is where the white comes into play.

You can find some fun alcohol ink projects HERE!

Step 5: Move it and groove it!
I broke out my straw and blew the colors around. The white really did not want to move around much.


Here is a second version of the alcohol ink coasters because why make one when you can make two!
I did the second coaster with stripes of white and added colors and they started to blend.


Because sometimes it’s hard to stop adding color, I added more to the first one!
I added some additional color to the first one. You are probably asking Why? Looking at it in pictures, it looked pretty good before I added more color. But in person, it really didn’t. Look at this mess! How fun are alcohol ink projects?

While we’re at it, why not try a third version?
I decided to do an additional coaster because I know I use A LOT of colors and A LOT of ink. I can’t help it! This time, I wanted to try one, where I used less and keep the colors a little more isolated. I didn’t blow anything around and I didn’t move anything. It all came together organically.


I will say, when I see this mess just sitting there, it goes against everything I believe in to not touch it. Seems wrong! I’m trying to think of what the right word is…anxious…antsy…compelled…I’m just not sure how to describe it. I HAVE to leave the room!

Clearly, it does not need me…it’s getting along just fine!

Step 6
Here they are with the ink all dry.

Step 7
I mixed clear resin and poured it on each of the coasters. It takes a little less than an ounce to get the job done. I usually mix an ounce and I often have a mold off to the side for any extra. I made a Leftover Coaster and I have a pile of resin teeth from leftovers…don’t ask. I’ll find a way to use them…one day.

Step 8
I used my lighter to pop the bubbles and let the coasters cure for a minimum of 12 hours.

Here they are all cured! Look at those beautiful colors! You have to really zoom in to appreciate the swirls.


That’s it! Could not be easier. I have to admit that my favorite one is the one I didn’t over mix. See, good things happen with a little self-control!
I know a lot of you worry about trying resin but don’t worry! Here are my 5 Reasons Your Resin Coasters Are Not Curing! Give it a read and it will help you troubleshoot and avoid some of the pitfalls at the beginning. It’s not hard stuff and it’s not scary stuff, it’s just stuff that helps if you actually know it.
Maybe you are new to alcohol ink projects and resin and don’t want to overwhelm yourself. I have an Alcohol Ink Coaster project that uses alcohol ink on tile. So easy and also such a fun project!
Thanks for stopping by! Remember: Life’s too short not to shimmer, so grab your glue gun and your glitter!™ Stay safe!
Mona
Be sure to share and PIN IT!
