To stay up on the latest, be sure to
SUBSCRIBE to my YouTube Channel!
You can click right HERE!
For easy reference, click on the Tutorials tab above.
Also, I created an Amazon store link, with items that I use in my crafts, just click on the
Products I Use above!
Products I Use above!
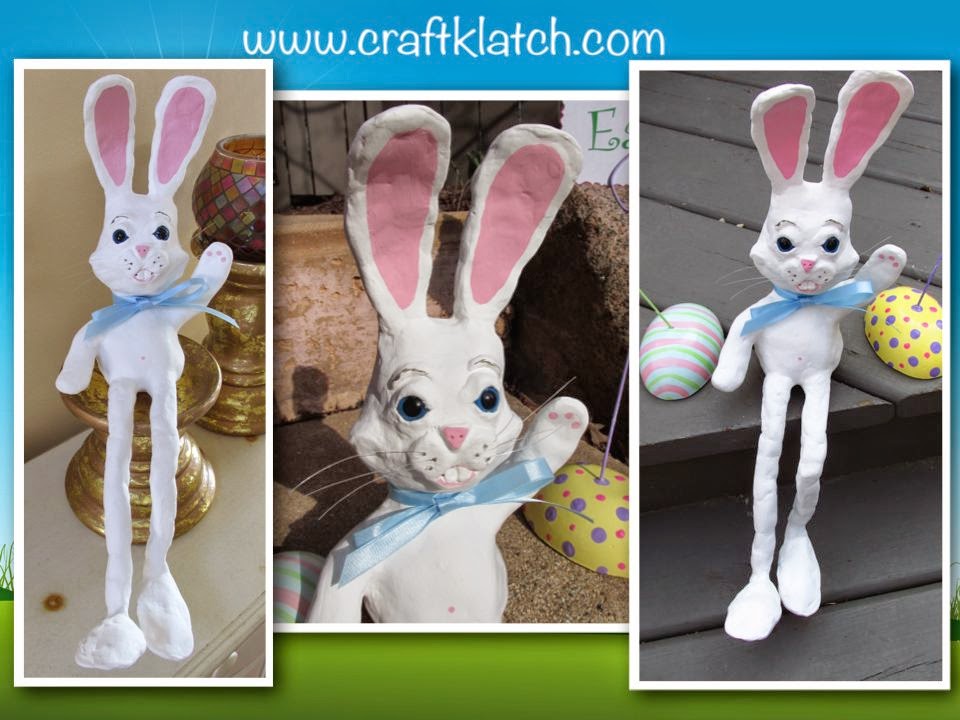
Here is my last Easter craft of the season, though this can really be for anytime of year.

You will need:
– Air dry clay
– Aluminum foil
– Wire – you can use a wire hanger, but I found some great floral wire at Dollar Tree
– Acrylic paint (white, pink, dark gray)
– Blue thin ribbon
– Find sandpaper or fine sanding block
– Fishing line
– Plastic eyes
– Pliers
– Hot glue
– Matte sealer or varnish
– Gloss sealer or varnish
The Das is the clay I used and the Paperclay is the other clay also like working with:
Here is the video tutorial:
Directions:
1. Take your wire and bend it to the shape of a bunny. It will look much like a bunny stick drawing. This will give you your general form. For the arms, take a piece (twice as long and you want one arm to be) and bend it in half. Wrap it around the body and pinch it tight with the pliers – where you want the arms to be positioned. Use a little hot glue to keep it in place temporarily.
2. Take aluminum foil and begin wrapping the wire. Roll the foil into a ball in places you want in thicker. The aluminum foil is a great product to mold you bunny into a general shape. Watch video to see how I did it.
3. Once you have the wire completely covered and shaped, it’s time for the clay. But first, position the bunny the way you want. Will he be sitting or standing? Will his arms be up or down? Will the ears be standing up straight or drooping?
4. Take the clay and begin covering the foil. To smooth the clay, have a little bit of water nearby and dip your fingers into the water and that helps smooth the clay. Work until you have the whole piece covered. You may want to do it in stages. Let it completely dry.
5. Once dry, now you want to use your sandpaper (if needed) and give it a quick sand. Be sure to wear a mask while doing this.
6. Take the eyes and cut off the stem. Hot glue them where you would like them placed.
7. Taking small pieces of clay, create the eyelids and the the bottoms of the eyes. Also add eyebrows. Remember to keep smoothing and use water to help it adhere to the dry clay.
8. Take a small ball of clay an make a nose. I wanted mine to be a triangle, but it doesn’t have to be. I used a skewer stick to poke in the nostrils.
9. I took two balls of clay and put them under the nose and blended.
10. I took a small strip and created the bottom of the mouth.
11. Then I took two small rectangles and made the buck teeth.
12. I added two balls of clay to both sides of his face, to create cheeks and blended them in.
13. Let everything dry.
14. Now it’s time to paint. Paint the entire bunny (except the eyes) white. It took two coats.
15. Using the pink, paint in the nose, the ears, the mouth and make dots on the hands and feet.
16. Take the dark gray to lightly define the eyebrows and put dots where the whiskers will go.
17. Allow to dry.
18. If you want to seal him with the matte varnish, now would be the time. Then go over only the teeth with a gloss varnish.
19. Cut long pieces of fishing line and glue into place. Once adhered, trim to the length you want.
20. Tie a bow around his neck and you have a cute bunny!
Happy Easter everyone! Thank you for stopping by and Happy Crafting!
Mona

