
When I hear Dollar Tree craft, I think budget-friendly. This Valentines dessert platter falls right in line with festive and frugal! And who can resist a fun DIY?
This project was actually a collaboration/challenge between Chas, from Chas’ Crazy Creations, and myself. We both interpreted the guidelines a little differently, which is great!
Seriously, isn’t that what creativity and imagination are all about?
I think there are some great Valentine’s Day crafts to enjoy!
I’m going to go through my project and then send you over to Chas’ video and her post!
The Rules
But first, let’s start with the rules!
The rules were pretty simple.
- Use Dollar Tree items to create a Valentine’s Day decoration
- Spend less than $10
- Supplement it with supplies you have at home
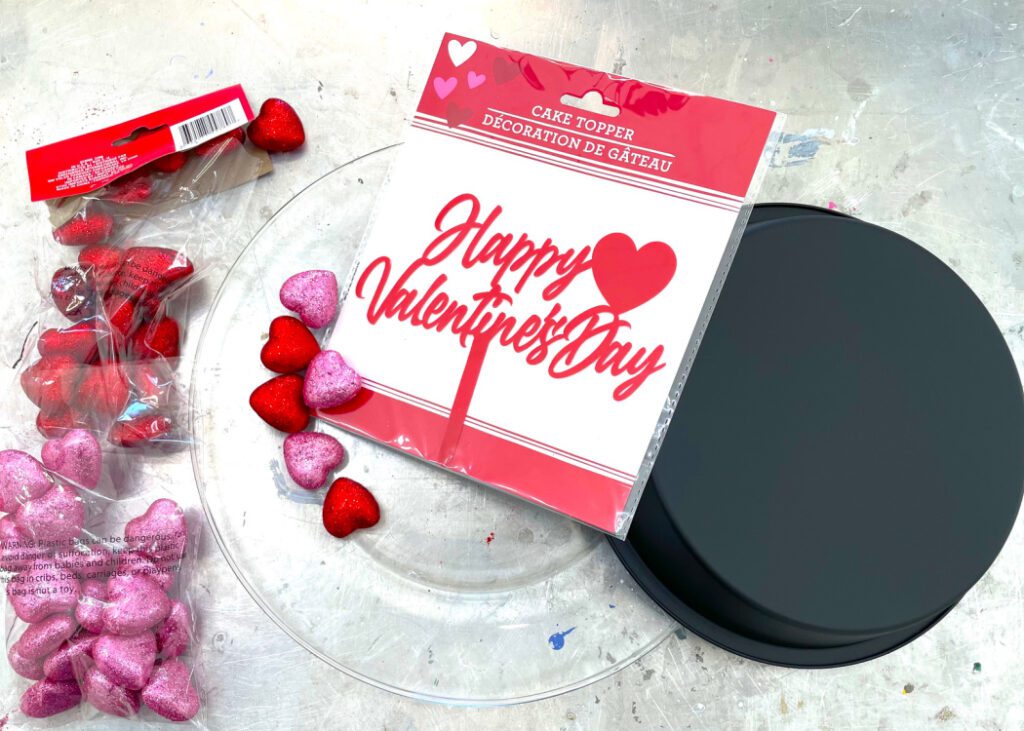
Supplies for the Valentines Dessert Platter
When we decided we were going to do this, I quickly ran out to my Dollar Tree to buy supplies and find some inspiration.
The only thing that kept running through my mind is cupcakes.
Don’t know why, but I was all about the cupcakes.
I bought my main supplies at Dollar Tree but I did have some supplemental supplies on hand. In case you don’t have a Dollar Tree nearby, I have links to similar products.
***HELP US VOTE ON OUR NEXT CHALLENGE HERE***
*This blog uses affiliate links. As an Amazon Associate I earn from qualifying purchases, at no additional cost to you.
- Mod Podge
- Glitter
- Cake topper (There are so many great ones available!)
- Hot glue
- Matte black paint
- Cake pan
- Styrofoam glitter hearts
Dessert Platter Video Tutorial
Directions for the Valentines Dessert Platter
Here are the Dollar Tree craft supplies I bought to make the Valentines dessert platter.
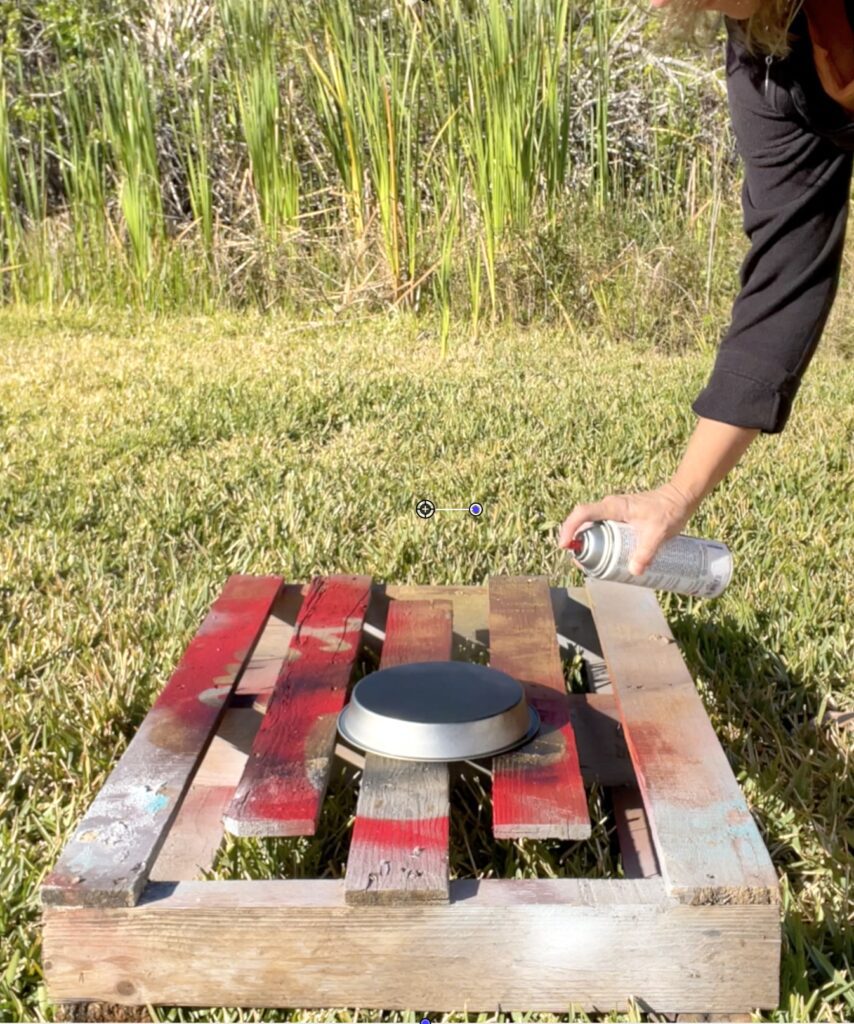
Step 1
The cake pan actually started out silver.
I painted the cake pan a flat black, inside and out.
For the paint, it doesn’t really matter if it is a glossy, satin, or matte finish.
Seriously, it was what I had on hand and it provides the background color and that’s all I was going for.
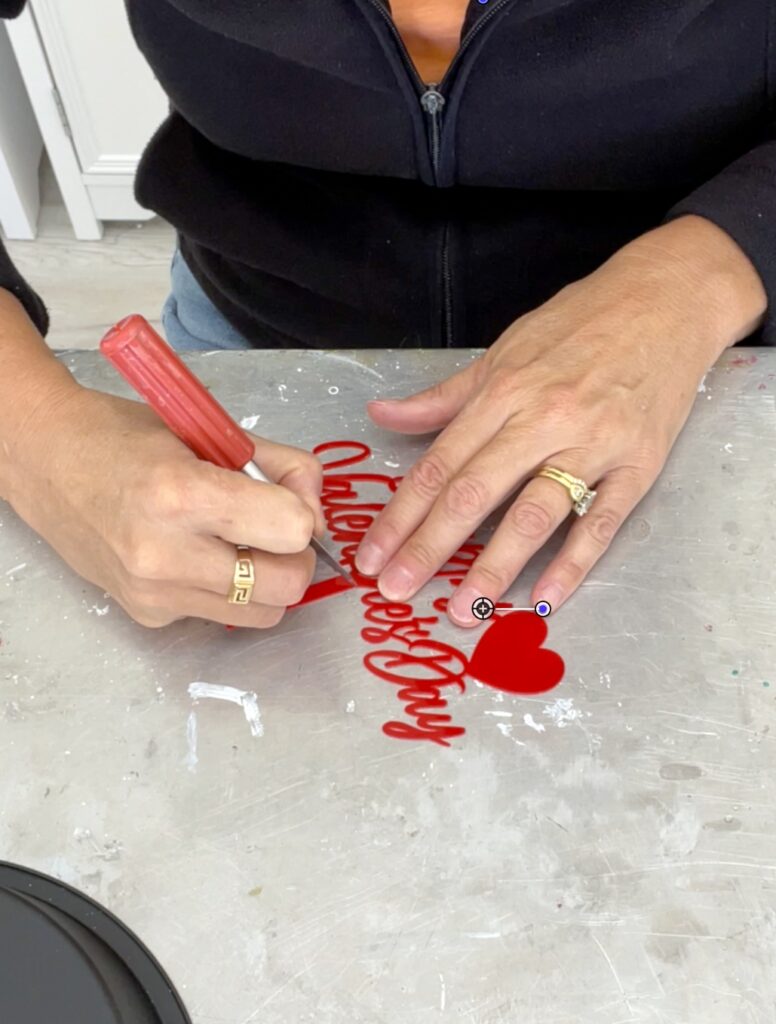
Step 2
I cut the stem off of the Valentine’s Day cake topper.
I used my craft knife to carefully score and break off the cake topper stem.
It is plastic and there is a film on the backside, which partially peeled when I did that. It was no big deal and I think if you do it carefully, you can probably just snip off the stem with scissors too.
Also, if you don’t get a perfect cut, don’t sweat it!
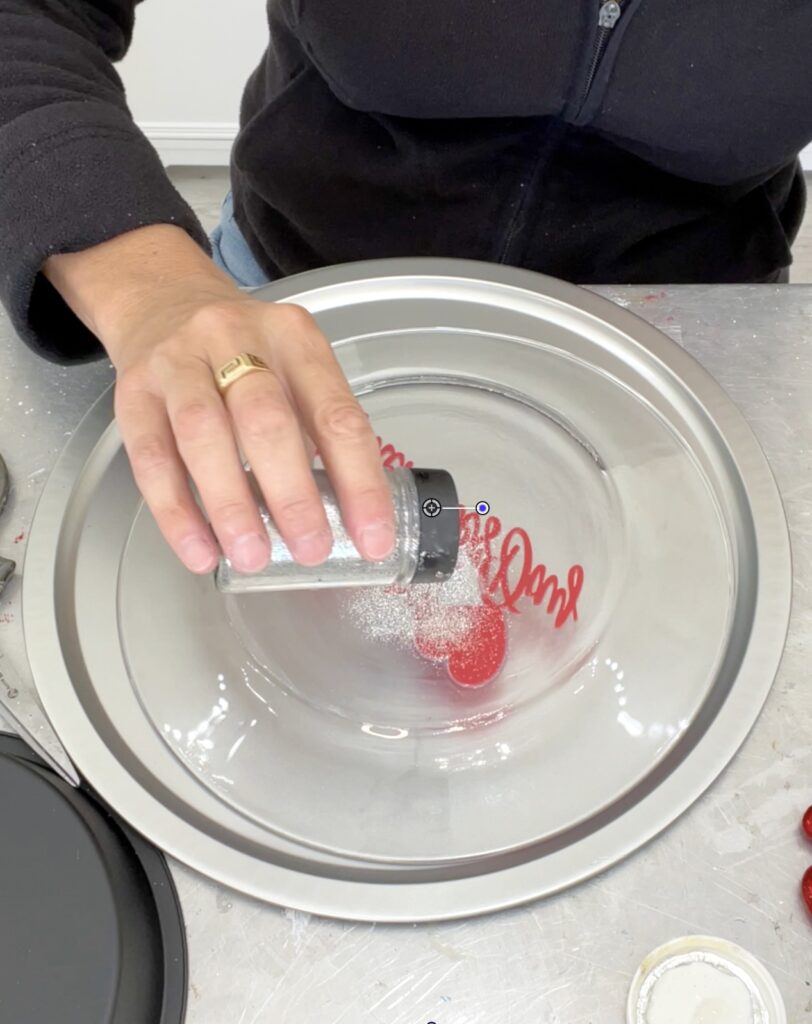
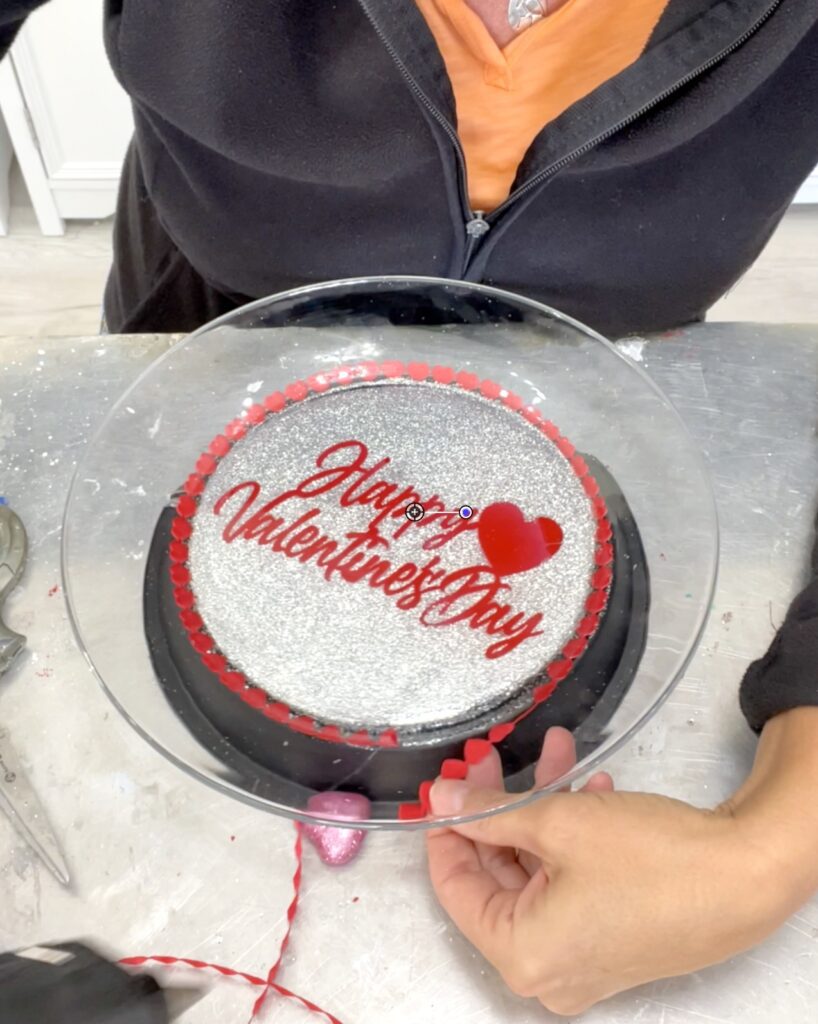
Step 3
I brushed Mod Podge onto the back of the glass plate. I only applied it to the inner circle.
Then, I pressed the cake topper into the Mod Podge and sprinkled it with fine silver glitter.
I thought the silver would contrast with the red nicely.
The Mod Podge I used is my favorite.
I use it because it already looks clear when you brush it on. With other glues and even some Mod Podges that are supposed to dry clear, it seems sometimes some of the white remains or maybe a cloudy film stays after drying.
The nice thing with this particular Mod Podge is you don’t have to worry about any of that!
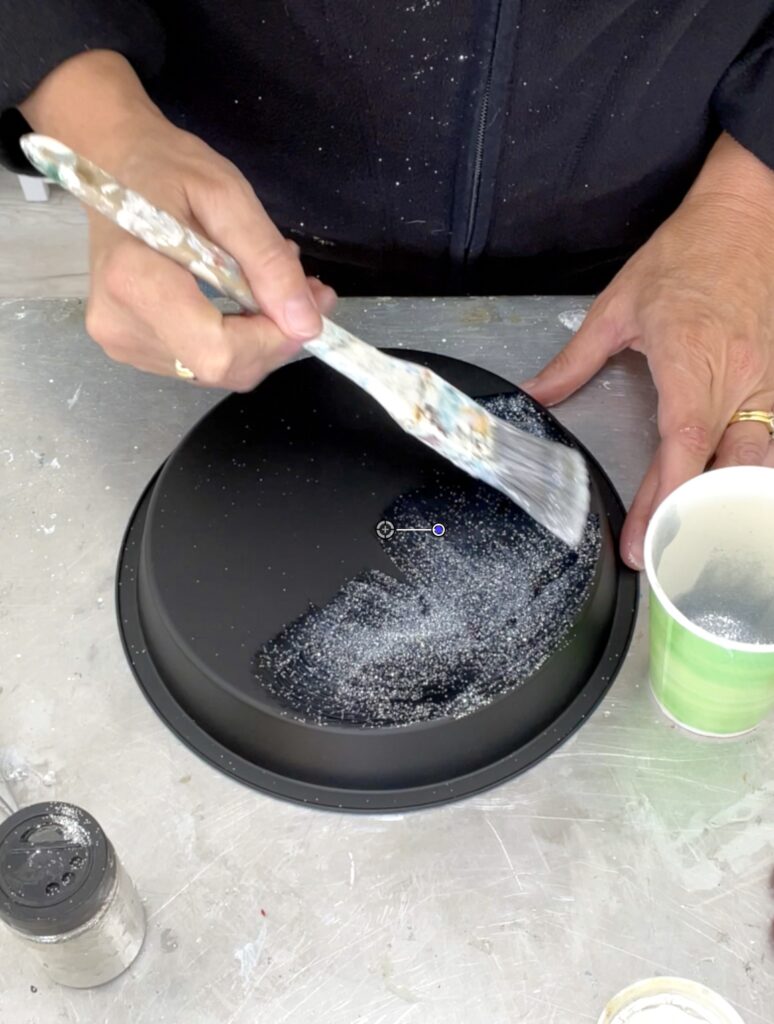
Step 4
In a cup, I mixed Mod Podge and fine silver glitter, brushed it onto the bottom of the cake pan, and pressed the glass plate onto it, so the two glitter sides would stick together.
I did this so that if any of the glitter wasn’t perfect on the back of the plate, the silver on the back of the cake pan would fill it in and hide it!
Step 5
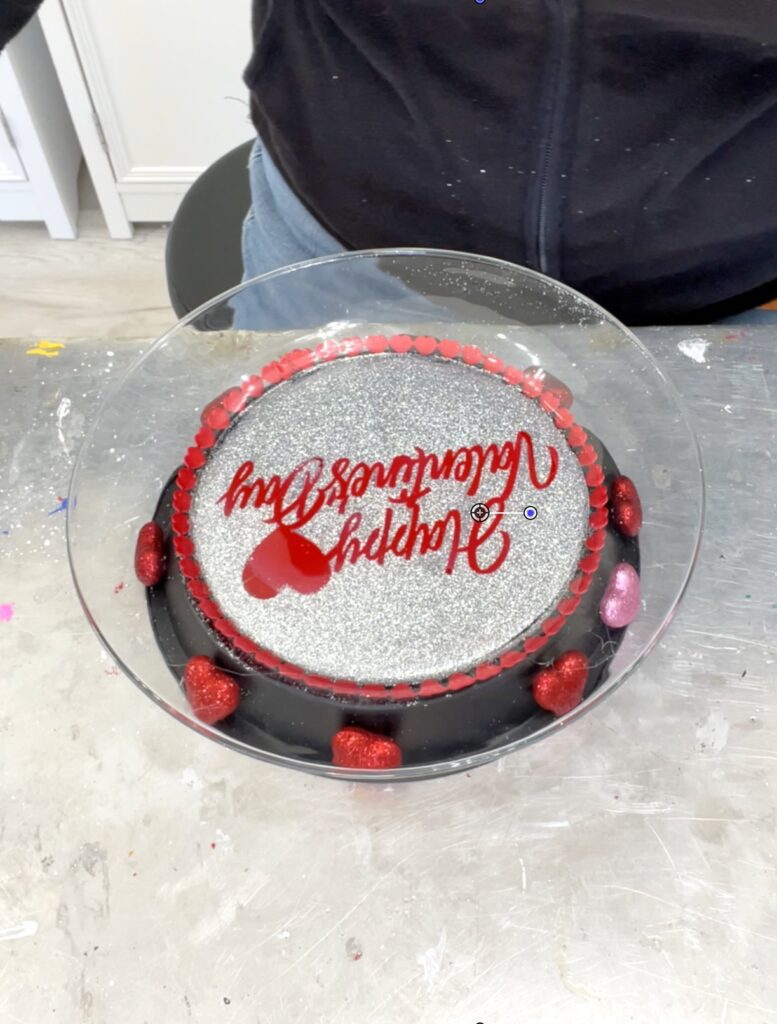
I used a heart ribbon and trimmed around the bottom of the plate, to make the glitter edge look clean.
I tried to be super neat with the glitter but sometimes you just can’t get a perfect edge.
So, I had some Dollar Tree heart ribbon that I was planning on using for a different project and it made the perfect edging!
WIN!
Don’t you love it when a project comes together!
Step 6
Using hot glue, I glued the glitter hearts onto the edge of the cake pan. I alternated colors, but you could use one color if you would rather.
Remember, there are no rights or wrongs in crafting and art!
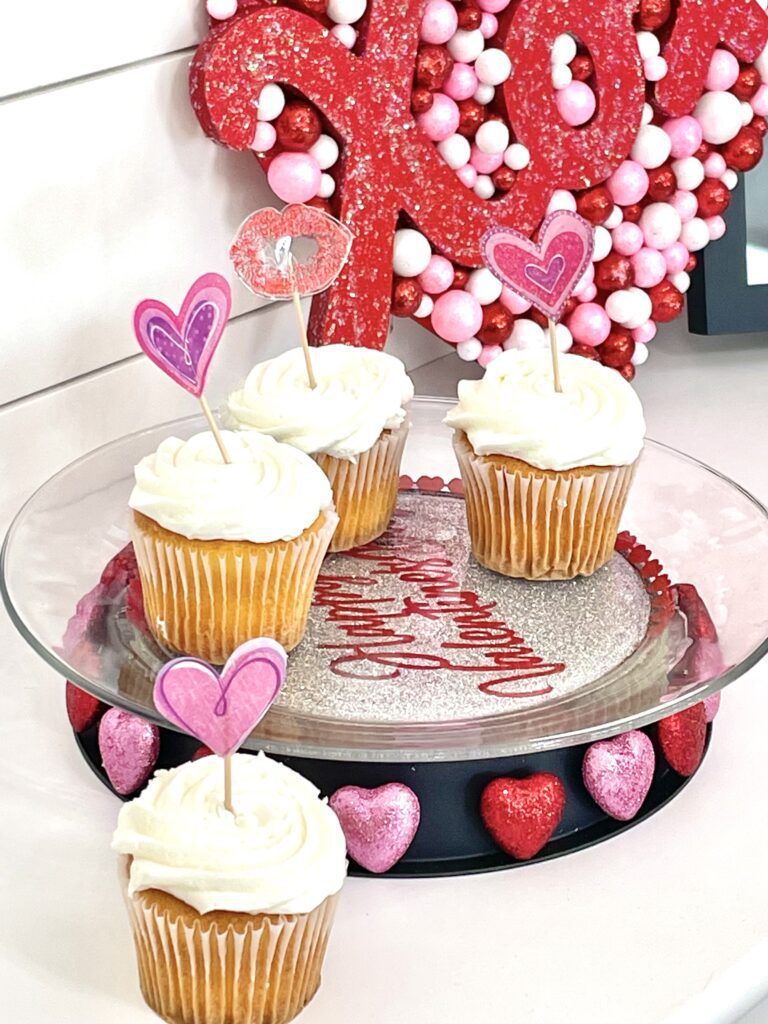
That’s it!
Bring on the cupcakes!

Tally Up the Cost
So, the moment of truth is here!
How much did I spend?
Drumroll, please!
- Cake pan: $1.25
- Glass plate: $1.25
- Pink hearts: $1.25
- Red hearts: $1.25
- Cake topper: $1.25
- Heart ribbon: $1.25
Total spent: $7.50
My supplemental items: I had the paint, hot glue, glitter, and Mod Podge at home.
Chas’ Valentine Dollar Tree DIY
Chas interpreted the scope of the challenge a little differently than I did, which is great!
After all, isn’t that what arts and crafts are all about?
I poured my $10 limit into one project.
While Chas tackled several fun DIYs with her $10 budget!
Enough talk, go check out the AMAZING creations that Chas came up with!!
Chas’ Valentine Dollar Tree DIY Video
Are you ready?
Sit back and take it all in!
Here is Chas’ video and she runs you through all of her projects, which are easy and super festive!
You can find the written directions to all of her Dollar Tree crafts HERE!

Be sure to send Chas some crafty love with a comment and be sure to subscribe to her channel and her blog!
You never know what she’s going to come up with next!
Other Valentine’s Day Crafts!
If you like this one, I know you will love these:
- Valentine’s Day Decor (also a Dollar Tree craft!)
- Heart Lights
- Valentine Box of Faux Chocolates
- Resin and Wood Heart Coasters
- Resin Heart
Valentines Dessert Platters You Can Buy!
In case you don’t have time to create your very own dessert platter, there are some great options out there!
Here are some great Valentines dessert platters you can buy!

Remember: Life’s too short not to shimmer, so grab your glue gun and your glitter!™ Stay safe!
Oh my goodness, Mona, this is amazing and now I’m thinking of cupcakes too – lol. I am always in awe of your creativity, you inspire me, and am such a fan! Thank you so much for asking me to do this challenge with you, and I cannot wait to do the next one.
Thanks, Chas! I can’t wait to do it again! You are a crafting powerhouse!
Loved this project- so cute and easy to make. Mod Podge also comes with glitter already in it – that may also work especially for the edges.
I loved all your tutorials on coasters – that got me started on that craft.
Keep up the good work!
Dolores – You are too kind! ❤️ I didn’t even think about the Mod Podge with glitter! Good call! I’m glad you enjoyed the coasters! I’m sure I’ll have some more in the future!