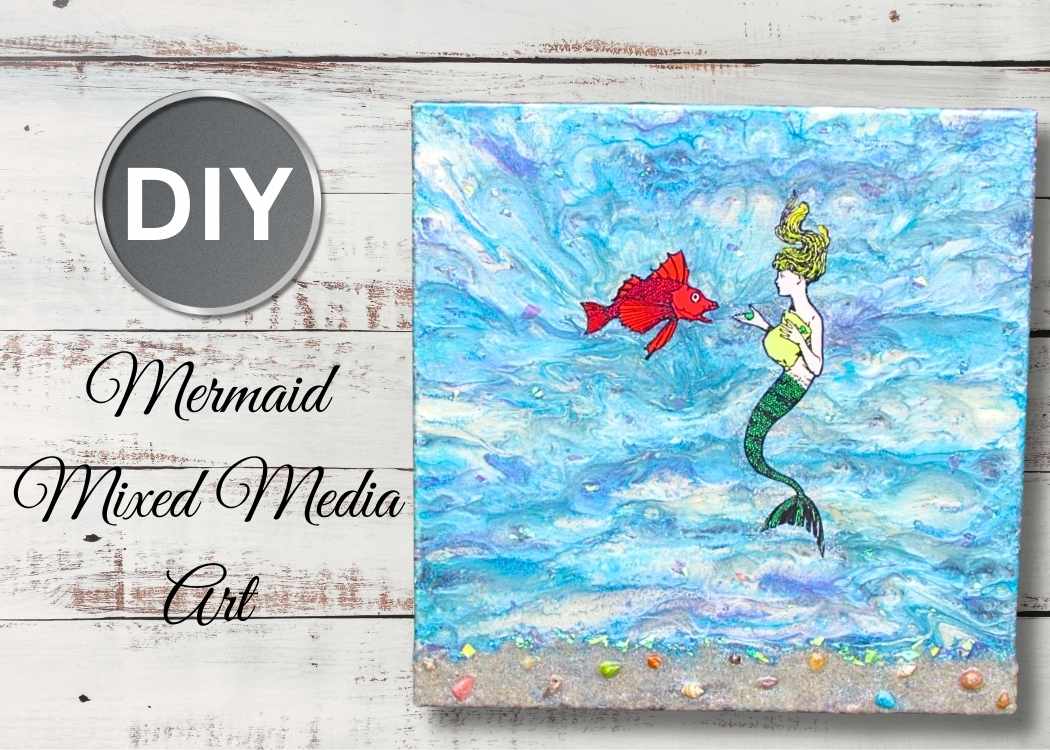
Create a beautiful piece of mixed media art with this mermaid canvas tutorial. It has texture, glitter, sand, and resin for a stunning finish.
If you have followed me for a while, you know I love all sorts of crafting. This particular project combines three different types of crafting and mediums…
…painting, decoupage, and resin.
I think it turned out pretty beautiful! Even better than I could have expected!
The paints I used did all the work for me on the background. They are truly amazing to work with and leveled up the mermaid art.
And some hints of glitter to make it extra special.
Supplies Needed
*Disclosure: This blog uses affiliate links from Amazon and other retailers. I earn a small amount from qualifying purchases at no additional cost to you.
- Pebeo Fantasy Moon Paints
- Pebeo Prisme Paints
- Mermaid and Fish Clipart
- Super Gloss Mod Podge
- Sand
- Chunky white glitter
- Fine blue and white glitter
- Small sea shells
- Blue confetti glitter
- 12″ x 12″ canvas
- Resin:
- When deciding on which resin to use, there are a lot of qualities that might be appealing, UV resistant, price, heat resistance, etc. Just make sure to select a resin that fits your needs.
- Use whatever brand you like:
- Easy Cast
- Art Resin
- Let’s Resin
- Promise Epoxy
- These are heat resistant resins:
- FX Poxy
- Stone Coat
Mermaid Mixed Media Art Video Tutorial
Check out the video. I’ll take you step by step through how I made this mixed media art.
How to Make Mermaid Mixed Media Art Directions
Step 1: Create the Ocean Background
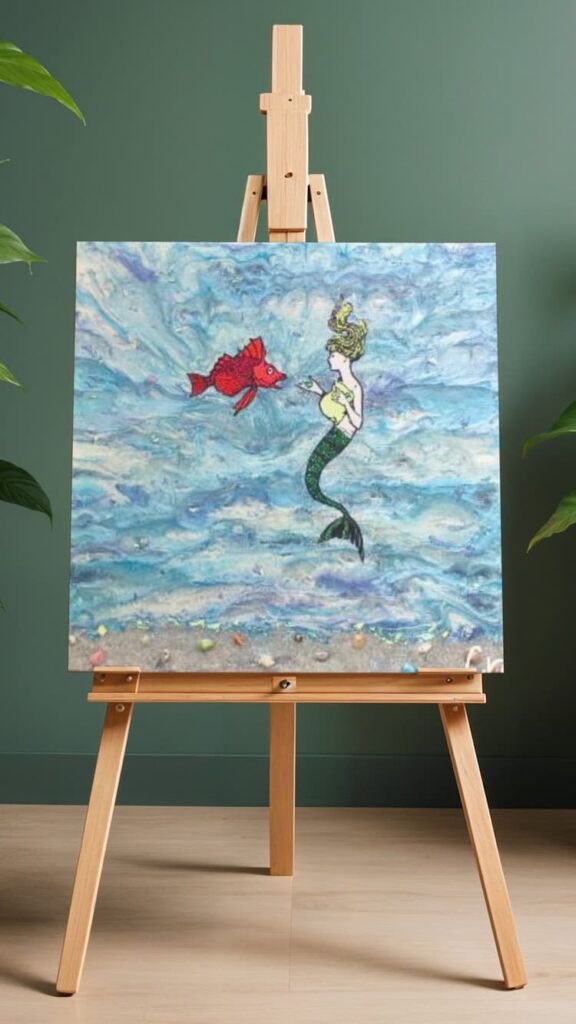
Dip stir sticks into the Pebeo Fantasy Moon and Prisme paints (use a fresh stir stick for each color) and drip them directly onto the canvas.
I used a mix of blues, purples, and white to give the background a watery, ocean-like feel.
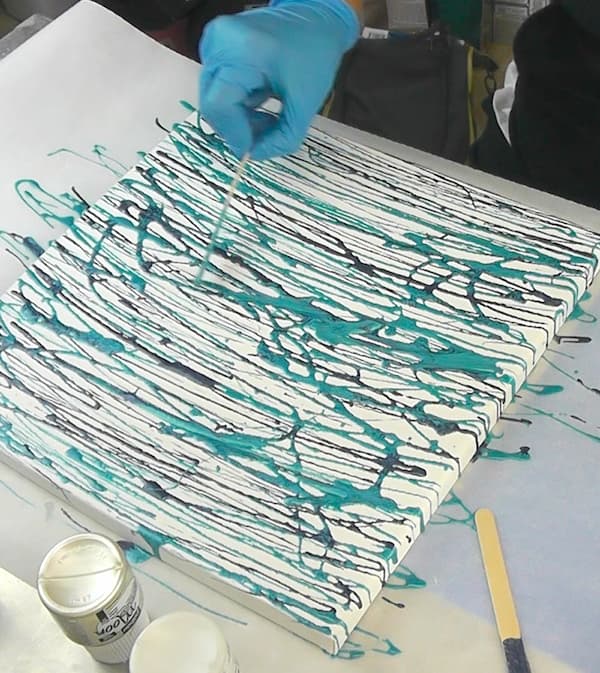
Gently move the paint around with the stir sticks to blend the colors and eliminate any blank spots.
Once blended, allow the canvas to dry completely.
Step 2: Add the Mermaid and the Fish to the Mixed Media Art
Print your mermaid and fish clipart onto cardstock using a laser printer. Outline the edges with a black permanent marker to remove any white borders.
Brush a generous coat of the Super Gloss Mod Podge onto the canvas and the back of the clipart. Position the mermaid art on the canvas, gently rubbing it into place.
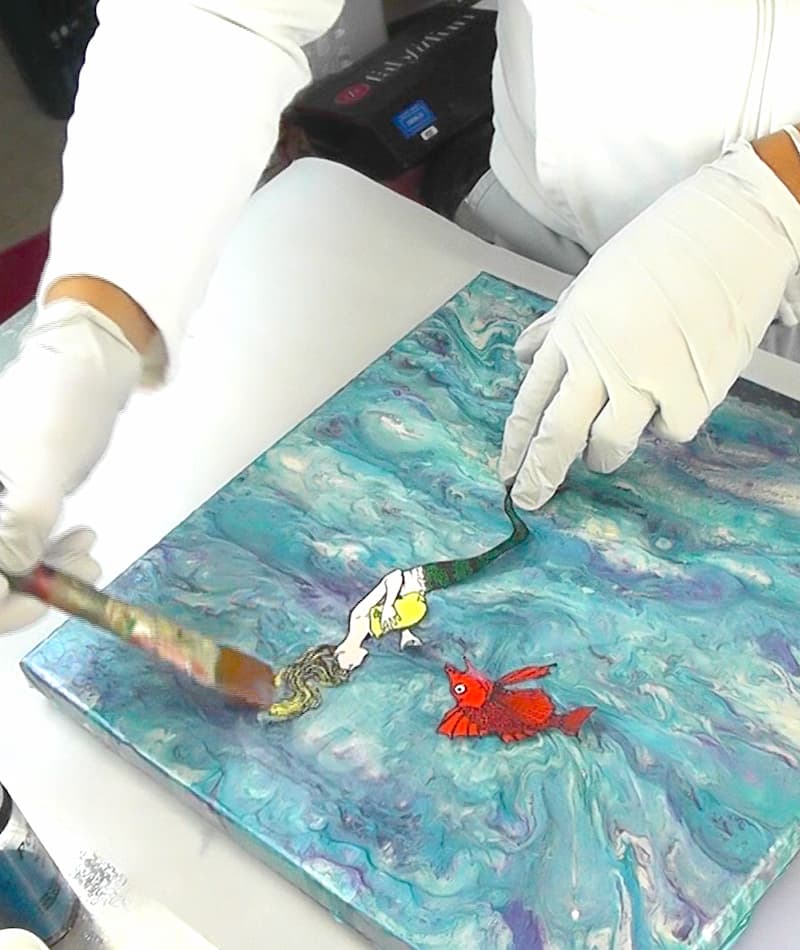
Seal everything with another layer of Mod Podge over the top.
I can’t stress enough, you want to make sure the images are completely sealed because it will leave spots on your images if any is left unsealed, especially the edges.
Step 3: Build Texture with Sand and Shells
Mix sand with the Mod Podge to create the ocean floor. When sand gets wet, whether from water, Mod Podge, or resin, it will immediately darken. It still looks fine when it’s dark, but I like to have it a bit lighter.
I’ve experimented with a few different things to lighten it, including paint, which didn’t work as well as I would have liked. But what does work well is if you mix white or clear. It brightens it right up.
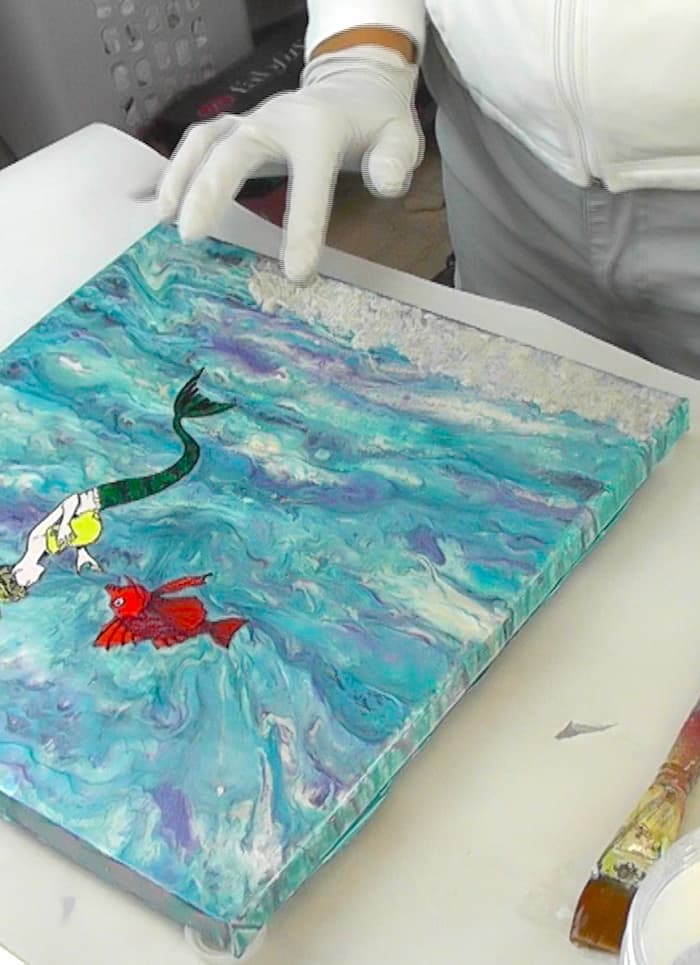
Apply this mixture to the bottom of the canvas.
Press small seashells into the wet sand. This alone probably won’t hold them in place, so I dripped a little Mod Podge over each shell to secure them, then sprinkled fine white glitter over the shells and sand for a bit of extra sparkle.
Step 4: Add a Little Glitter to the Water
You know how I love glitter, so I mixed some fine blue glitter with the Mod Podge and used a toothpick to apply it to the water areas, blending it into the blue paint.
You aren’t going crazy with the glitter, just adding a little glitter accent and magic here and there.
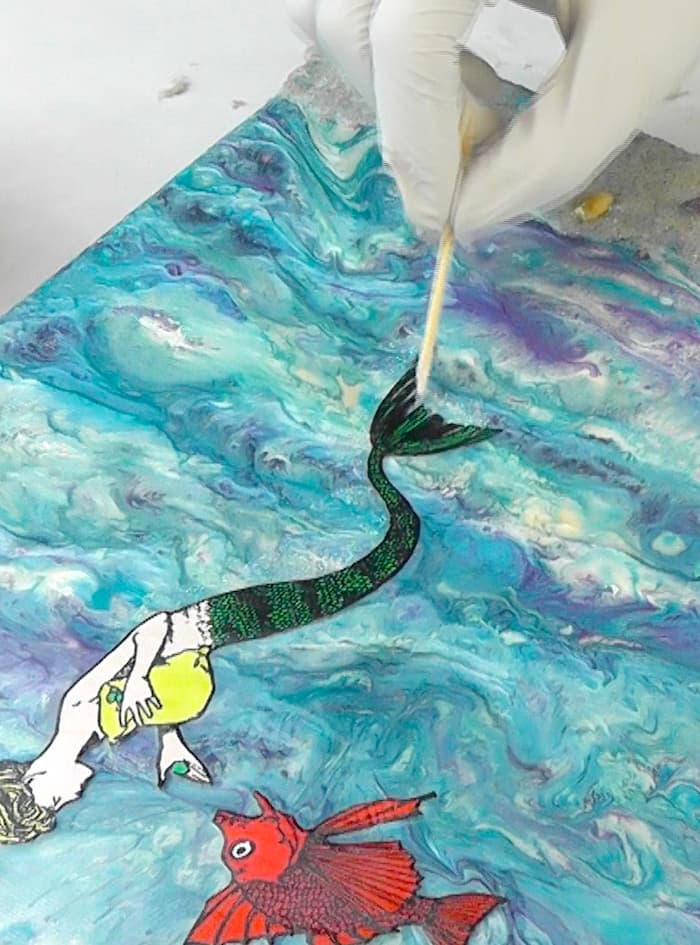
Next, mix the fine white glitter with Mod Podge and apply it around the mermaid to create a glowing, magical effect.
Step 5: Here Comes the Resin!
Brush on two additional coats of Mod Podge to seal the entire piece. Once completely dry, mix about 5 ounces of resin and pour it over the canvas, spreading it evenly to the edges with a stir stick.
(Sorry for the blurry pic)
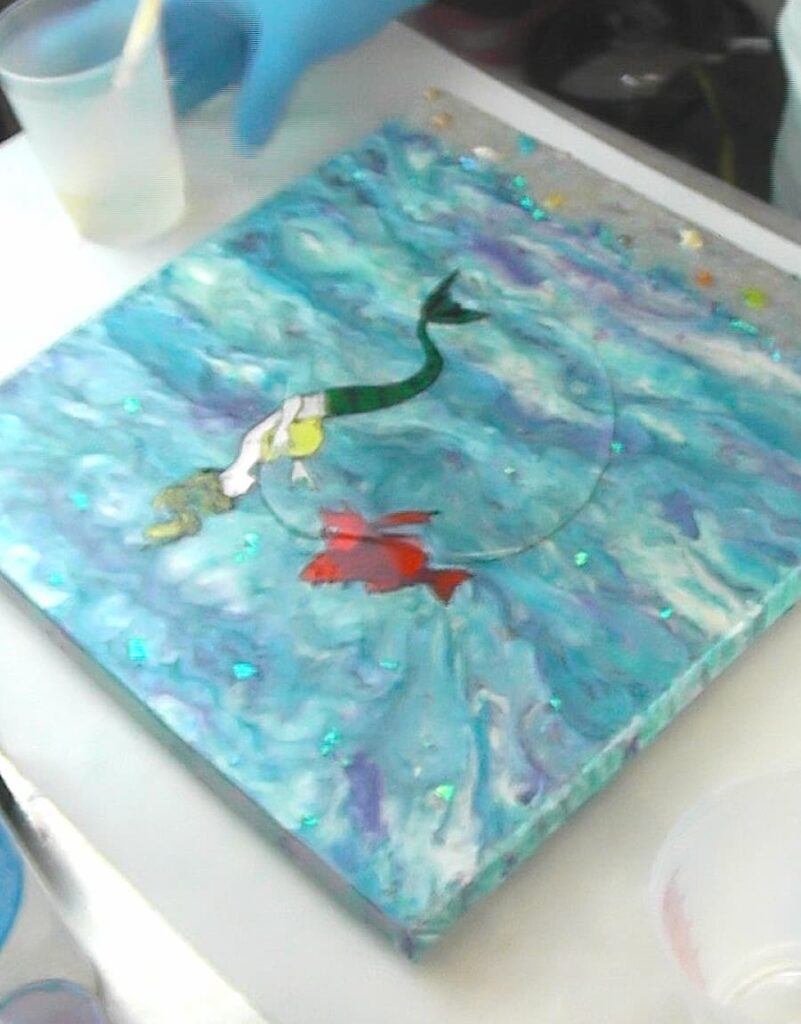
Pop bubbles with a lighter and allow the resin to cure for at least 12 hours.
Just Wow!
Now you have a stunning mixed media art mermaid filled with texture, shimmer, depth, and let’s just say it…
MAGIC!
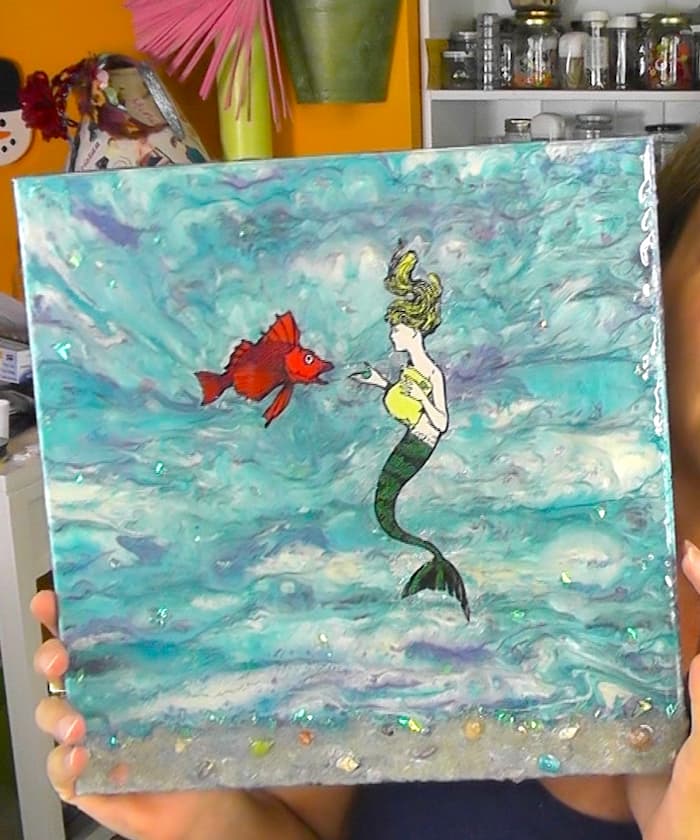
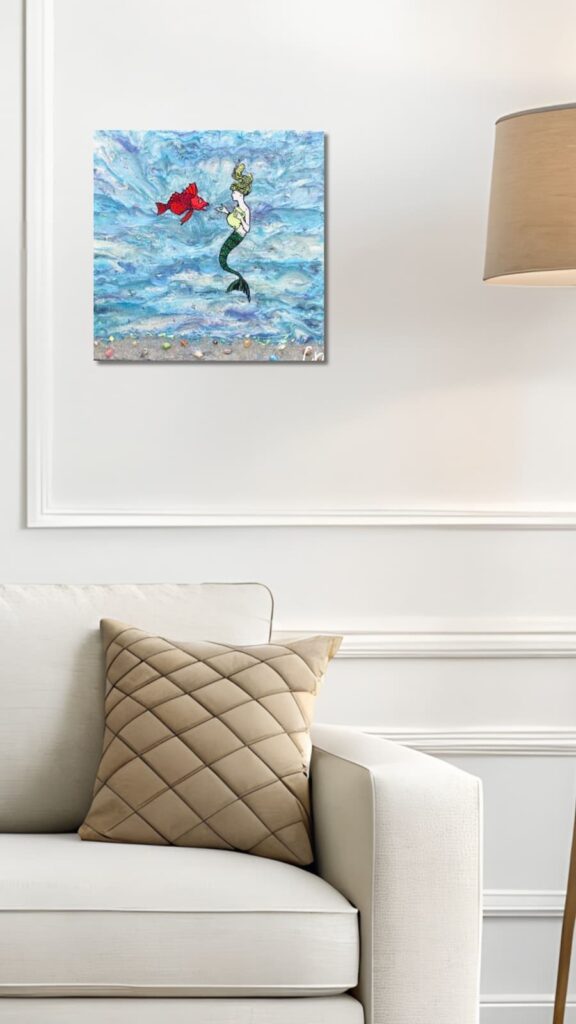
Your biggest worry is going to be deciding which room to hang your mermaid mixed media art statement piece.

You MUST Check These Out
I have made several other mermaid projects, including two with the same image but that are totally different. You are going to love them! And they are all fun examples of mixed media art!
- Mermaid Coaster DIY
- Resin Mermaid Light Craft (Yes! An actual light!)
- Easy Mermaid Brush
- Little Mermaid Coaster
Be sure to let me know what you think!
Thanks for stopping by! Remember: Life’s too short not to shimmer, so grab your glue gun and your glitter!
Mona
Also, remember you can find me on YouTube!