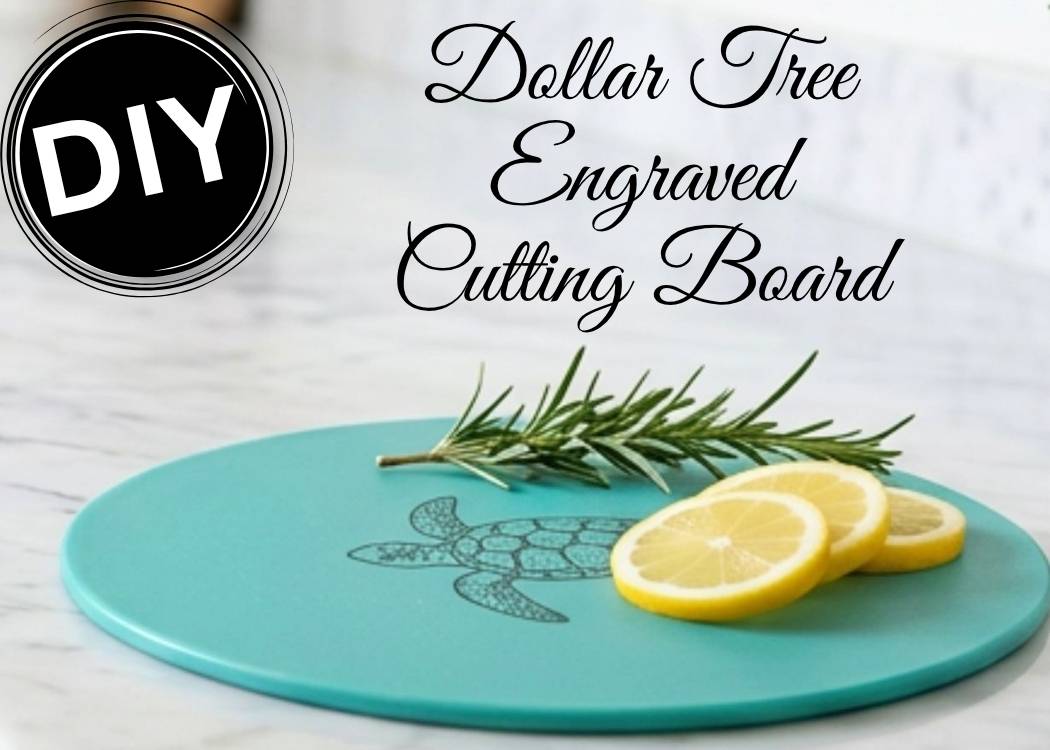
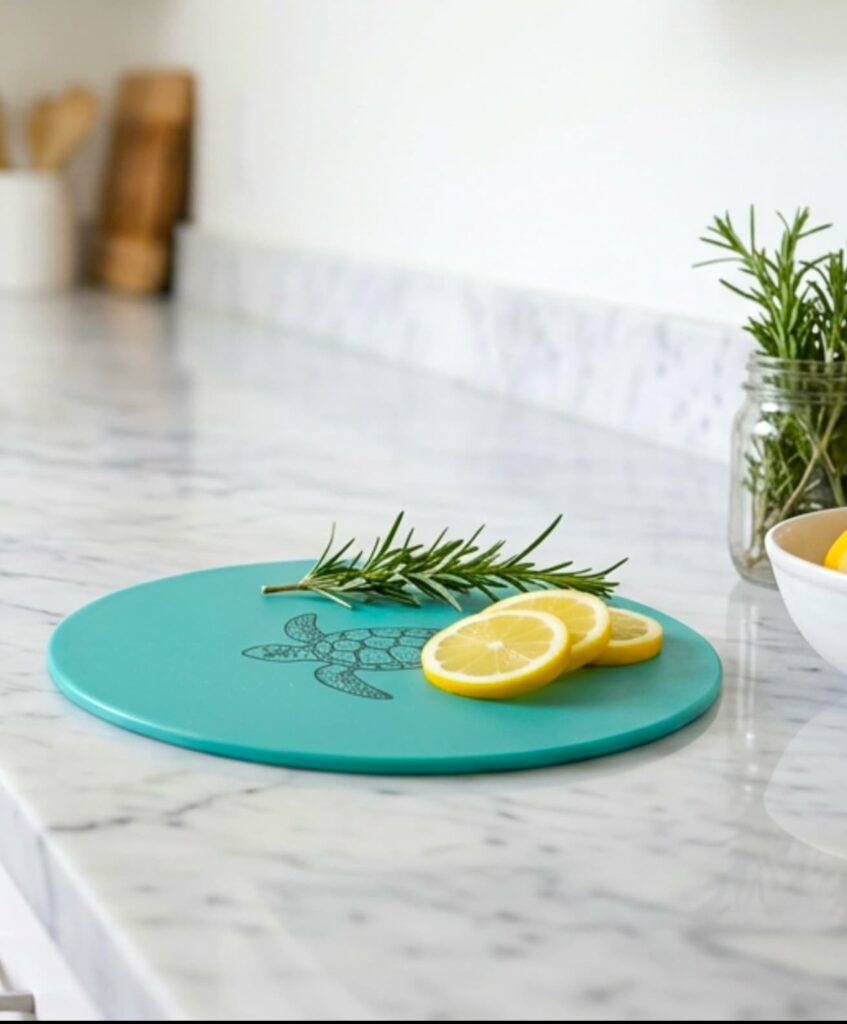
Turn a $1.25 cutting board into a boutique-style Dollar Tree cutting board craft using paint and laser engraving. Durable, custom, and giftable!
As you know, I love taking something inexpensive and turning it into something that looks high end. This Dollar Tree cutting board craft started as a $1.25 glass cutting board and ended up looking like something you’d find in a chic boutique for $30 or more.
And no…it’s not vinyl.
It’s engraved.
In this tutorial, I am walking you through exactly how I painted, baked, and laser engraved this glass cutting board so the design is permanent, remains unetched on top, and is completely functional.
Watch the Full Video for the Dollar Tree Cutting Board Craft Here
You can find all my projects on YouTube!
Why I Don’t Use Vinyl on Glass Cutting Boards
Vinyl and glass just don’t stay best friends for long…especially once washing gets involved. I wanted something that wouldn’t peel, lift, or scratch off over time.
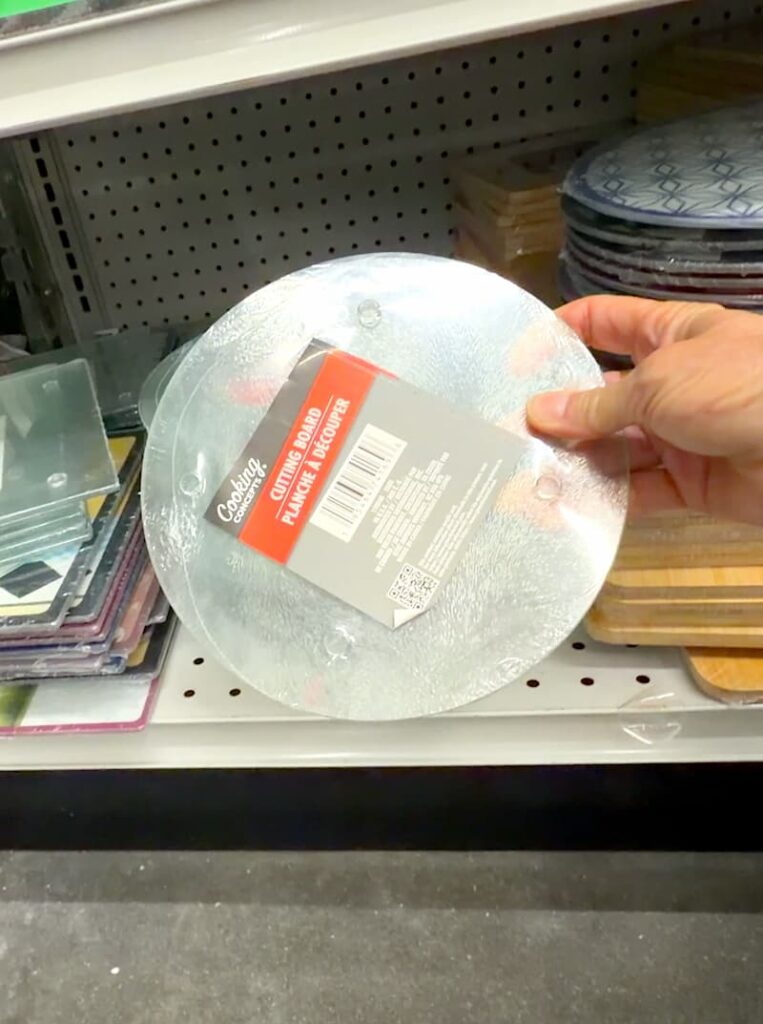
When I found this glass cutting board, I was pretty excited. It was a great Dollar Tree find!
So instead of putting a design on the top surface, I painted the back of the cutting board and engraved it through the paint.
That way, the paint never touches the food, the top remains unmarred, and the engraved design shows beautifully from the front.
In case you missed it, and you want to see eight different glass paints in action, check out Craft Lab to see what actually sticks!
Materials Needed for This Dollar Tree Cutting Board Craft
*Disclosure: This blog uses affiliate links from Amazon and other retailers. I earn a small amount from qualifying purchases at no additional cost to you.
- Glass cutting boards (I bought mine at Dollar Tree)
- Opaque multi-surface paint (I used Ceramcoat, but Folkart is actually even better)
- Paintbrush
- Oven
- Laser engraver (I used the Lumos from Wecreat)
 Get $80 OFF with my exclusive code: craftklatch80
- Image (I created mine in Canva)
- WeCreat MakeIt app (It’s free)
That’s it, the paint costs $2.49, and you won’t use all of it. If you already own a laser engraver, there’s no additional cost.
Directions for Dollar Tree Cutting Board Craft
Step 1: Cleaning the Cutting Board
Before we jump into painting and engraving, we need to give the paint a good foundation, and that means cleaning it.
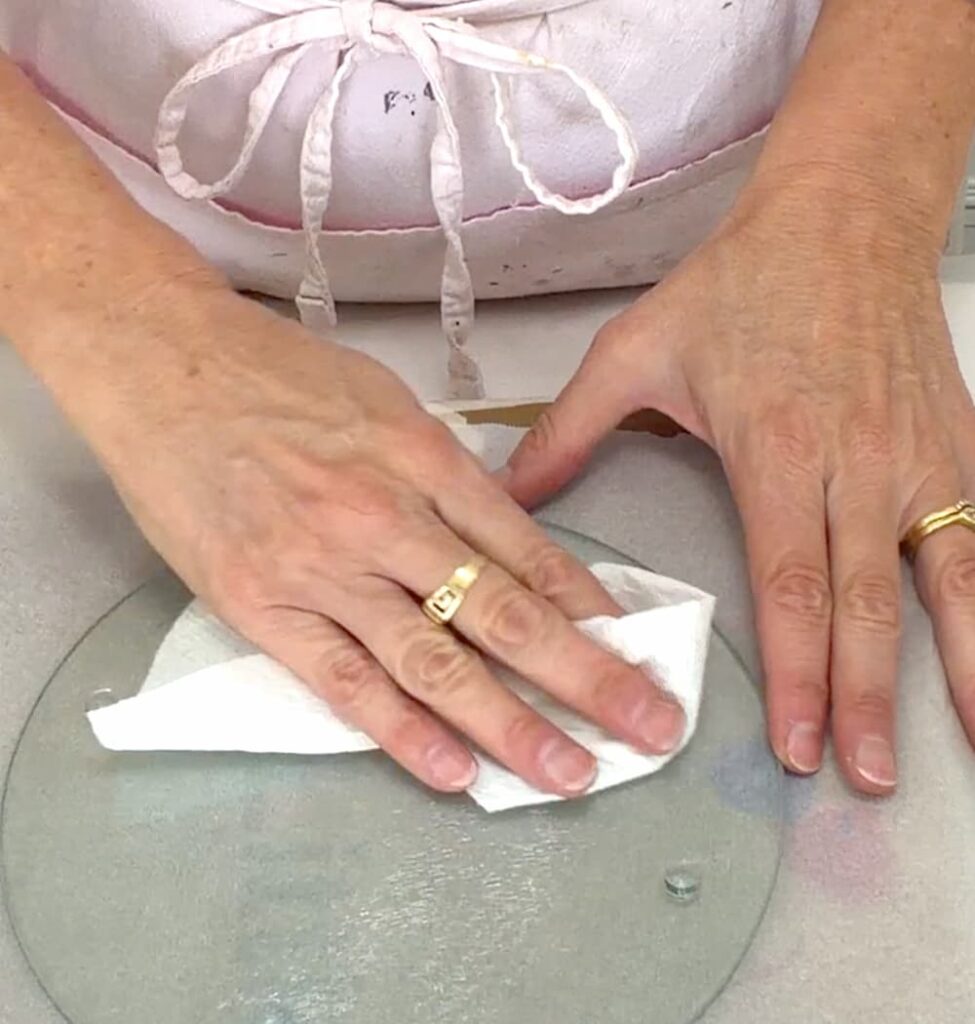
I simply used a paper towel (microfiber cloth would be even better) and rubbing alcohol.
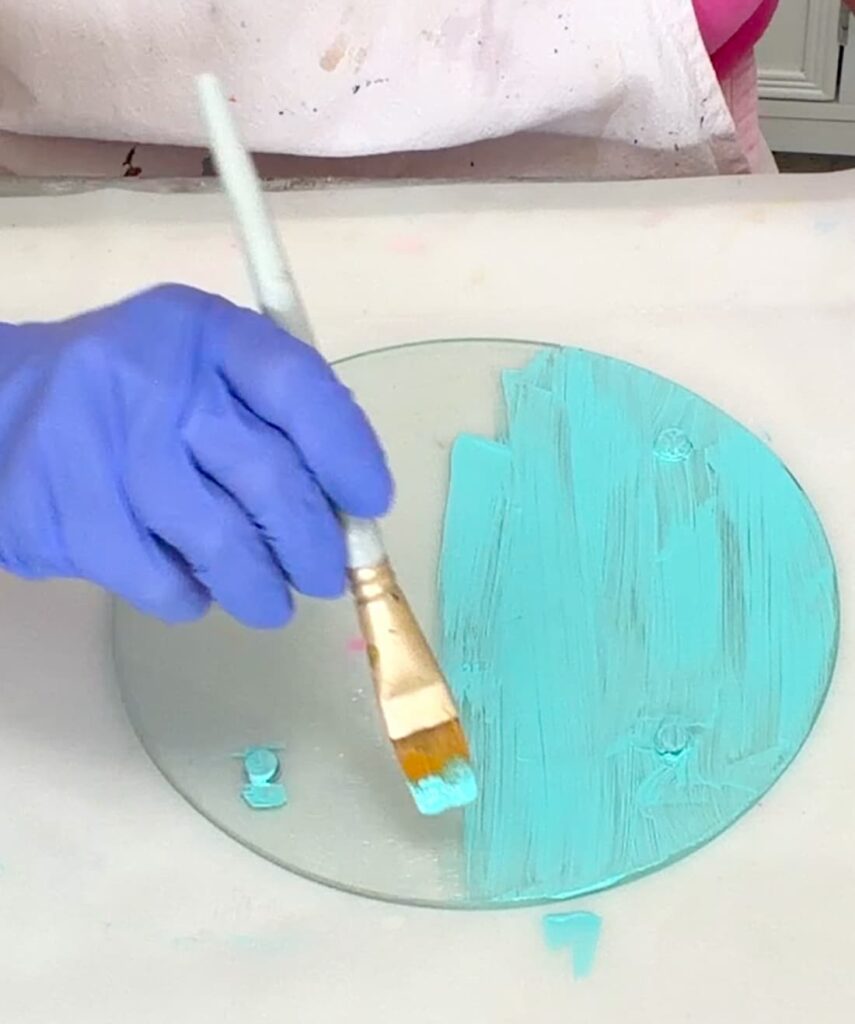
Step 2: Paint the Back (And Why It Matters)
The paint goes on the back for two important reasons.
First, it keeps the paint completely away from food contact.
Second, I’m engraving from the backside, which means the top surface stays unmarred; it already has a slight ripple. But no engraving on the top means no food getting stuck in the engraving (big YAY!).
When the laser engraves through the paint layer, it creates a crisp image that shows through the glass from the front. That contrast is what makes this Dollar Tree cutting board craft look so polished.
This is important: You can’t just use any paint. Regular acrylic will scratch off easily. I used a multi-surface paint that is designed for multiple surfaces, including glass, and can be oven cured.
Once baked, it bonds to the surface instead of sitting loosely on top.
Make sure the paint is opaque. Transparent colors won’t give you that bold contrast when engraved.
After painting two coats, I let mine dry for 24 hours before baking.
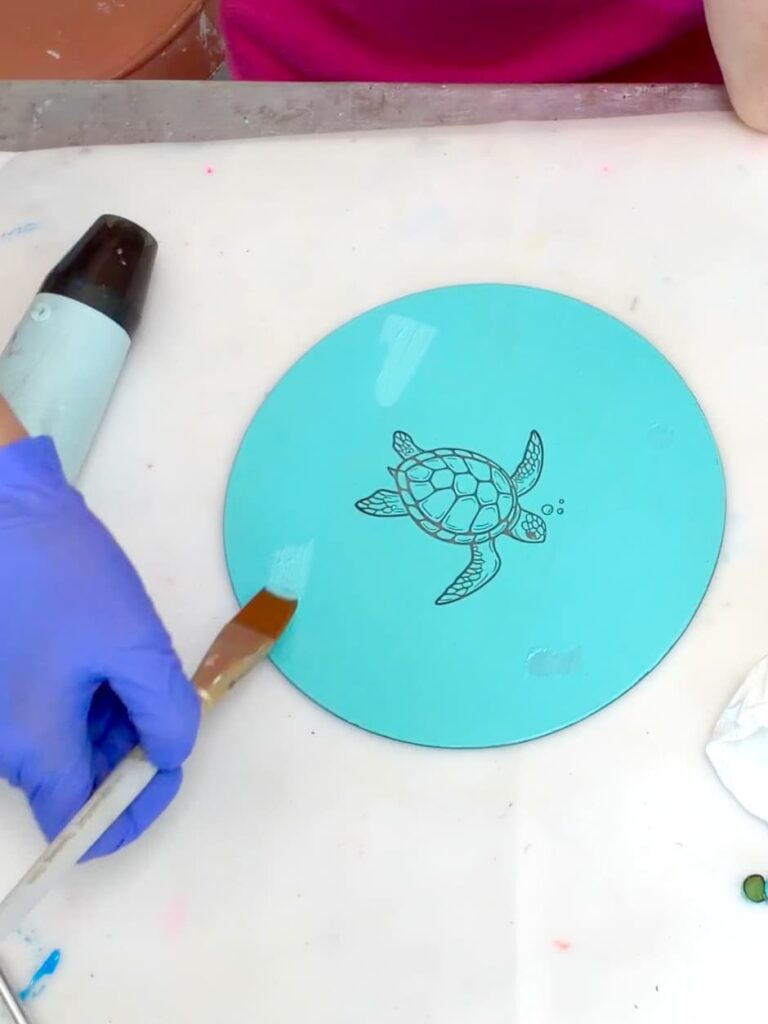
Step 3: Oven Cure for Durability
Once the paint is fully dry, it’s time to heatset it.
I followed the directions for the paint. If you end up using a different paint, be sure to follow the directions for that specific paint.
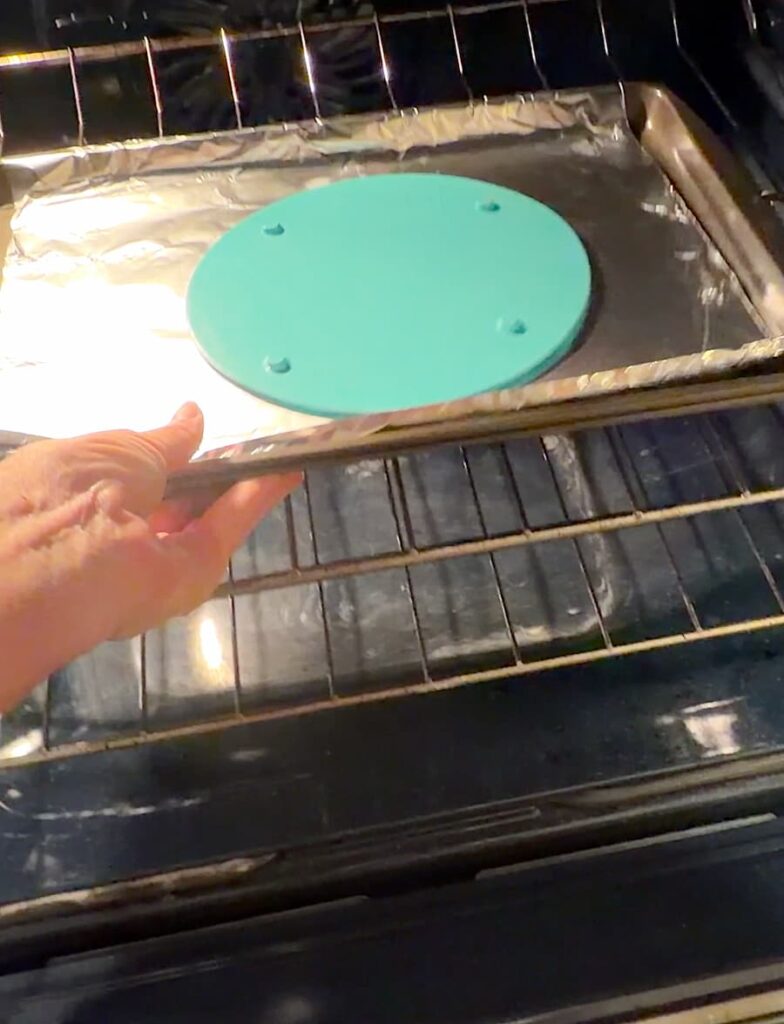
I place the glass cutting board in a cool oven…not preheated. This is important because glass needs to warm up gradually to avoid cracking.
I set the oven to 350°F (175°C) and baked it for 30 minutes once it reached the temperature (so not 30 minutes from when I put it in the oven, but 30 minutes from when it hit 350°F.
After 30 minutes, I turned off the oven and let the cutting board cool completely inside the oven before removing it.
Cooling slowly helps prevent breakage.
Another tip: Wait 72 hours before washing. Hand washing is the best way to extend the life of the piece. The paint says it is top rack dishwasher safe. I believe that is probably true when I tried to scrape it off.
I would not put it in the microwave either,
Step 4: Designing the Turtle
I created my turtle design in Canva, but you can draw something yourself, or you can find lots of other royalty free images to use as well.
I adjusted the sizing and placement, and I could have easily added a name or words to personalize it.
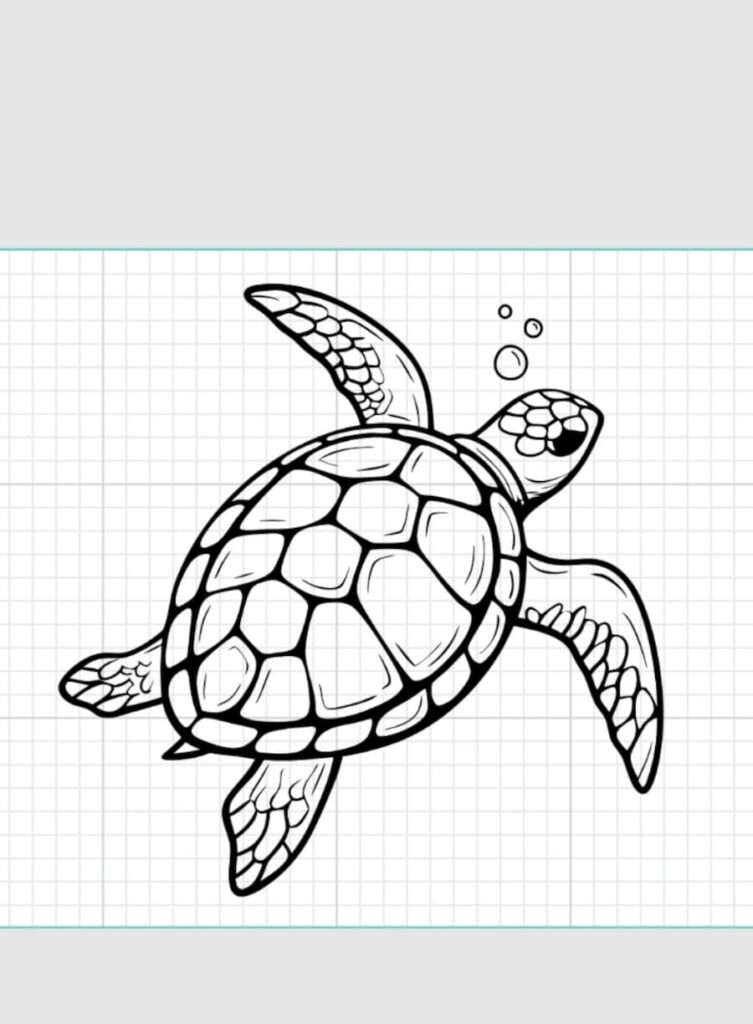
Once I was happy with it, I exported the design to my computer and uploaded it to the WeCreat MakeIt app. Inside the app, I resized it to fit the cutting board and prepped it for engraving.
This project would be perfect for personalization. Think: family names, beach house decor, wedding gifts, you name it.
Step 5: Laser Engraving the Back
Typically, when engraving glass, you either need to mask it or paint to protect the surface. Protect might not be the correct word, since the laser will pass through the clear glass.
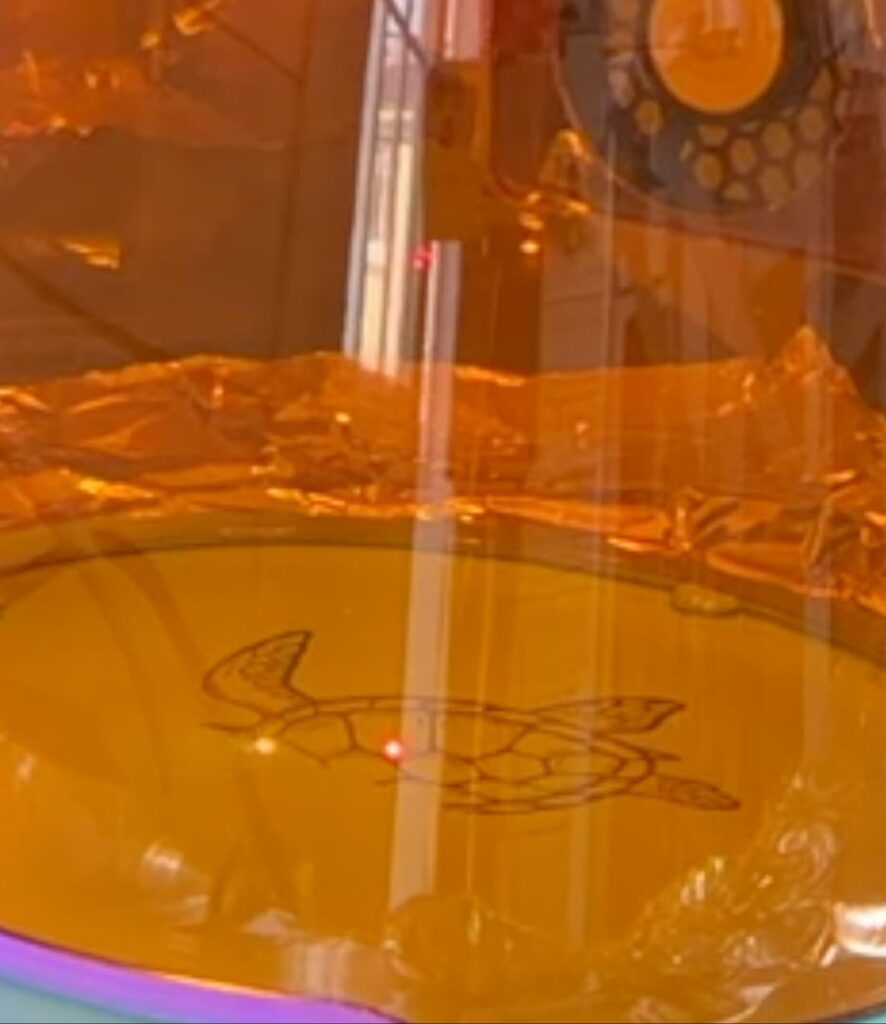
Since the paint was already applied to the back, masking wasn’t necessary.
I used my WeCreat Lumos portable laser engraver for this project. The cutting board was larger than the base and pull down shield, so I removed the laser from the base, added the cone attachment, and positioned it directly over the cutting board.
That portability is one of my favorite features. The cone allows me to engrave items that wouldn’t normally fit inside a standard laser bed, which makes projects like this possible.
Here are the exact settings I used:
- Blue Light
- Fill Engrave
- Power: 100%
- Speed: 100 mm/s
- Number of passes: 1
- Line Density: 300
- Bidirectional engraving
- Time: 17 minutes, 28 seconds
One thing to keep in mind is that all glass is different. Thickness and composition vary. Always test your materials first. If your glass is thinner, you might need to adjust your settings.
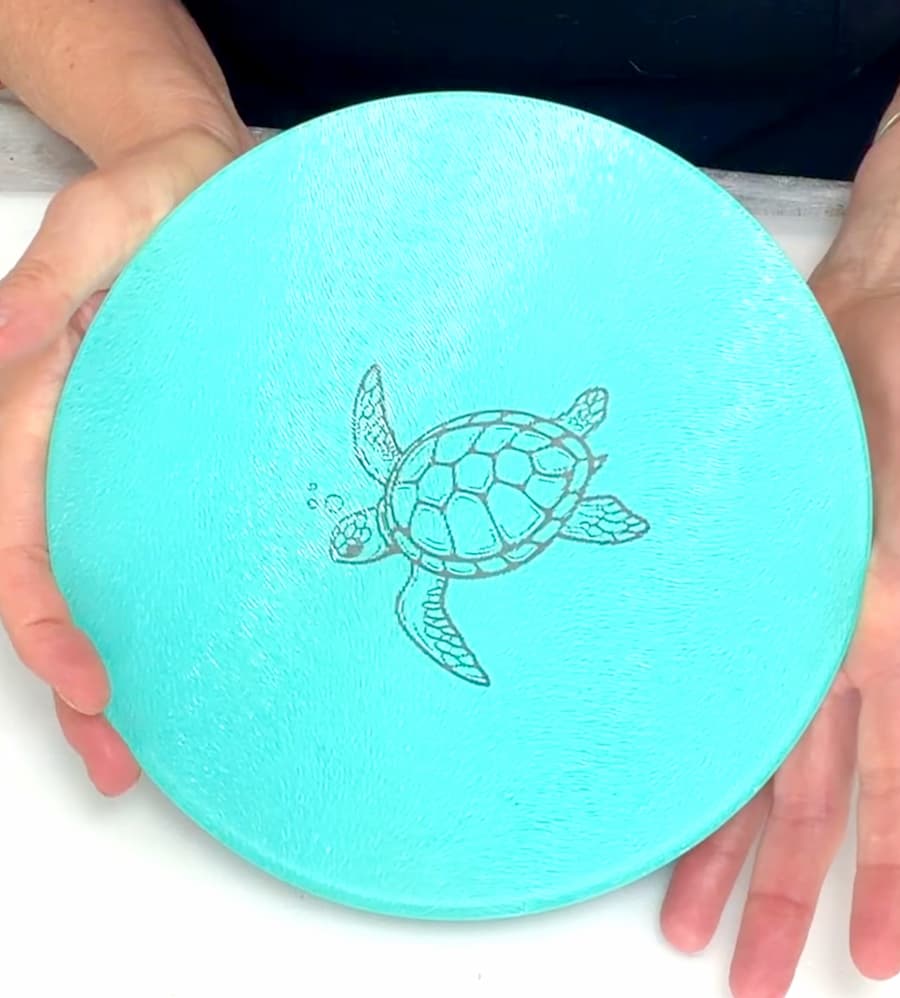
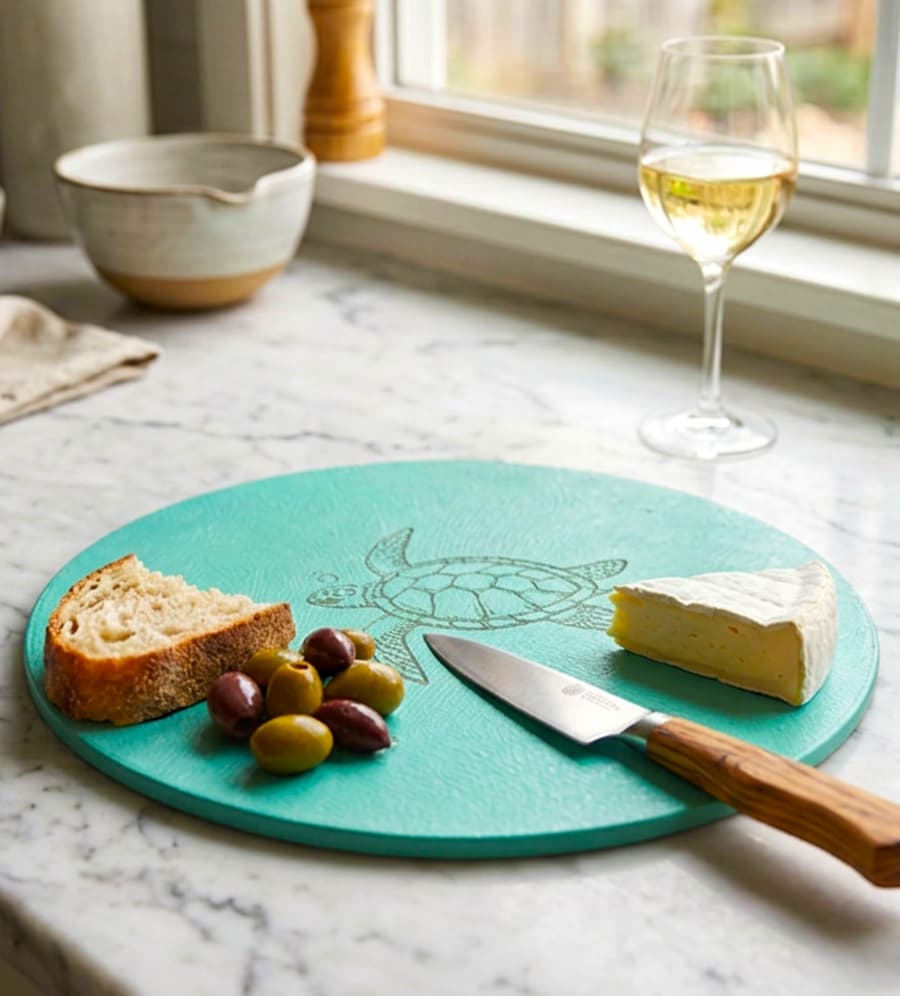
The Dollar Tree Cutting Board Craft Reveal
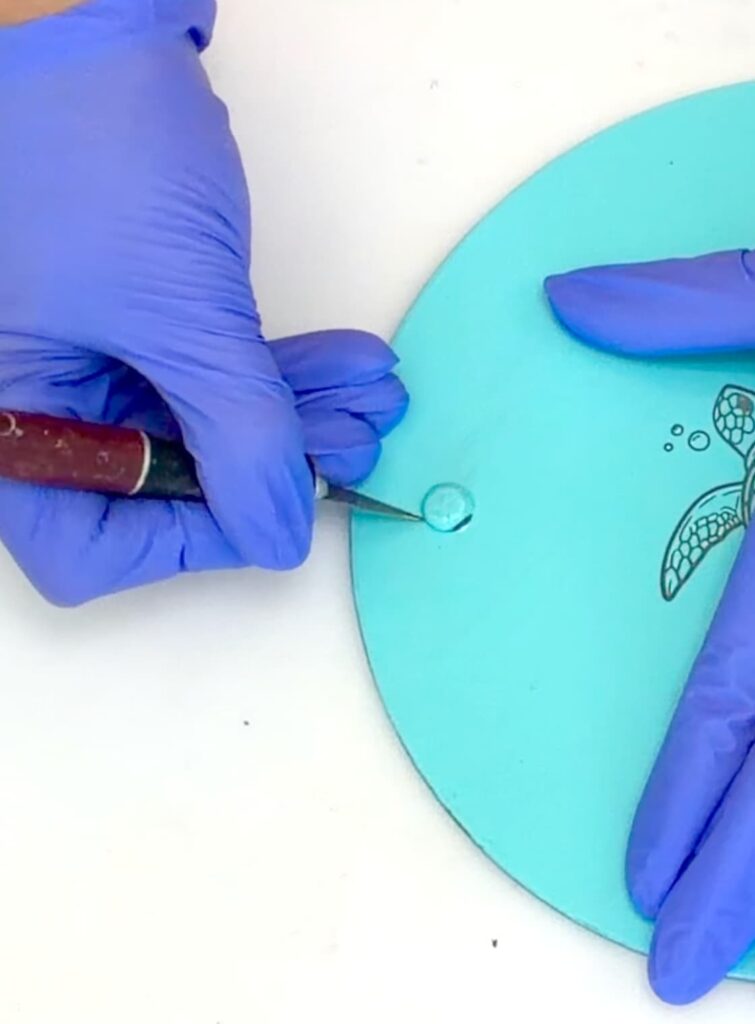
When I flipped it over, I was so happy with how crisp the turtle looked.
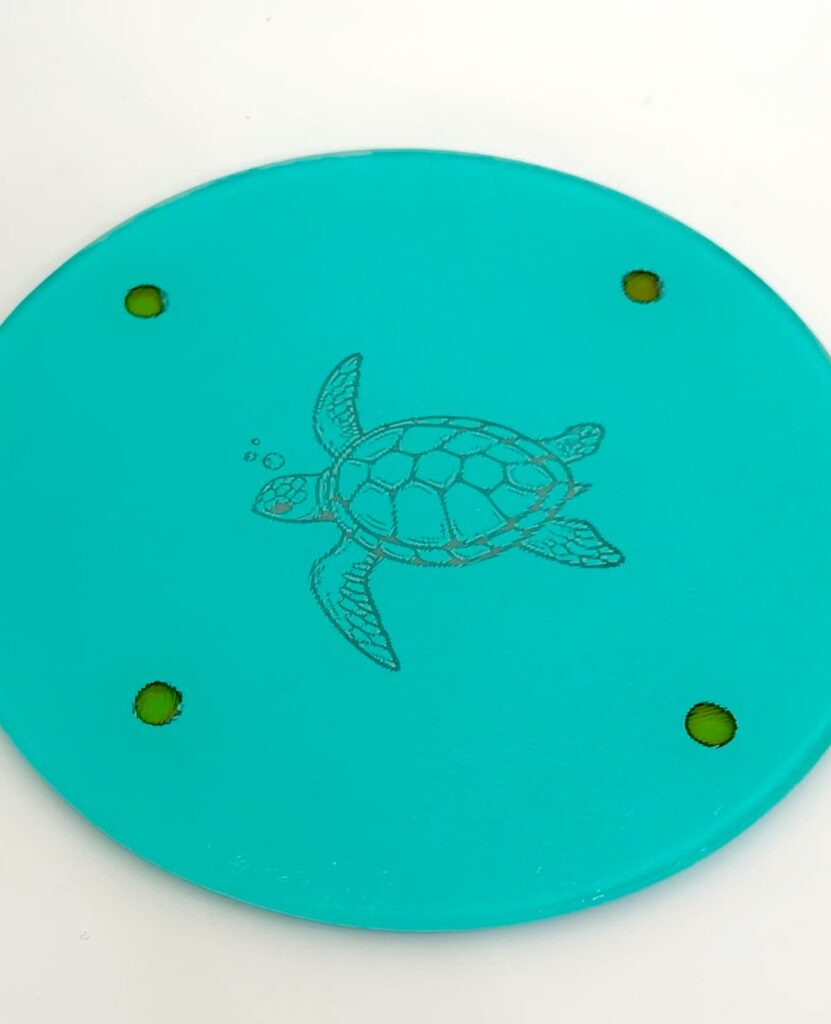
*There was one thing I needed to fix…those dots. Keep reading to see how I did it.
The lines were clean, the contrast was bold, and the top surface remained unmarred. The glass makes it feel like a professional product instead of a quick DIY.
It’s hard to believe it started with a $1.25 cutting board.
What I Would Have Done Differently
There is only one thing I would have done differently on the Dollar Tree cutting board craft.
I would have removed the silicone bumpers on the bottom of the cutting board and then painted the bottom.
They didn’t really bother me, but it shows up really well on video and photos, so that’s when it started bothering me.
It appears the adhesive yellowed when it was in the oven, and that’s why it happened.
To fix it, I carefully removed the bumpers by using a craft knife and cutting around them. I lightly sanded the area with 2000 grit sandpaper, and repainted it with two coats.
I did blend the paint with the area around it, so it would be seamless.
After the touch-up dried overnight, I baked it again just like before.
You cannot even tell where the repair was made!
How Durable Is the Dollar Tree Cutting Board Craft?
Such a great question, and you should want to know!
Because the paint is oven-cured, it bonds to the glass instead of sitting on top of it. The laser removes the paint for the design, creating a permanent detail.
This method fails if you use regular acrylic paint, skip curing, or cool the glass too quickly. Aggressive scrubbing with abrasive cleaners on the paint side could damage the finish over time.
I did a scratch test on the edge of the cutting board, where I had gotten some paint on the edge. After baking it, I was unable to remove it when trying to scratch it off with my fingernail.
When I used a stainless steel needle tool and craft knife, I had to scrape pretty hard to shave it off.
So, when done and cleaned correctly, it holds up beautifully.
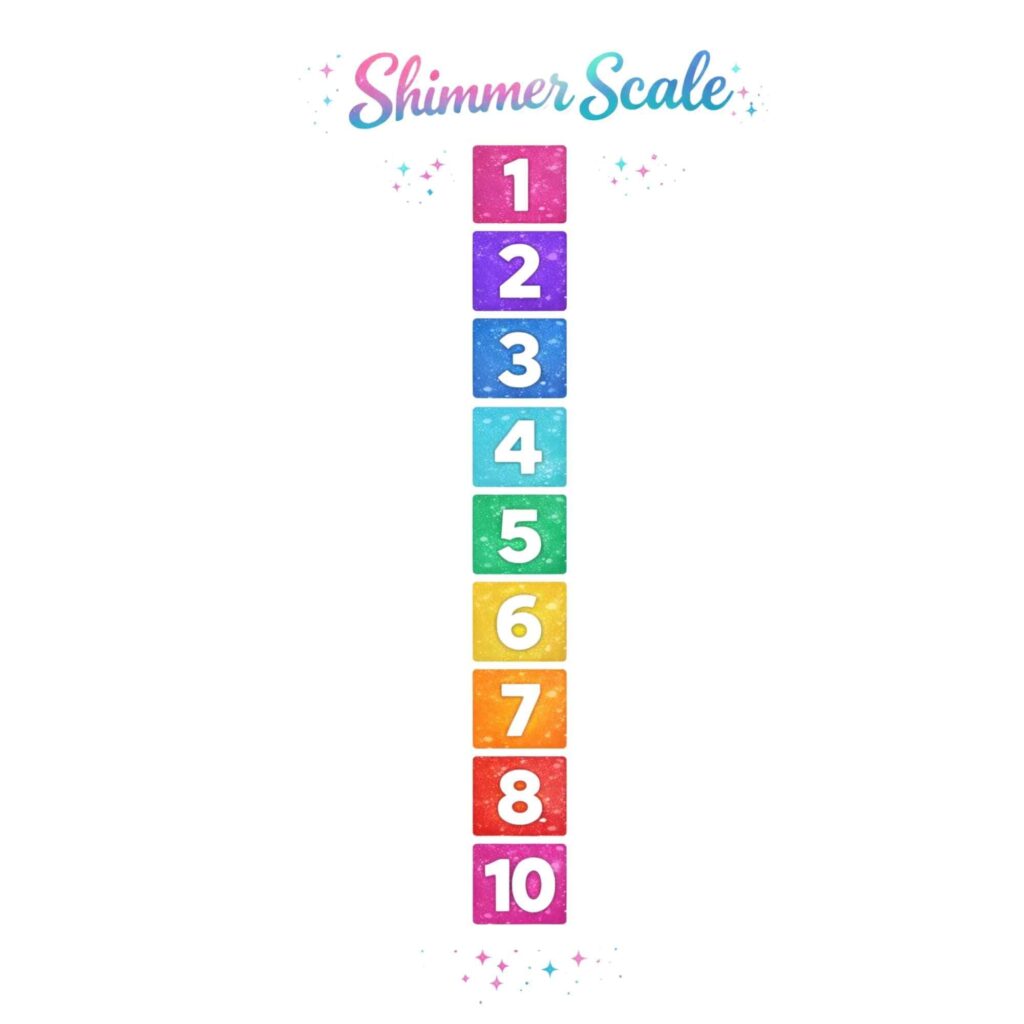
Shimmer Scale Rating
Now it’s time for you to rate the Dollar Tree cutting board craft by using the Shimmer Scale!
1 = Unworthy
10 = Boutique Worthy
Be sure to let me know in the comments how it rates and what you would expect to pay for something like this if you saw it in a chic boutique?
Is This Dollar Tree Cutting Board Craft Worth It?
Let’s talk numbers.
- Cutting board: $1.25
- Paint: $2.49 (and you’ll have plenty left over)
- Skill-wise, if you are comfortable with a laser, this is very beginner-friendly
- Great craft fair offering
For me, this Dollar Tree cutting board craft is absolutely worth it, but what do you think?
More Fun Projects
- Laser Engraving on Glass DIY
- DIY Cutting Board Laser Engraving for Valentine’s Day
- Easy Metal Laser Engraving a Photo DIY
- Easy Resin Ocean Art: Dollar Tree Coastal Decor [Video]
Thanks for stopping by! Remember: Life’s too short not to shimmer, so grab your glue gun and your glitter!
Mona