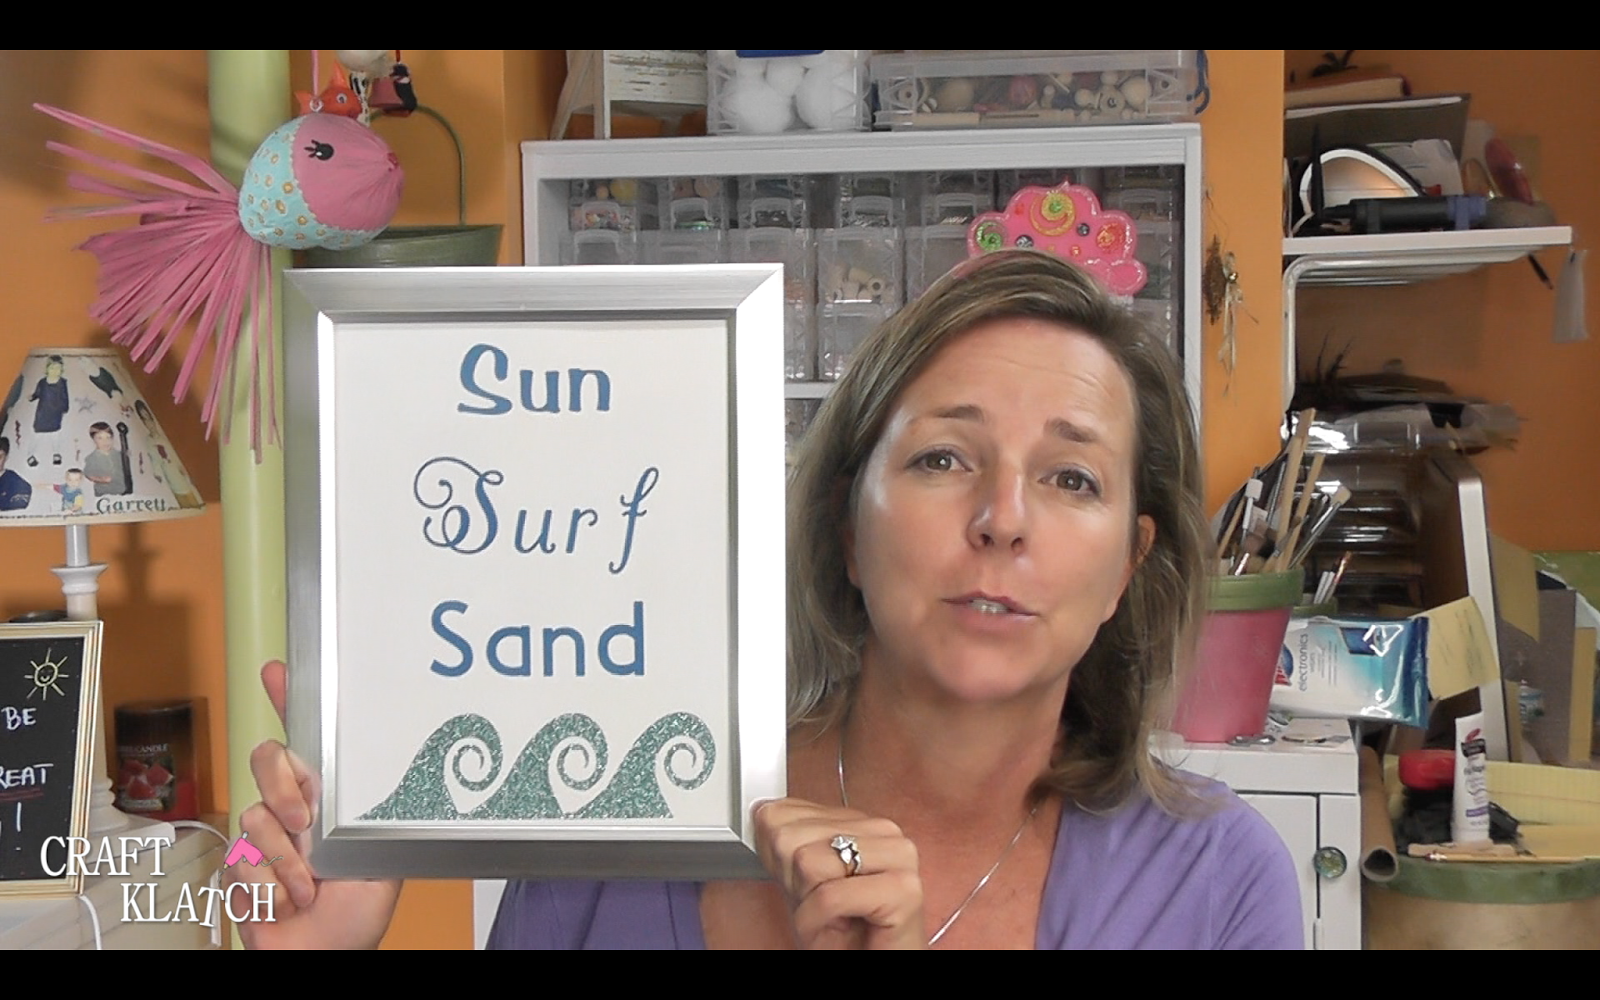
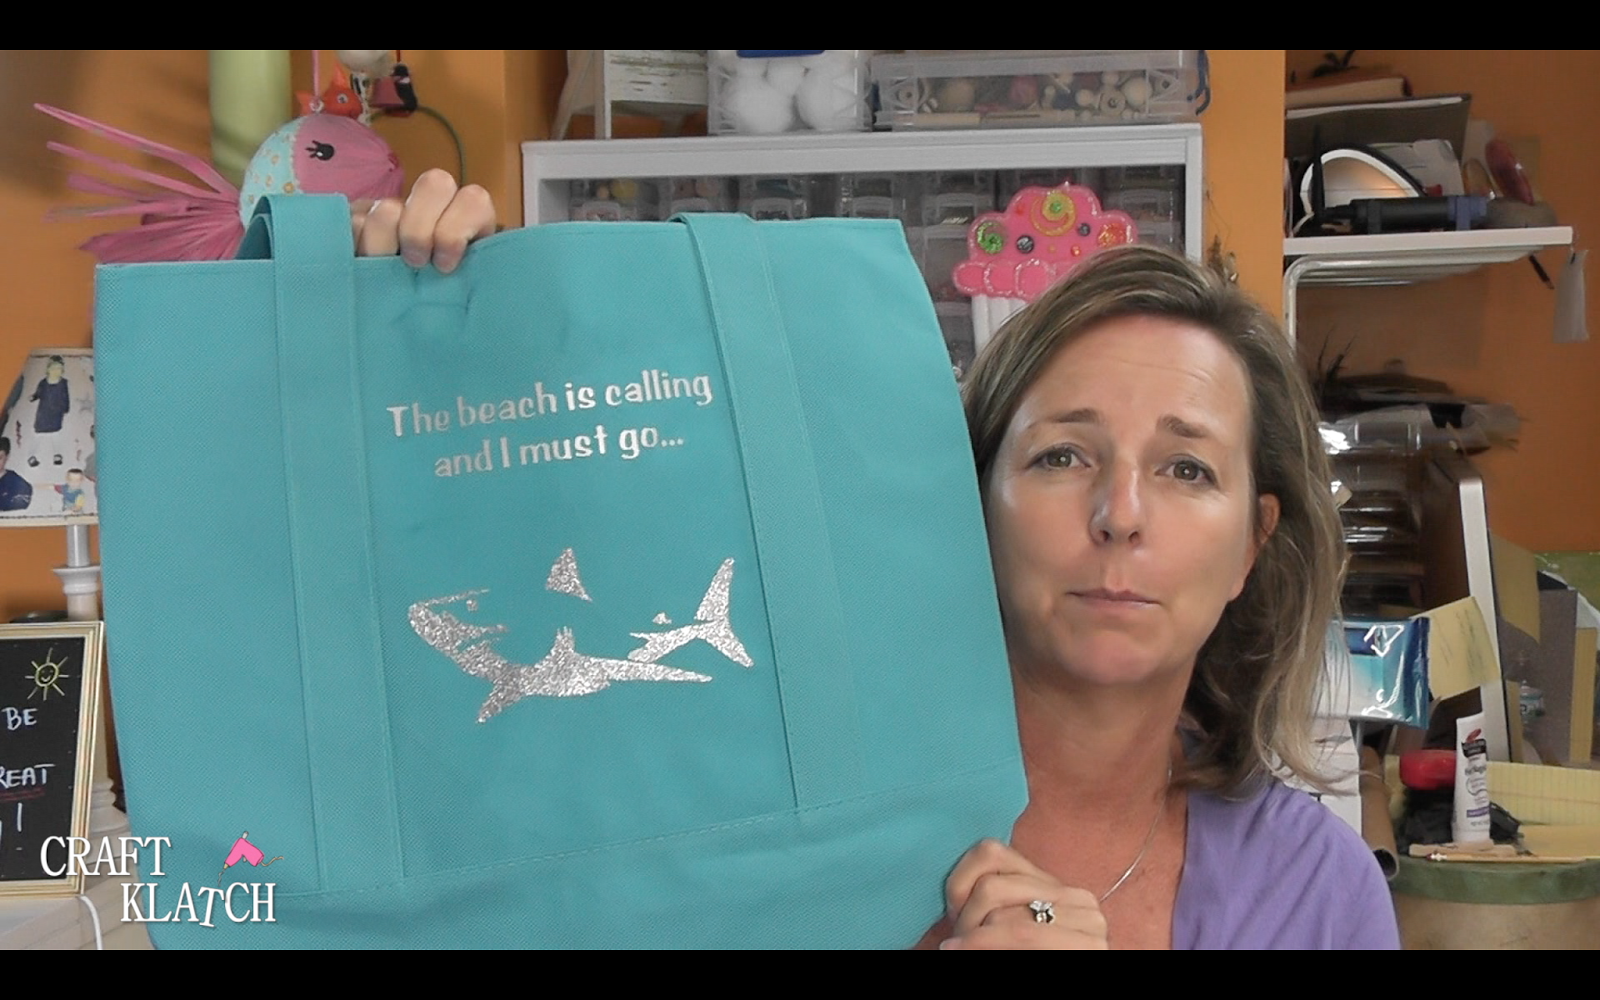
I created one of a kind, inexpensive, beachy decor for my home! I used beautiful iron on vinyl from https://www.BestCreationInc.com. I also used some items from Dollar Tree and customized them to go with the beach theme.
![Craft Klatch ®: DIY Beach Decor, Crafts and DIYs beach, beach decor, home decor, how to, diy, craft, crafts, crafting, craft ideas, home decor projects, flamingo, seahorse, vase, artwork, cricut, cricut projects, cricut crafts #cricut #cricutcrafts #cricutprojects #coastaldecor](https://www.craftklatch.com/wp-content/uploads/2017/08/Beach2BDecor2BDIY2Bthumbnail.png)
You will need:
– Iron on materials: https://www.BestCreationInc.com
– Frame from the dollar store
– Canvas tote bag
– Vase from dollar store
– A piece of card stock paper
– Pillow cover: https://amzn.to/2vGGZbb
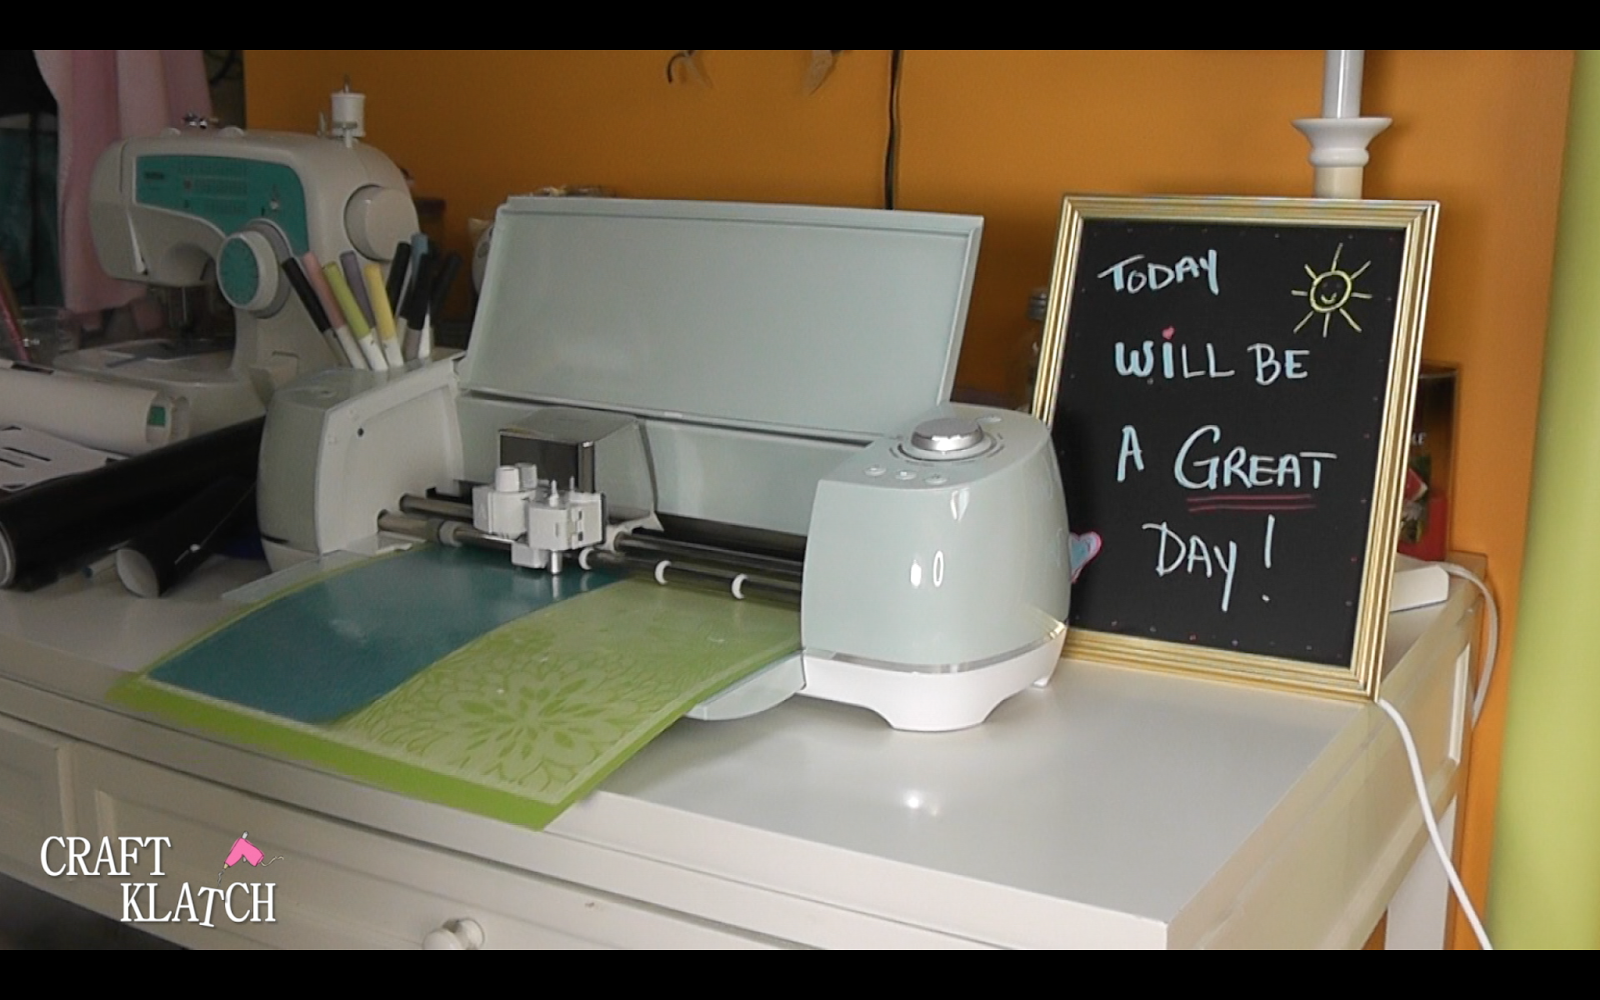
A cutting machine – mine is a Cricut, you can find it at either of these locations:
– Cricut (Amazon)
or
– Cricut from Cricut site
![Craft Klatch ®: DIY Beach Decor, Crafts and DIYs beach, beach decor, home decor, how to, diy, craft, crafts, crafting, craft ideas, home decor projects, flamingo, seahorse, vase, artwork, cricut, cricut projects, cricut crafts #cricut #cricutcrafts #cricutprojects #coastaldecor](https://www.craftklatch.com/wp-content/uploads/2017/08/Screen2BShot2B2017-08-152Bat2B8.50.102BPM.png)
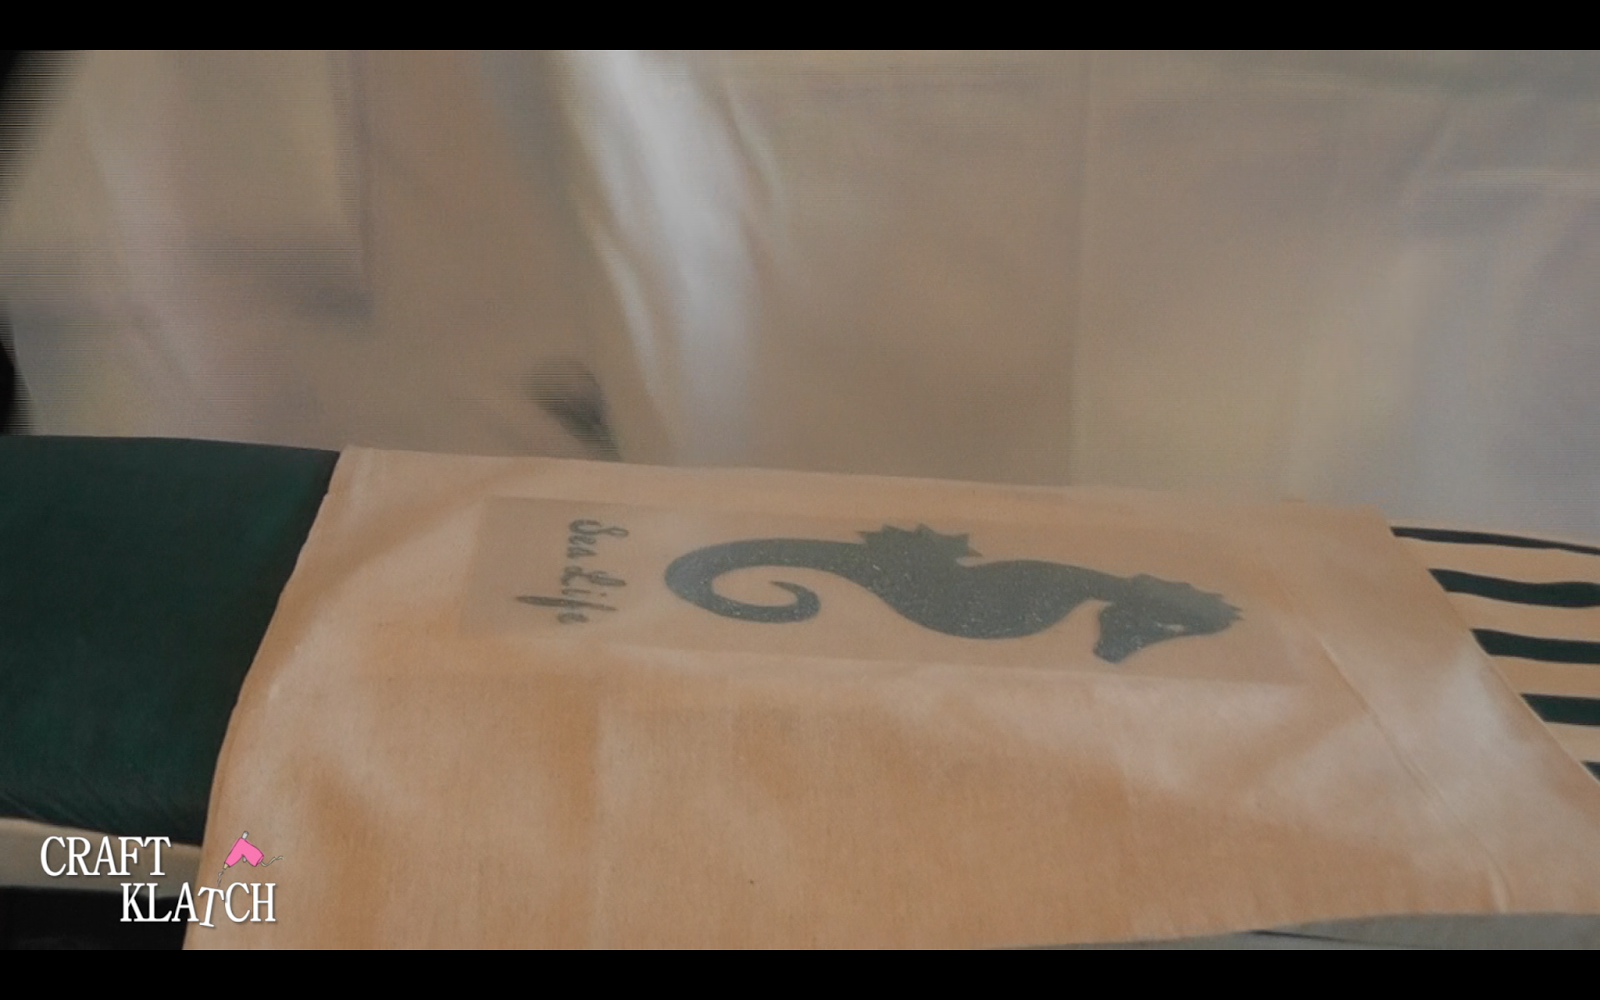
2. I picked up a linen pillow cover, with a natural look.
![](https://www.craftklatch.com/wp-content/uploads/2017/08/Screen2BShot2B2017-08-152Bat2B8.51.112BPM.png)
3. I created a seahorse in the Cricut Design Space and cut it out in paper, to be sure it was the right size.
![](https://www.craftklatch.com/wp-content/uploads/2017/08/Screen2BShot2B2017-08-152Bat2B8.51.202BPM.png)
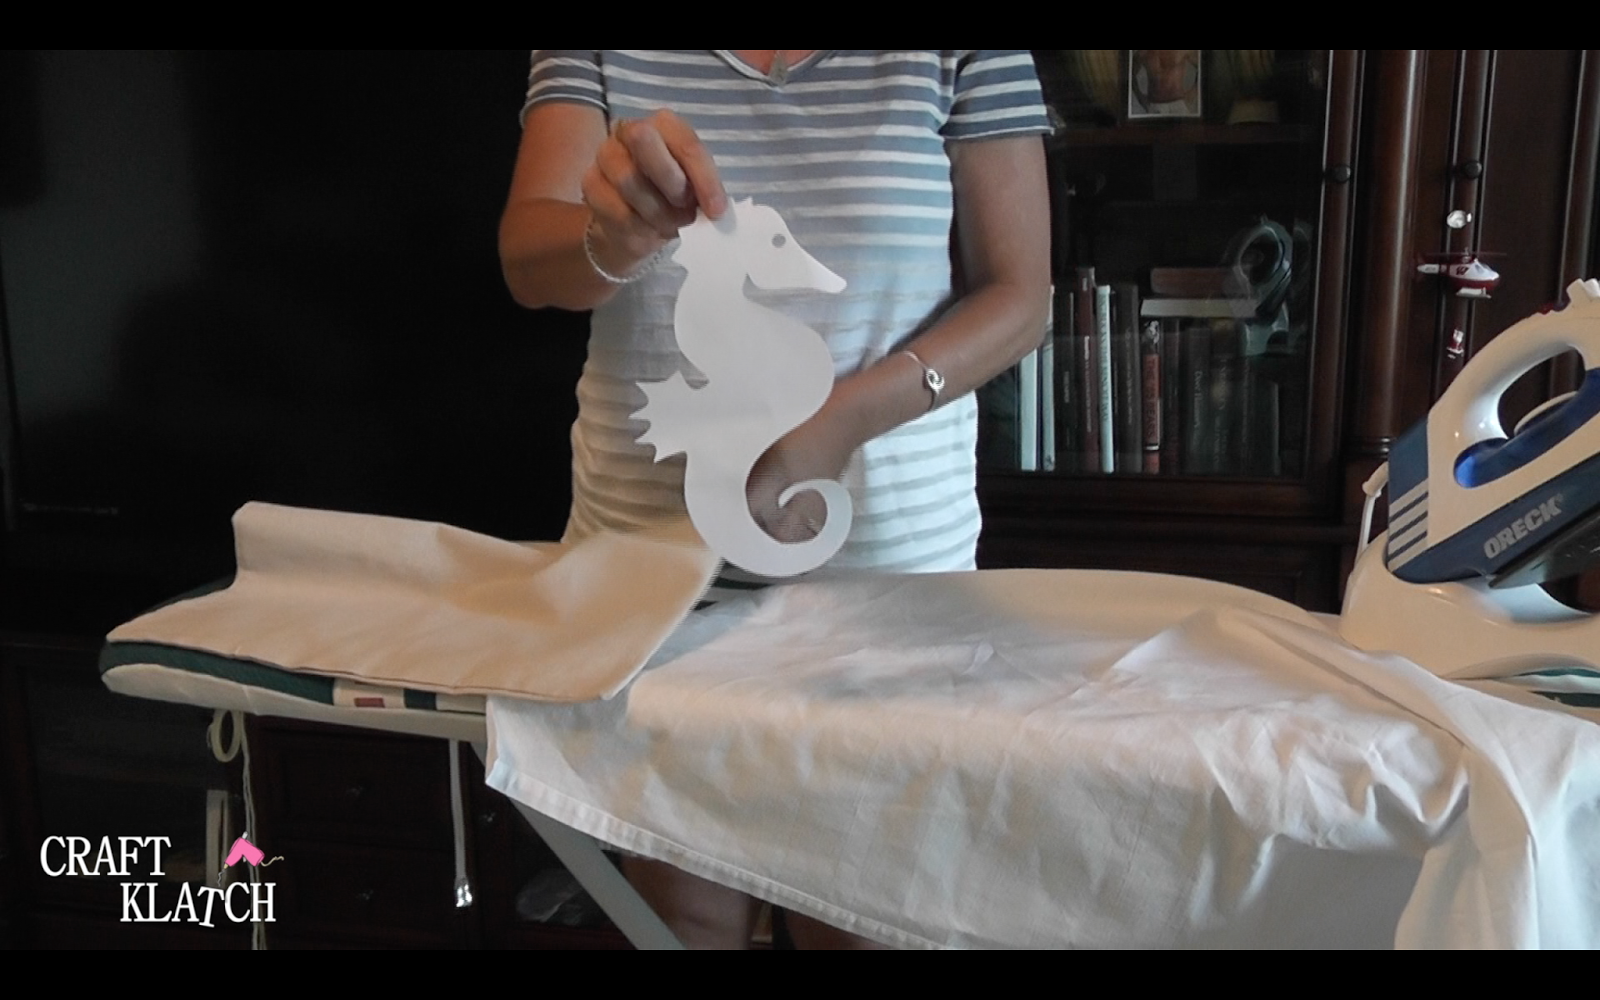
4. I then cut it out of the glitter iron on.
![](https://www.craftklatch.com/wp-content/uploads/2017/08/Screen2BShot2B2017-08-152Bat2B8.51.292BPM.png)
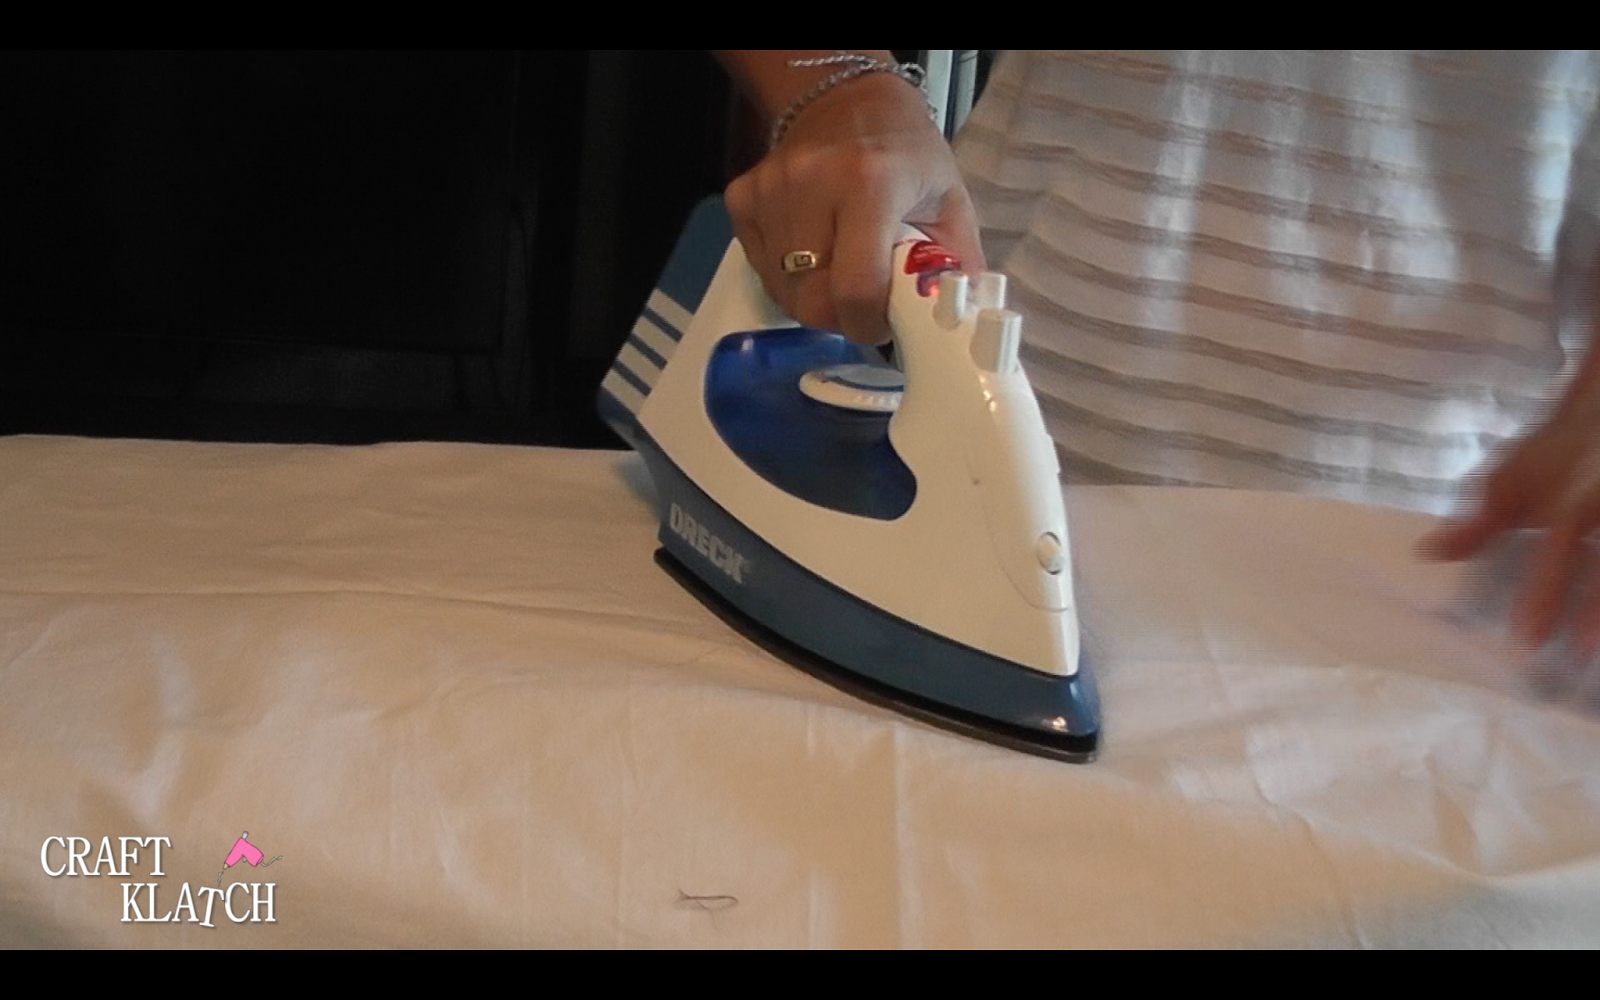
5. I then put it on the pillow cover and covered it with a white sheet.
![](https://www.craftklatch.com/wp-content/uploads/2017/08/Screen2BShot2B2017-08-152Bat2B8.52.022BPM.png)
6. I ironed, with my iron on high and no steam.
![](https://www.craftklatch.com/wp-content/uploads/2017/08/Screen2BShot2B2017-08-152Bat2B8.52.162BPM.png)
7. After it has cooled, carefully pull off the plastic.
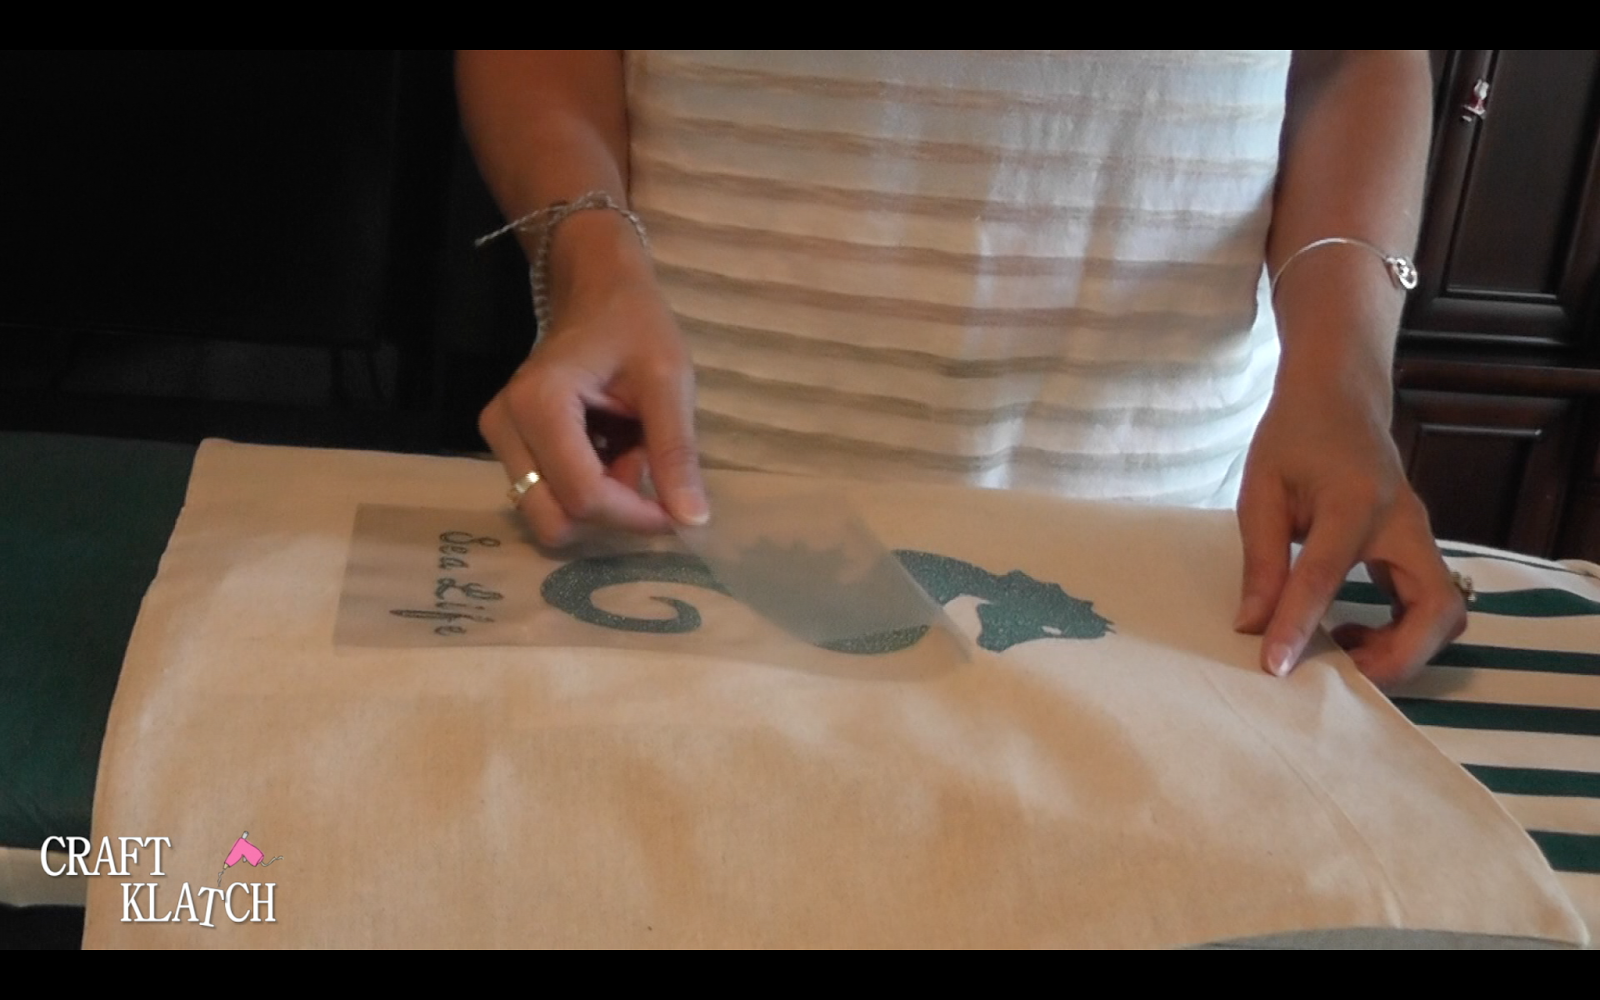
![](https://www.craftklatch.com/wp-content/uploads/2017/08/Screen2BShot2B2017-08-152Bat2B8.52.292BPM.png)
![](https://www.craftklatch.com/wp-content/uploads/2017/08/Screen2BShot2B2017-08-152Bat2B8.52.422BPM.png)
There it is!!!
![](https://www.craftklatch.com/wp-content/uploads/2017/08/Screen2BShot2B2017-08-152Bat2B8.53.022BPM.png)
![](https://www.craftklatch.com/wp-content/uploads/2017/08/Screen2BShot2B2017-08-152Bat2B8.52.522BPM.png)
![](https://www.craftklatch.com/wp-content/uploads/2017/08/Screen2BShot2B2017-08-152Bat2B8.53.072BPM.png)
![](https://www.craftklatch.com/wp-content/uploads/2017/08/Screen2BShot2B2017-08-152Bat2B8.53.182BPM.png)