
I’ve been thinking about this project for a while. I wanted to make the best golf ball lamp. I’m not sure I succeeded, but I think it turned out pretty cool! If you are looking for the perfect gift for a golfer, I think this is it! It’s one of a kind and you can make it with love!
A great way to stay on top of my latest crafts is to subscribe to my Craft Klatch YouTube Channel!
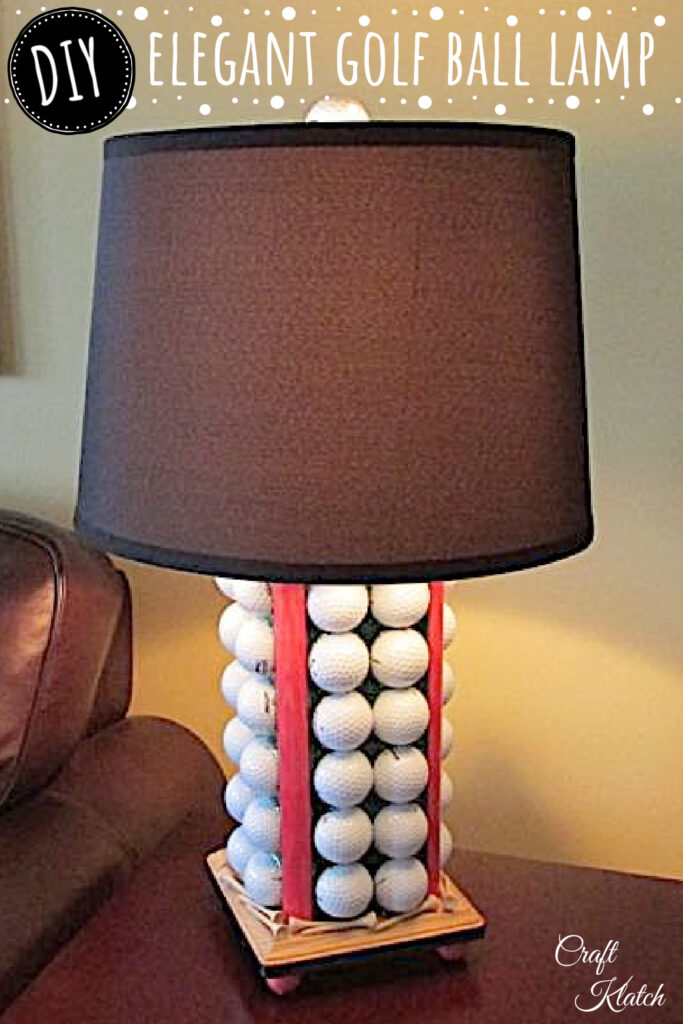
To Make The Best Golf Ball Lamp, You Will Need:
*This blog uses affiliate links. As an Amazon Associate I earn from qualifying purchases, at no additional cost to you.
- Silicone loaf mold: https://amzn.to/3ywJey1
- 48 Golf balls – 49 if you want to add one on top: https://amzn.to/2RLD9LB
- Two 4″x4″ wood plaques: https://amzn.to/2SW4loo
- Quarter round trim: https://amzn.to/2AHJj5E
- Lamp kit: https://amzn.to/2D4NaLx
- Black lampshade: https://amzn.to/2CheNiY
- Black ribbon: https://amzn.to/2Cn45r8
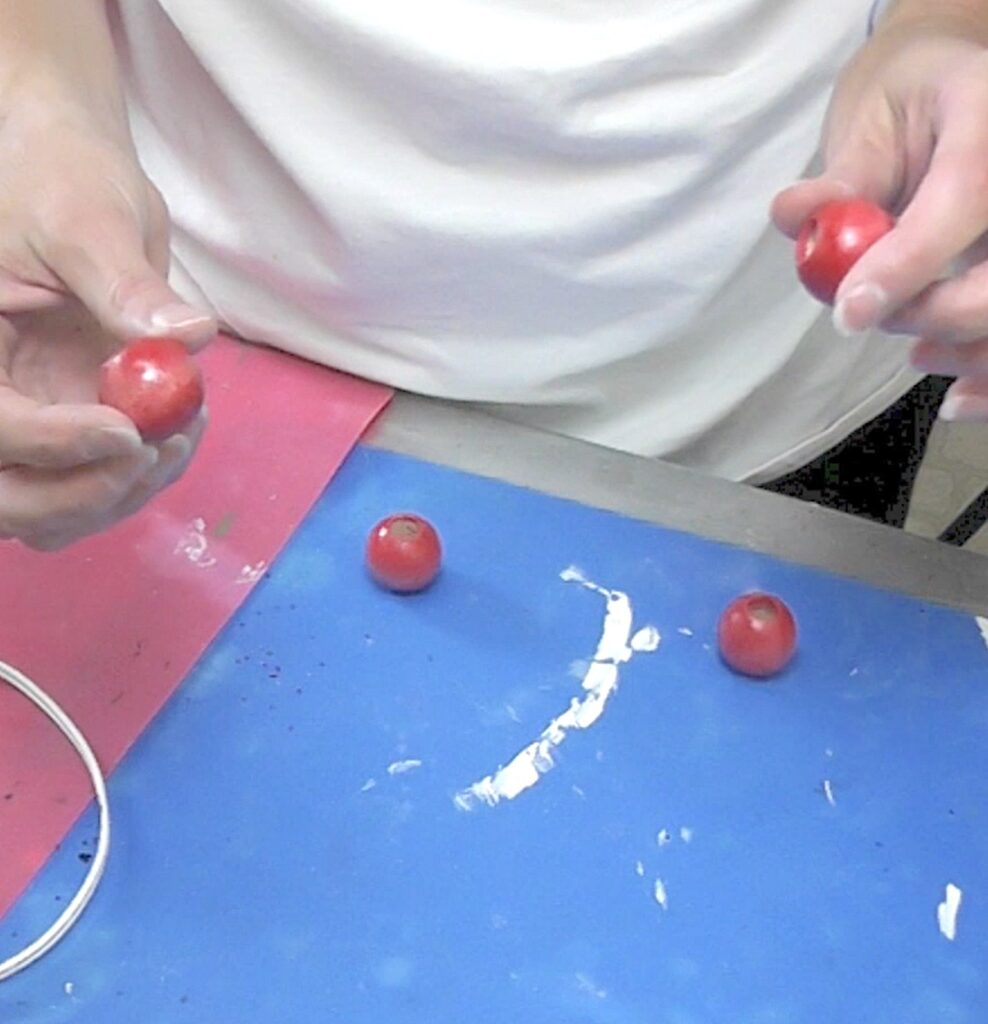
- Four dowel heads or beads: https://amzn.to/2VNGpFy
- Chunky green glitter: https://amzn.to/2VO8NHv
- Cherry stain: https://amzn.to/2SMyd6d
- 8 small “L” brackets: https://amzn.to/2SPr2KD
- Screws
- Glue: https://amzn.to/2TFgM7M
- Hot glue: https://amzn.to/2SMrqtr
- Golf tees: https://amzn.to/2D7NZ6F
- Red acrylic paint: https://amzn.to/2STnpUe
- Triple Thick: https://amzn.to/2SNV0Pa
- Resin:
- When deciding on which resin to use, there are a lot of qualities that might be appealing, UV resistant, price, heat resistance, etc. Just make sure to select a resin that fits your needs.
- Use whatever brand you like:
- Easy Cast
- Art Resin
- Let’s Resin
- Promise Epoxy
- These are heat resistant resins:
- FX Poxy
- Stone Coat
Best Golf Ball Lamp Video Tutorial
The absolute best way to see what I did is to check out the video tutorial!
Directions
Step 1
Mix seven (7) ounces of resin, according to the package directions. Then, mix in 1/4 cup of green glitter and be sure to mix it well.
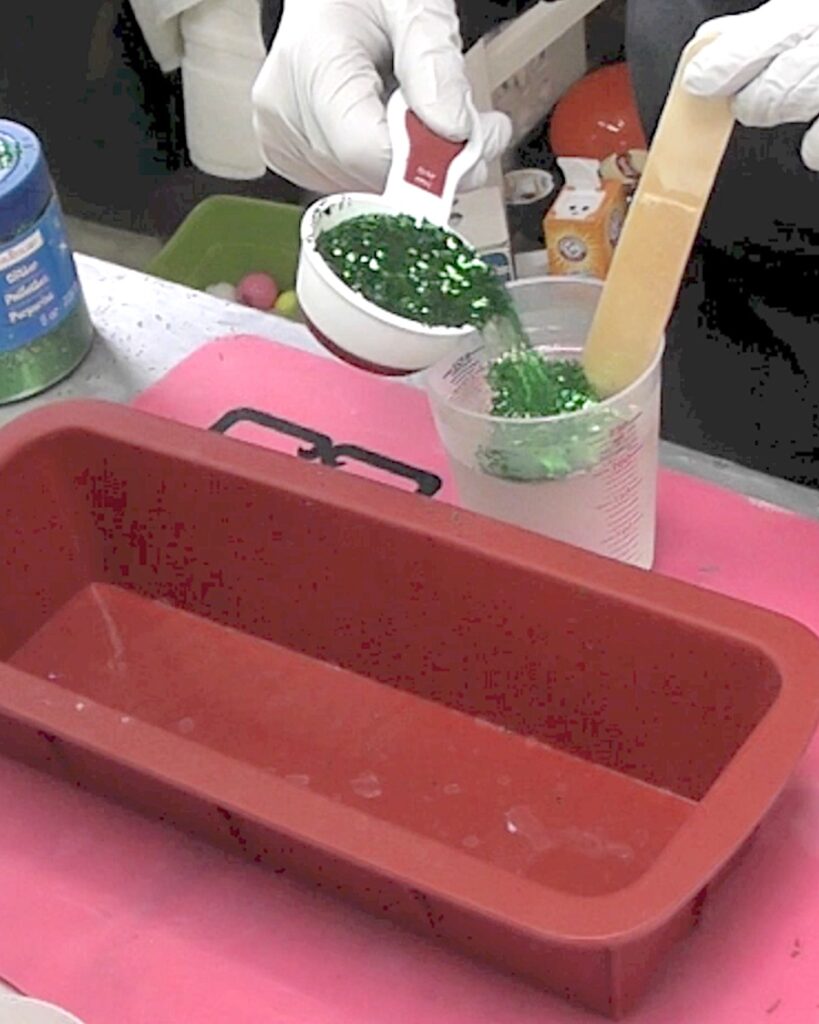
Step 2
Pour into the mold. I poured from the middle of the mold because I didn’t want any stray drips running down the sides.
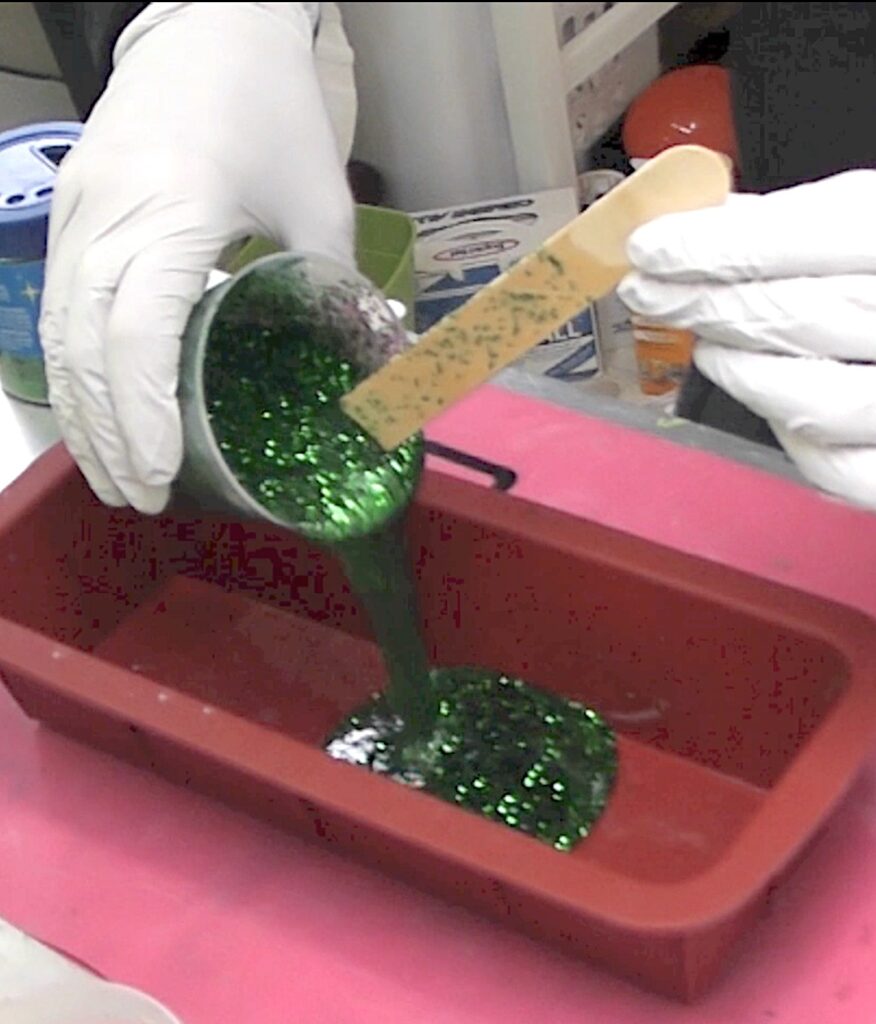
Step 3
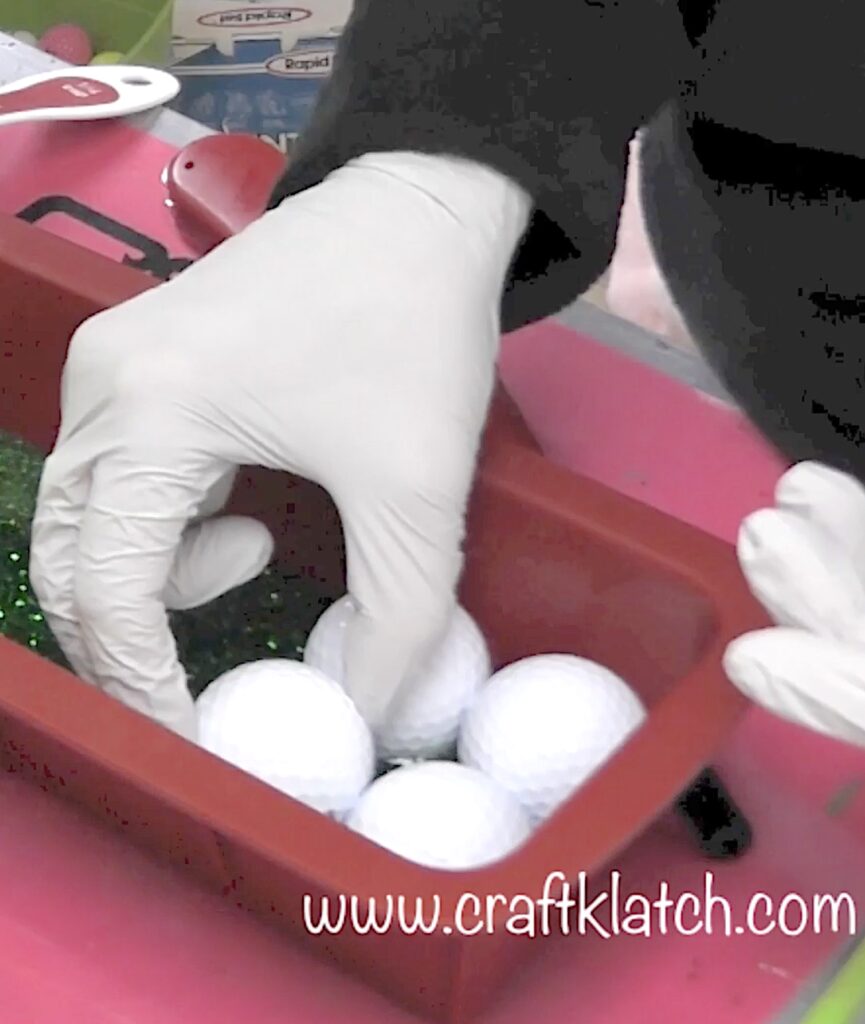
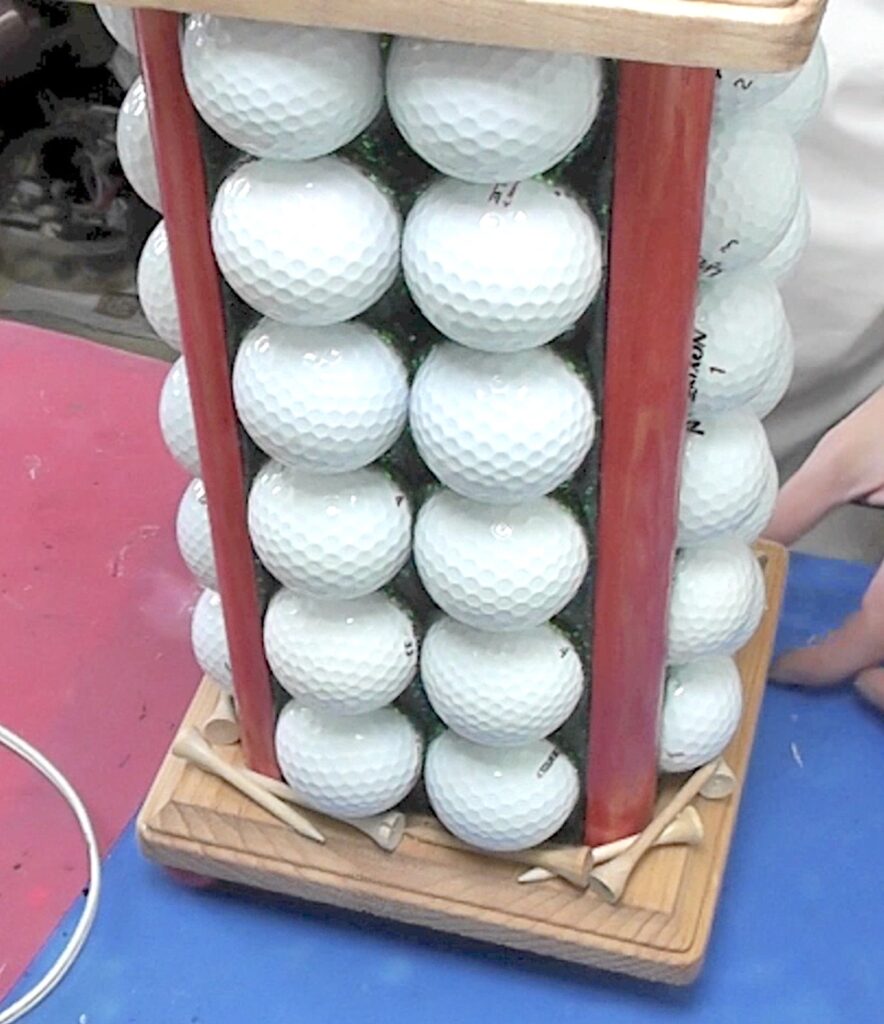
Take your golf balls and gently place them into the resin.
You need to let it cure for a minimum of 12 hours before unmolding. The full cure takes 72 hours. However, after 12 I remove it and place it on a flat surface. I put parchment paper underneath, so I can repeat the process three more times and don’t tie up the mold for a full 72 hours.
Step 4
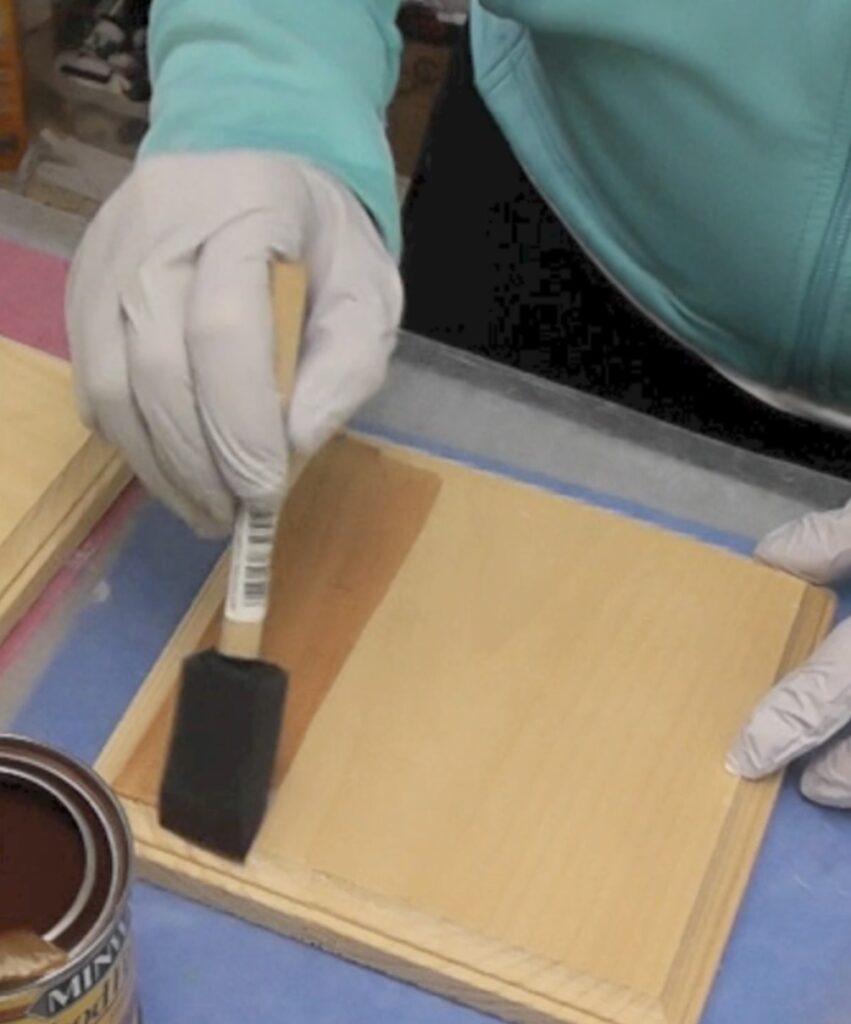
While waiting for the sides to cure, you can prep your caps. The caps are actually wood plaques purchased from the craft store. Take a brush or sponge brush and brush the stain onto the plaques. Let it sit for a minute before wiping off any excess with a paper towel. Go with the grain and then repeat with the backside.
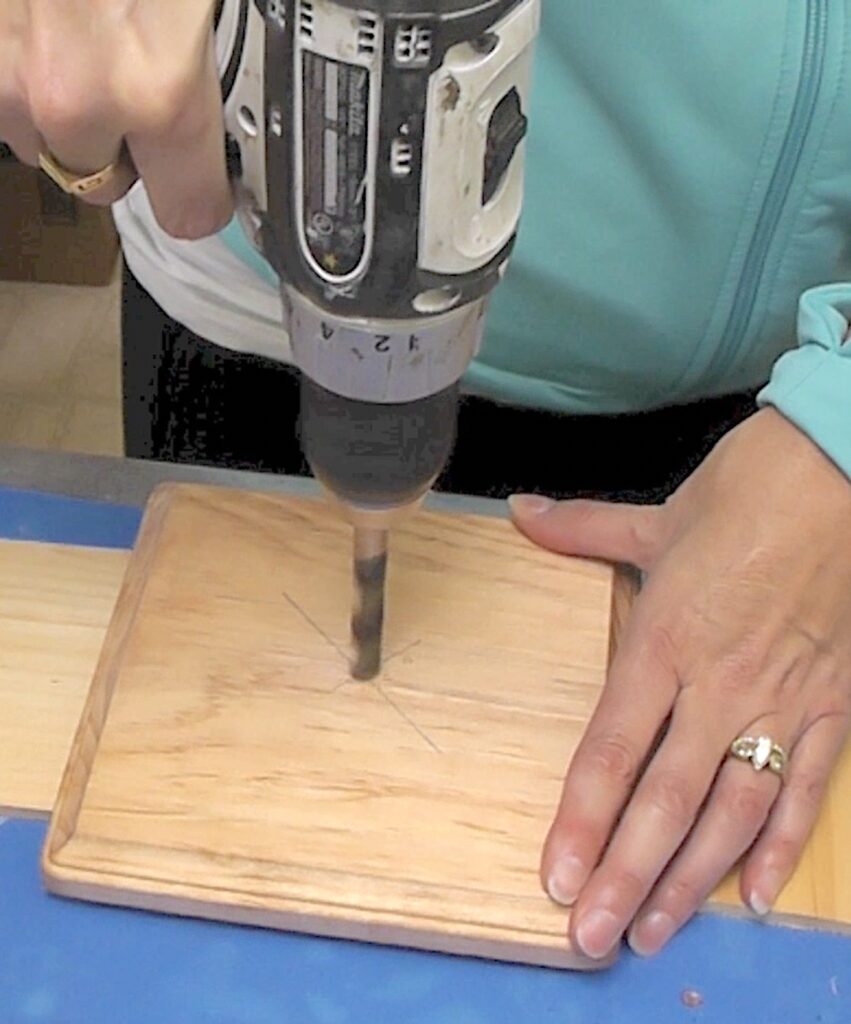
Step 5
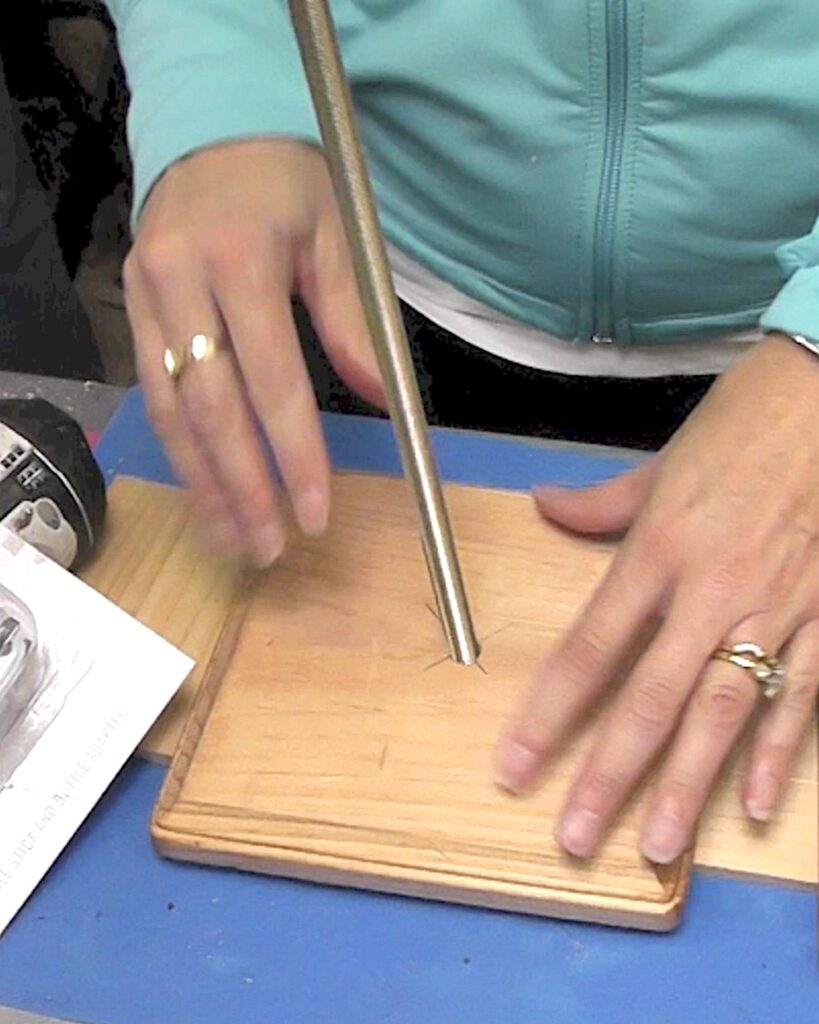
Find the center of the plaques (psst…I show you an easy way in the video) and drill a hole in the corresponding size to your lamp kit.
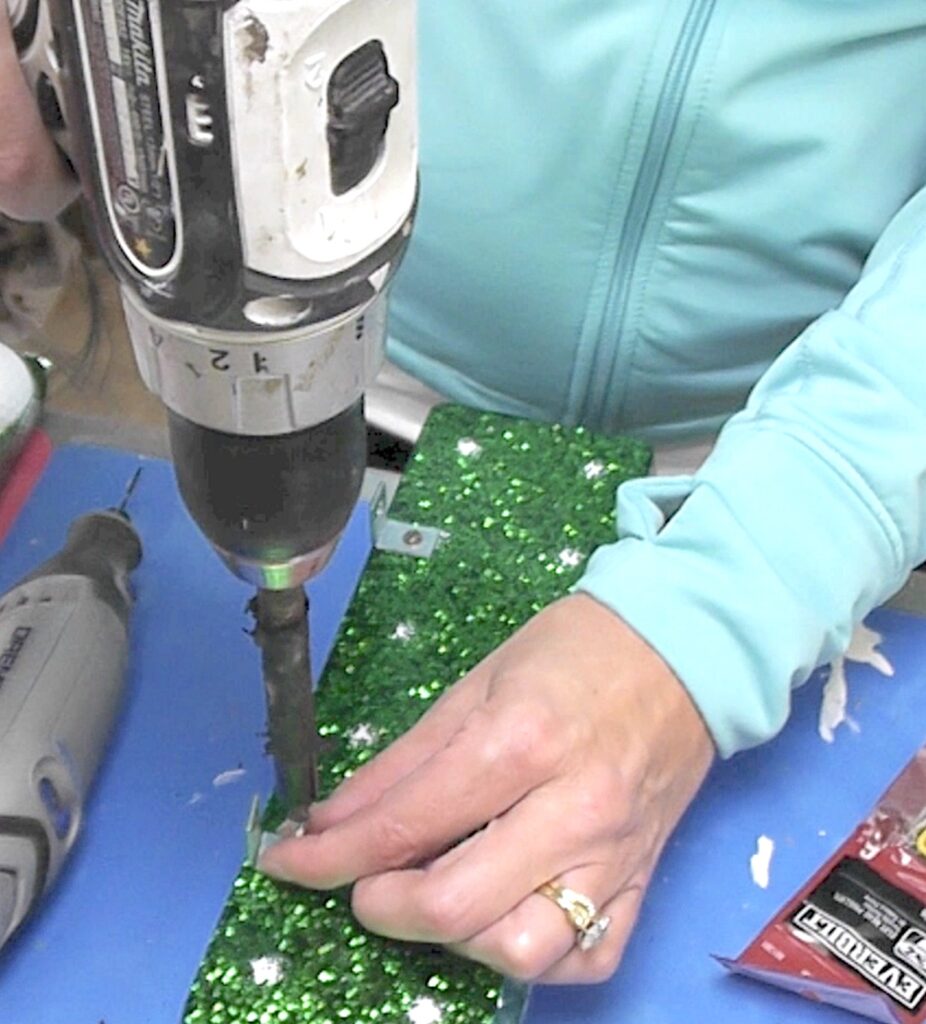
Step 6
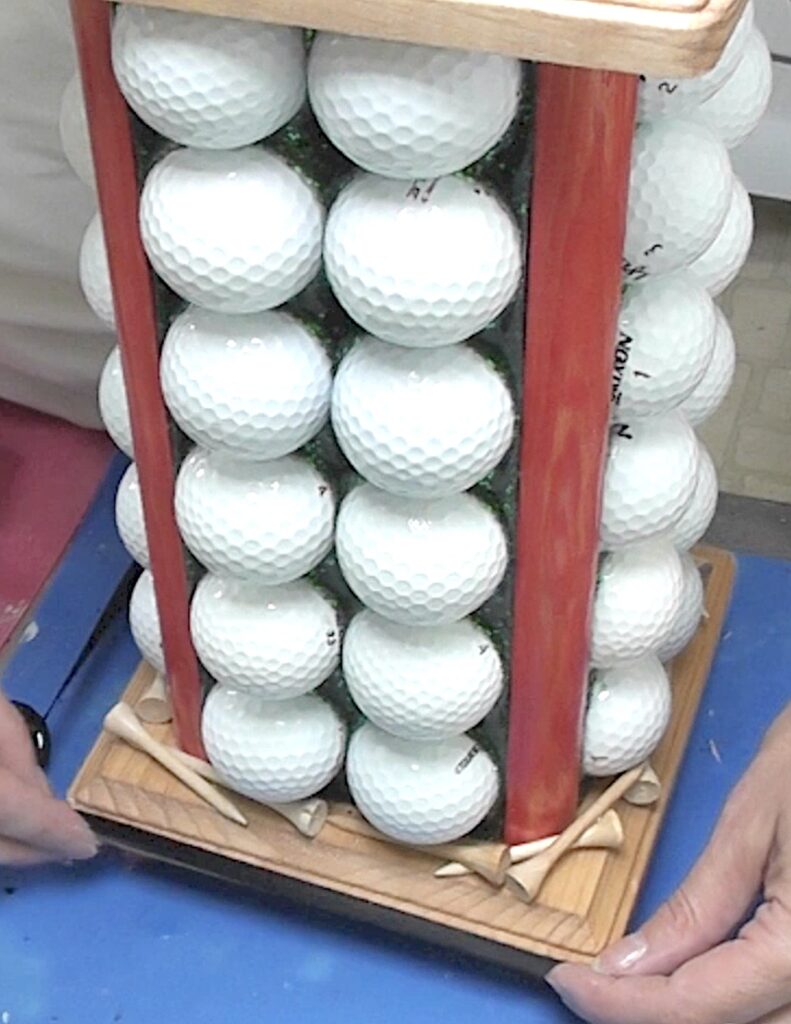
Take small “L” brackets and drill a pilot hole (just a predrilled hole) into the resin and screw on the brackets. You need two to attach each side. I attached two of the sides together. You cannot attach all four together, so I did two and two.
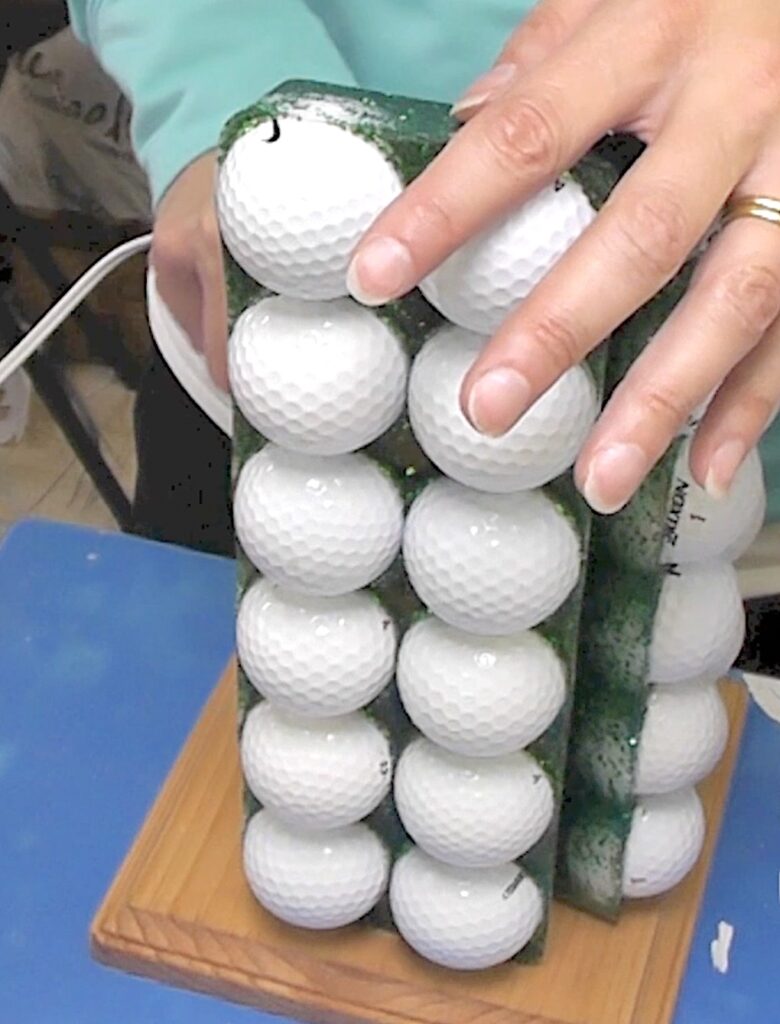
Step 7
Standing the two newly joined pieces together, on the plaque, you will start to see it come together. Center them on the plaque and use some hot glue to attach them to the plaque. You just need enough to secure the pieces so when you flip them over they will not shift.
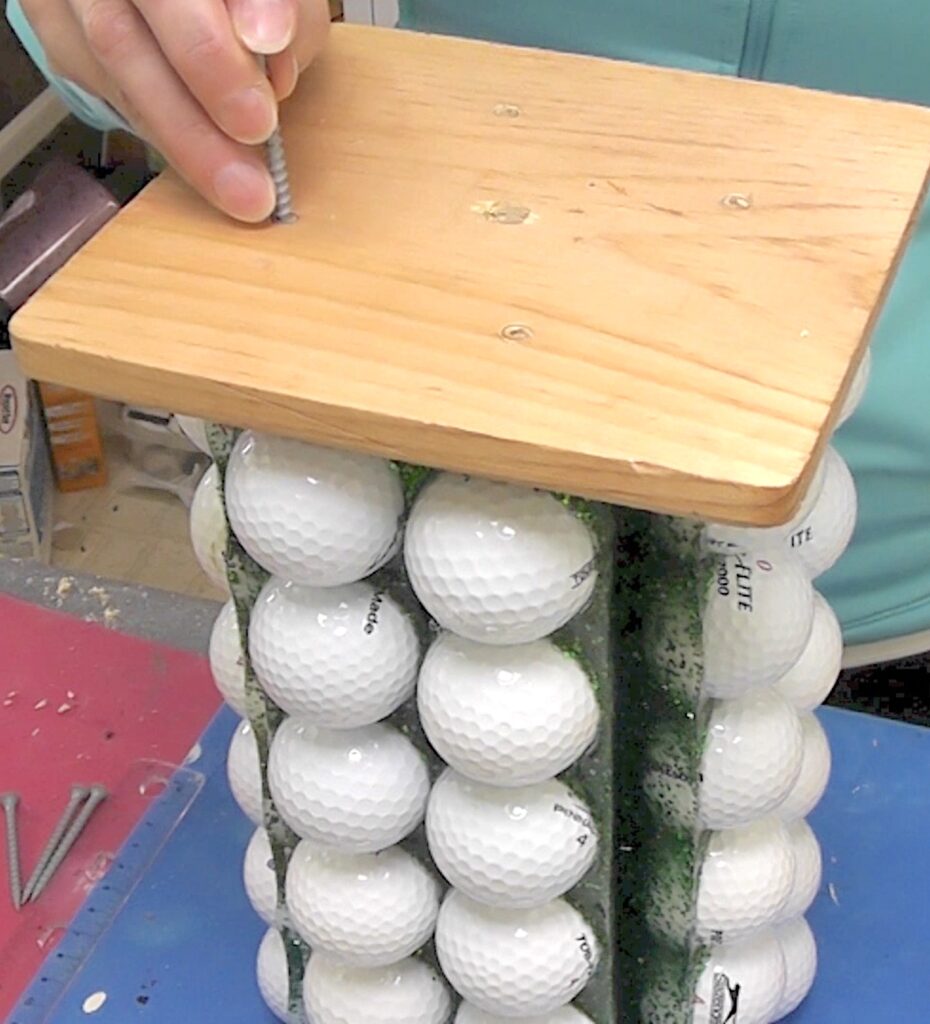
Step 8
When the glue has cooled, flip them over and drill screws into the bottom of the plaque. You want to be careful when doing this because you want to make sure you are actually driving it into a golf ball, but also that you are far enough back. You don’t want to accidentally have it come through the outside of your lamp. The bottom should now be secure. I added four screws total to the bottom.
Step 9
Follow the directions on your lamp kit to put it together and run the wire through. Get it all properly placed.
Step 10
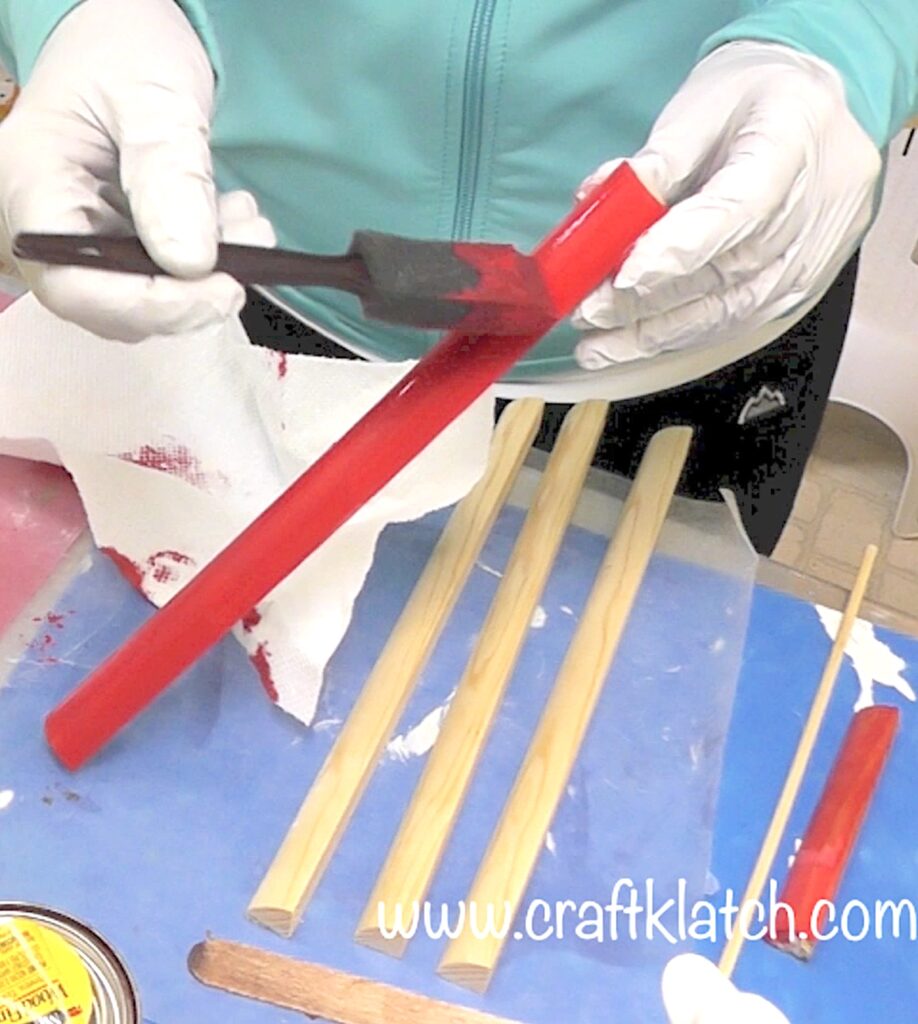
Cut four quarter-round trim pieces, to the length of your sides. You want them to fit well into the corners and between the base plaque and the top plaque. With watered-down red paint, paint the quarter-round pieces and wipe off the paint almost immediately. We are going for a wash, not a solid color. Allow them to dry.
Step 11
Do the same with the dowel caps/heads and once dry, seal all of the dowel caps and the quarter round pieces with Triple Thick. Allow them to dry.
Step 12
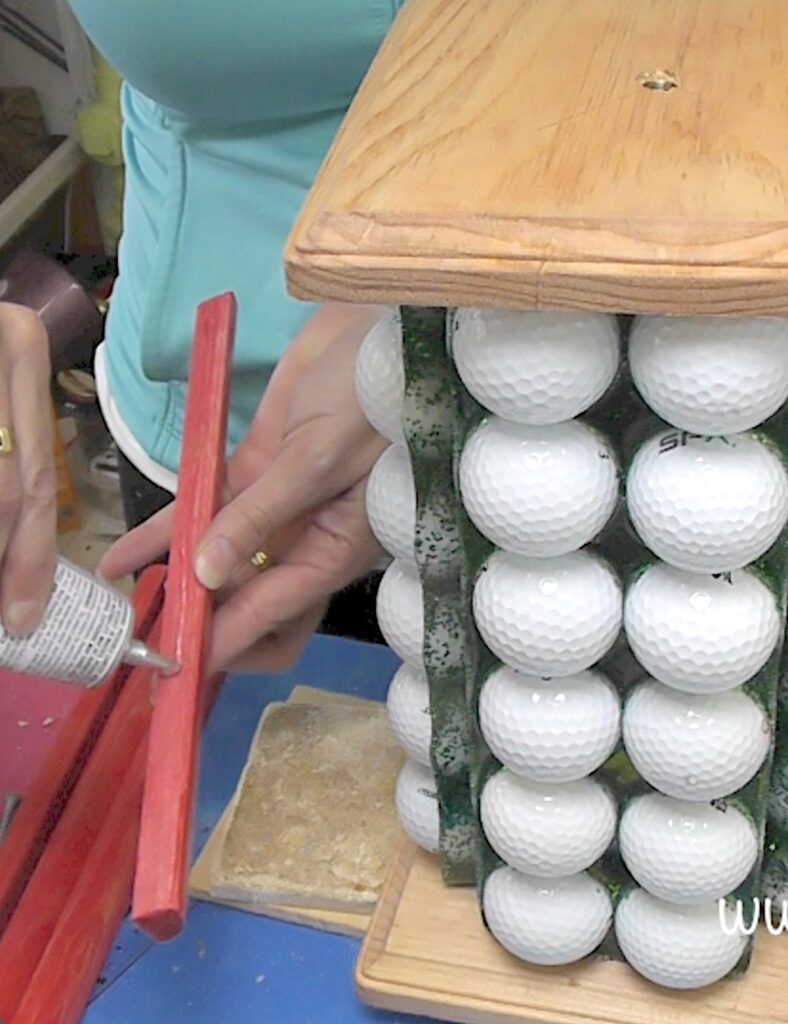
Take a combination of E6000 and hot glue and glue the quarter round pieces into the corners and the other pieces onto the bottom, for feet.
TIP: Put a couple of rubber bands around the lamp to keep it all together. while the glue dries on the quarter rounds.
Step 13
Add some golf tees for additional decoration.
Step 14
Glue a thin black ribbon onto the bottom plaque for an accent color.
Step 15
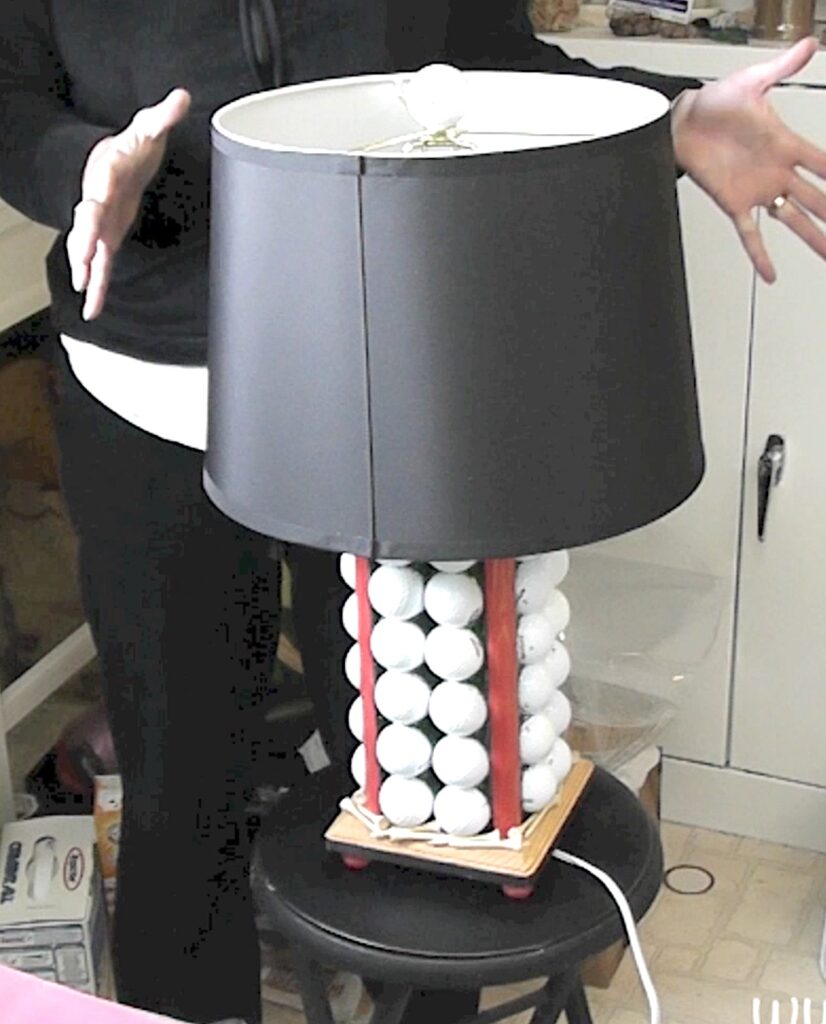
Add the lamp shade.
Step 16
For a fun and easy finial (the thing at the top of the lamp), drill a partial hole into a golf ball and screw it onto the top of the harp.
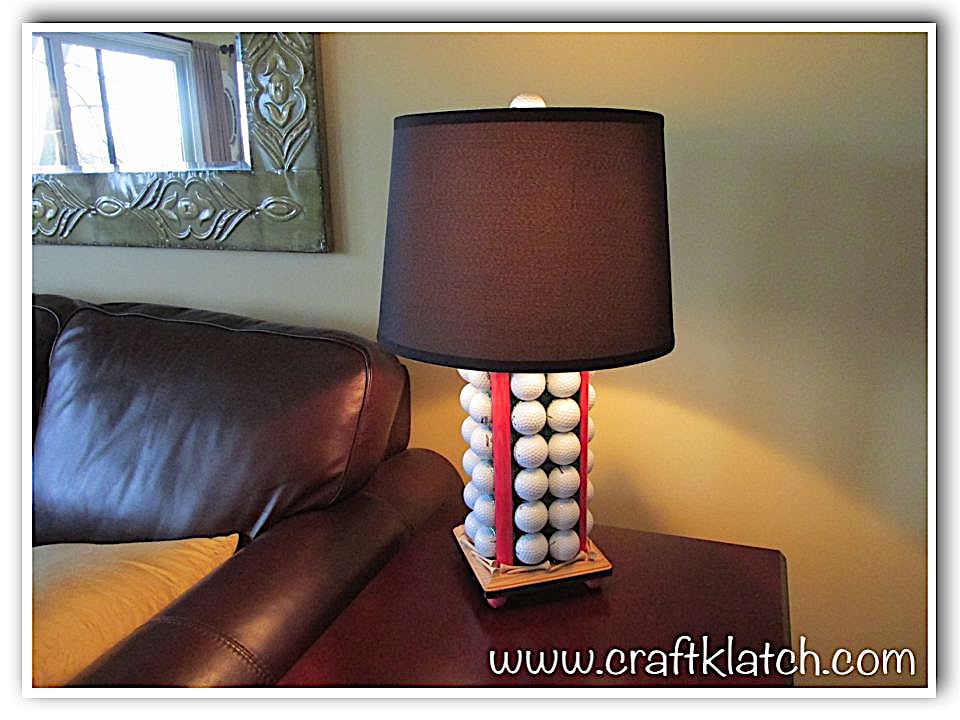
Phew! That is it! C’mon…it might not be the best golf ball lamp ever, but it’s pretty cool!
Other Lamp Projects I have Made
If you like the idea of making a lamp from scratch or perhaps giving a lamp an easy makeover, check out these awesome lighting projects!
- Gumball Lamp DIY Ideas: Garbage to Gorgeous® Episode 25
- Cupcake Home Decor | Resin Lamp DIY
- Easy Lamp Makeover | Coastal Decor
- DIY Resin Mermaid Light Craft Tutorial
I’ve worked on a ridiculous amount of golf ball crafts and you can find them here: 30 Golf Ball Crafts
Here are some Golf Ball Lamps and Decor Options!

Be sure to PIN IT for later!
Thanks for stopping by! Remember: Life’s too short not to shimmer, so grab your glue gun and your glitter!™ Stay safe!
Mona