Make a magical axolotl with chameleon powders and resin! Watch the simmer come to life in this fun and colorful DIY craft tutorial!
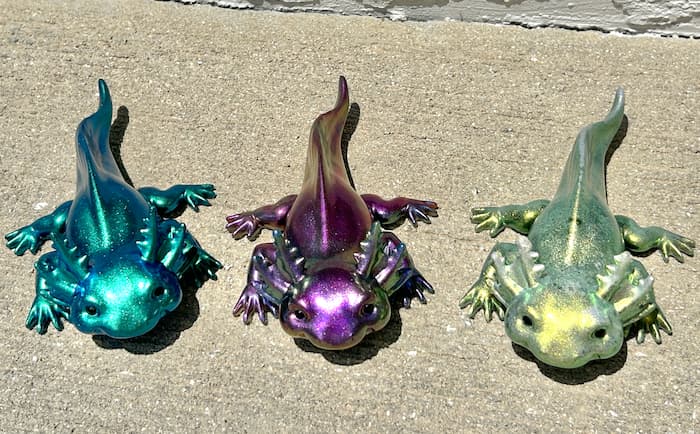
Here is my latest axolotl project! I am obsessed with this mold and wanted to try color blending the chameleon powders to see how they would look!
I originiall did the teal axolotl, which turned out gorgeous! Then, I did the olive axolotl, which you can see the video HERE.
Now I’m combining colors using the chameleon powders in magenta, champagne, plum, and a surprise pop of grape! The results are shimmering and magical! The colors were a total surprise in the best way!
Supplies Used
*Disclosure: This blog uses affiliate links from Amazon and other retailers. I earn a small amount from qualifying purchases at no additional cost to you.
- Epoxy Resin
- Resin Mixer
- Chameleon Powder
- Black Pigment
- Axolotl mold
- UV bonding resin
- Black multi-surface paint
Here is the Magical Axolotl Video Tutorial
Here is the video tutorial so you can see the magical axolotl come to life! I’ll show you exactly how I made it!
Directions on How to Create Shimmering Axolotl
Here’s a step-by-step of how I brought this magical creature to life:
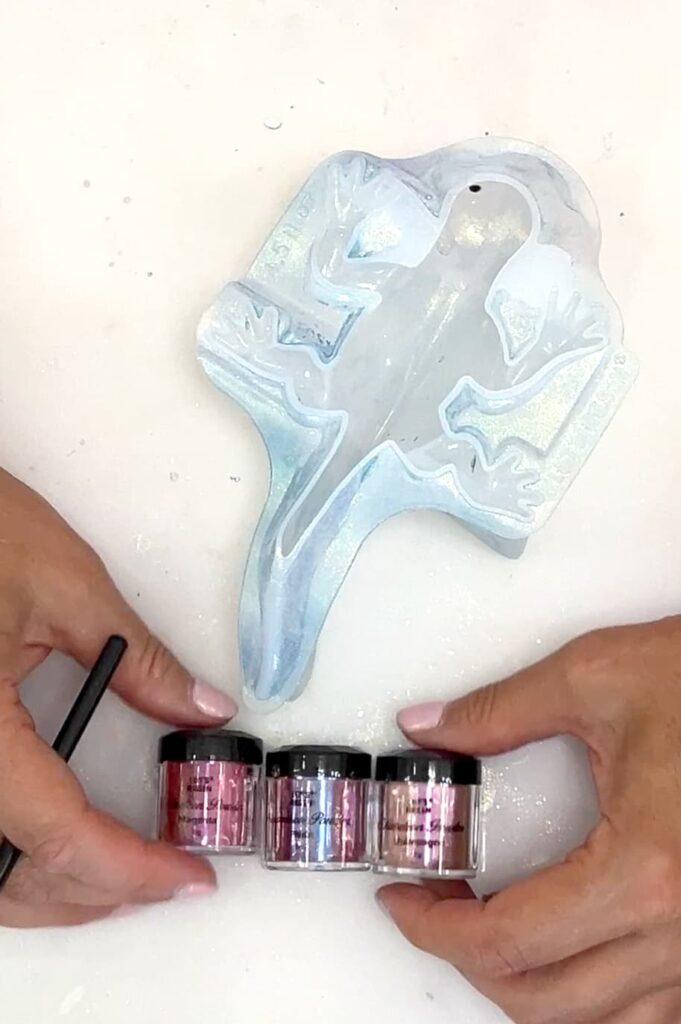
Step 1: Brushed on Chameleon Powders
I started with magenta, brusting it into random areas on the mold. then I layered champagne, plum and finished it off with grape for extra magic. I covered the whole mold and let the colors blend together however they ending up blending.
Step 2: Mixed and Poured Resin
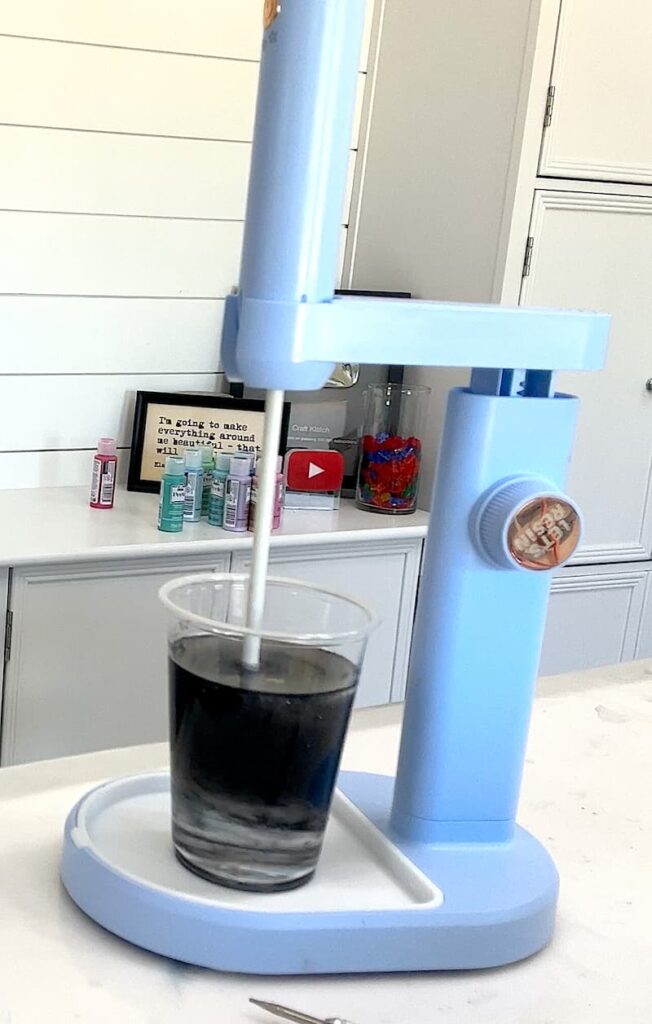
Using my resin mixer (I’m in LOVE with it!), I blended the resin with black pigment. The mixer saves me so much time and effort! Turns out I craft cleaner with it too!
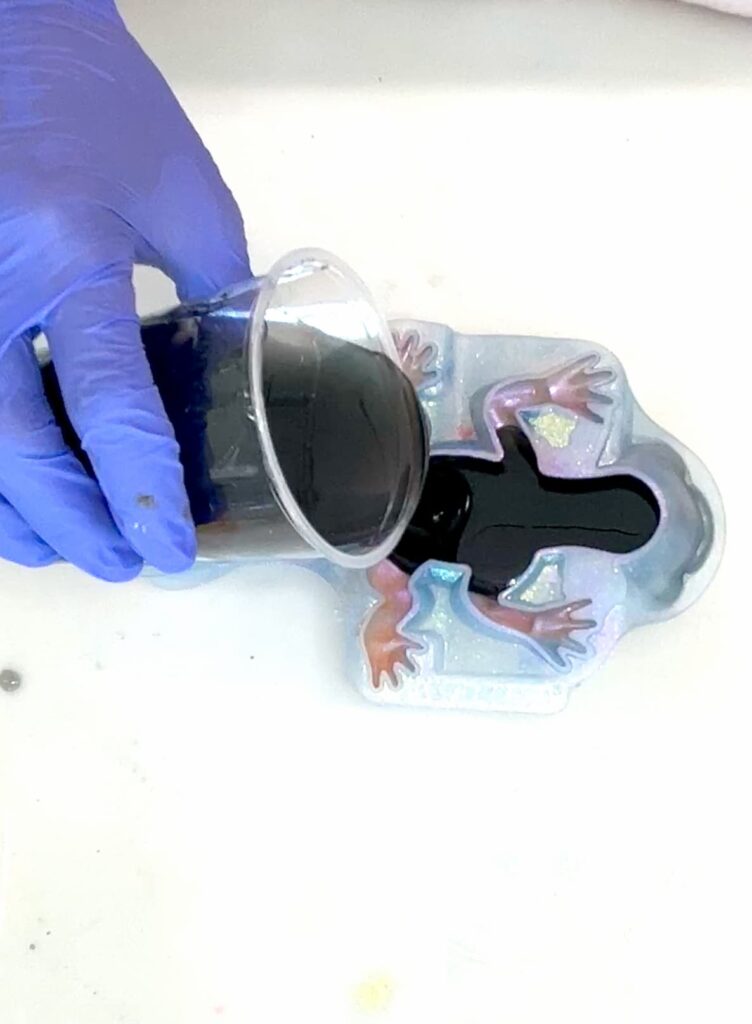
I poured the mixed resin directly into the mold, making sure it was filled completely. Any extra resin went into another project — no waste here!
Step 3: Removed the Axolotl and Touched Up
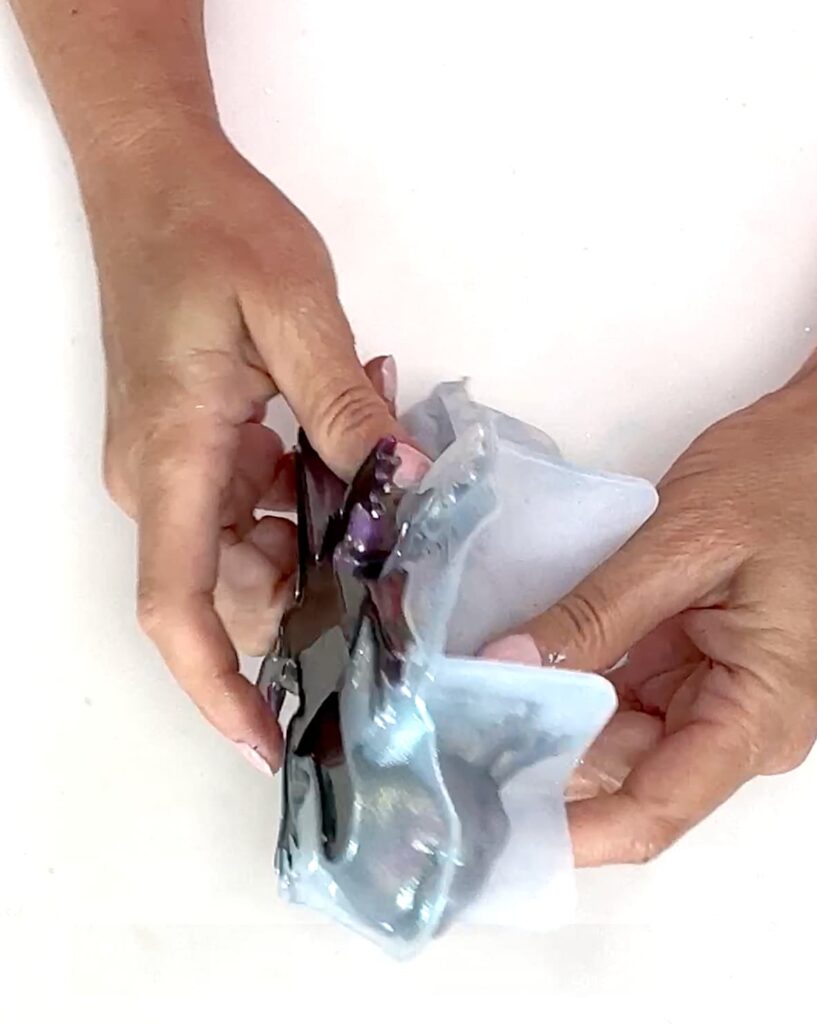
Once cured, I demolded the axolotl and…WOW! The colors were even more amazing in person. However, a few of the head spikes didn’t fully form. That was my fault for not clearing the powder from the mold tips.
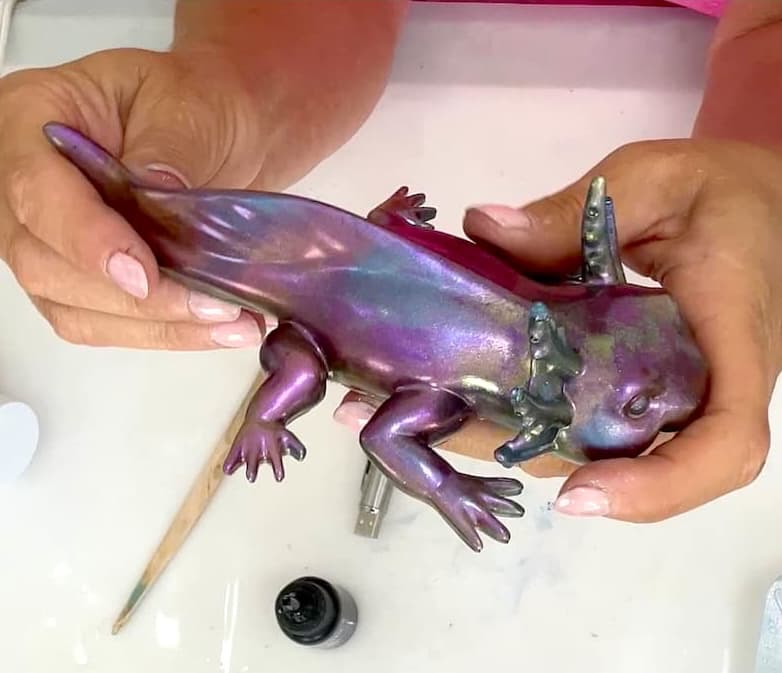
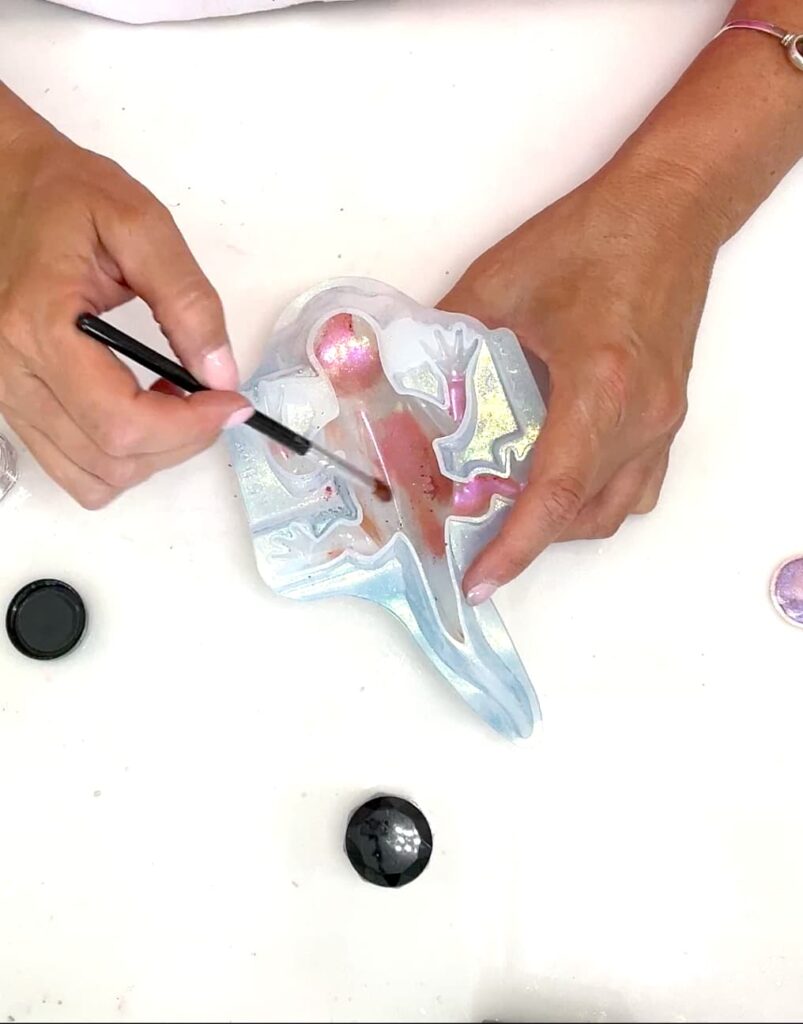
Step 4: Repaired with UV Bonding Resin
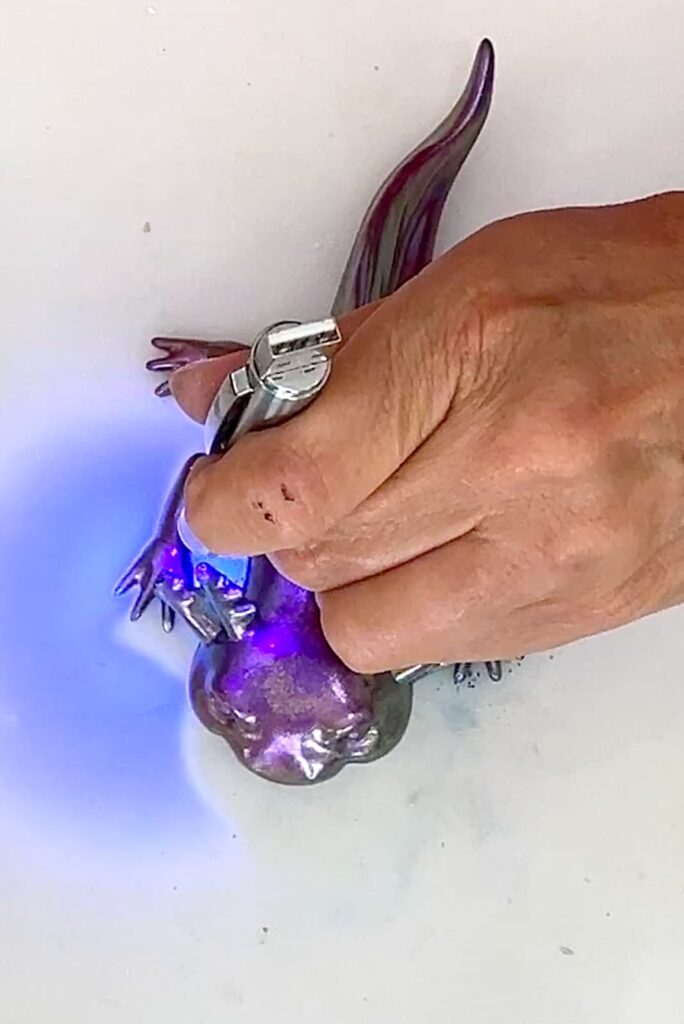
I used UV bonding resin to build up the missing spike details. I brushed a little grape chameleon powder onto the resin, cured it, and voila — problem solved!
Step 5: Painted Eyes
To finish, I painted the axolotl’s eyes black using multi-surface paint and let it dry. Then, I used the UV bonding resin over it. It really brought him to life!
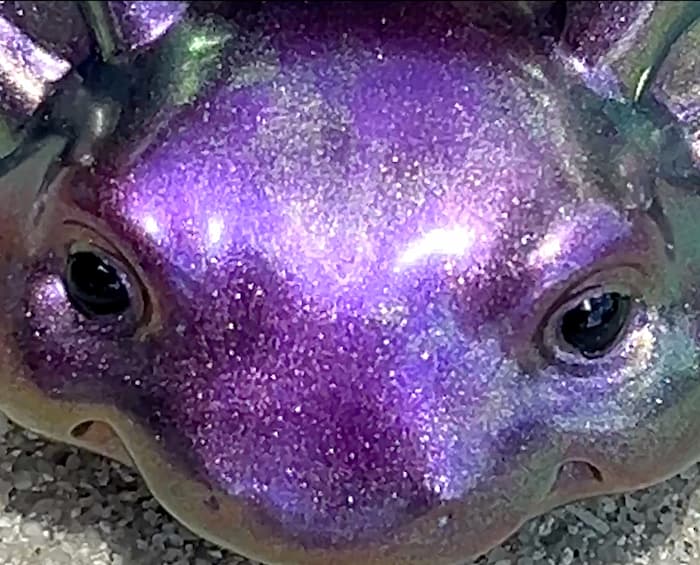
The Final Reveal in Sunlight
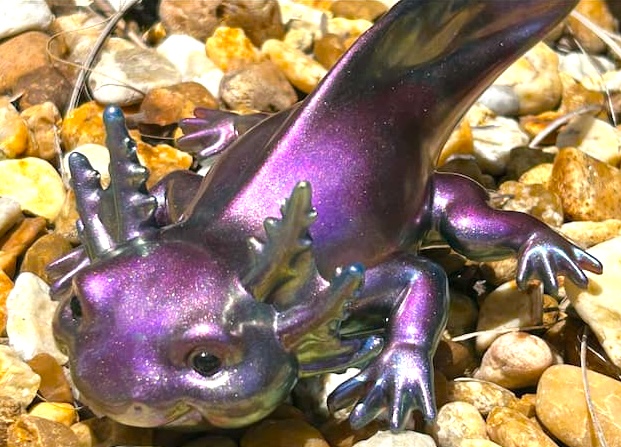
The shimmer is next-level! You can see the hints of the champagne, magenta and flashes of the grape. The plum is mixed in there too! They all blended together beautifully! I could not stop staring at him in the sunlight
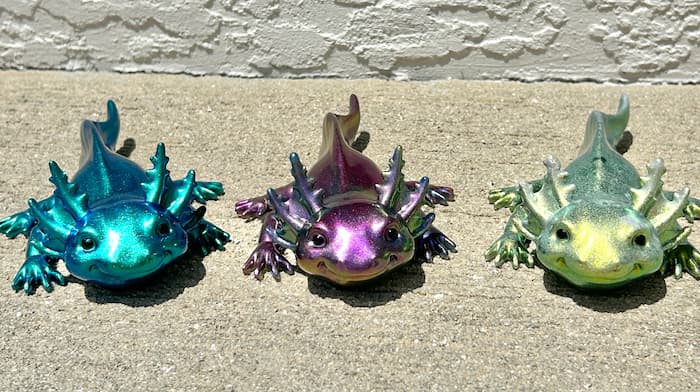
This is the third axolotl I have made and each have their own personaltity. I don’t know which is my favorite yet…Which one do you like best? Let me know in the comments!
What’s Next?
I have one more axolotl version coming up and it’s totally different — no chameleon powder and no black resin! It’ll be a surprise you won’t want to miss!
Other Resin Projects You’ll Love
- Step by Step Resin: How to Color-Blend Coasters [Video]
- How To Make Polar Bear Resin Art DIY
- DIY Resin Cactus Coasters
- Turtle Resin Coasters
Thanks for stopping by! Remember: Life’s too short not to shimmer, so grab your glue gun and your glitter!
Mona
YouTube Video Tutorial
You can find the YouTube video tutorial for the magical axolotl here: