Your resin crafting just got more beautiful, faster, and easier! I’ll take you through the step by step resin tutorial on how to color-blend resin coasters with vibrant colors! And I’ll save you time and money!
You’ll want to resin craft even more!
Let’s jump in and create a stunning coaster set and I’ll introduce you to some amazing tools that are resin game changers!
*This post is sponsored by Resiners. The ideas and opinions are all my own.
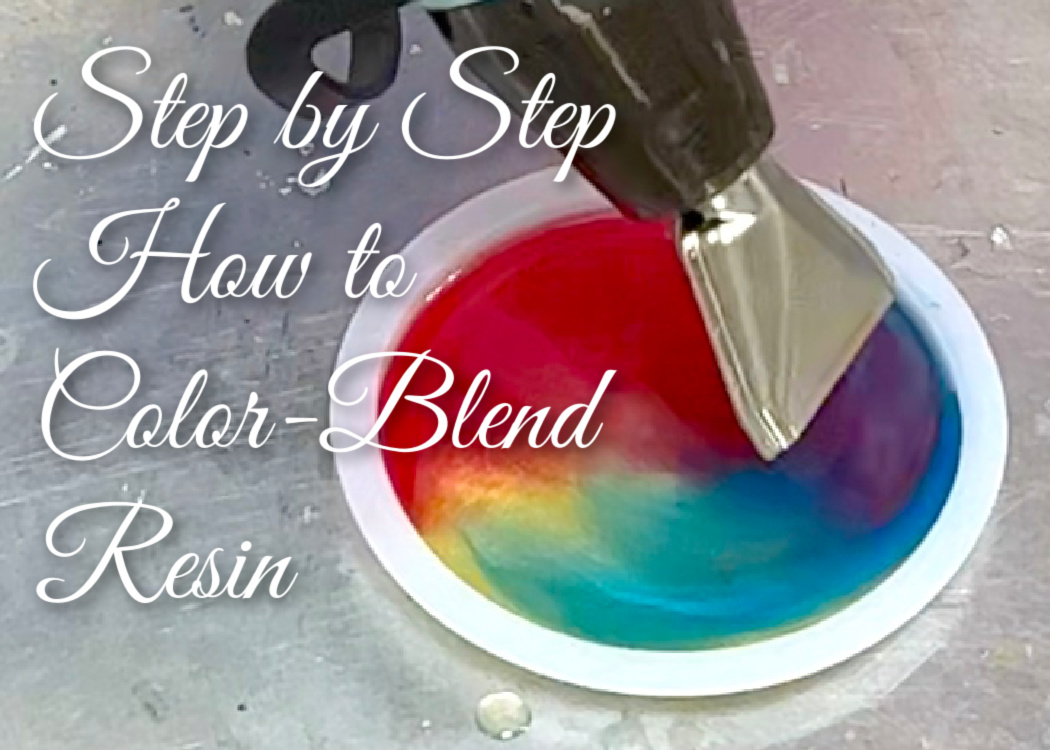
Step by Step Resin: How to Color-Blend Coasters Video Tutorial
You can see step by step how I make the colorful coaster set and see the Resiners tools in action!
Step by Step Resin directions on How to Color-Blend a Resin Coaster Set
Step 1: Gather Your Materials
*Disclosure: This blog uses affiliate links from Amazon and other retailers. I earn a small amount from qualifying purchases at no additional cost to you.
For this resin tutorial, you will need:
- Mica powders (I used bright red, magic yellow, deep blue)
- Airless bubble removal machine
- Heat gun
- Cure air resin curing machine
- Resin coaster mold set (with holder)
- Resin
**For a 10% discount on Resiners site, use the promo code CRAFTKLATCH
Step 2: Preparing the Resin
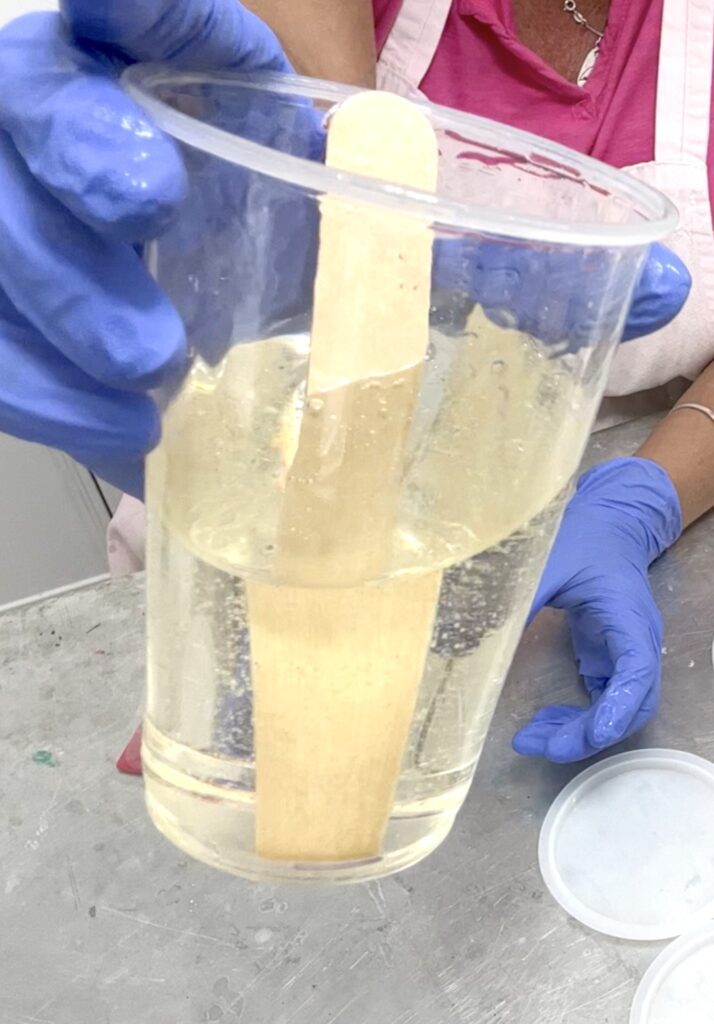
Prepare your epoxy resin according to the package directions. I started out with six ounces, which was enough for the coasters and part of the holder. Eight ounces would get the job done with one batch.
Step 3: Bubble Battle
I have worked with A LOT of resin over the years. I have found that even the ones that claim to be bubble-free usually have microbubbles.
Bubbles in resin are a pet peeve of mine and getting rid of those bubbles is time-consuming, frustrating, and can be costly.
How to get rid of bubbles in resin
- Stick lighter – For years, this was my go-to. It was small enough to control so it never got too hot to melt the molds. The problem is that disposable lighters are costly and the butane to refill the refillable lighters is also costly. Not to mention, I feel like half the butane never made it into the lighter.
- Butane torch – These work great if you are doing larger projects but they can often overheat a silicone mold and you end up having the silicone mold become one with the resin. You can end up ruining your project and your mold.
- Heat gun – It works unless you don’t want your resin to move around. This is hard to use if you are doing and if you have different colors and don’t want them to blend.
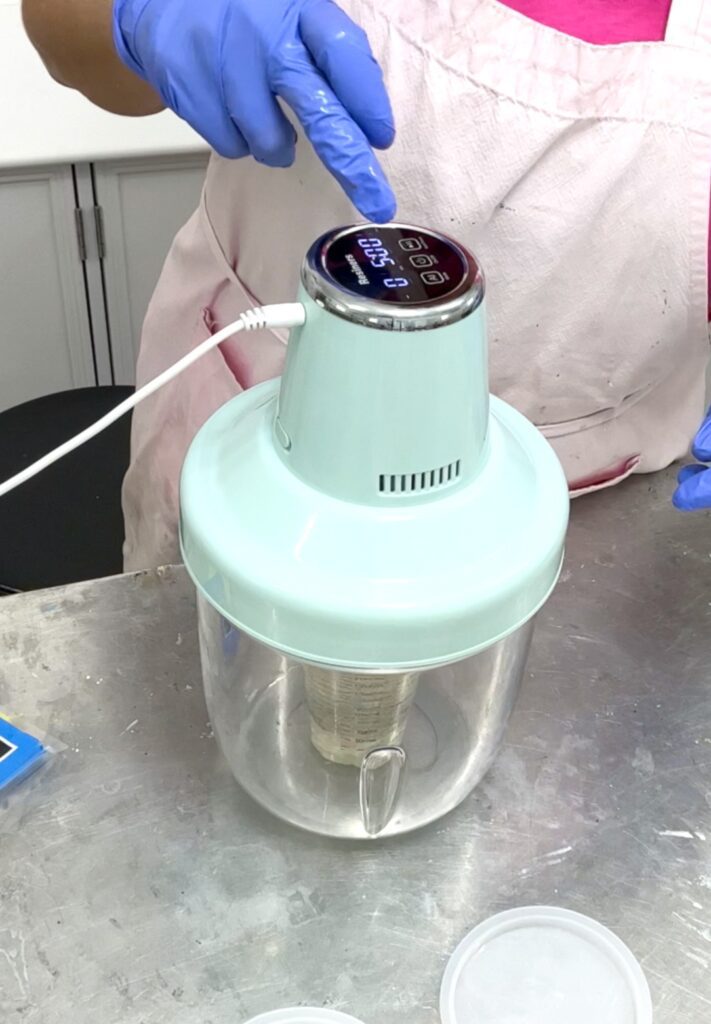
Those were the options available. But I recently learned of this Airless Bubble Removal Machine by Resiners.
I had my doubts…
…it seemed too good to be true…
…but was I wrong!
Watch the video above and you will see the bubbles get sucked right out of the resin!
I didn’t see one bubble on the surface or even a microbubble!
It made my heart happy!
It was simple enough. I placed my resin cup in the bubble remover, set the timer, and let the machine do all the bubble removal!
I had six ounces of resin and set it to five minutes. That’s all it took!
*I did learn a lesson. Originally, I had 8 ounces in an 8-ounce mixing cup. There wasn’t enough room to suck out the bubbles. Again, you’ll see what I mean if you watch the video. I almost overflowed the cup. Had I used a different cup/container, it would have worked perfectly!
Step 4: Unleash the Colors – Mica Powders
Then, I separated the resin into three cups and selected which mica powders I was going to use. In one cup, I mixed in the yellow, in another the red, and in the third the blue.
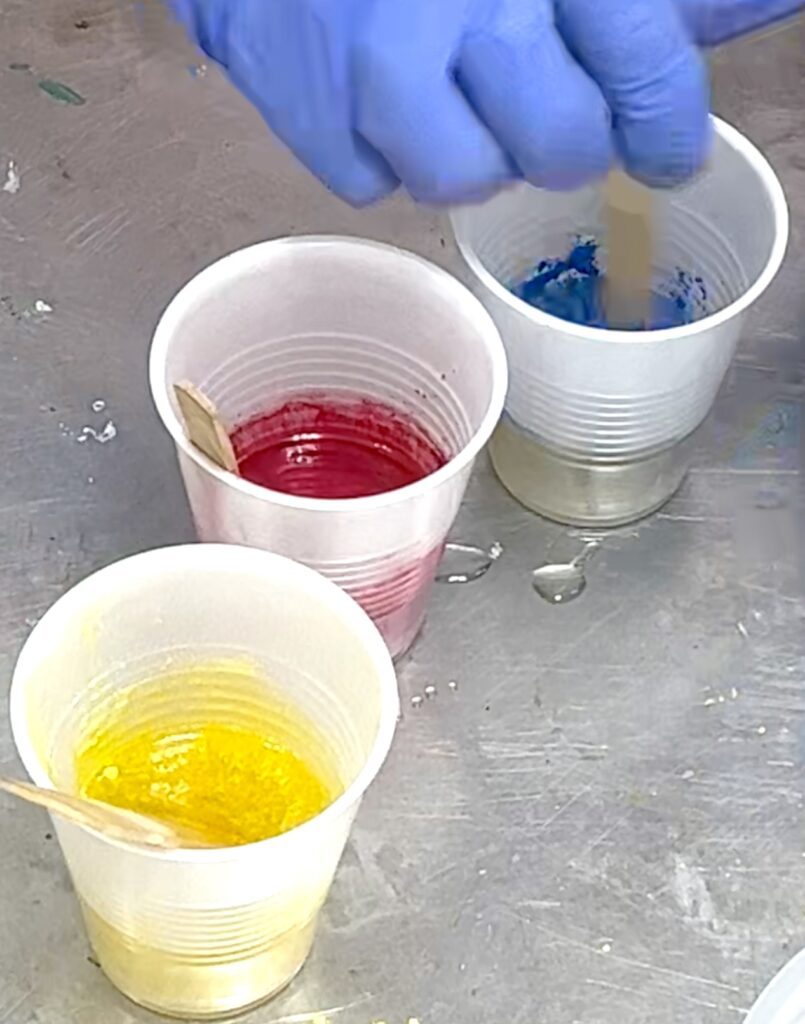
My resin was vibrant and bursting with color!
Check out all the beautiful colors that come with this mica powder set!
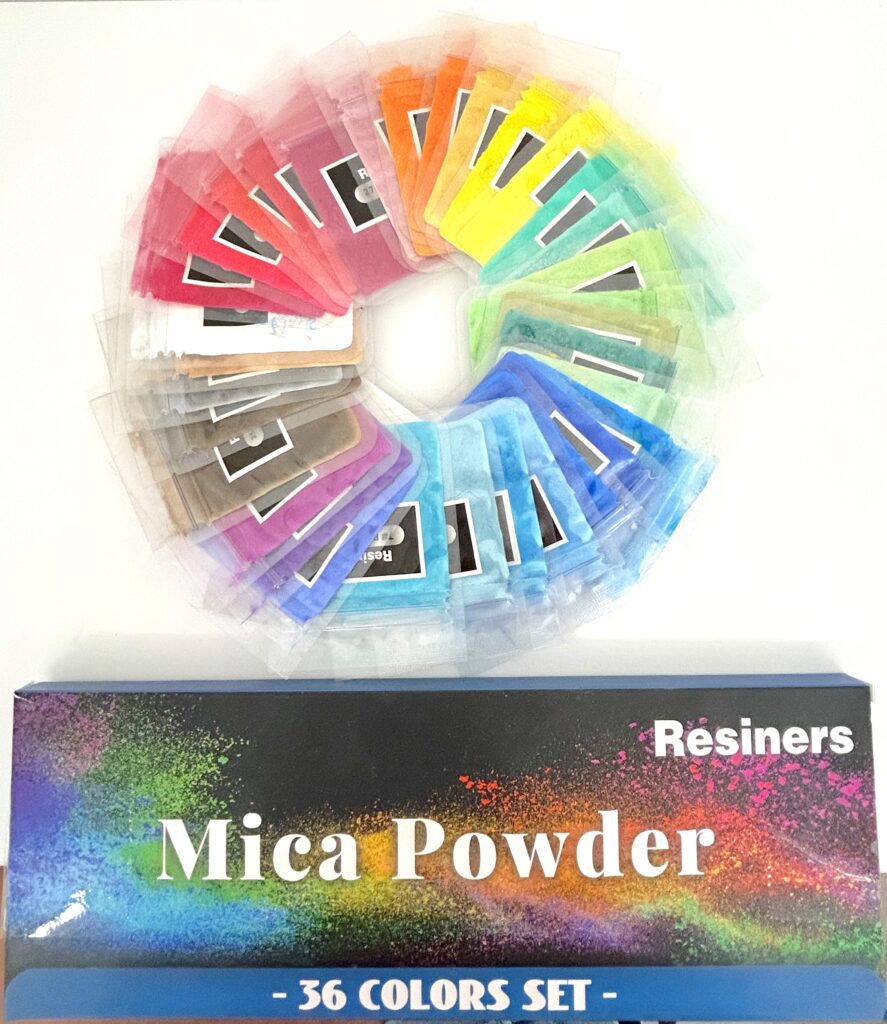
Your resin color blending combinations are endless!
Step 5: Now I’ll Show You How To Color-Blend Resin
After pouring some of the different colored resins into the coaster molds, I attached the snazzy nozzle to my heat gun. Blending the colors into each other was so easy with the nozzle because it gave it a wider area to push.
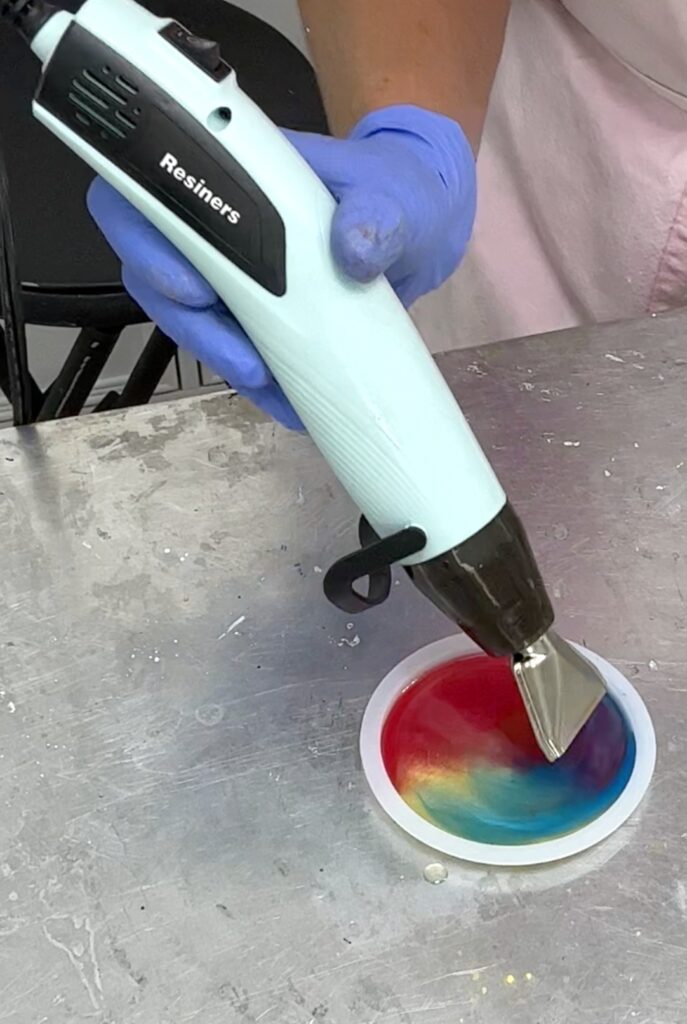
It worked perfectly!
If you have ever wondered if figuring out how to color-blend resin is hard, this is the first time I did resin color blending with a heat gun and it was easy! I played around with different designs.
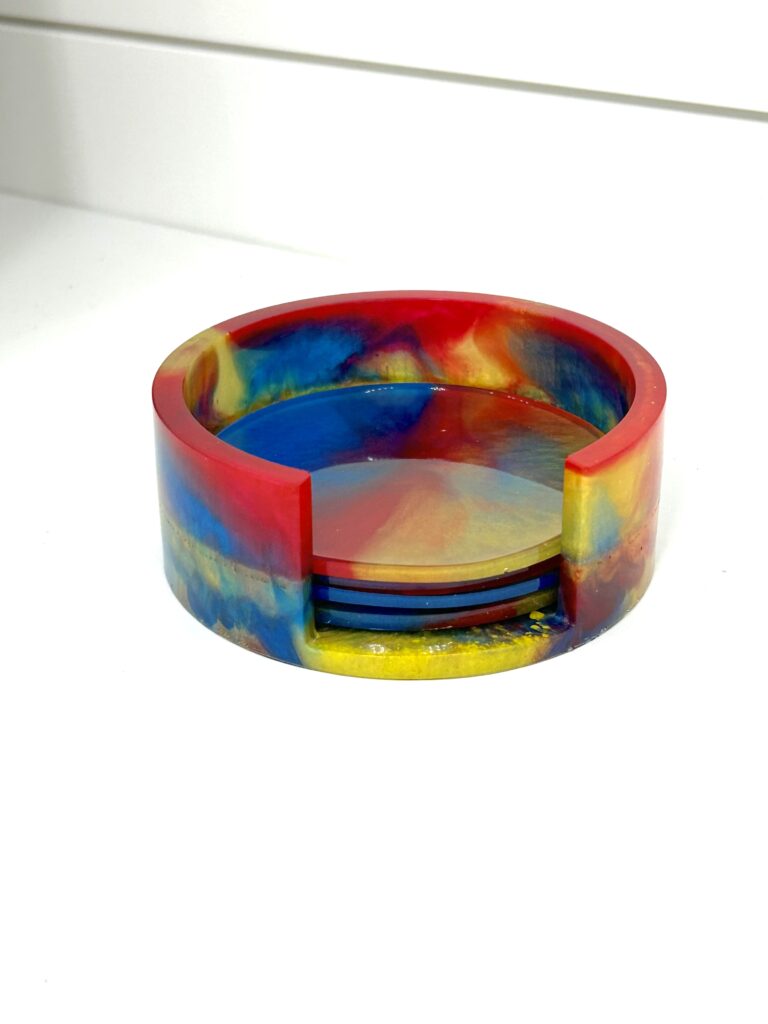
For the coaster holder, I poured the leftover resin into it and when I put the final resin on top, I used the heat gun to blend the colors together.
Step 6: The Cure
I mentioned my bubble pet peeve earlier. My second resin pet peeve is the curing time.
It. Takes. Forever.
I’ve been resin crafting for well over 10 years now and I really didn’t think there could be much else I could get excited about in the world of resin.
Wrong again.
There are machines that can cut down resin curing time to 2 hours…WHAT?!?!
Again…I had my doubts.
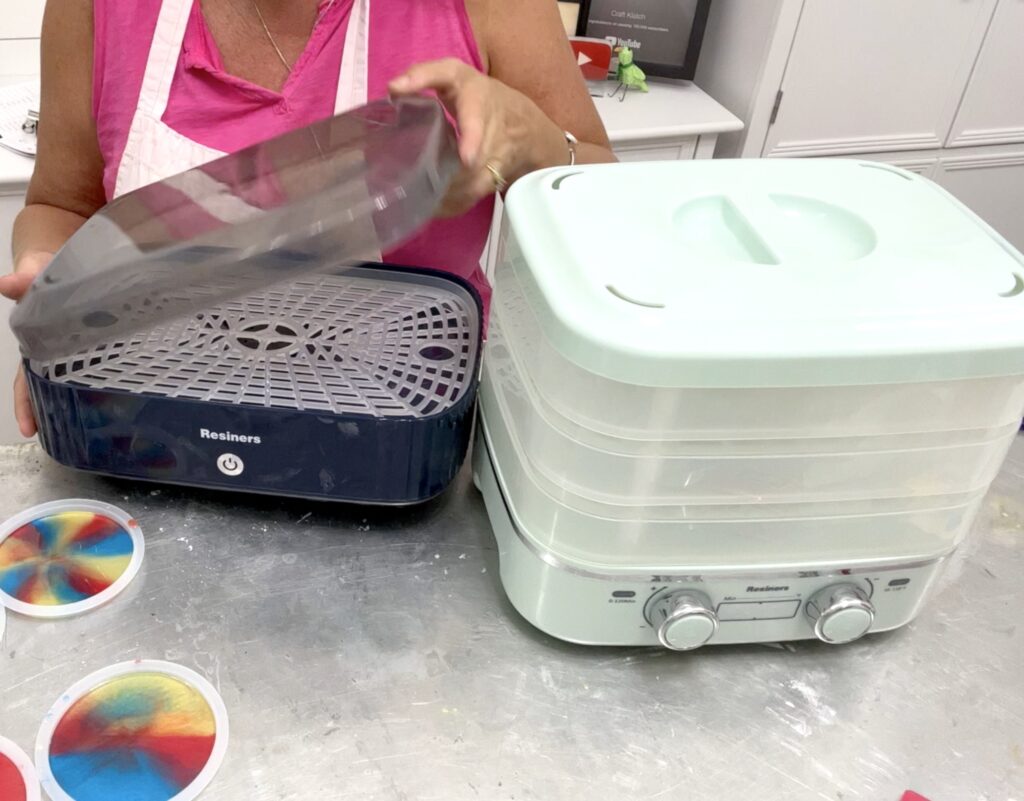
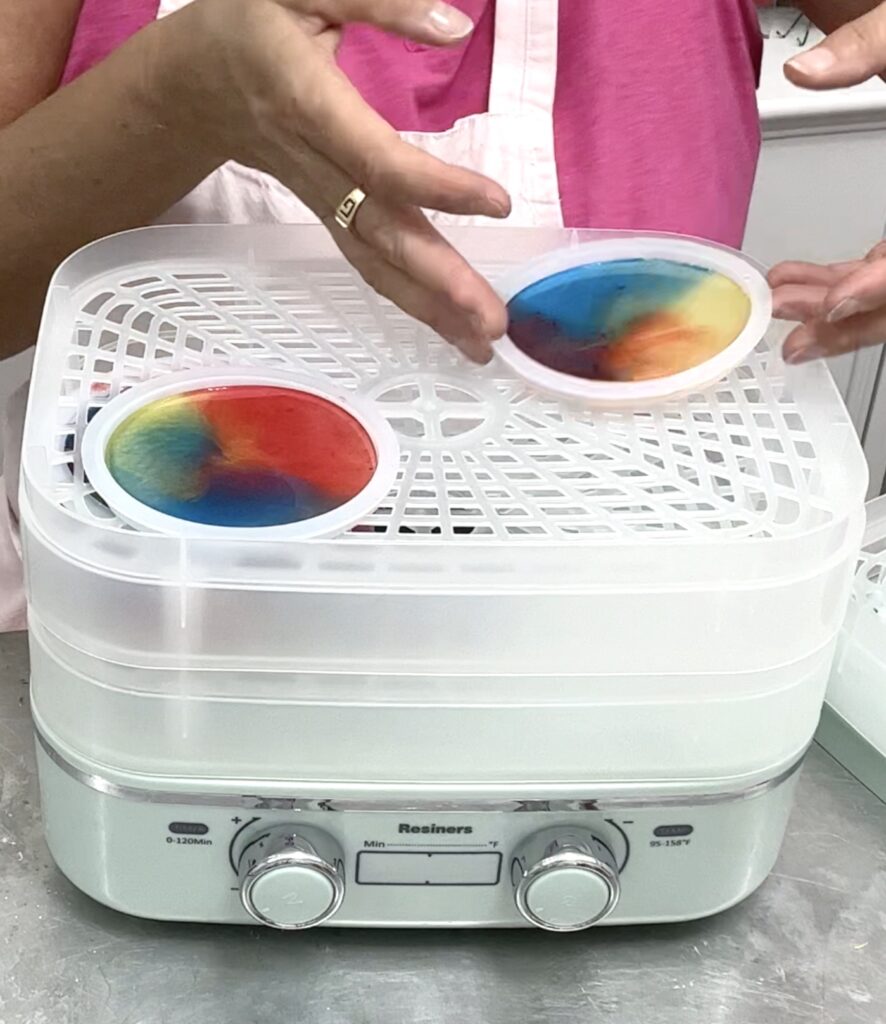
Resiners has two machines. There is the Cure Air resin curing machine and the Deeper Resin Curing Machine.
The Cure Air has one tray and the Deeper Resin Curing Machine has multiple trays if you have lots of resin projects to cure at the same time.
So I loaded it up!
Let me tell you what I like about them, aside from the obvious shorter curing time.
Your resin projects are covered.
That means:
- No dust
- No pet hair
- No people hair (I’m looking at you)
- No curious fingers being thrust into your uncured resin, while asking, “Is this dry?” (I won’t name any names but they know who they are).
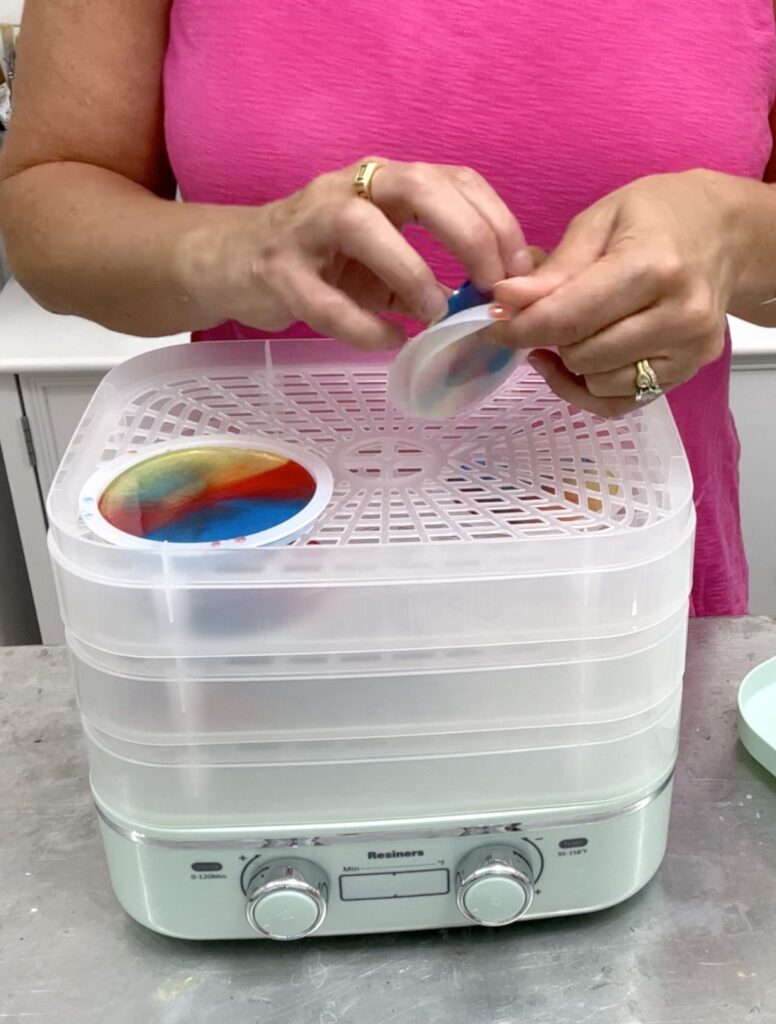
As I said, I had my doubts but two hours later, my resin had cured.
Is it too much to say it’s a miracle? Are you thinking game changer too?
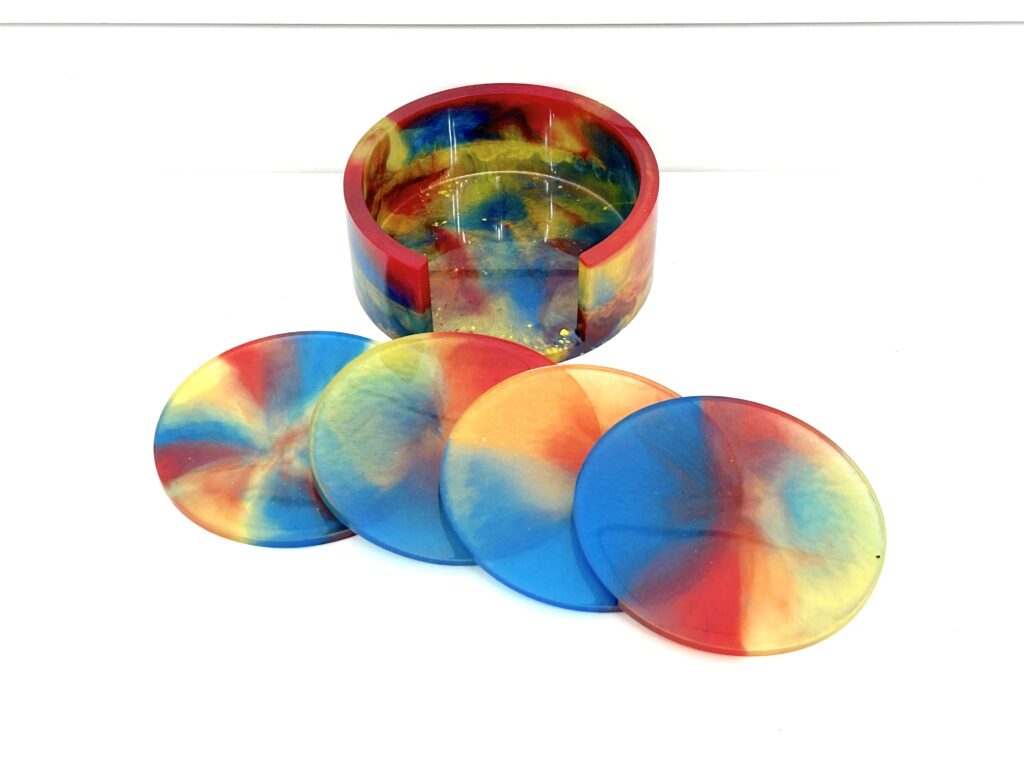
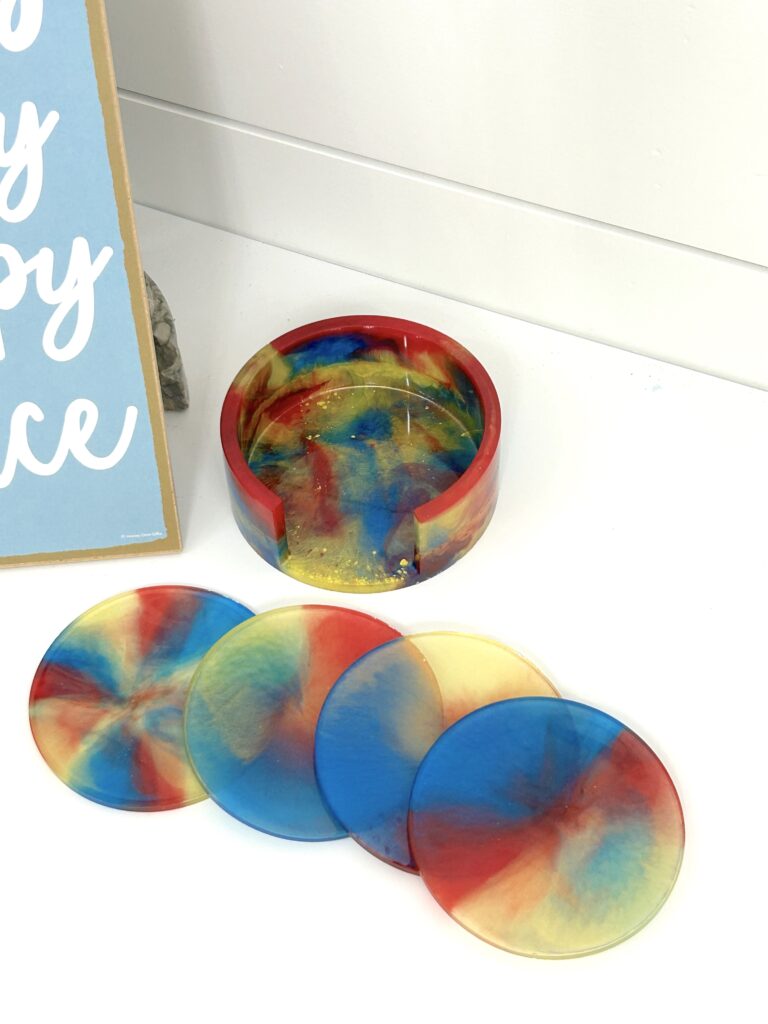
Step 7: The Grand Reveal
Once two hours had passed, I pulled out the resin pieces. I removed them from the molds and realized how pretty they are!
I also love that there is a holder to keep the coasters organized and in one place.
And look! There is room for four more coasters. Now I can do them in record time!
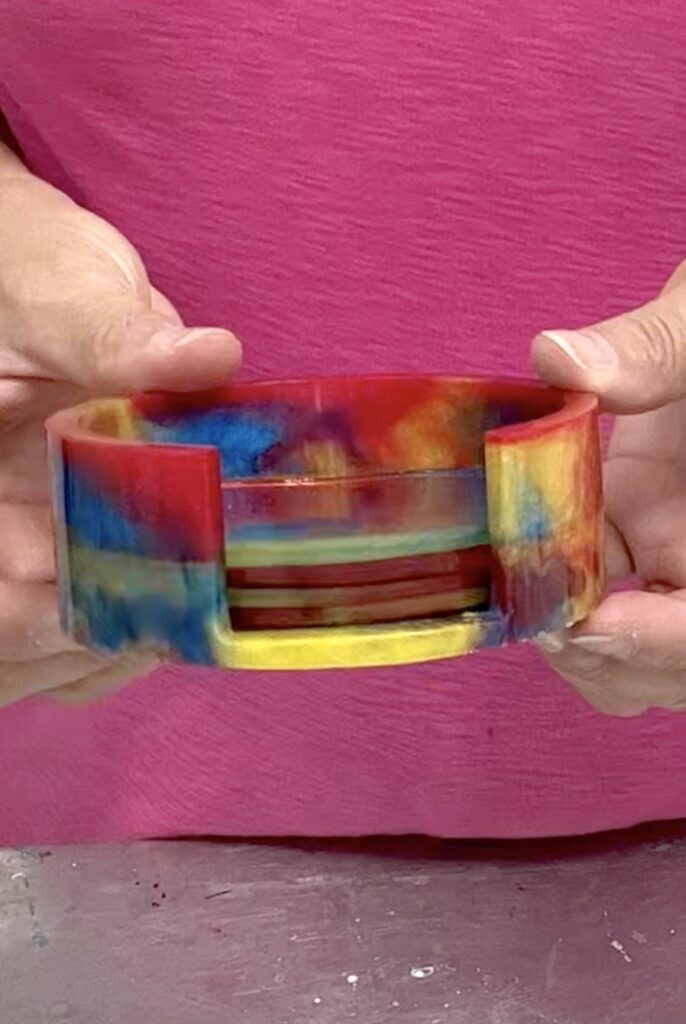
And look at the colors! So beautiful!
The mica set comes in so many colors. I wanted to go bold and bright. You might find the hardest thing about how to color-blend resin coasters is trying to figure out which color to use!
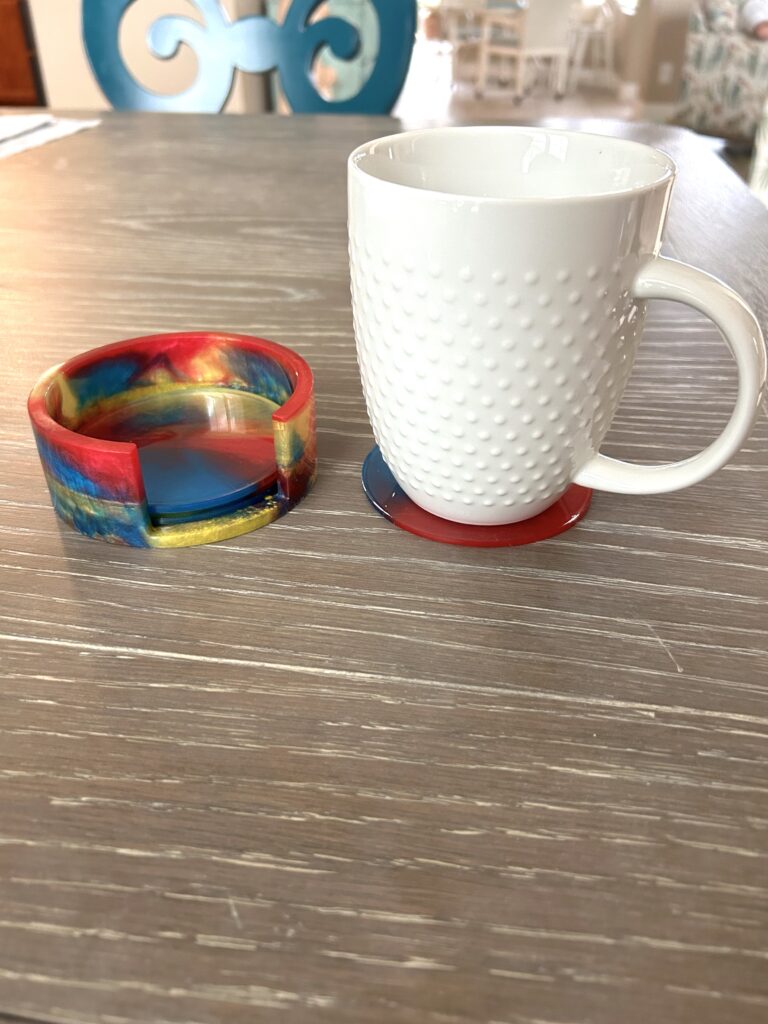
*Tip: If you plan on using your coasters for hot beverages, just make sure the resin you use is heat resistant.
They remind me of summer ice cream…like something I’d buy from the ice cream truck!
Remember to use the promo code CRAFTKLATCH for 10% off your order at Resiners.
You can also find Resiners amazing products a the Resiners Amazon Store.
One More Thing…
I have one more question:
Which excites you more, the blasting bubbles or fast curing?
Honestly, I’m on the fence and can’t decide. I’d love to hear what you think!
Thanks for stopping by! If you want to see a resin coaster set I made for Christmas, be sure to check out my Penguin Christmas Coasters!
Here are some of my favorite all-time coasters:
Remember: Life’s too short not to shimmer, so grab your glue gun and your glitter!™ Stay safe!
Mona