SUBSCRIBE to my YouTube Channel!
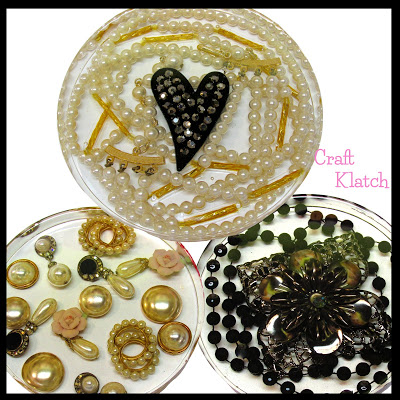
Today we are scrounging through old jewelry boxes and be sure to check garage sales, for broken or costume jewelry. They can create a very vintage look to the coasters.

The links below help support this channel, as I may earn a small commission at no extra cost to you.
You will need:
Coaster mold: http://amzn.to/2cmHwsW
Resin (use whatever resin brand you like):
Easy Cast: http://amzn.to/2yjYmBC
Art Resin: http://amzn.to/2yk9X3z
Clear Cast: http://amzn.to/2z4rxGw
FX Poxy: http://amzn.to/2AF3Pkk ~ According to the manufacturer, this one is heat resistant to 500 degrees F and is UV resistant.
Easy Cast: http://amzn.to/2yjYmBC
Art Resin: http://amzn.to/2yk9X3z
Clear Cast: http://amzn.to/2z4rxGw
FX Poxy: http://amzn.to/2AF3Pkk ~ According to the manufacturer, this one is heat resistant to 500 degrees F and is UV resistant.
Costume jewelry: Look around at garage sales or you your jewelry box!
Here is the video tutorial:
Directions:
1. Mix your resin, according to the package directions. I was making three coasters, so I did six ounces.
2. Pour resin into each cavity and pop bubbles with lighter.
3. Add your jewelry. TIP: If you plan on using earrings, do a little prep works and with a wire cutter, snip off the posts, so they will lay flat.
4. Pour any remaining resin over the jewelry. Some jewelry may float, so you want to allow it to cure before adding your finish layer.
5. Pop your bubbles and add more resin, to embed everything.
That’s it! After 12 hours, you can unmold it!!
Thanks for stopping by! Remember: Life’s too short not to shimmer, so grab your glue gun and your glitter!™ Stay safe!
Mona

