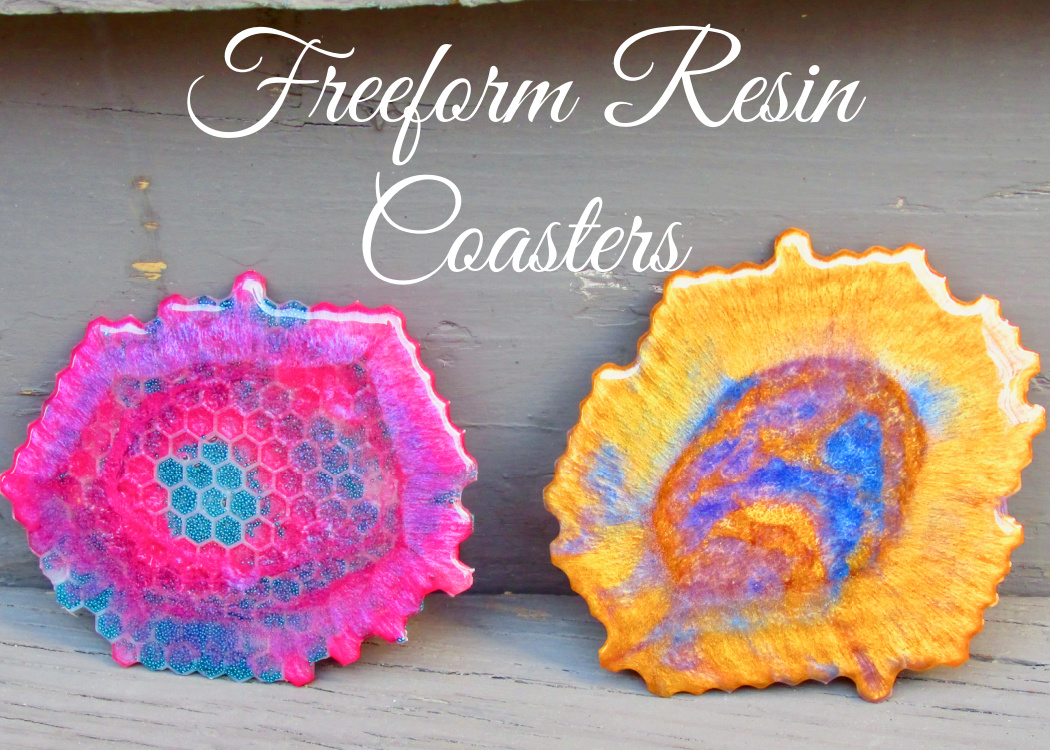
Have you ever wondered if you could free form resin? This is an easy project to start experimenting with a freeform resin technique.
They have a fun honeycomb texture and you can make them any color!
For any decor!
Free Form Resin Coaster Video Tutorial
I’ll explain it all later in the post, but here is a quick video tutorial so you can see exactly how I made them!
Supplies You Will Need to Make the Free Form Resin Coasters
*This blog uses affiliate links. As an Amazon Associate I earn from qualifying purchases, at no additional cost to you.
- Resin
- When deciding on which resin to use for your coasters, you need to keep in mind whether you want it just for cold cups or for hot ones as well.
- If only for cold drinks, you can be flexible and use whatever brand you like:
- If you want it to work for both hot and cold drinks, you need to look for a heat-resistant resin, like these:
- Stone Coat (Quick coat)
- Stone Coat (Heat resistant)
- FX Poxy ~ According to the manufacturer, this one is heat resistant to 500° F.
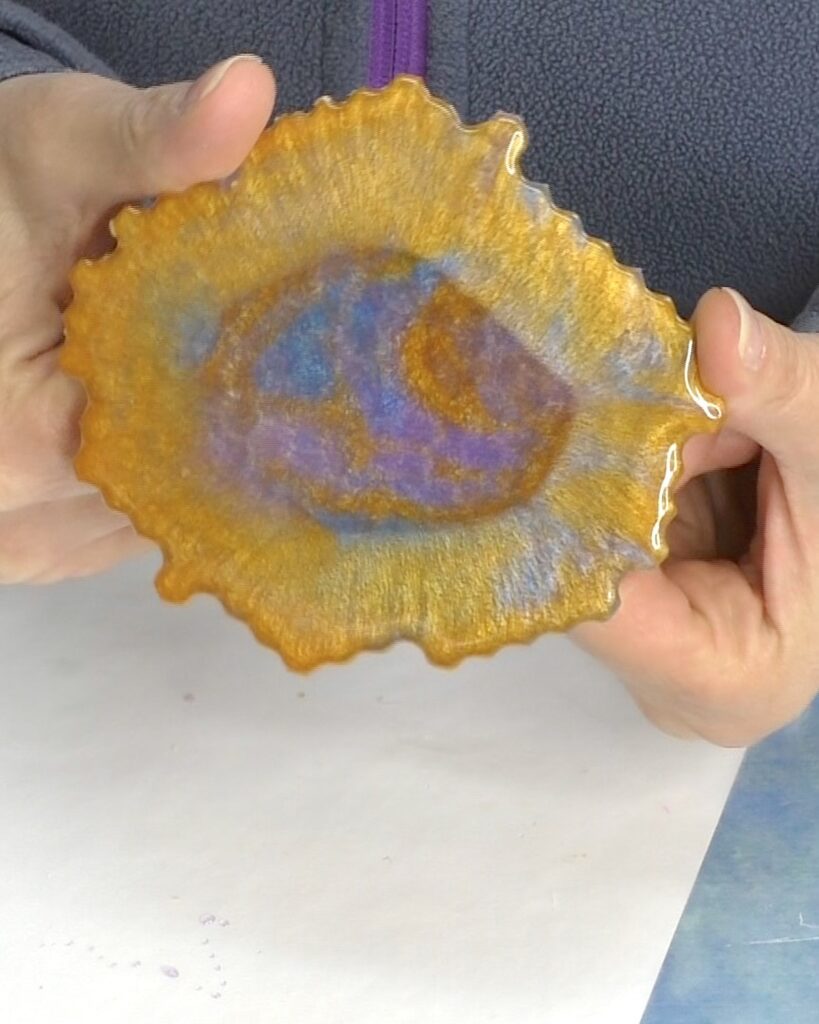
Directions for Free Form Resin Coasters (First Version)
I found this silicone hot pad and thought it would make a great base for a resin project… of course I thought coasters!
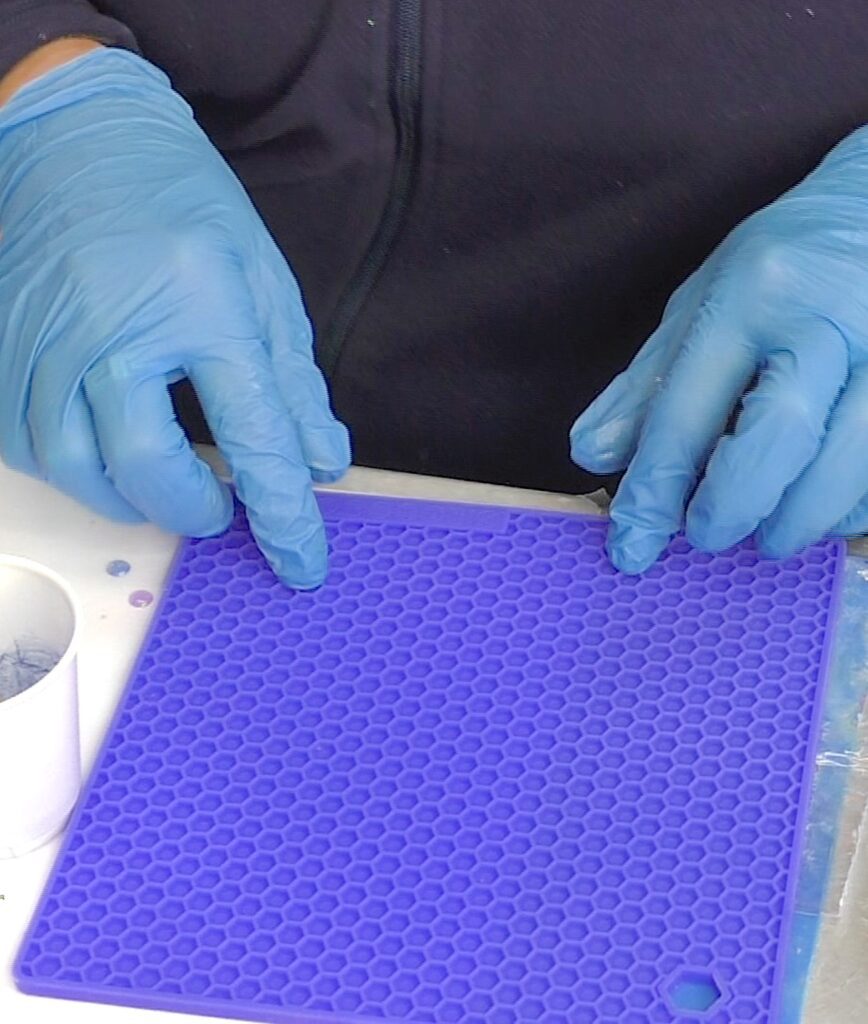
Step 1
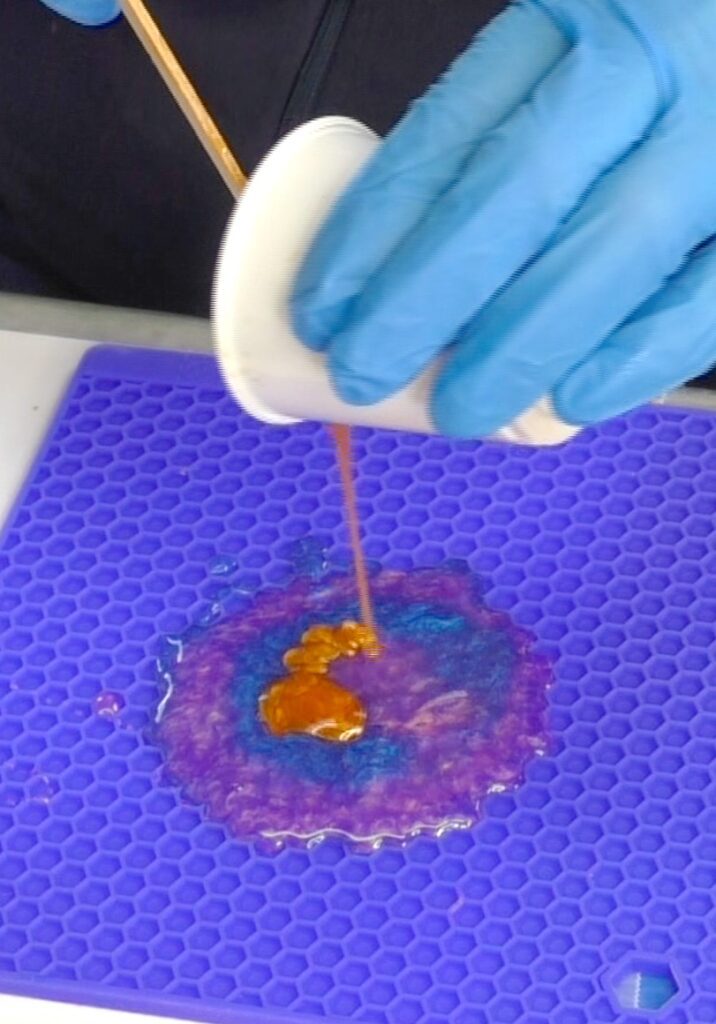
Using leftover resin from other projects, I decided to make coasters. I had about an ounce and I had divided it and mixed different pigment colors into it.

Step 2
I poured the different colors on the silicone mat…the blue, the pink, the yellow.
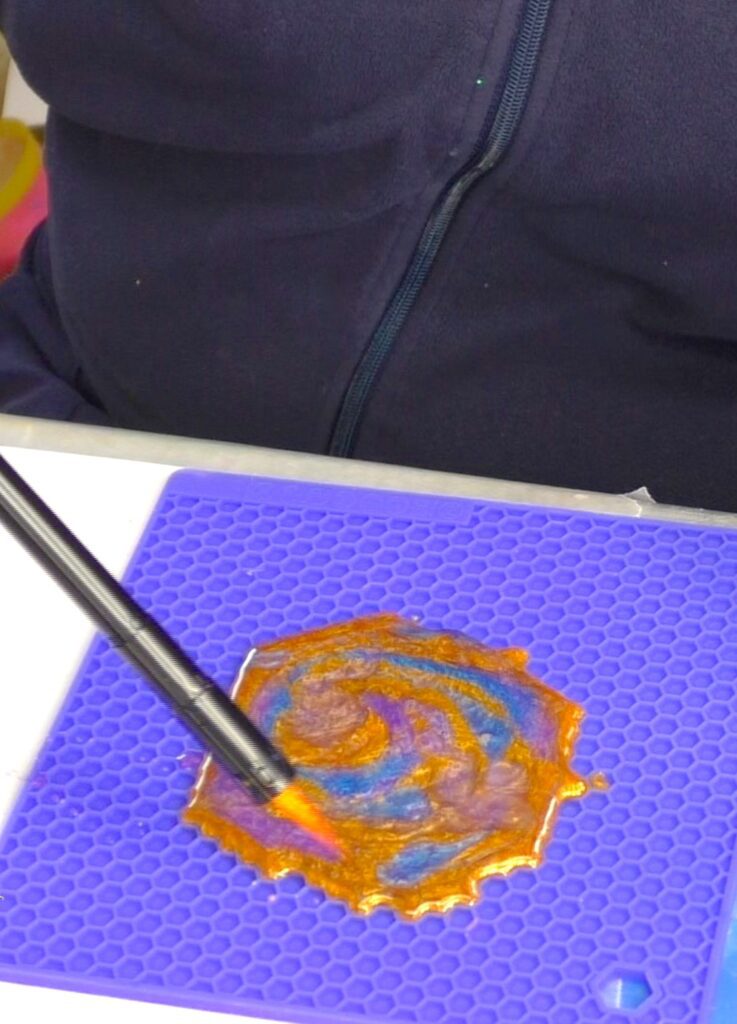
Step 3
I used my lighter to pop the bubbles and let them cure for a minimum of 12 hours.
After the 12 hours, I peeled them off the mat and Viola! a free form resin coaster!
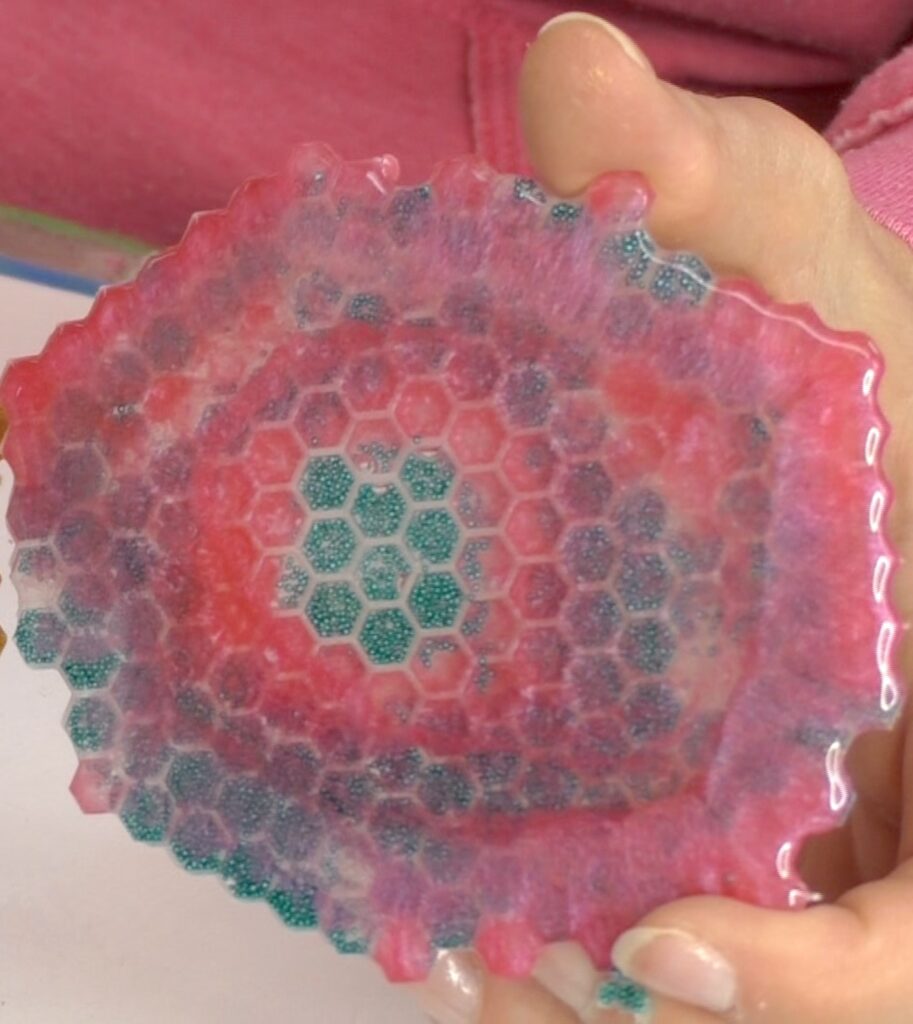
Directions for Freeform Coasters (Second Version)
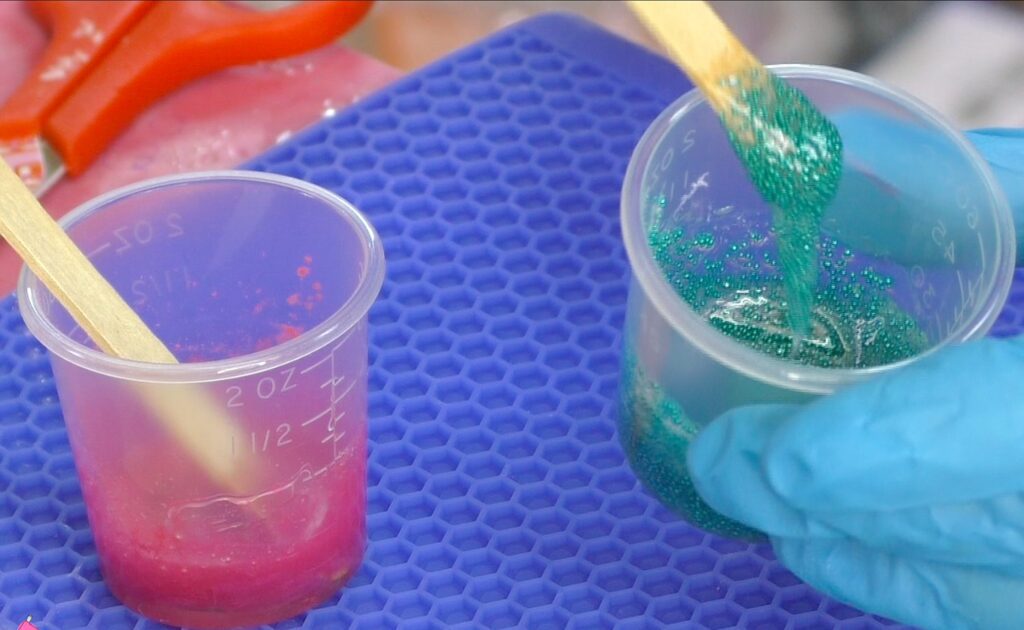
Step 1
I divided one ounce of resin into three cups. The first has pink pigment powder, the second blue microbeads and the third was left clear.
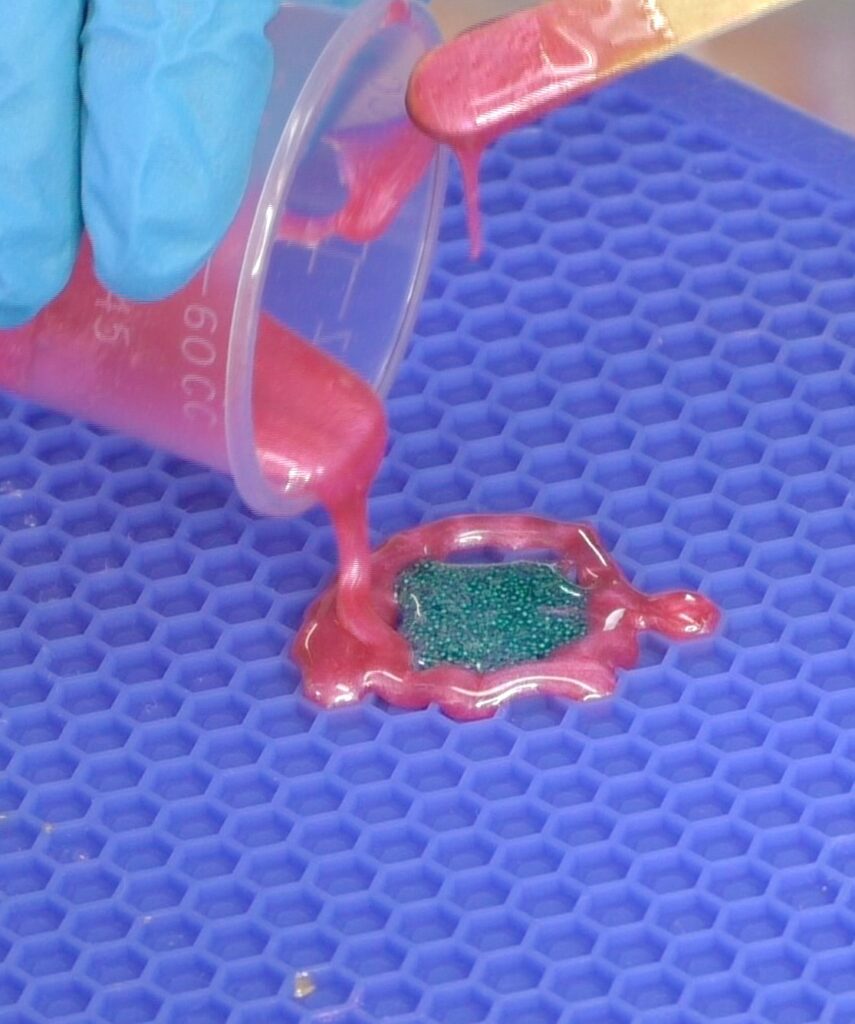
Step 2
I poured some of the microbeads, followed by the pink around it and then repeated. I finished it off with clear so the microbeads would not get covered by the pink.
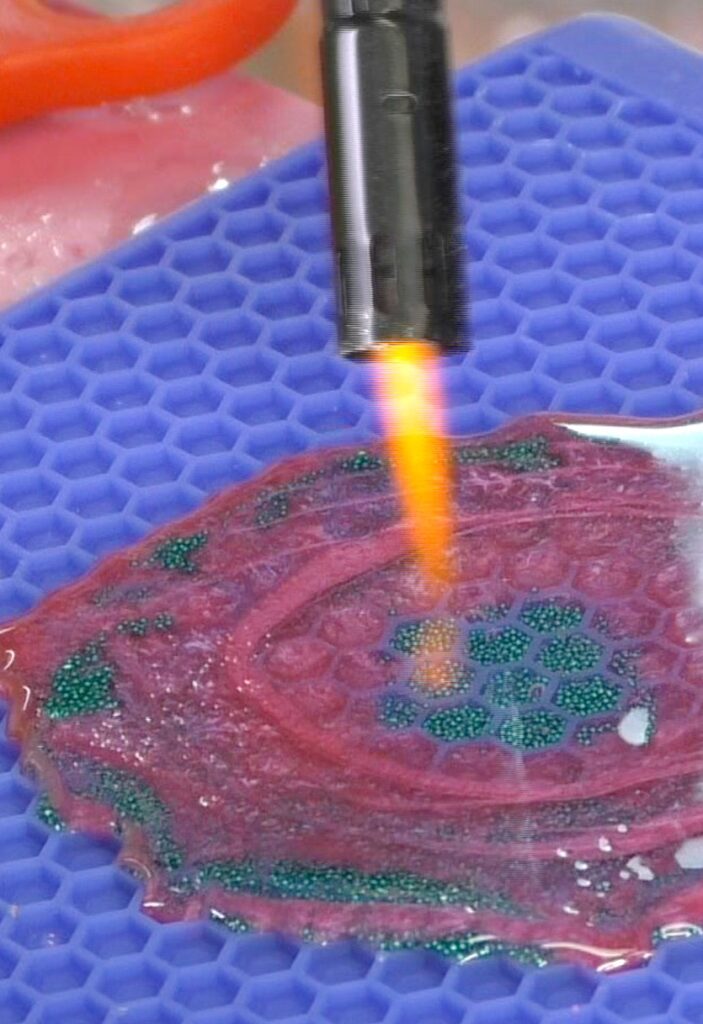
Step 3
I used my lighter to pop the bubbles and let it cure for a minimum of 12 hours. It does not get any easier than that!
Once cured, I peeled it off and I had another freeform resin coaster!
That’s it! I hope you give them a try!
Other Fun Coasters
- Alcohol Ink Coasters
- Not Your Grandma’s Doily Coaster
- Color Shift Paint Coasters
- Rainbow Resin Coasters
- Crater Coasters
Of course, if you are looking for more freeform coasters, these two are my favorite!
Thanks for hanging out!
Remember: Life’s too short not to shimmer, so grab your glue gun and your glitter!™ Stay safe!
Mona
You surprised me. These coasters aren't at all what I was expecting. Rather unique and kind of mod. Cool!