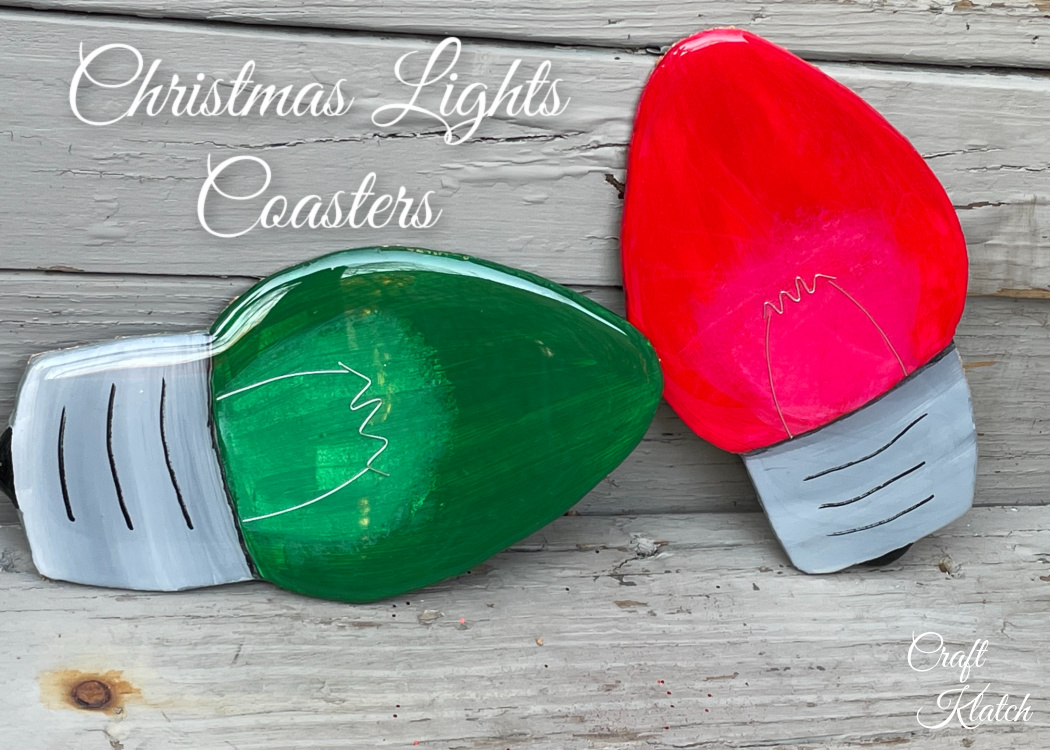
Make some DIY Christmas Light Coasters to brighten your holiday decor! It’s an easy resin project to make unique Christmas decorations.
Do you want something a little different for your holiday decorating? When you think of Christmas decorations, Christmas lights have to be at the top of the supply list!
What if you can make some really big and really fun DIY Christmas lights?
Well, that’s what we are making today!
We are making them as coasters, to satisfy my coaster obsession. However, think beyond the coaster and how they can be used in different ways! Let me give you some festive ideas!
*This blog uses affiliate links. As an Amazon Associate I earn from qualifying purchases, at no additional cost to you.
5 Ways to Use the DIY Christmas Light Coasters Not As Coasters
- Create a garland. You can do this with the wood and resin, or just a paper (card stock) version. Use a rope, string, or ribbon and glue the paper or lightweight wood Christmas lights to the ribbon and hang it up as a decorative garland. It’s a really easy DIY! Be sure to have the kids color the lights, so they can feel involved too!
- Wall Decor. Create the coasters as directed below, but the cork backing is optional. Then, use the removable strips, that you can hang on the wall. You can have a whole wall full of these Christmas lights, or scatter them about. When the holidays are over, you can simply remove them without damage to your wall.
- Add to a Wreath. They are a great stand-alone decoration, but you can also add them as a decorative holiday element to a wreath or sign.
- Yard Decor. As long as you have them sealed on both sides, you can glue or use a removable strip and add them to a stick or garden stake. You can post them along a walkway or line the driveway.
- A Sign. You can use a simple strip of wood or a larger piece of wood and attach the lights. You can size them as you wish and put a letter on each one to spell out MERRY CHRISTMAS, or if you’d rather not make 14, you can keep it simple and just do JOY.
Onto the project! You can find the free template and video tutorial at the end of this post.
If you are into Christmas lights, I do have a Christmas Lights Coaster that is TOTALLY different than this one!
If you are wondering which Christmas coaster is my most popular you can find that one HERE!
Supplies You Will Need to Make The DIY Christmas Lights
You probably have a lot of these supplies already! Otherwise, I have linked the supplies, so you can easily find them!
- Hardboard
- Acrylic Paint Set (green, white, gray, red, black)
- Red & Green Acrylic Paint
- Thin silver wire
- Clear drying glue
- Tape
- Petroleum jelly
- Cork shelf liner
- Craft knife
- Saw
- Resin
- When deciding on which resin to use for your coasters, you need to keep in mind whether you want it just for cold cups or for hot as well.
- If only for cold drinks, you can be flexible and use whatever brand you like:
- If you want it to work for both hot and cold drinks, you need to look for a heat resistant resin, like these:
- FX Poxy ~ According to the manufacturer, this one is heat resistant to 500° F.
- Stone Coat
- When deciding on which resin to use for your coasters, you need to keep in mind whether you want it just for cold cups or for hot as well.
Directions On How To Make The Christmas Light Coasters:
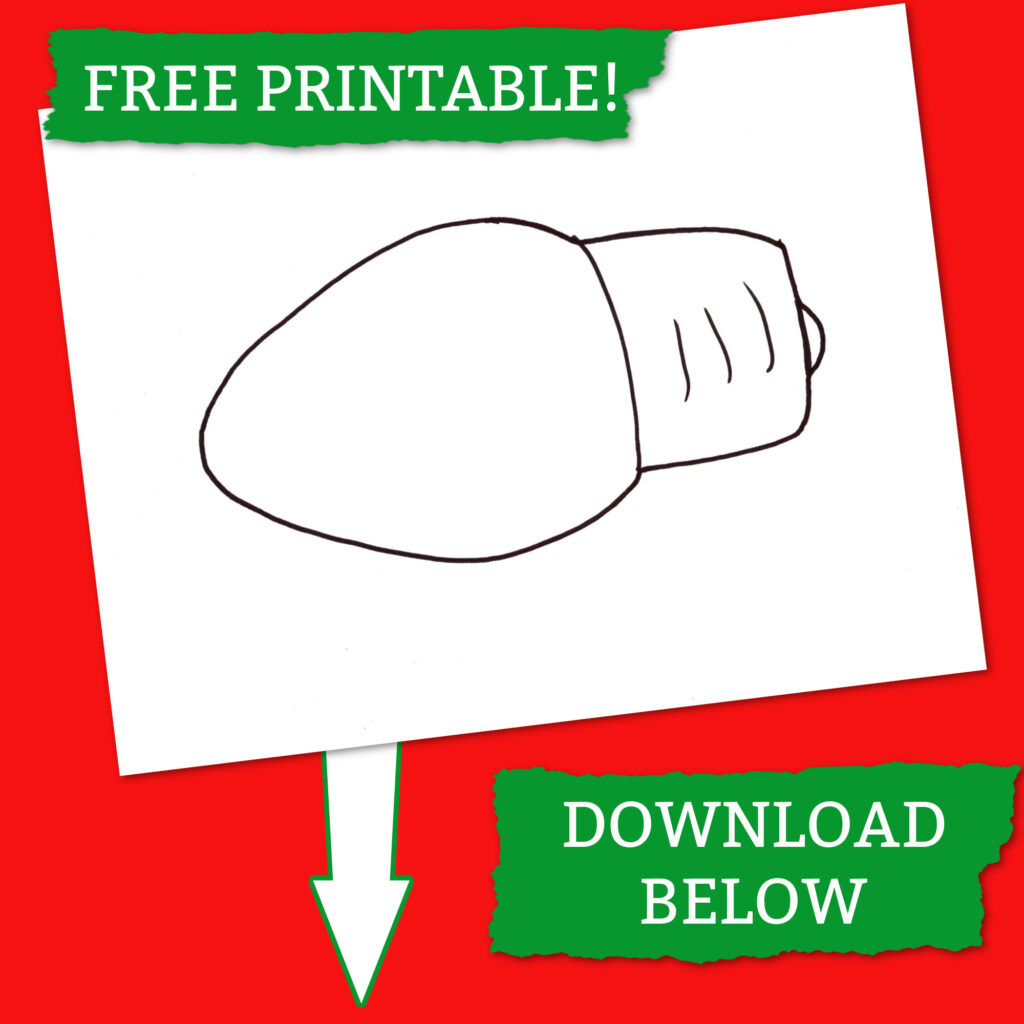
I have a free template at the end of this post that you are welcome to use. However, don’t hesitate to create your own as well! It’s such an easy design.
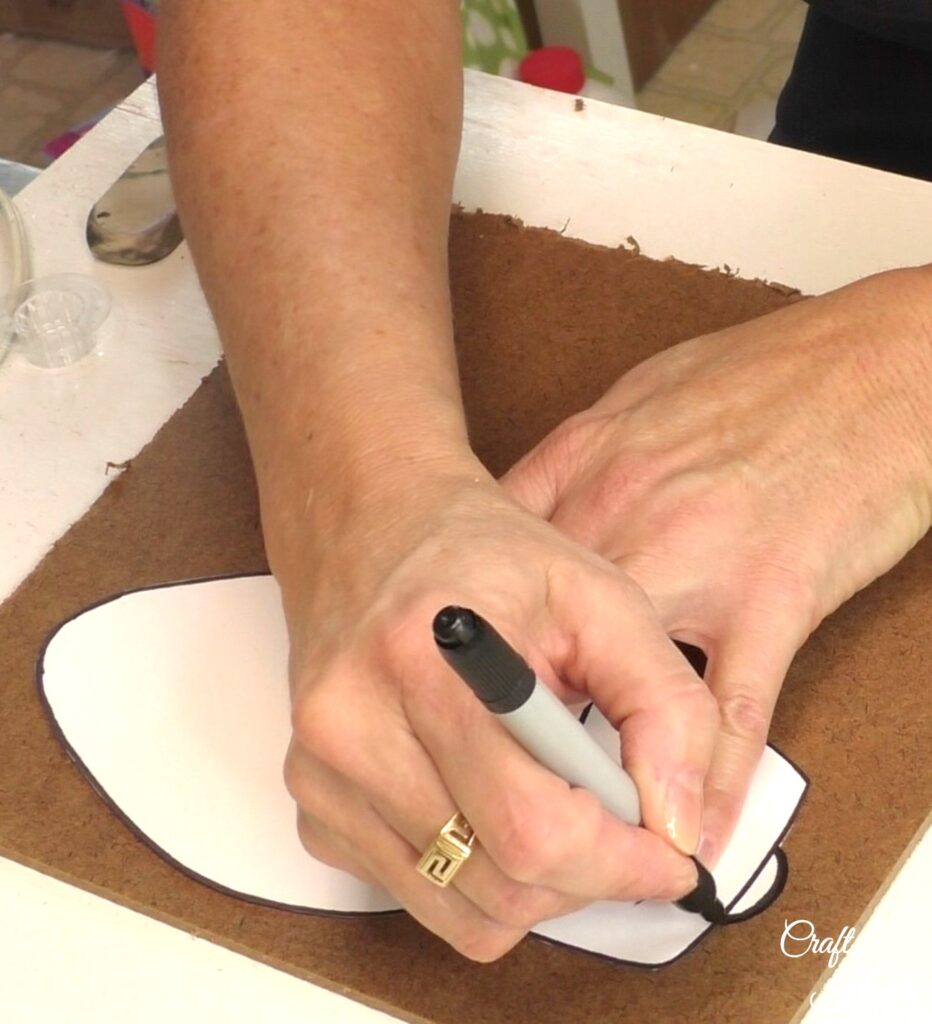
Step 1: Design Your Christmas Lights
Draw out the lightbulb, on paper, and cut it out.

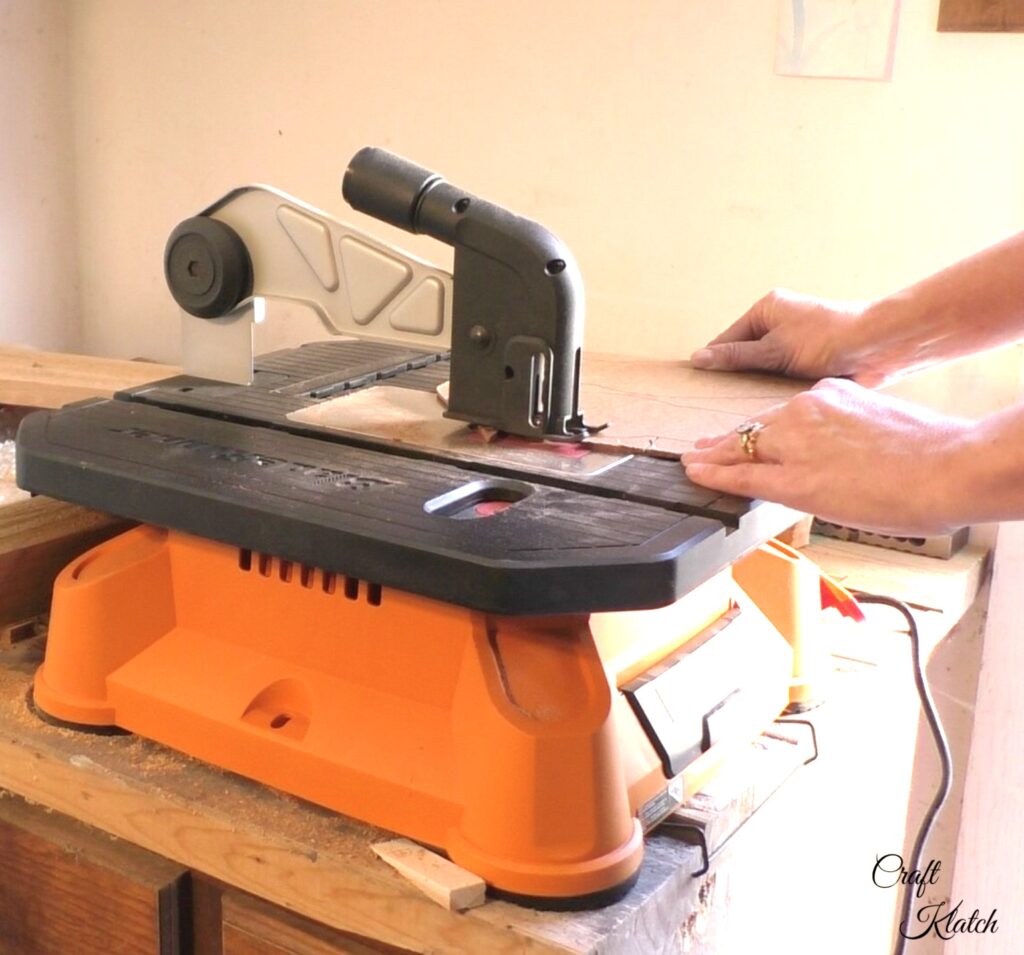
Step 2: Cut Out the Lights
Trace the template onto the hardboard and use an awesome saw to cut it out!
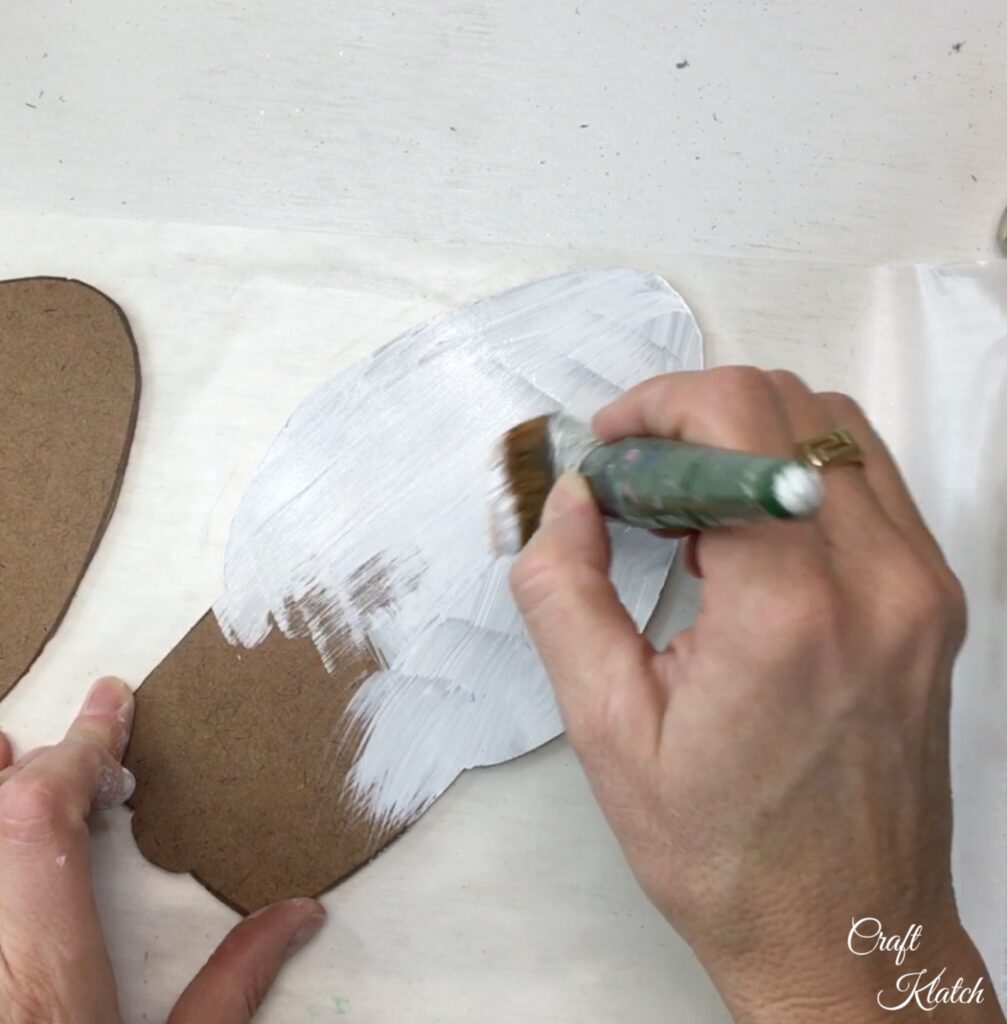
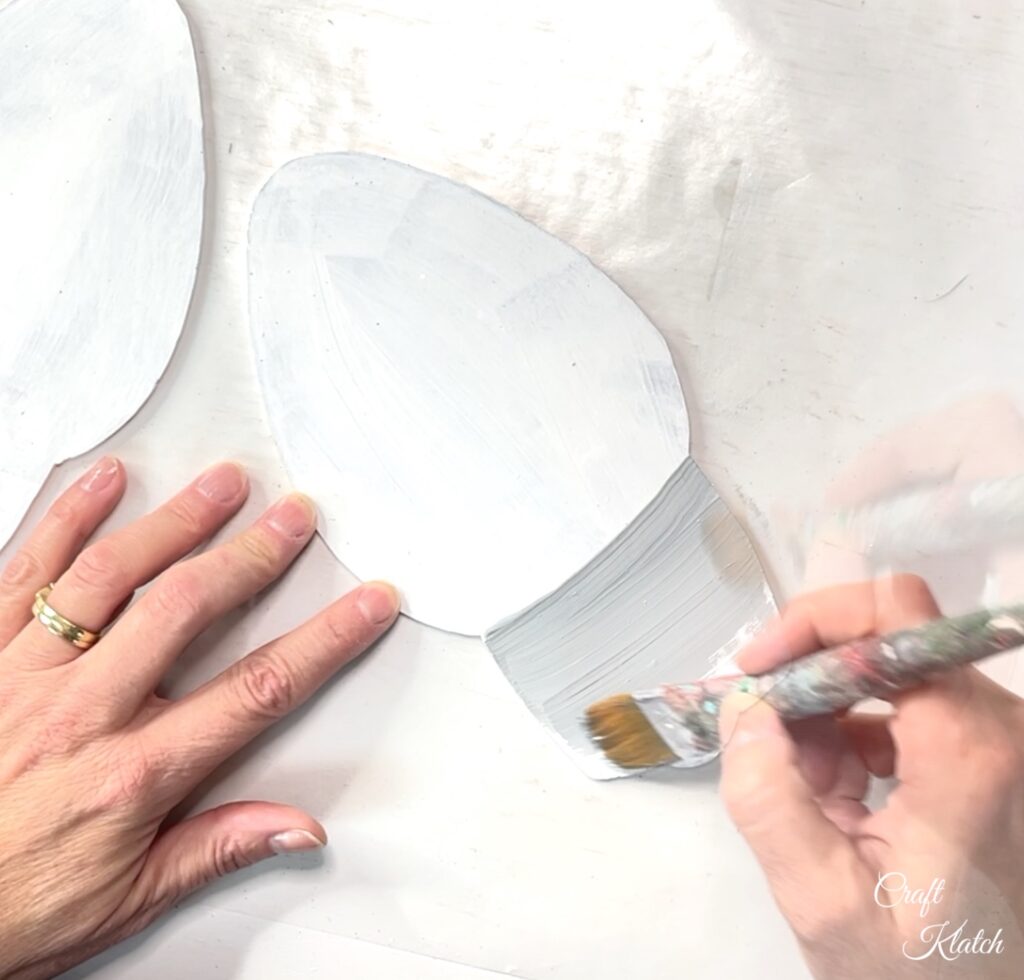
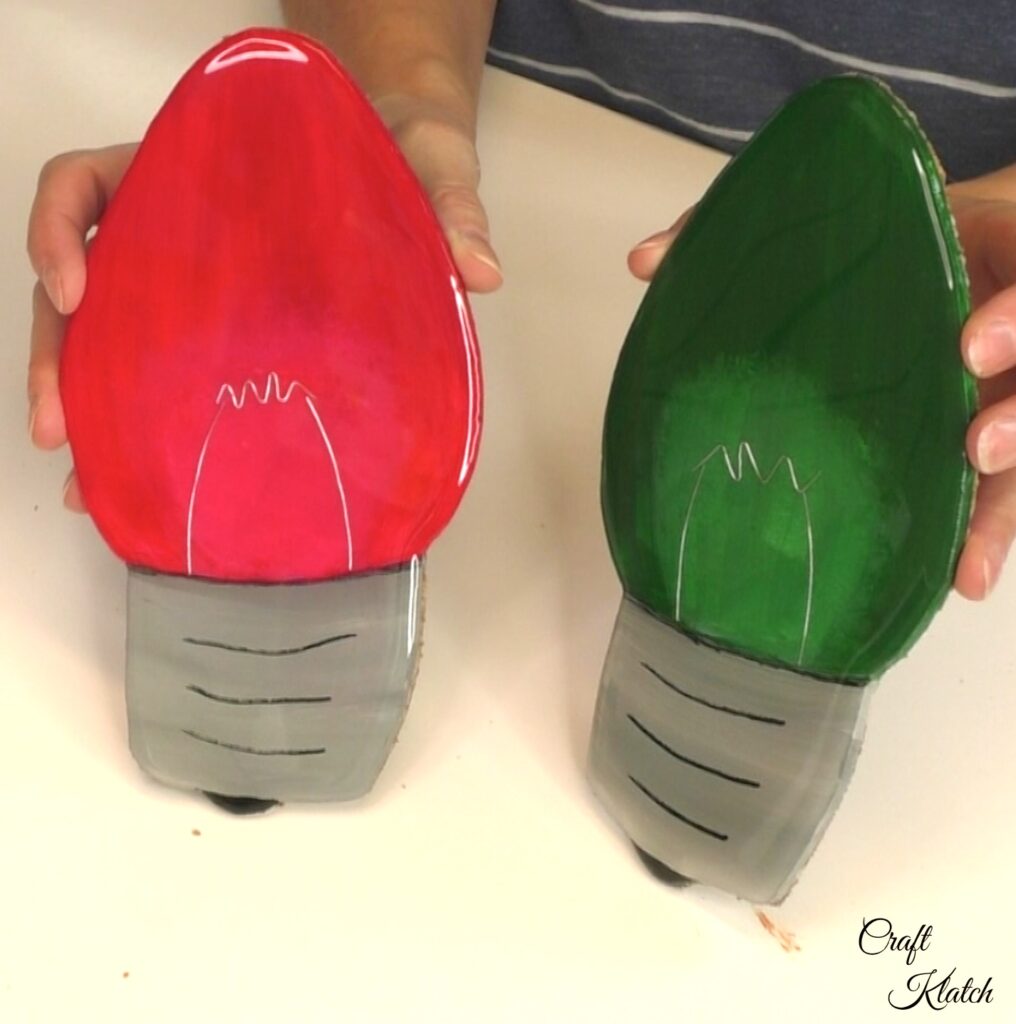
Step 3: Paint The Lightbulbs
The hardboard is dark and we want to give it a fresh base. Use white acrylic paint to paint the front, back and don’t forget the edges.
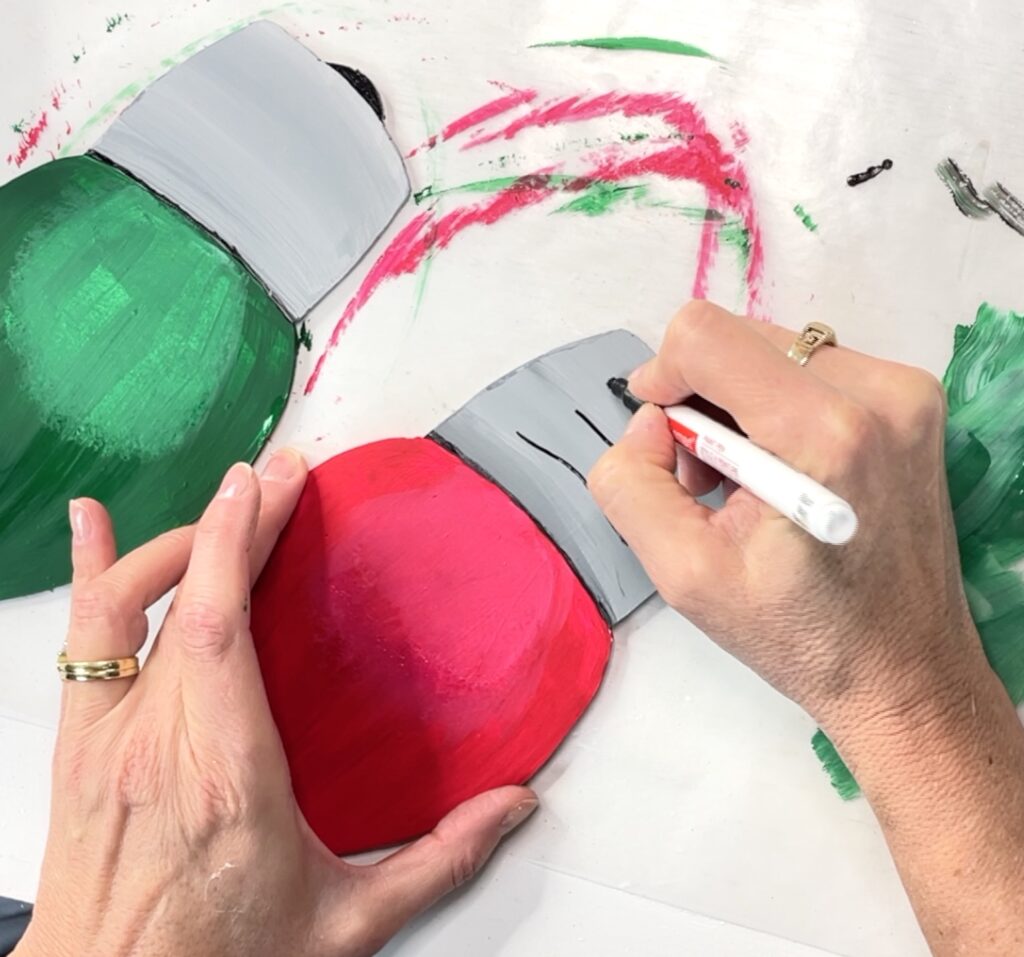
Step 4: Paint The Base
Gray or silver paint is perfect to paint the base of the bulb. You could also go gold. I used two different grays on the same brush and the blended together nicely as I was painting.
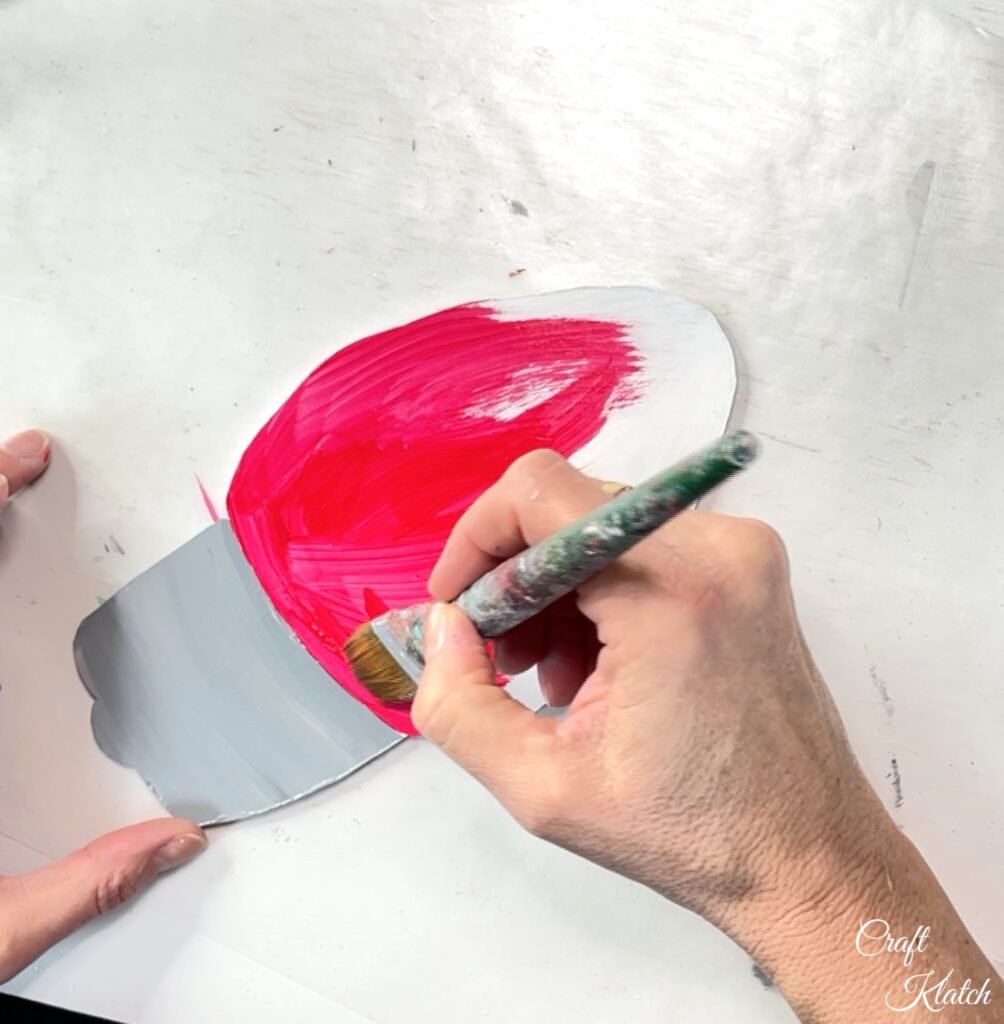
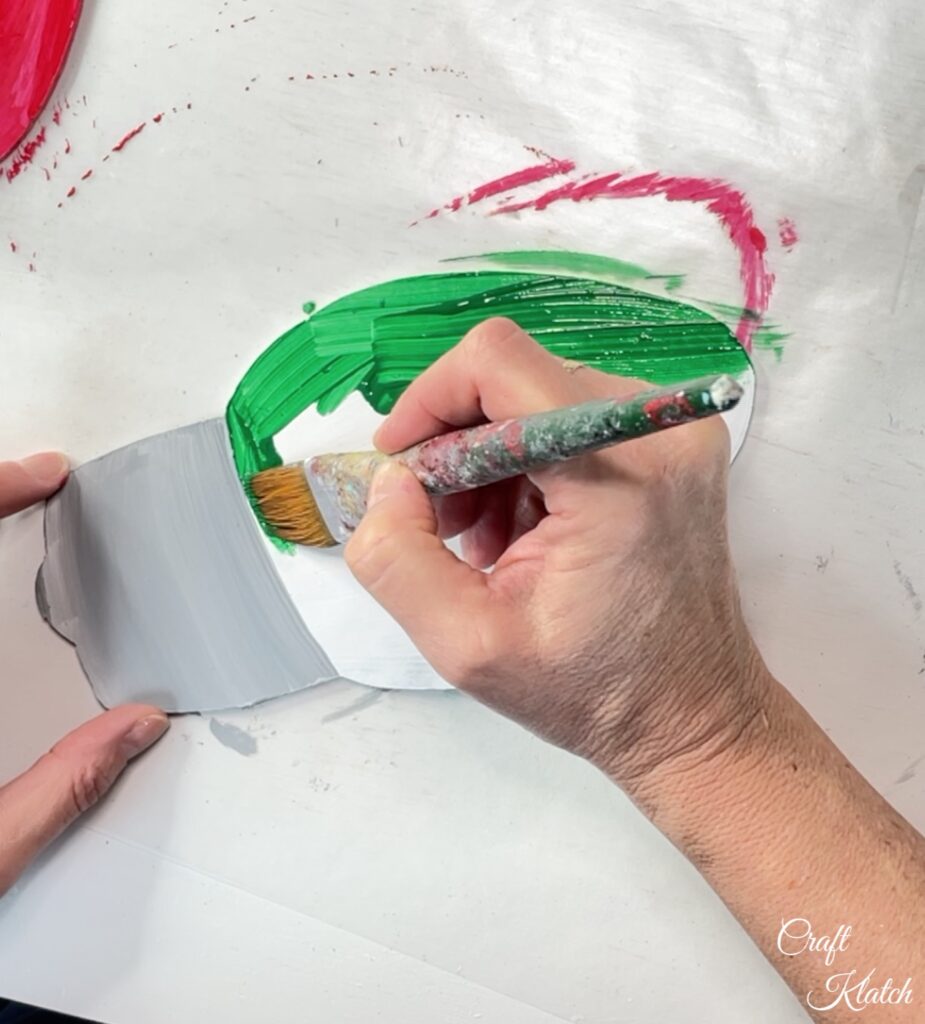
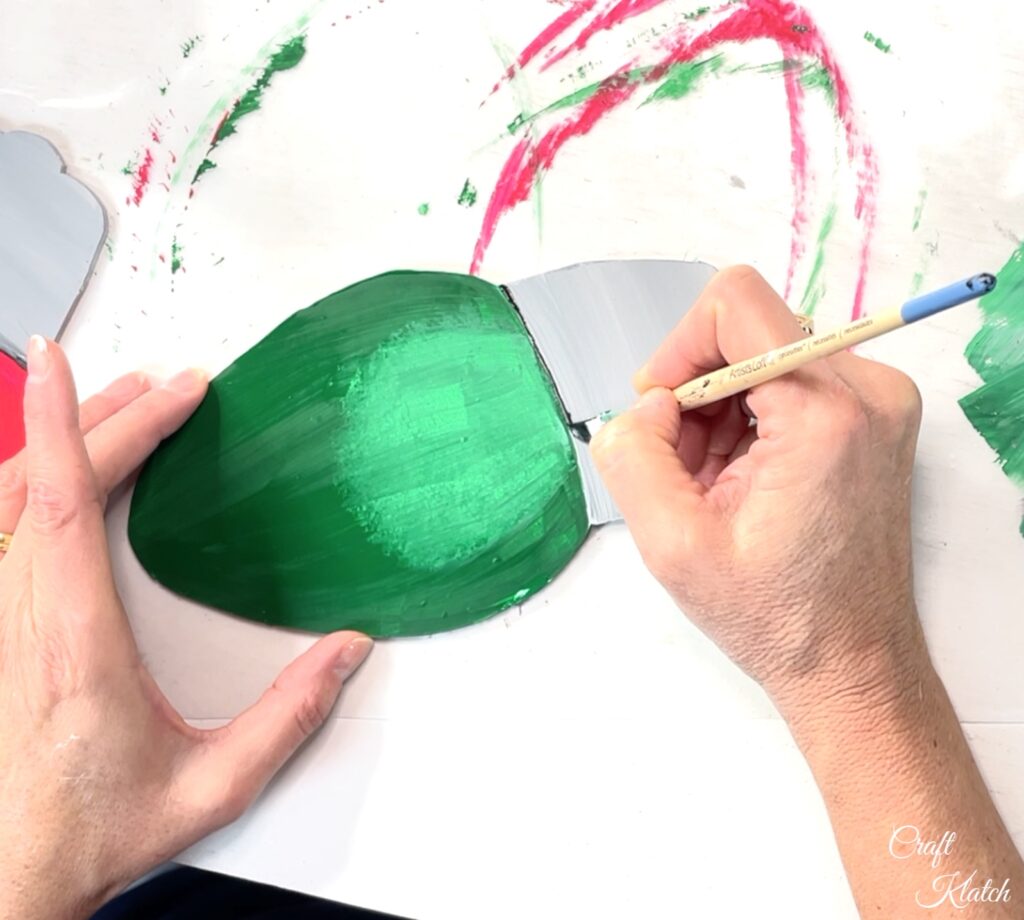
Step 5: Bright Colors For The Christmas Lights
Paint the Christmas lights bright colors. Plan on two coats. I went traditional green and red, but if you are making a set, all colors should be welcome. Yellow, blue, orange, etc. Or if you are doing untraditional colors, like more a frosty blue and white, do blue and white bulbs.
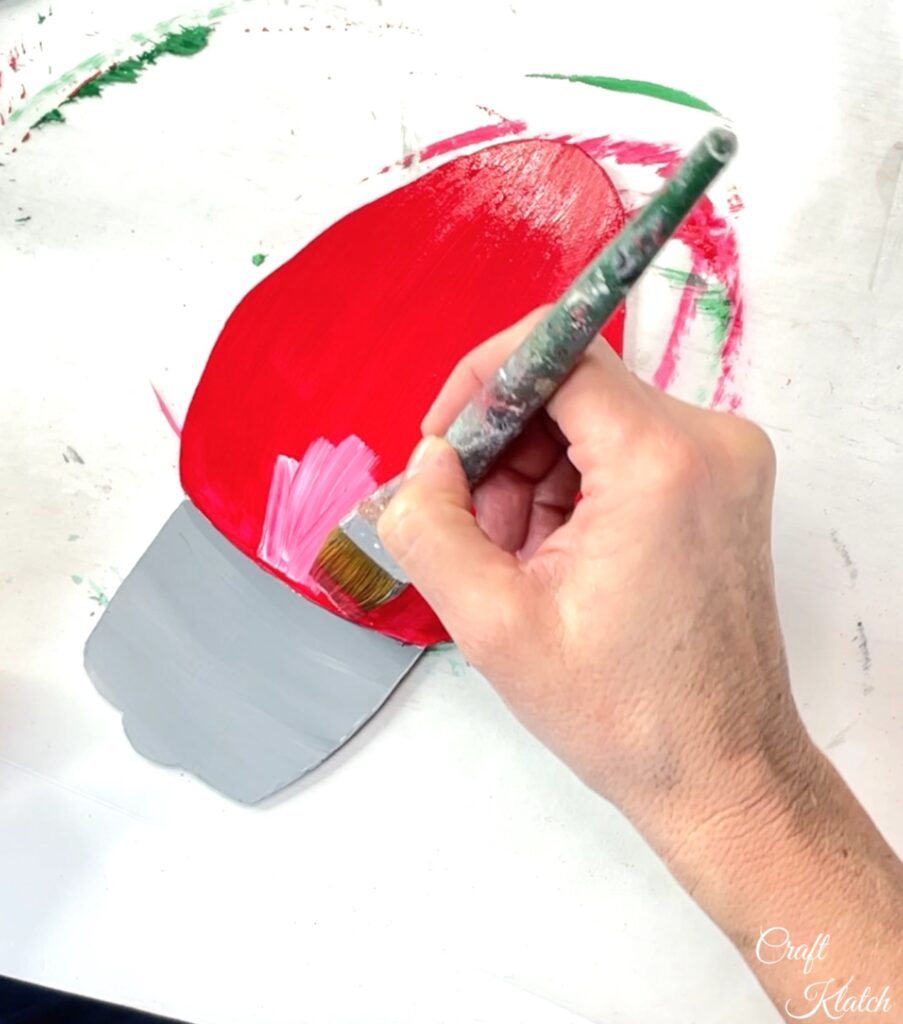
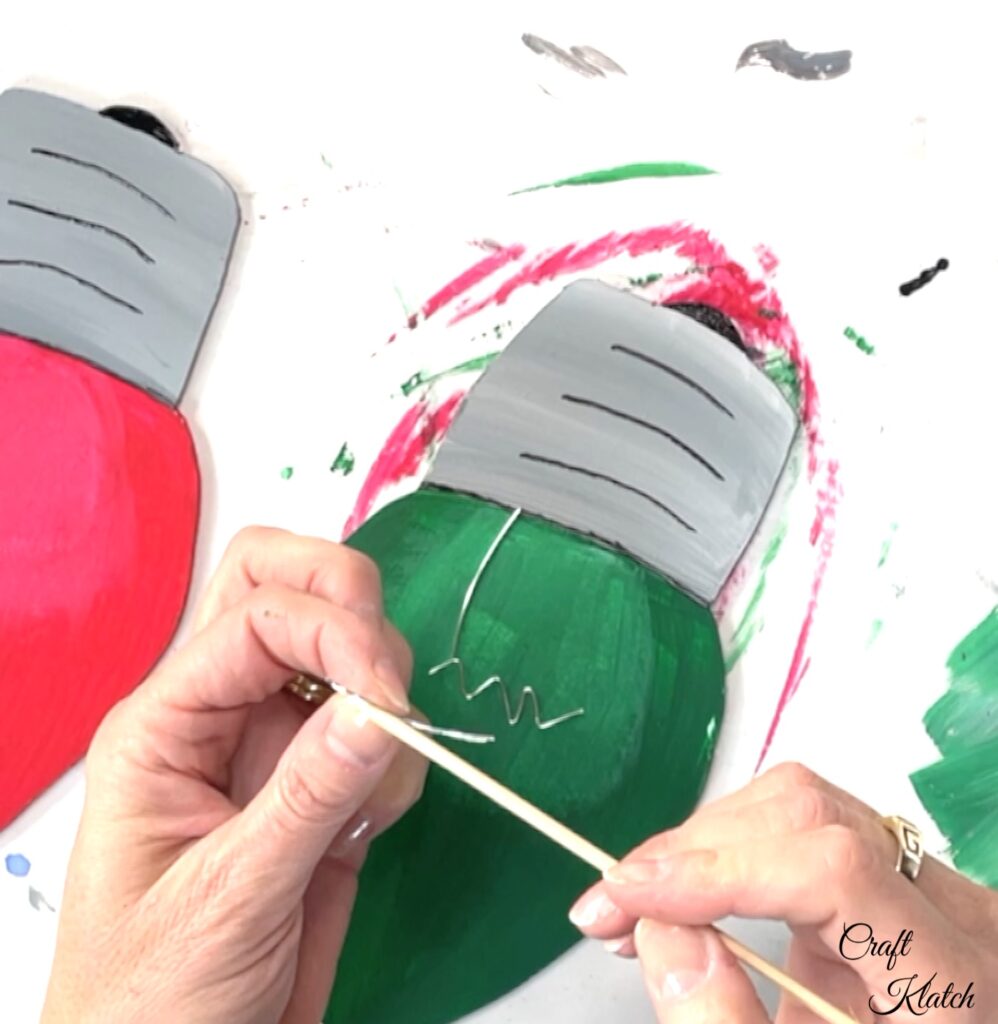
Step 6: Inner Light
When you look at a lightbulb, you will notice that there is a wire filament. When the lightbulb is lit, the area by the filament is lighter and I tried to recreate that. Use white and red paint and blend, blend, blend until it looks like a diffused light.
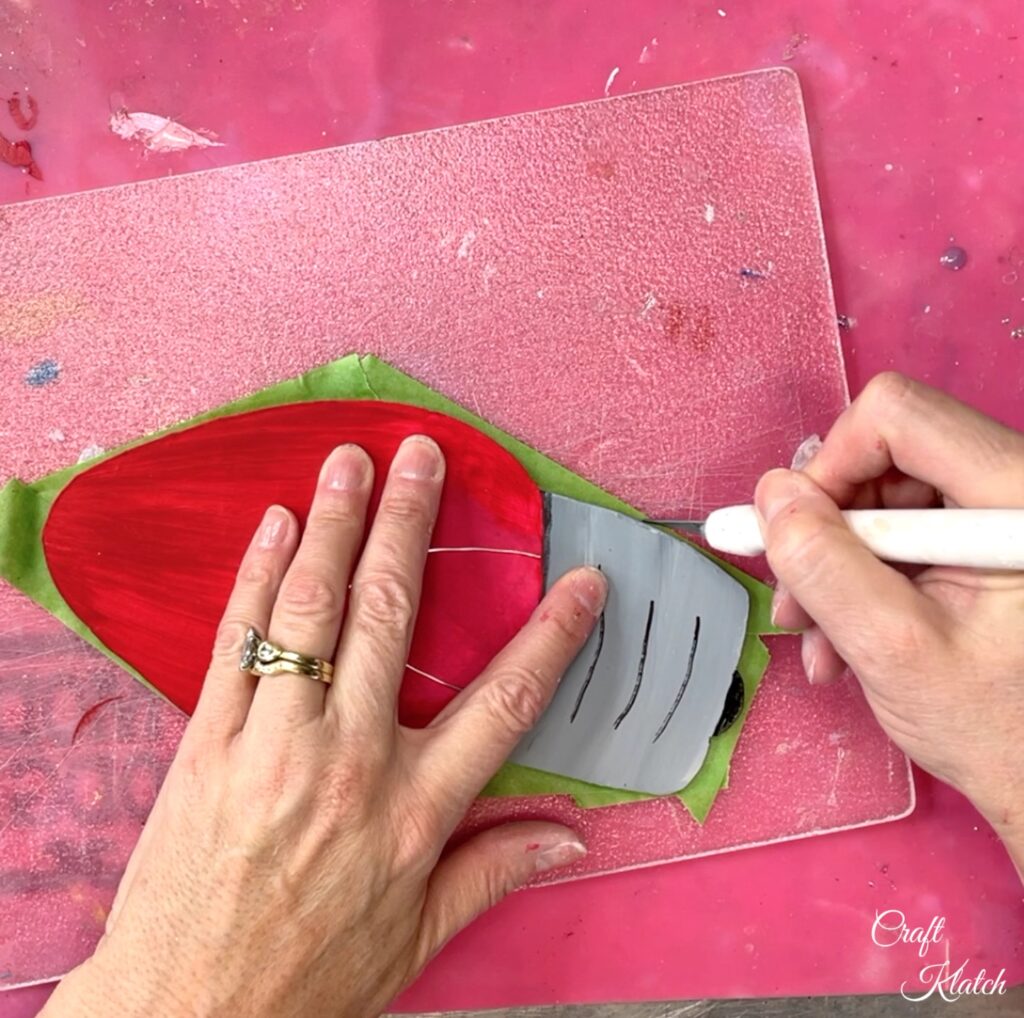
Step 7: More Details
Paint on the details, like a shadow under the bulb and the tread on the base.
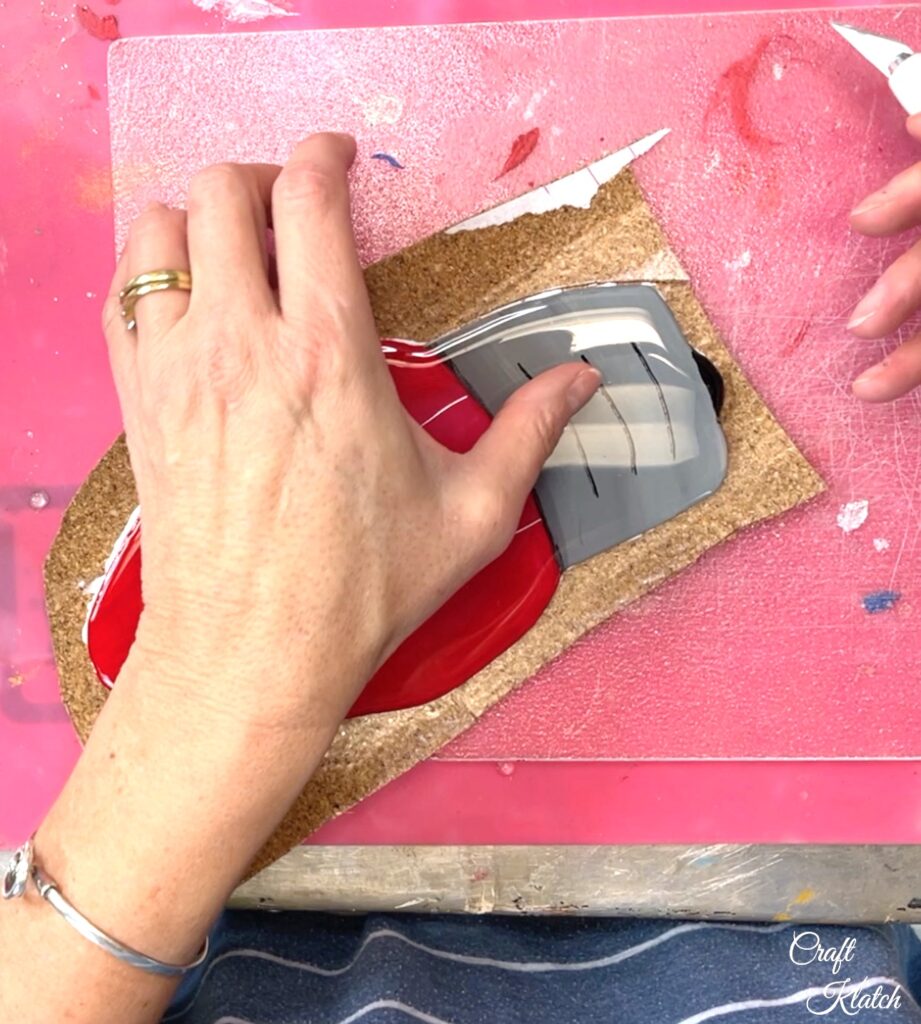
Step 8: A Little Extra Detail
Take some thin wire and cut two straight strips and on strip that you can bend into a zig zap pattern. That will make the filament.
It’s important to make sure you use thin wire and when you bend it, you still want it to lay flat.
If it is raised, you risk the resin not properly covering it and having a lump on your coasters.
Use a clear drying glue to attach the wires.
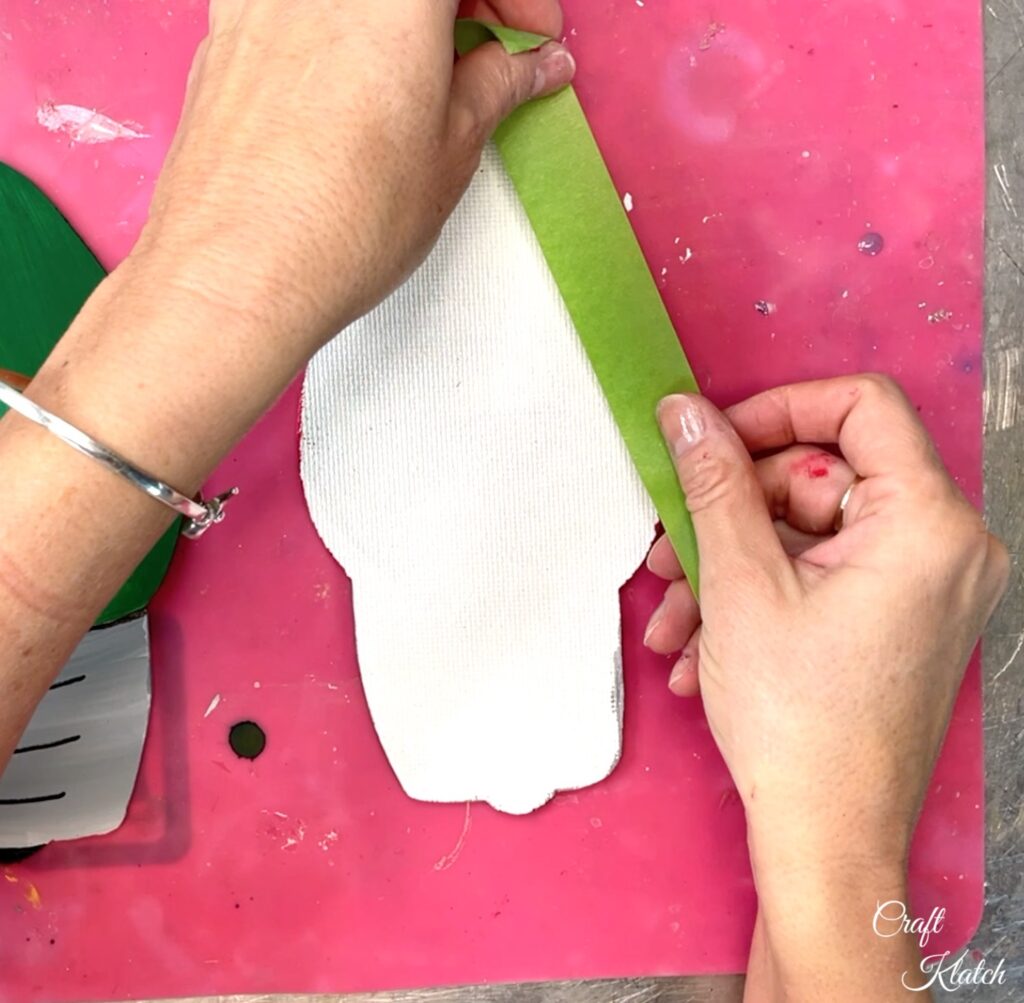
Step 9: Add Tape To The Bottom
Add tape to the bottom edge of the coaster. This is to catch the resin drips, so they don’t get stuck to the wood.
Then trim off the excess with your craft knife.
TIP: I like to put a little bit of petroleum jelly along the outer edge of the tape, so the resin drips pop off that much easier.
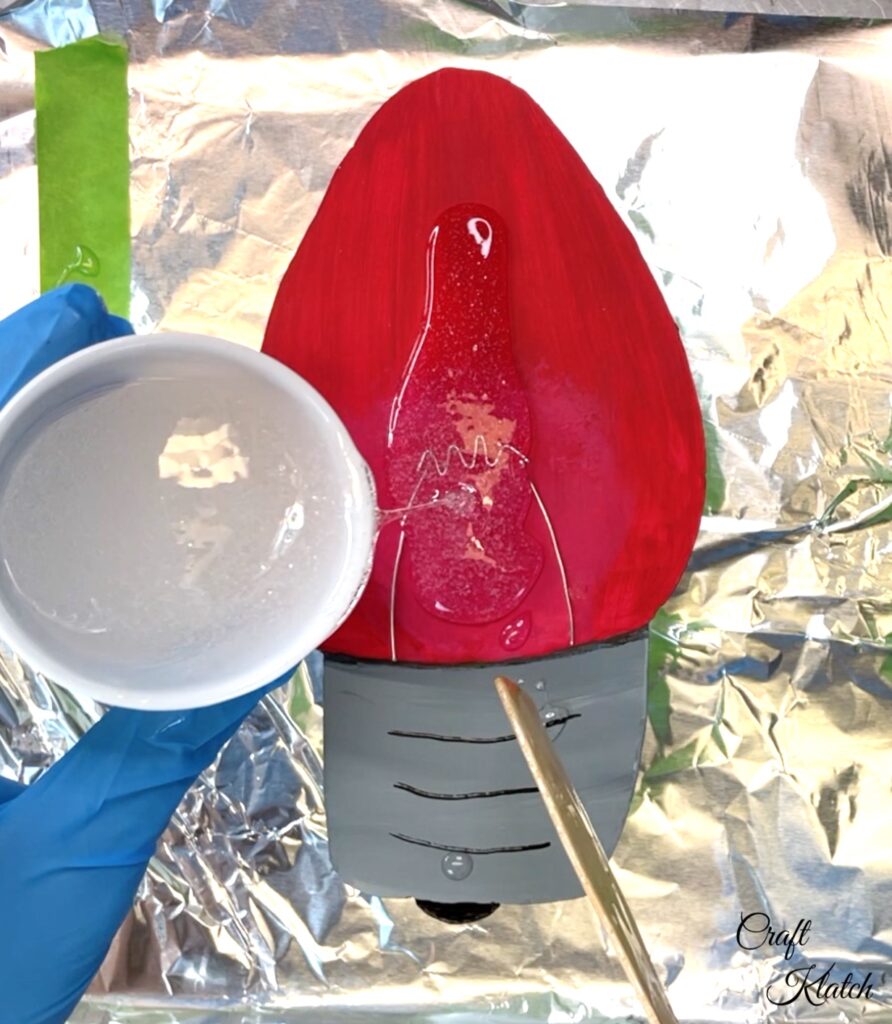
Step 10: Time For The Resin
Mix your resin. About three ounces should be enough for two coasters. Make sure you help it move around if it needs it. Use your stir stick to make sure it gets to the edges.
You want it to drip over the edges because you want the edges to be protected too.
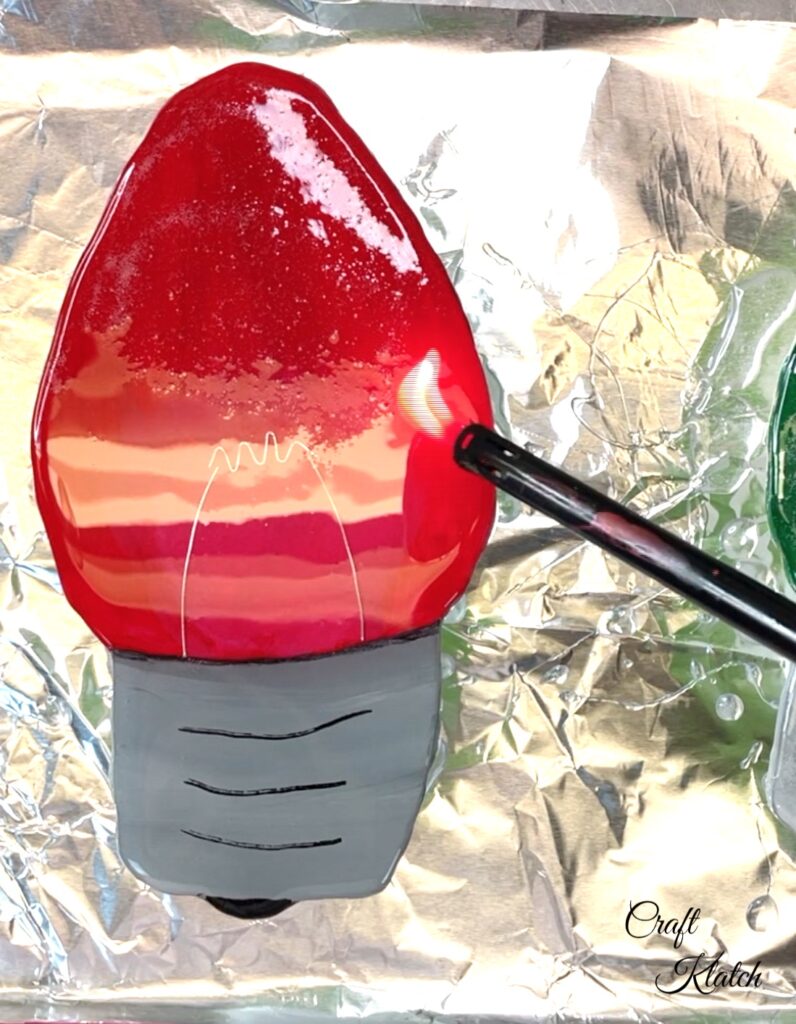
Use a lighter or a torch to pop the bubbles in the resin. Make sure to let them sit undisturbed for a minimum of 12 hours.
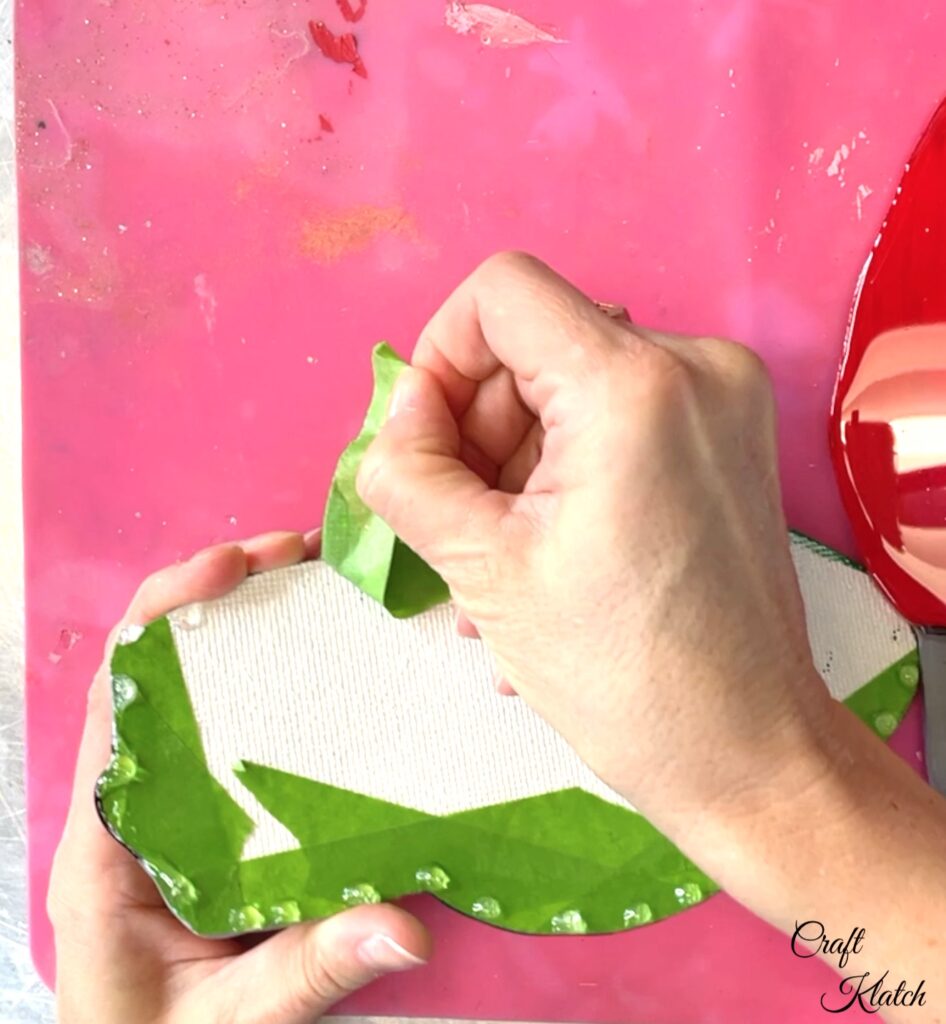
Step 11: Remove The Tape
Once the resin has cured, remove the tape from of the back.
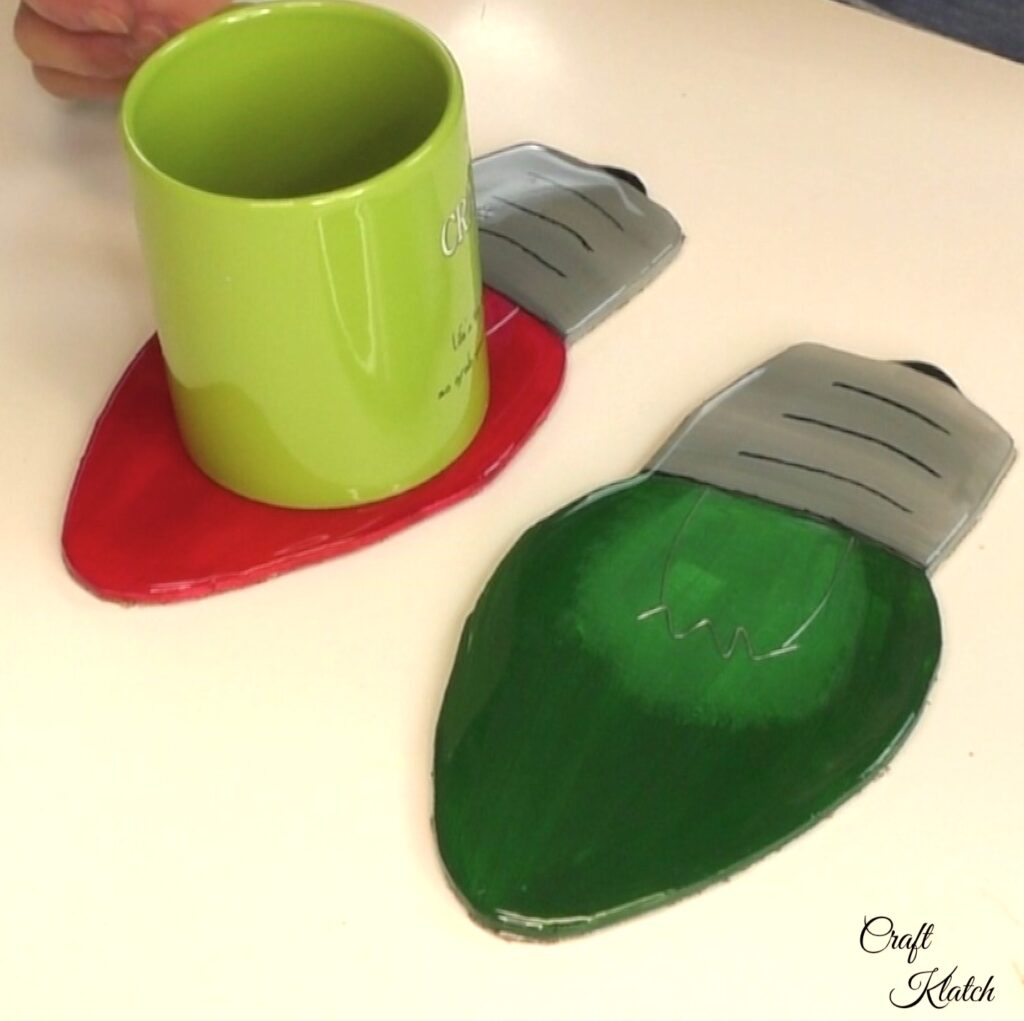
Step 12: Cork The Christmas Light
Use cork shelf liner to line the backs of the coasters. The shelf liner has adhesive on it, but I like to add glue to give it additional strength.
That’s it!
The coasters are done and pretty sizable. They can accommodate even your largest hot chocolate or hot toddy mug.
What I love about crafting and making original decorations is that you can have unique Christmas decorations that no one else will have. You can’t buy this at a store, but you can make it! We talked about five different ways to use them earlier if you don’t want to use them as coasters.
Maybe you aren’t ready to jump into making the DIY Christmas Lights. That’s okay! There are plenty of easy resin projects you can try instead! Check out some of my resin crafts.
If you are a resin newbie or are hesitant to jump in and give it a try, don’t wait! I have tips that can help put your mind at ease and help you sidestep typical mistakes or pitfalls.
The first is 5 Reasons Your Resin Coasters Are Not Curing.
The second are The Biggest Resin Mistakes.
Read those and you will be a resin pro in no time!
If you are looking for more inspiration for the holidays, I have so many Christmas Crafts to help you!
If you don’t have time to craft some coasters, these might be fun to add to your holiday decorations:

Video Tutorial
As promised, here is the video tutorial, so you can see all the details.
Free Printable: Christmas Light Template
Thanks so much for stopping by! Merry Christmas and Happy Holidays!
Remember: Life’s too short not to shimmer, so grab your glue gun and your glitter!™ Stay safe!
Mona
I was looking this a little differently. If you put a whole in the top of the bulb(grey part), it may hold a cup, then cut a thumb hole in the bottom and you end up with a carrier for a drink and small plate…Just a thought..
Such a great idea Deb! I hadn’t thought of that!!!
What a festive idea! That wire adds a lot. Thanks for sharing the tutorial. Have a great weekend Mona!
Thank you so much, Marielle! Have a great weekend too and Happy Holidays!