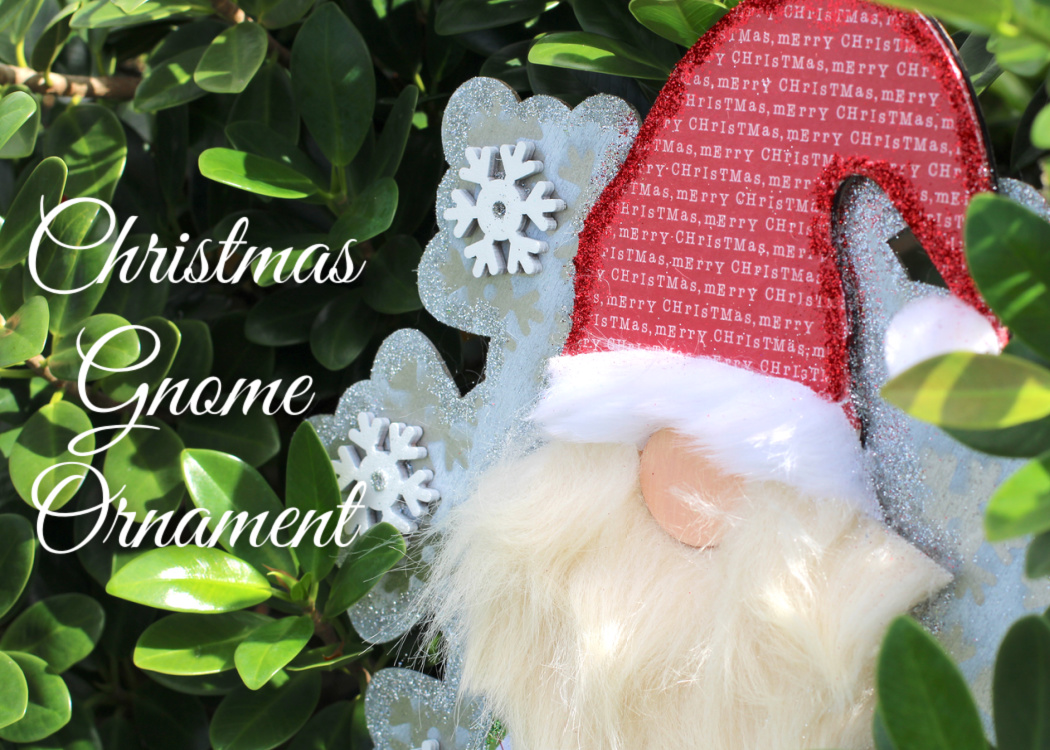
Create a Christmas gnome ornament using wood cut-outs from Dollar Tree! It’s a very budget-friendly Christmas craft!
Who can resist some good gnome crafts, especially for Christmas?
Not me!
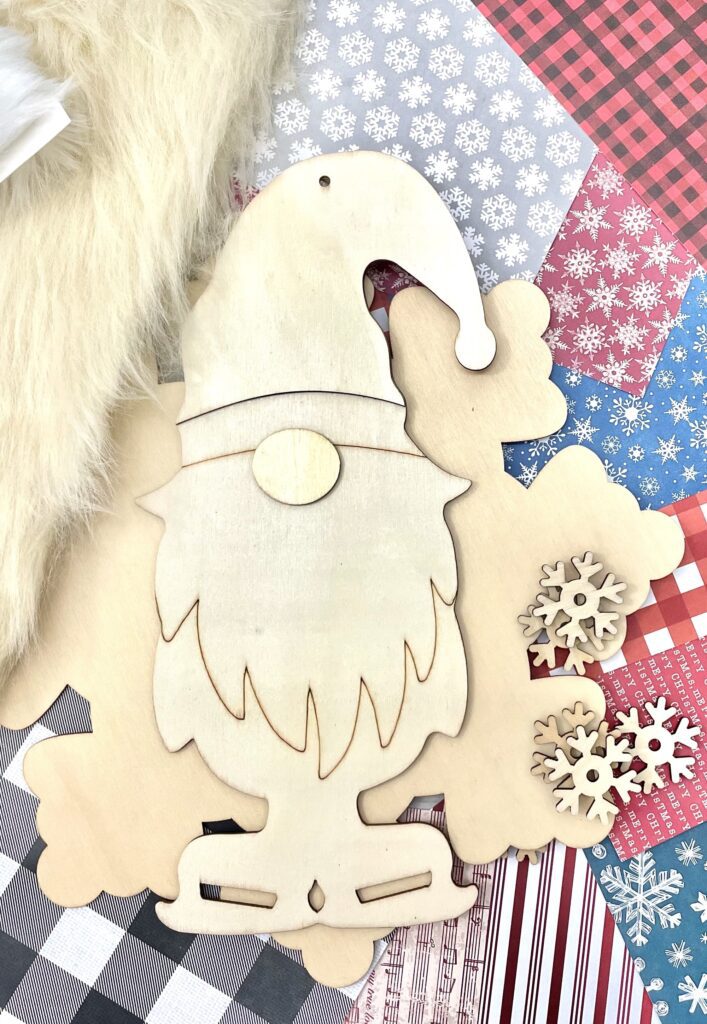
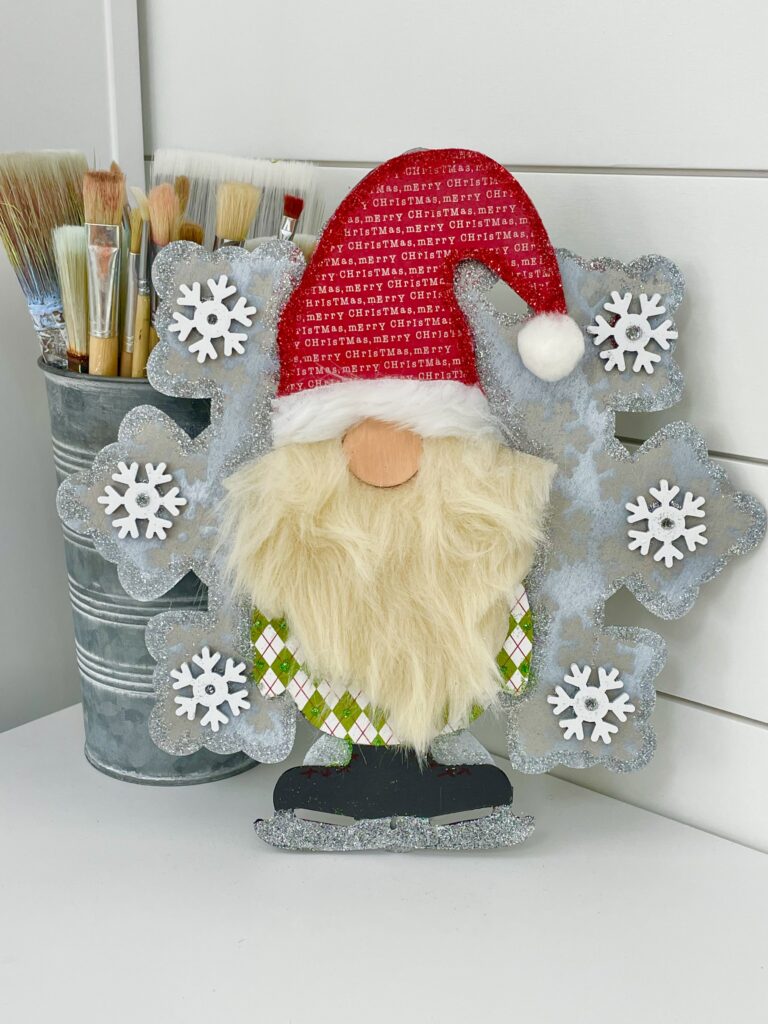
I found the adorable gnome wood cut-out at my local Dollar Tree store and I already had this snowflake cut-out from last year.
For a little change of pace, I thought combining them might be fun.
In another twist, I thought of using scrapbook paper instead of just paint because they come in festive patterns, colors, and designs.
Supplies for Christmas Gnome Ornament
*This blog uses affiliate links. As an Amazon Associate I earn from qualifying purchases, at no additional cost to you.
- Gnome cut out
- Snowflake cutout
- Scrapbook paper
- Mod Podge (matte)
- Glitter
- Glue
- Scissors
- Brush
- Faux fur
- Wood snowflakes
- Pom pom
- Silver spray paint
- White spray paint
- Black permanent marker
- Flesh paint
Christmas Gnome Ornament Video Tutorial
Here is the full gnome tutorial in case you want to see how I made it!

Christmas Gnome Ornament Directions
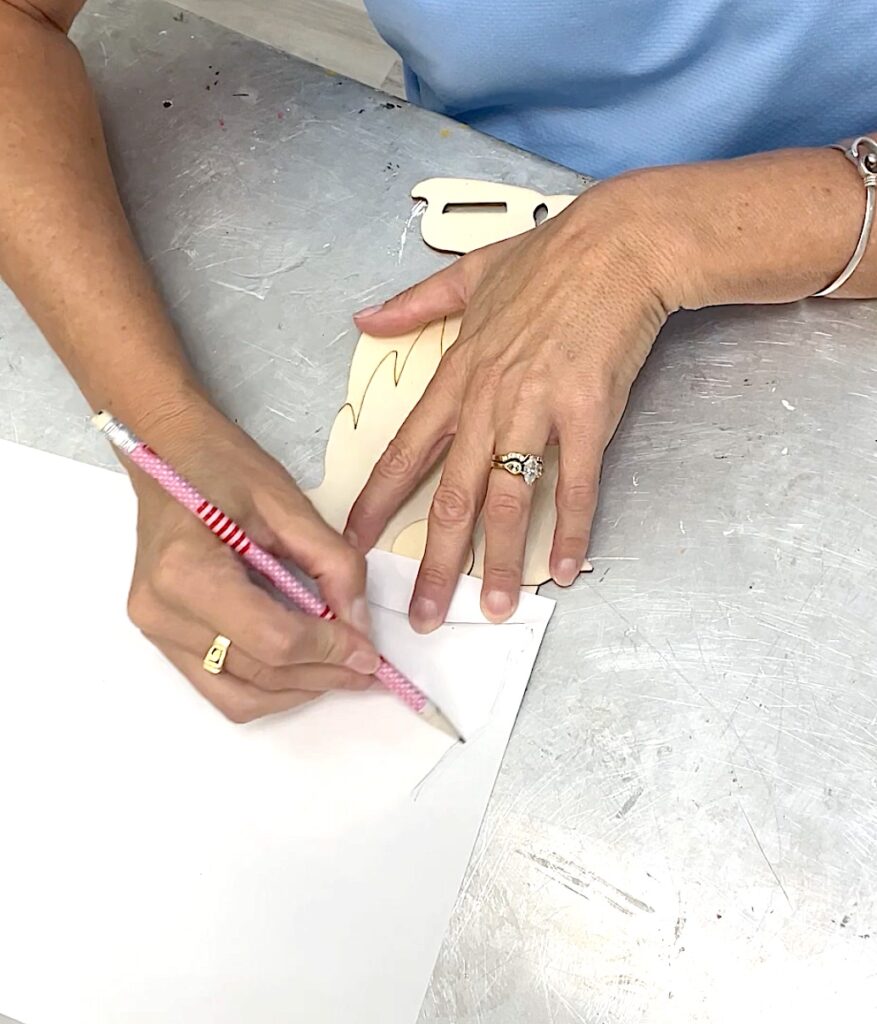
Step 1
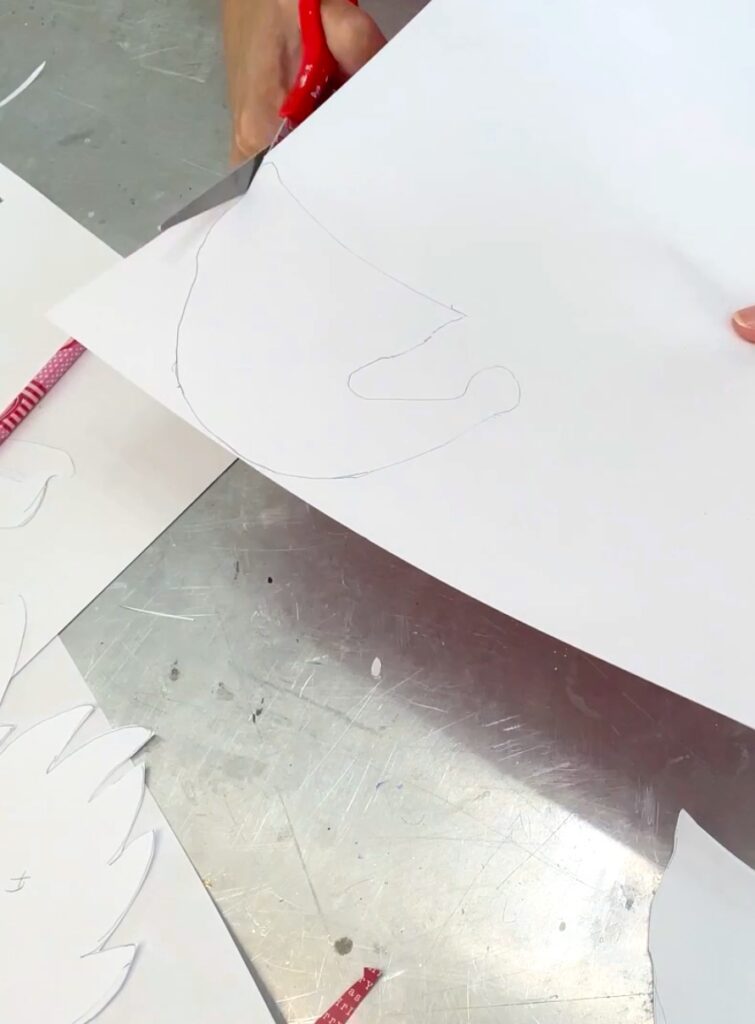
Trace the gnome. I used a piece of paper and a pencil to rub or trace the edges of the various gnome parts. I did the hat, the hat trim, the beard, his shirt and the legs and skates. Then, I cut then out and wrote front on the front of it.
Step 2
Use the templates you just made and place them on the back of a piece of scrapbook paper. The side where you wrote “front” should be up against the back of the scrapbook paper. Trace it and cut it out.
So the same with the beard and the hat trim using the faux fur.
Step 3
Paint the wood gnome to seal the wood. Sometimes when you only paint one side of the a piece of thin wood, it can bow or curl. To prevent that, I painted both sides to seal it. Then, when I did the Mod Podge, nothing curled.
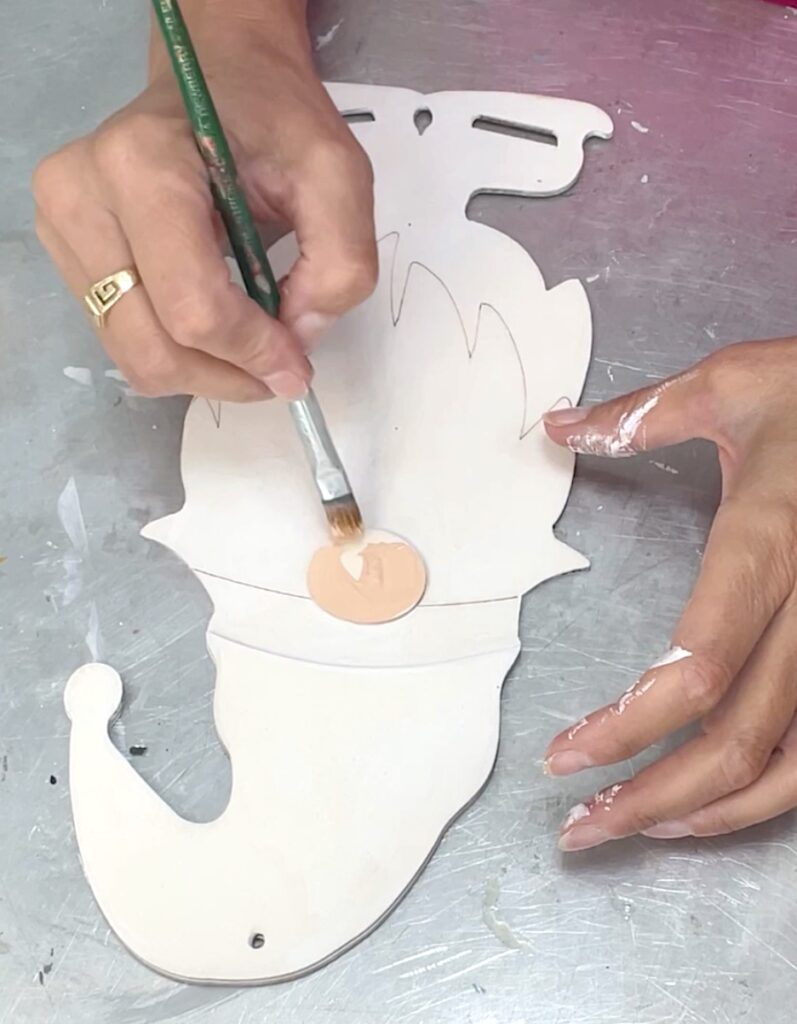
While you are at it, paint the nose a flesh color.
Step 4
Wet your brush. Then, brush the Mod Podge on the back of the cut out scrapbook paper and on the corresponding part of the gnome. Lay it down in the proper place and brush the front with more Mod Podge. Put a little Mod Podge on your finger and further smooth the paper. This prevents wrinkles and bubbles.
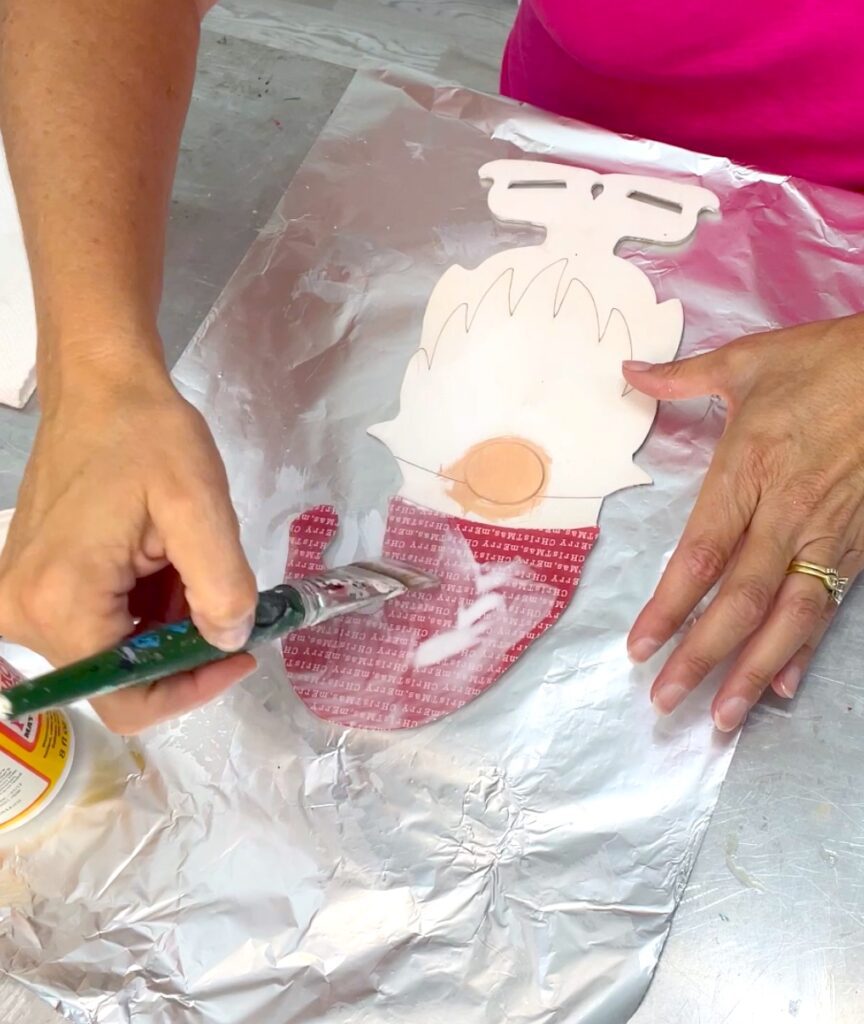
Then, put a little extra water on your paintbrush. Lightly brush over the Mod Podge and you won’t have any visible brushstrokes.
Step 5
Paint the snowflake with silver spray paint. Lay the little snowflakes on the dry snowflake and use white spraypaint to spritz it. This will create a subtle pattern on the larger snowflake. Remove the smaller snowflakes and paint eight of them white.

Step 6
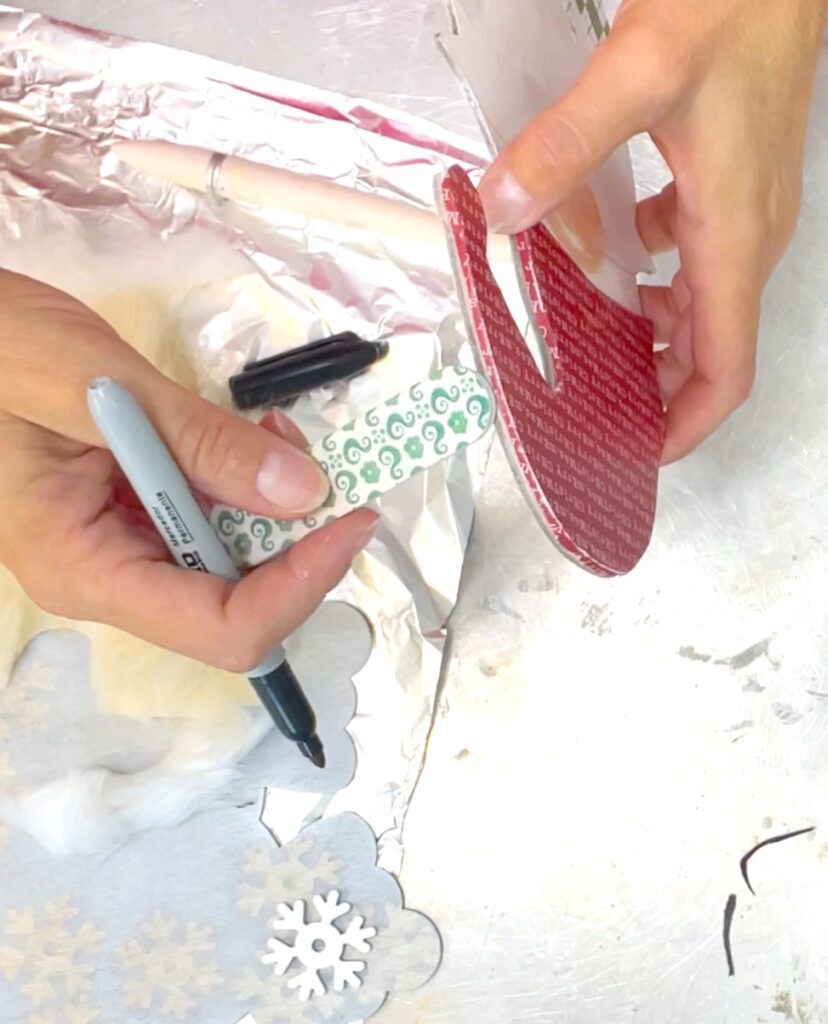
When the gnome has dried, use an emery board to smooth the edges of the paper, which may be sticking out passed the edge of the wood. Then, use a black permanent marker to color the edge black.
Step 7
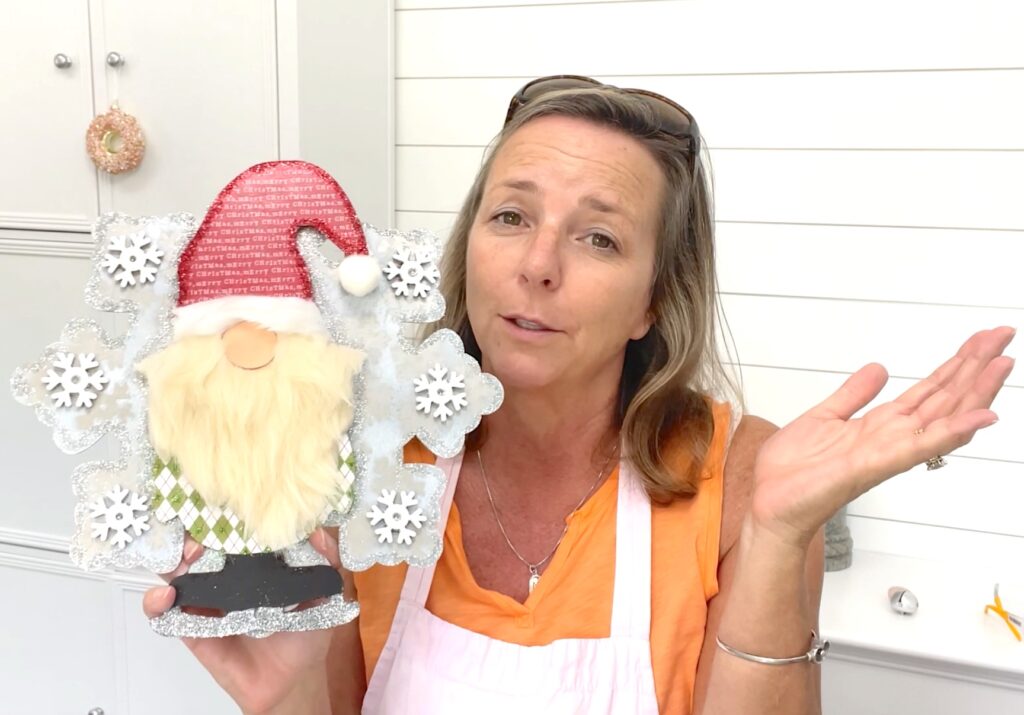
Glue everything together. Add the beard, the hat trim and the pom pom at the end of the hat. Also glue on the snowflakes and add glitter trim and accents. I glittered the ice skate blades too!

Once it’s dry, you have a super cute Christmas gnome ornament! You can add the string back to hang it. You can have it in a bookcase or on a mantel. If you take Command strips, you can randomly hang it on just about anywhere!
Other Christmas Crafts You Are Sure to Love!
Here are some other great projects you are sure to enjoy!
- Dollar Tree Gift Bag Luminary
- Dollar Tree Snowman Terrarium
- Snowman Sign
- Light Up Dollar Tree Snowman
Gnome Christmas Decor
If you love gnomes but don’t have time to make this ornament, here are some other fun decorations you can buy!

.
Thanks for stopping by! Remember: Life’s too short not to shimmer, so grab your glue gun and your glitter! Stay safe!
Mona
Thank You so very much for your amazing Christmas crafts. The Gnomes are just magical. You are a star.
Thank you so much, Gillian! You are too kind! ❤️ I’m glad you enjoyed the gnomes!