How to make an AMAZING heart candy box for Valentines Day! It’s a great gift idea and holiday decor! Get ready to break out the resin!
Valentine’s is creeping up on us and I thought it would be fun to make some resin crafts for Valentine’s Day! If you want a box of chocolates out for display, but can’t resist the temptation, here’s a box of candy you can’t eat!
Other Valentine crafts you may enjoy!
Video Tutorial
Here is the quickie video tutorial! You can find the full version that will answer ALL your questions at the end of this post!
*This blog uses affiliate links. As an Amazon Associate I earn from qualifying purchases, at no additional cost to you.
Materials List:
- Silicone heart mold: https://amzn.to/2kqfrnB
- This would be a fun alternative heart: https://amzn.to/35SuttC
- Silicone candy mold: https://amzn.to/2jCJ40s
- Resin: https://amzn.to/2kUMAo2
- Red pigment: https://amzn.to/2kgmCvO
- Brown pigment: https://amzn.to/2kQV1kS
- White pigment: https://amzn.to/2kq7wX6
- Transparent yellow pigment: https://amzn.to/2kguE7U
- White fabric paint: https://amzn.to/2krfOO4
- Red fabric paint: https://amzn.to/2kQVk2e
- Brown fabric paint: https://amzn.to/2jWpUpM
- Stiff red felt: https://amzn.to/2krxOb7 (you can buy single sheets at the craft store)
- White ribbon: get it at the craft store, so you can see it and feel it
- Hot glue: https://amzn.to/2kri2wZ
- Ultimate glue: https://amzn.to/2kqmgp6
- Screw: go to the hardware store to find the right size – I recommend going with a flatter head than I had
- Dremel tool/drill: https://amzn.to/2jCy3vW
Directions:
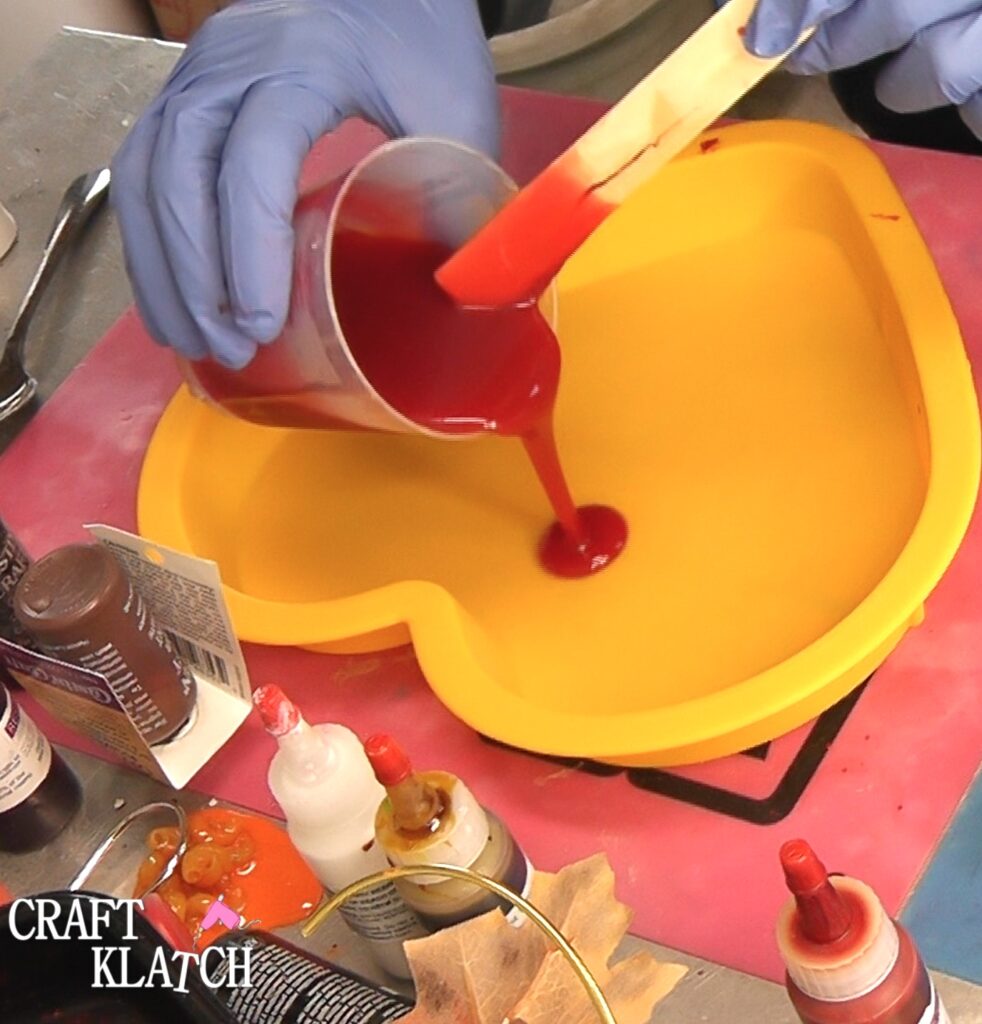
1. Mix four ounces of resin (according to the package directions) and mix in opaque red pigment.
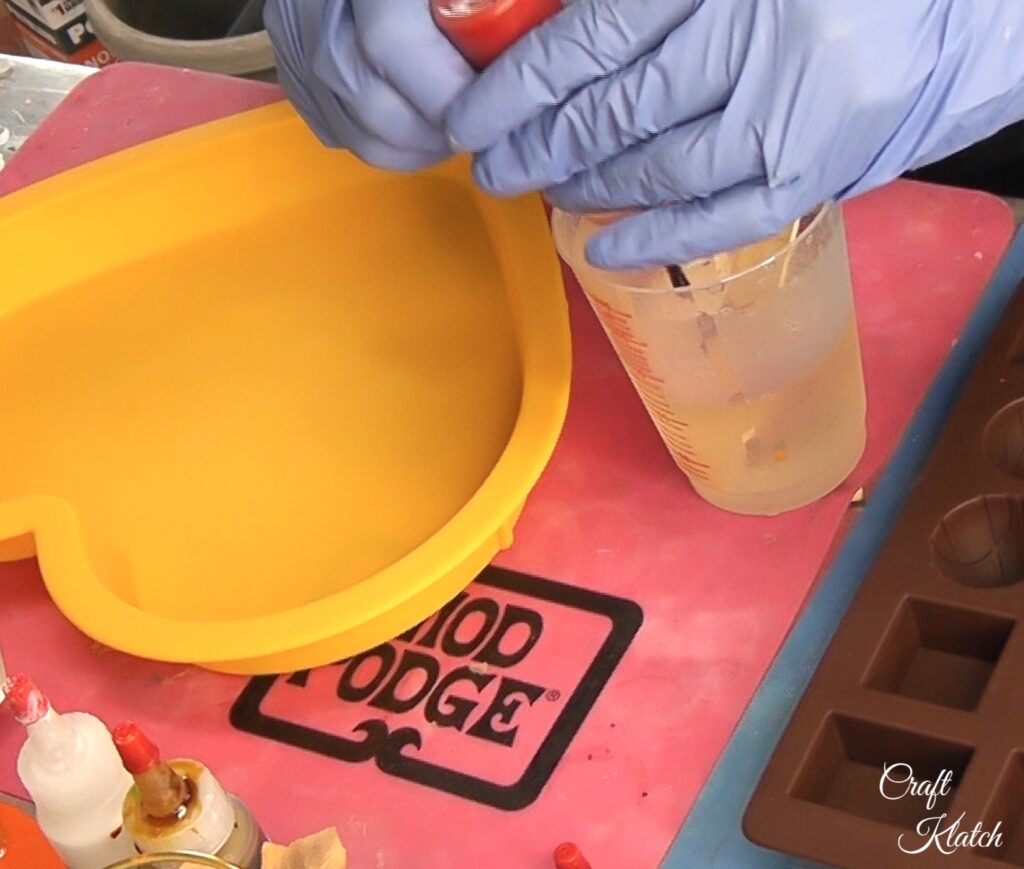
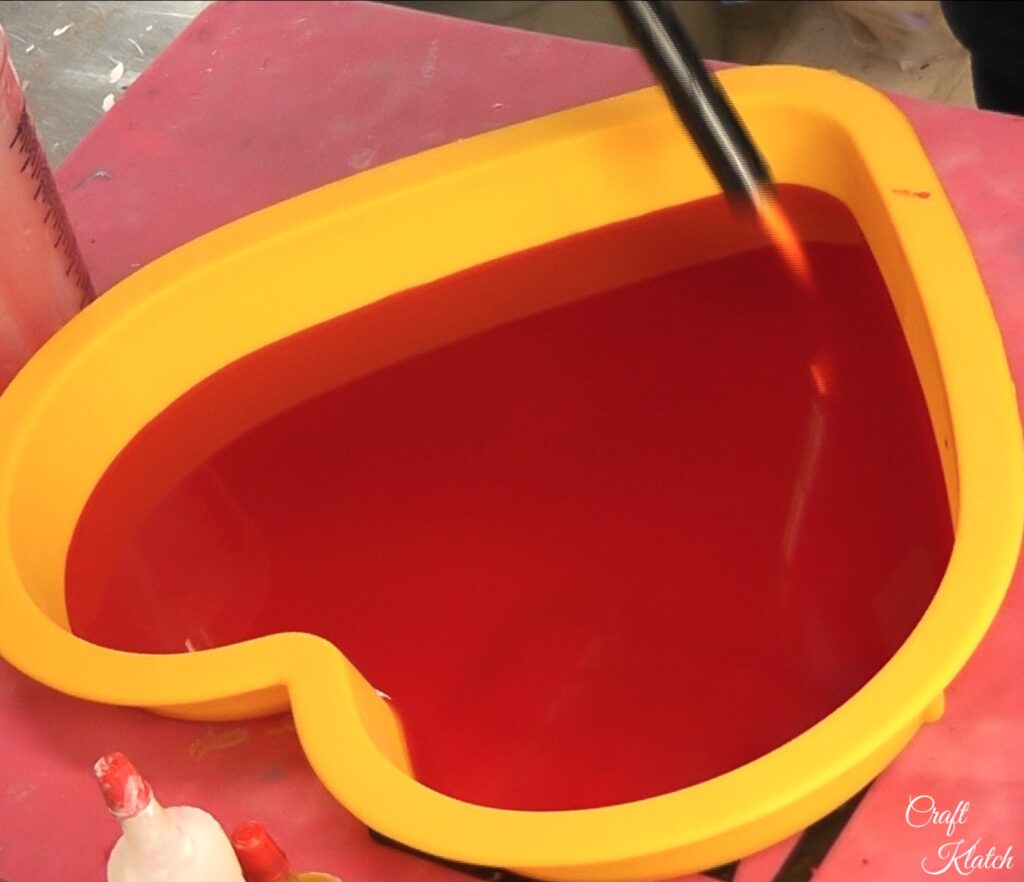
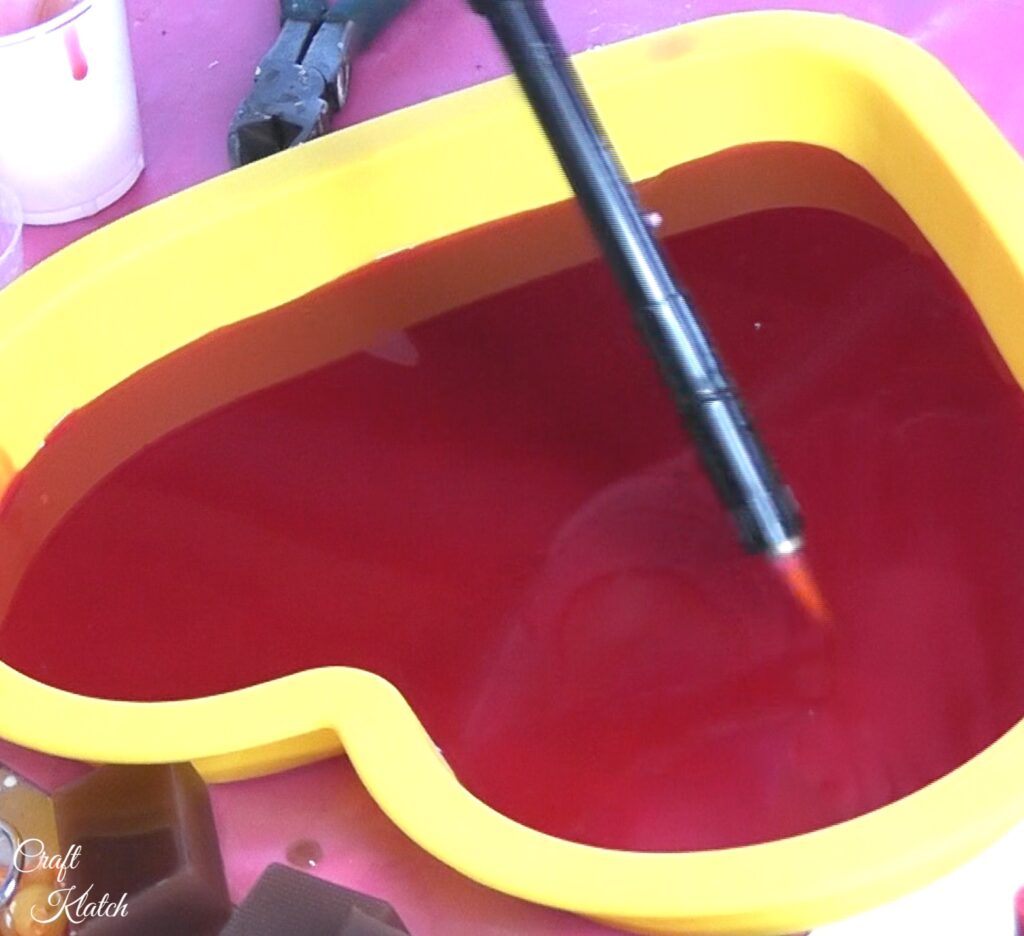
2. Once well mixed, pour into the heart mold. Pop bubbles and allow to cure at least 12 hours.
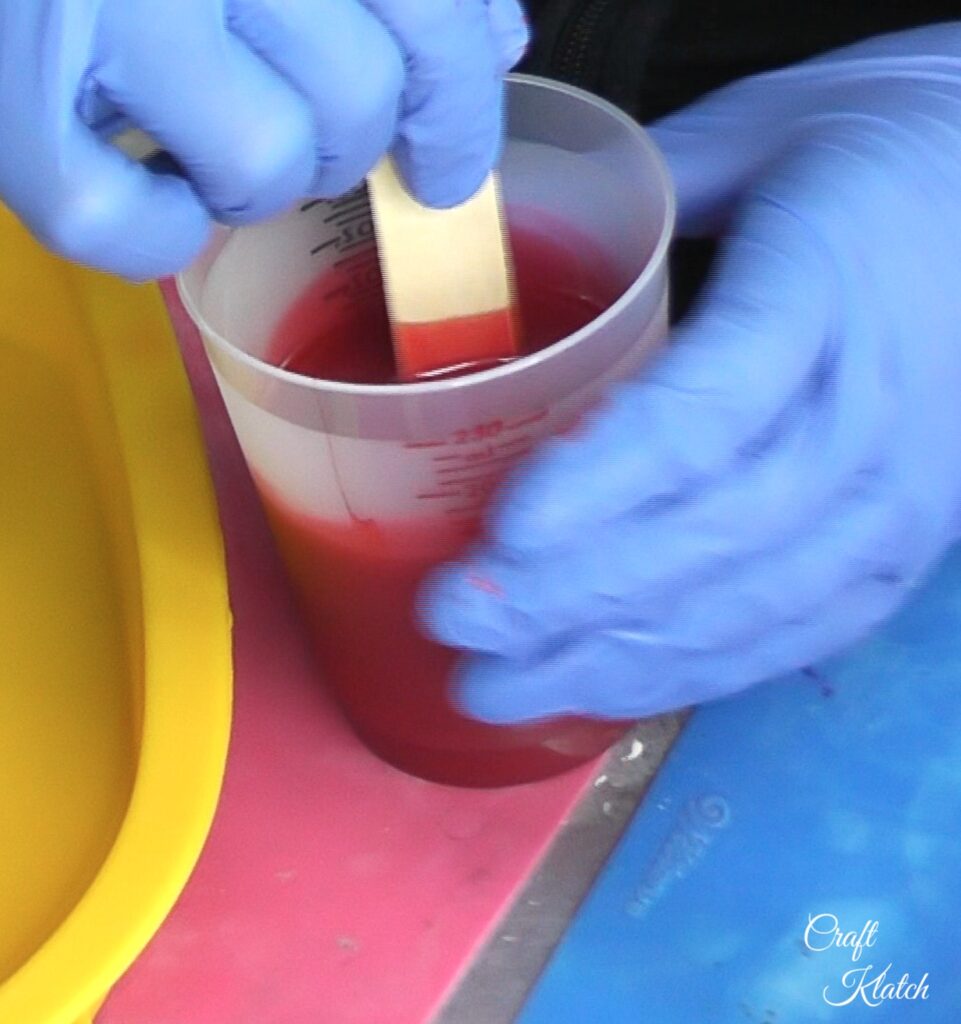
3. Mix six ounces of resin and divide into three different cups. In the first cup, add brown pigment. In the second, brown pigment and just a tiny bit of black. In the third, mix white pigment and just a tiny bit of the transparent yellow.
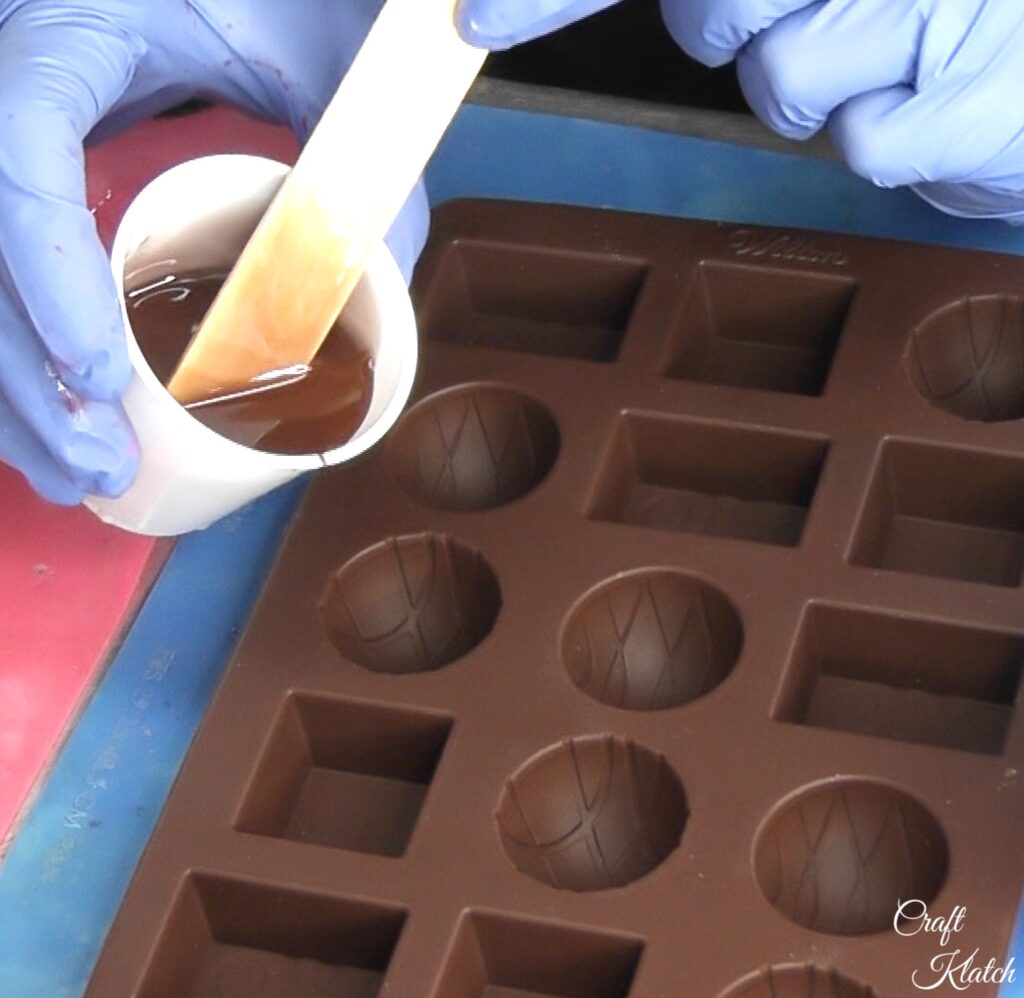
4. Pour them into the silicone chocolate candy mold. Pop the bubbles and allow to cure a minimum of 12 hours.
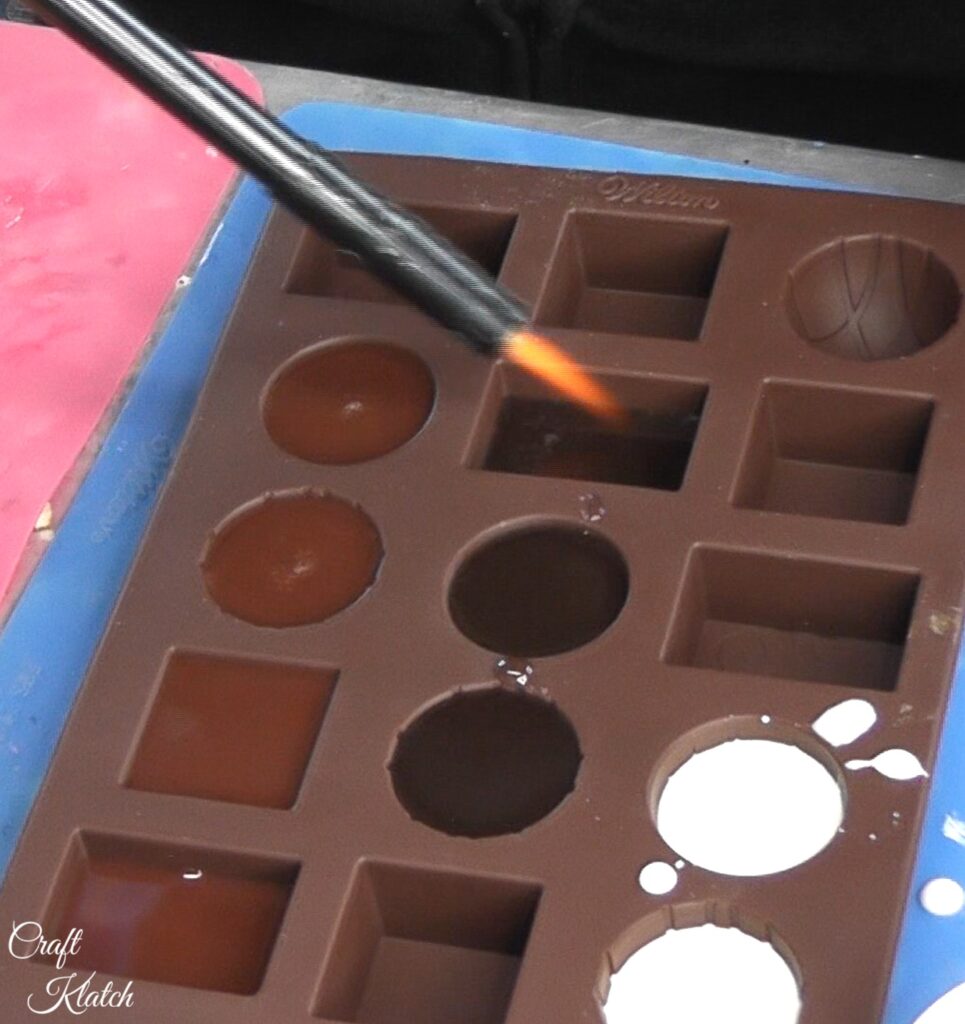
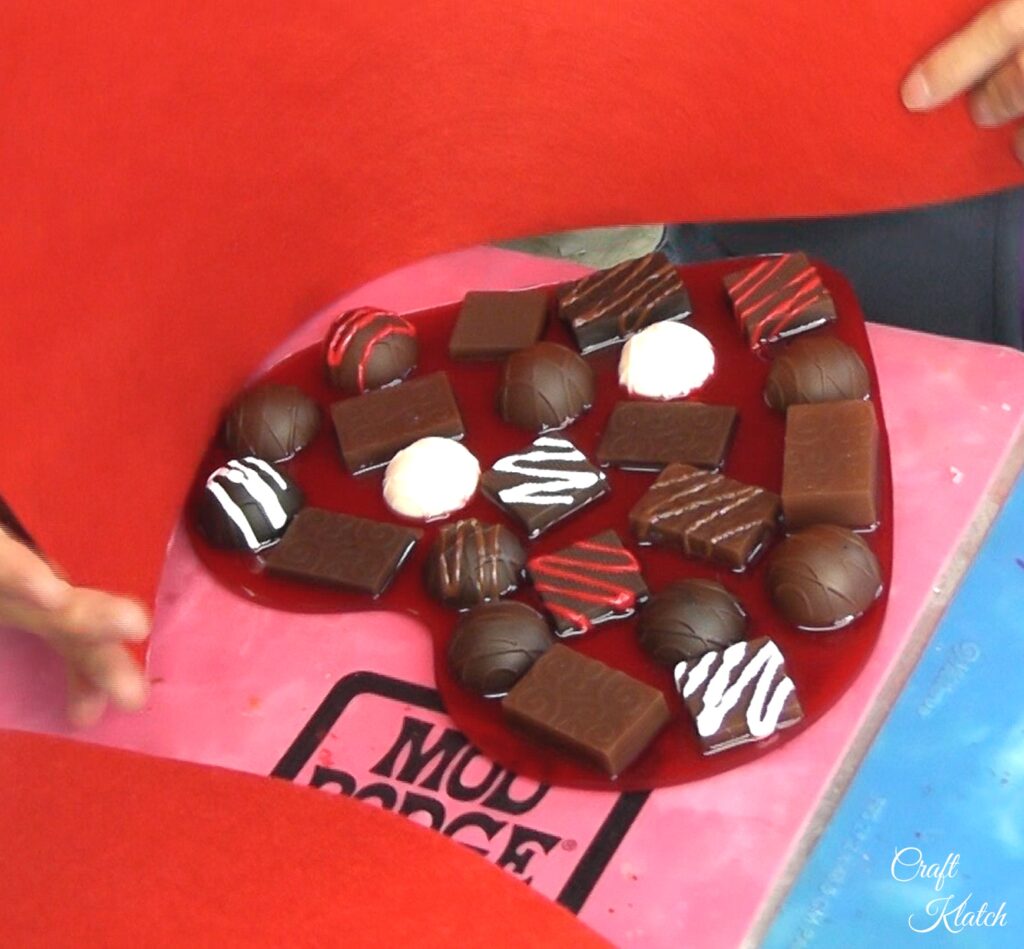
5. Remove the chocolate candy from the mold. If you don’t end up with enough candy, repeat and make more.
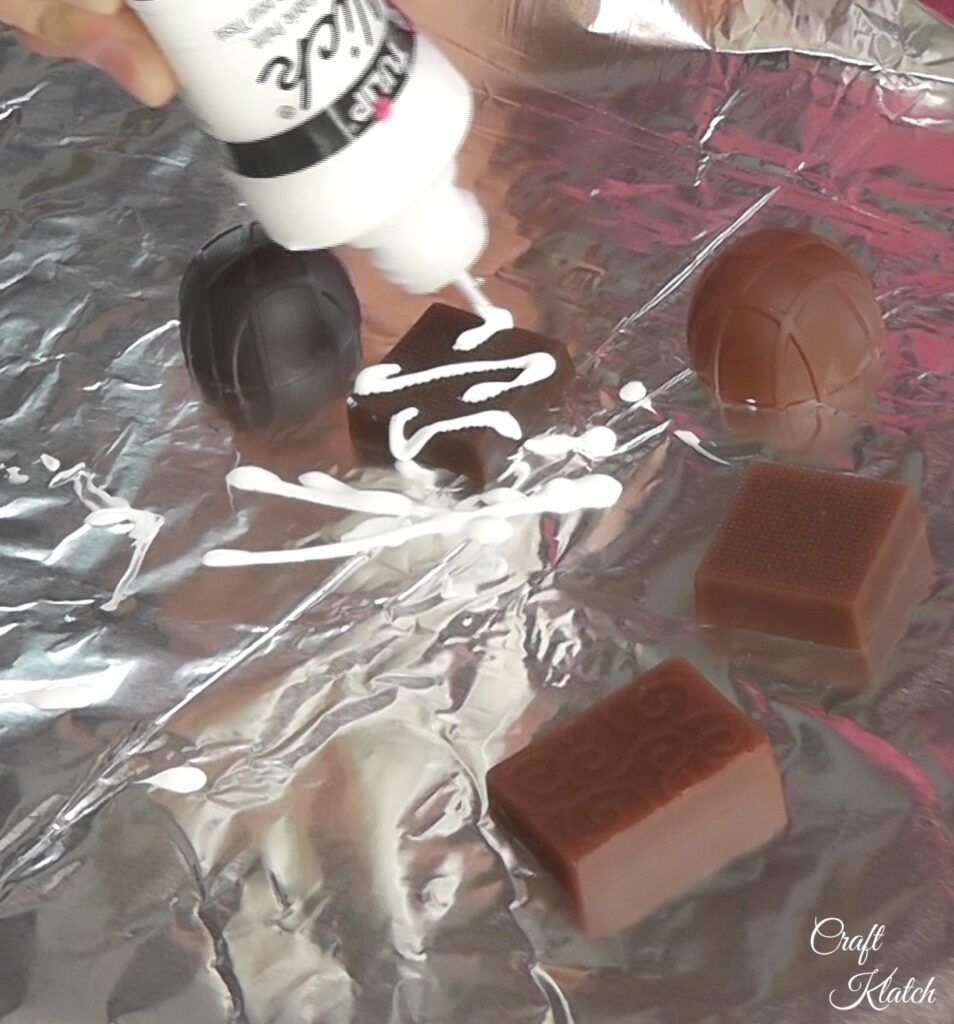
6. If you want to dress up some of the candy, take fabric paint in red, brown and white and drizzle it over the resin pieces. Allow to dry.
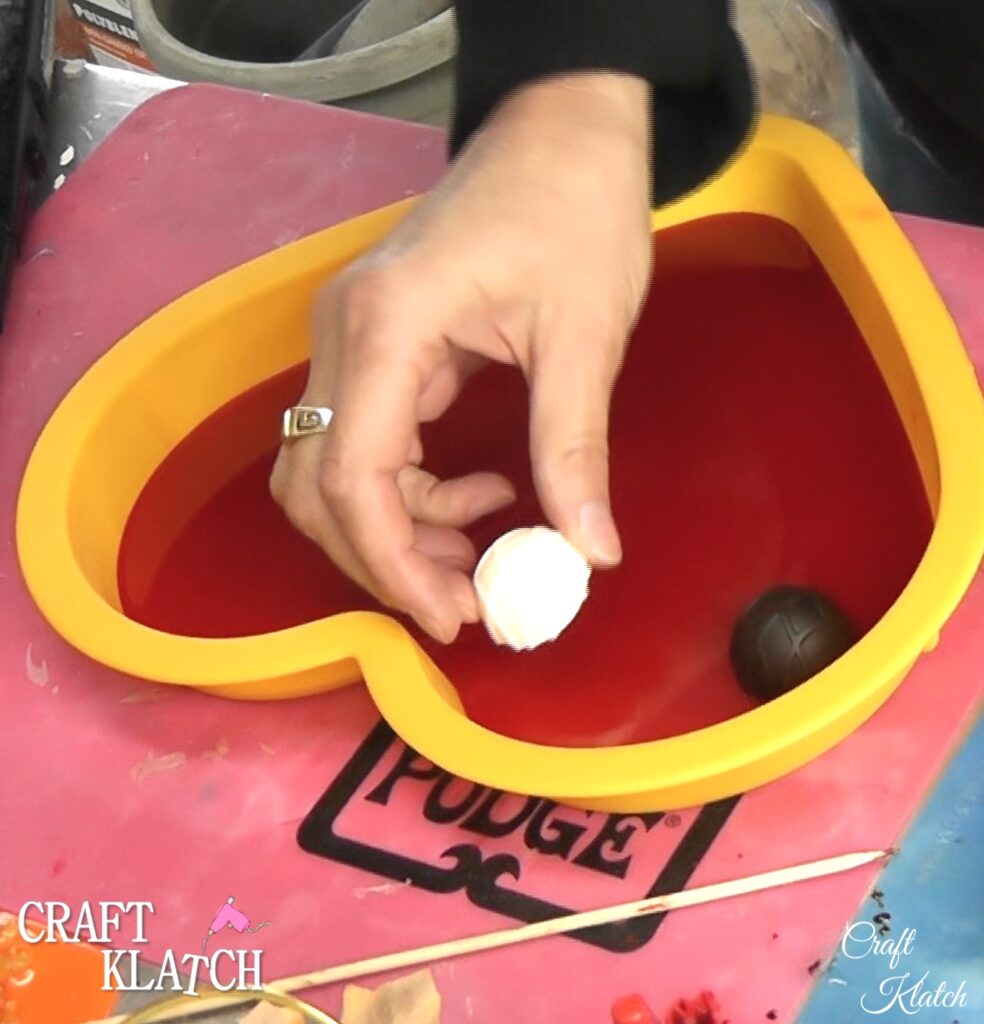
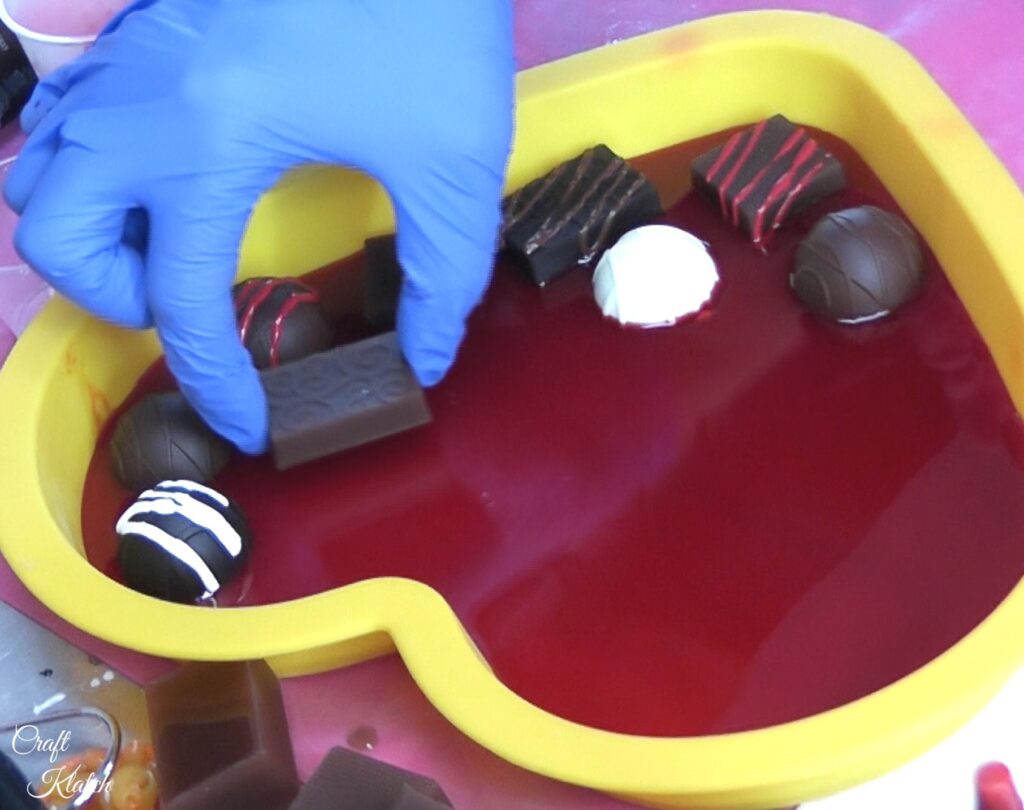
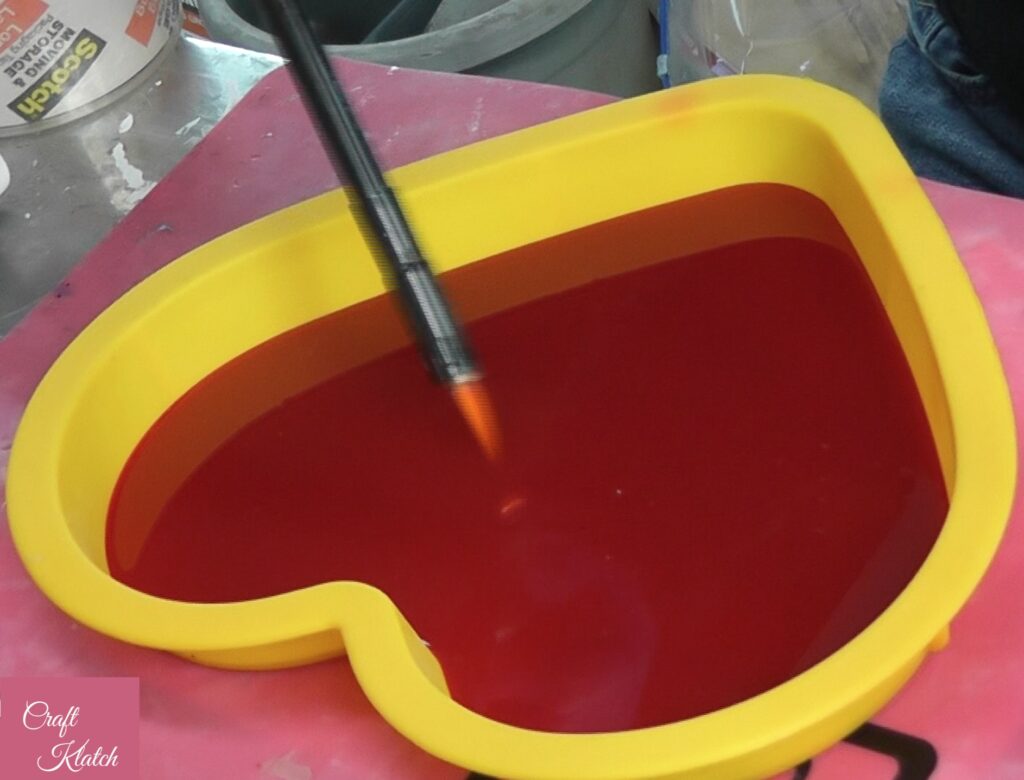
7. Mix two ounces of resin, with red pigment and pour it into the heart mold. Pop the bubbles.
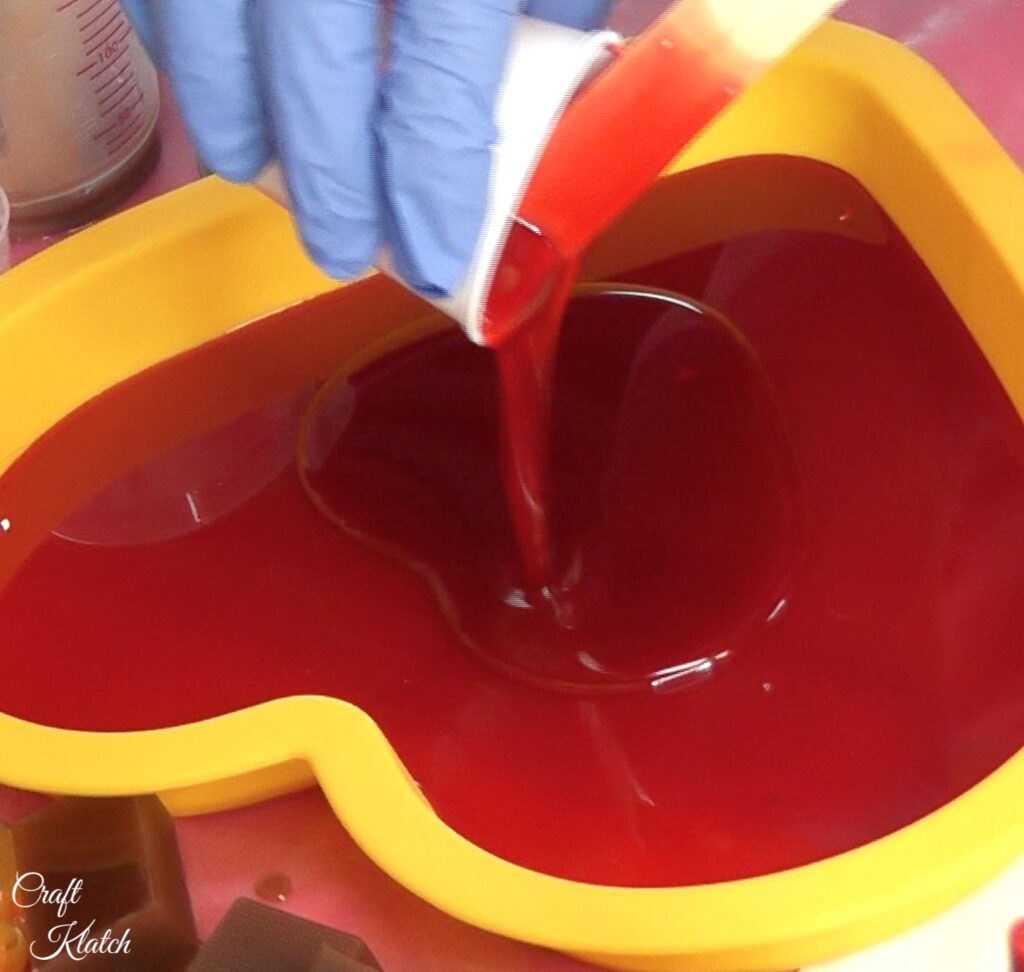
8. Place the resin candy pieces in the resin and allow to cure a minimum of 12 hours. Then, remove it from the mold.
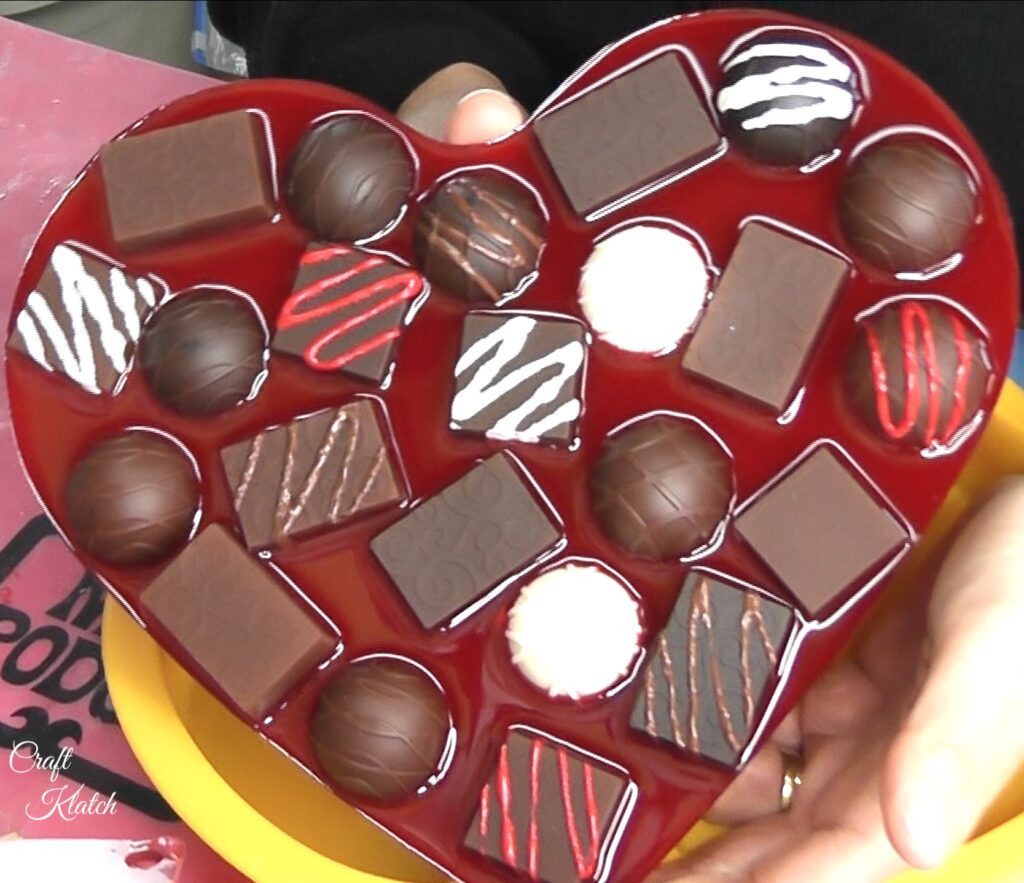
9. Mix five ounces of resin and add red pigment. Pour it into the heart mold. Allow it to cure a minimum of 12 hours before removing. You will want it to fully cure on a flat surface before moving forward.
Or you can also add two ounces of clear resin after the red has cured 12 hours because it will likely cure harder than the resin that has the added pigment.
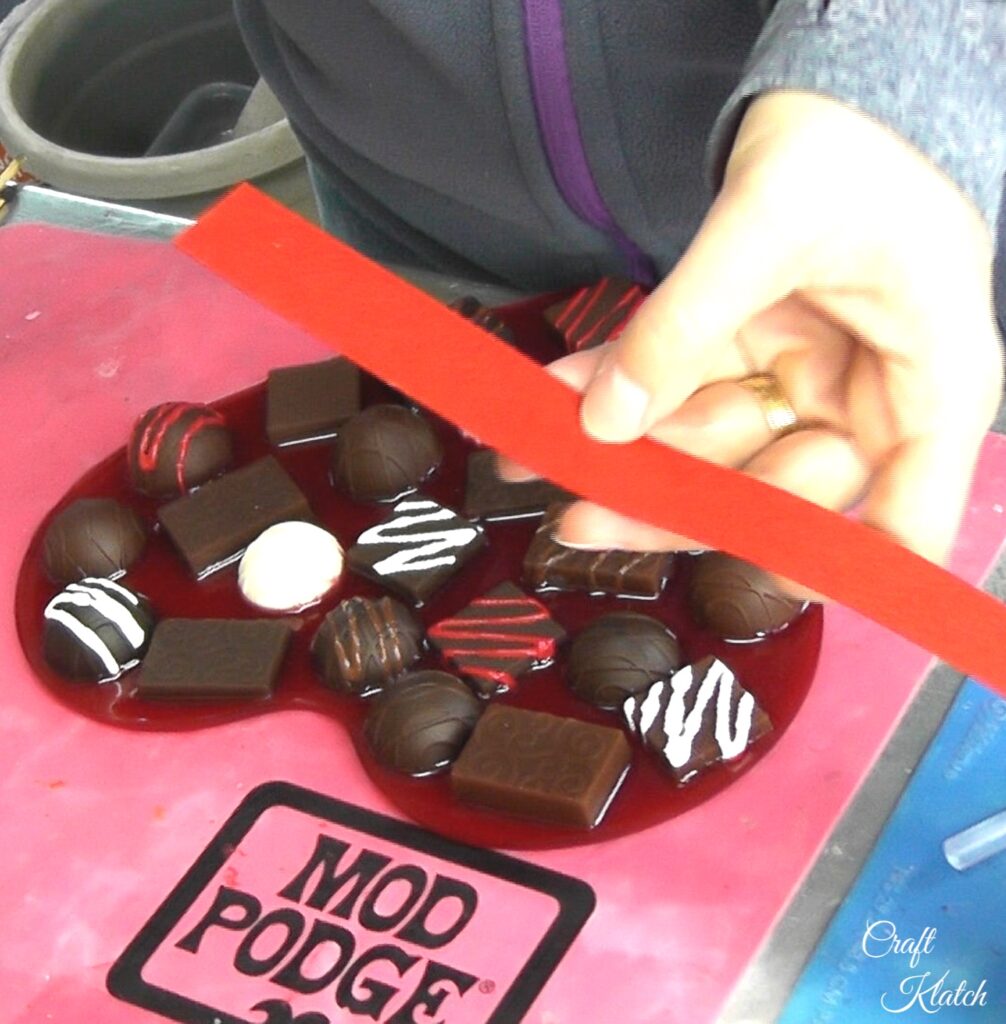
10. Take stiff red felt and cut strips about an inch wide. Depending on the size of your mold and your felt, you may have to cut more than one strip to be able to frame the edge of the heart, with the candy in it.
11. Using a mix of hot glue and Ultimate glue, glue the felt strip in place around the resin heart with the candy in it. The hot glue holds the felt in place, while the other glue dries and creates a stronger bond. Allow to dry.
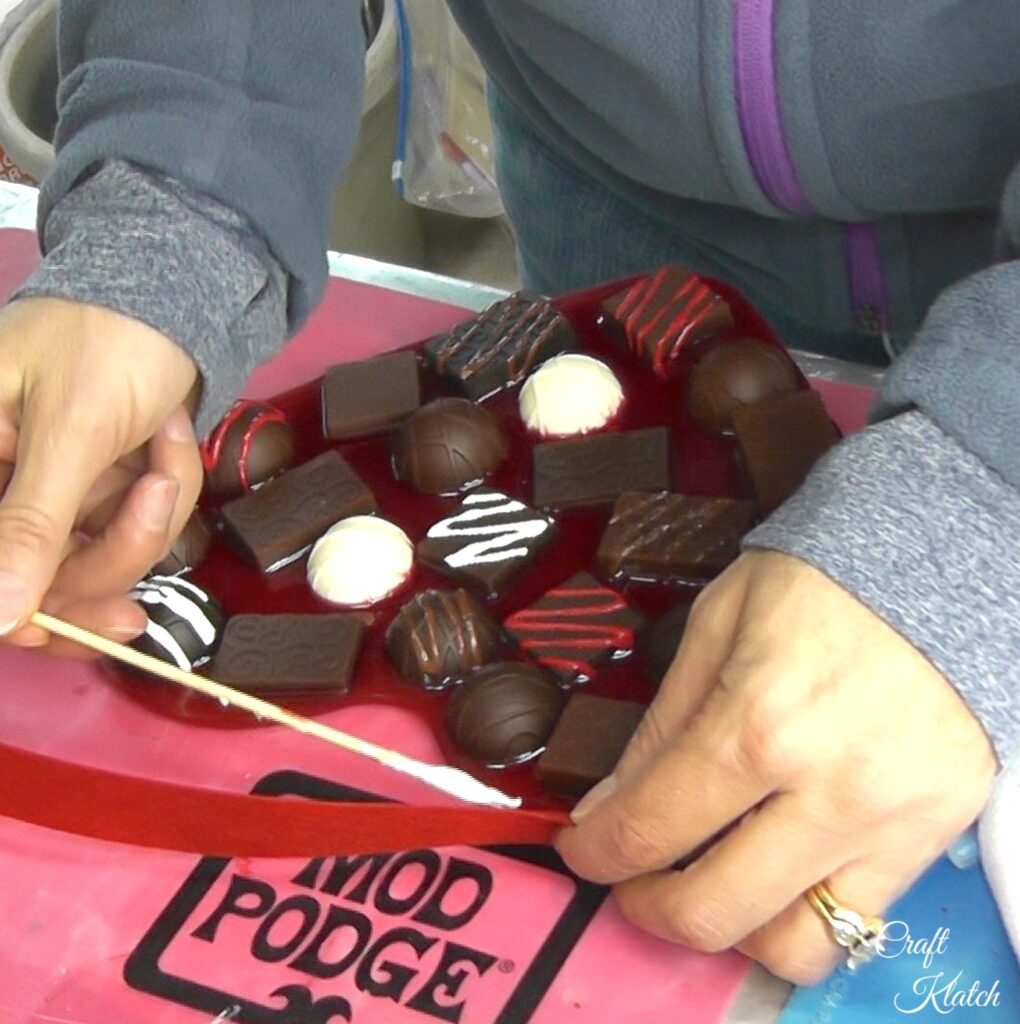
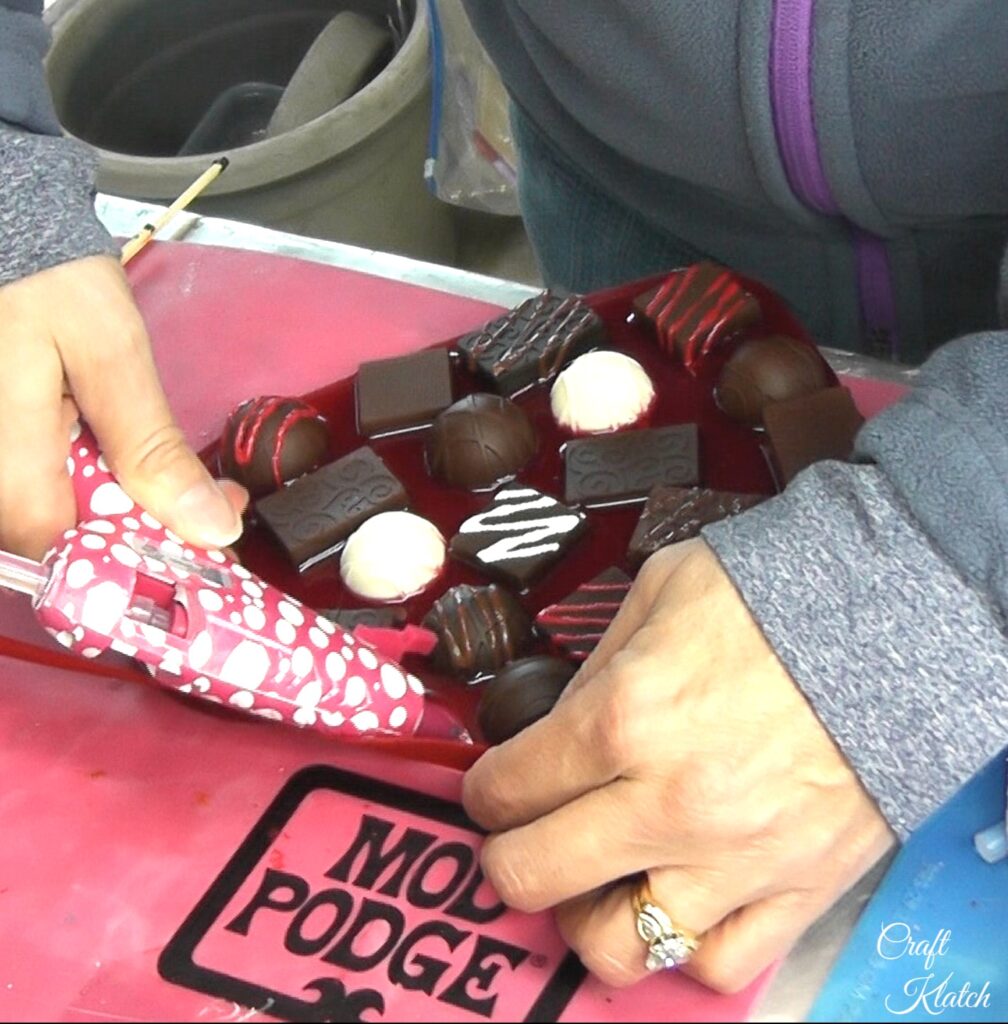
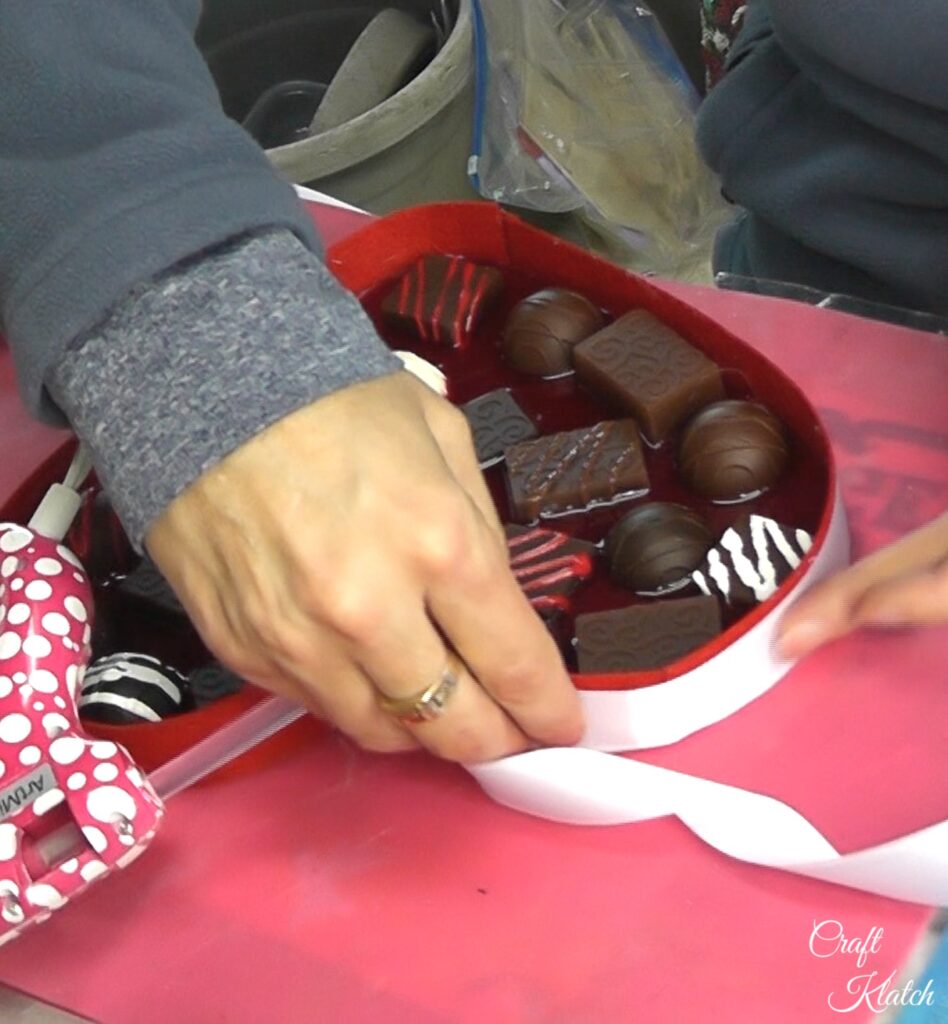
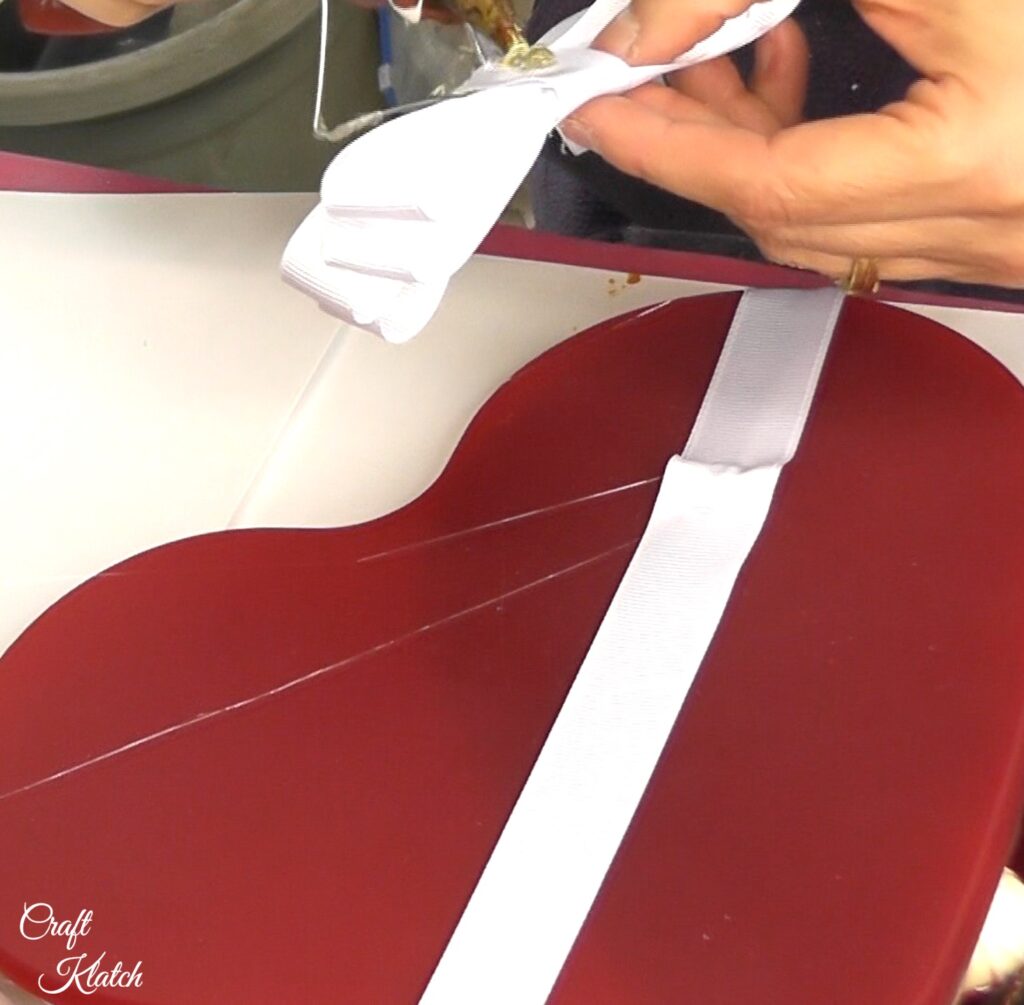
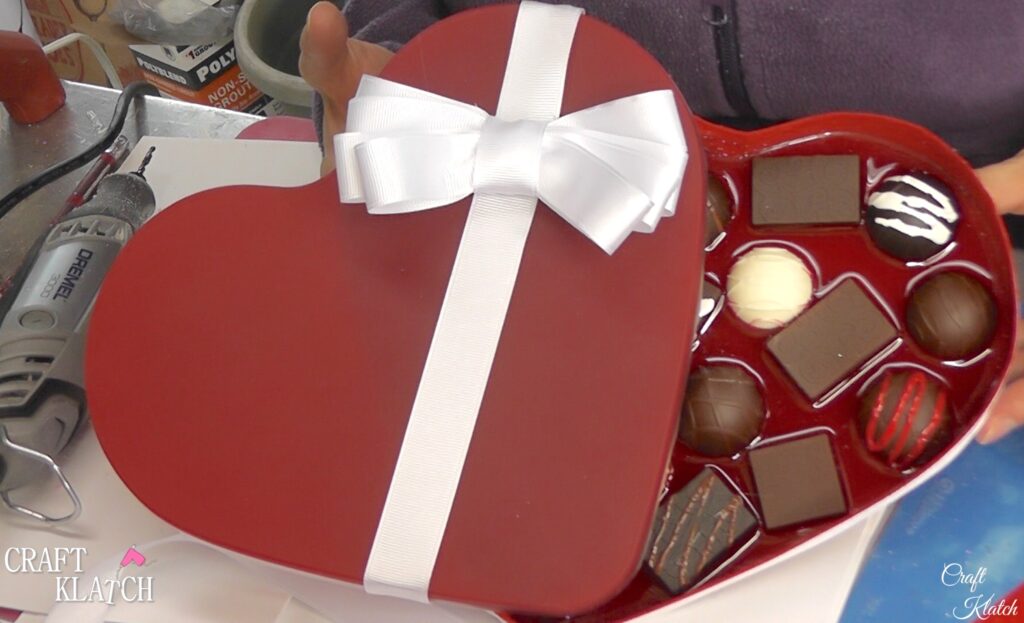
12. If you want to give it another detail, glue the white ribbon around the felt too.
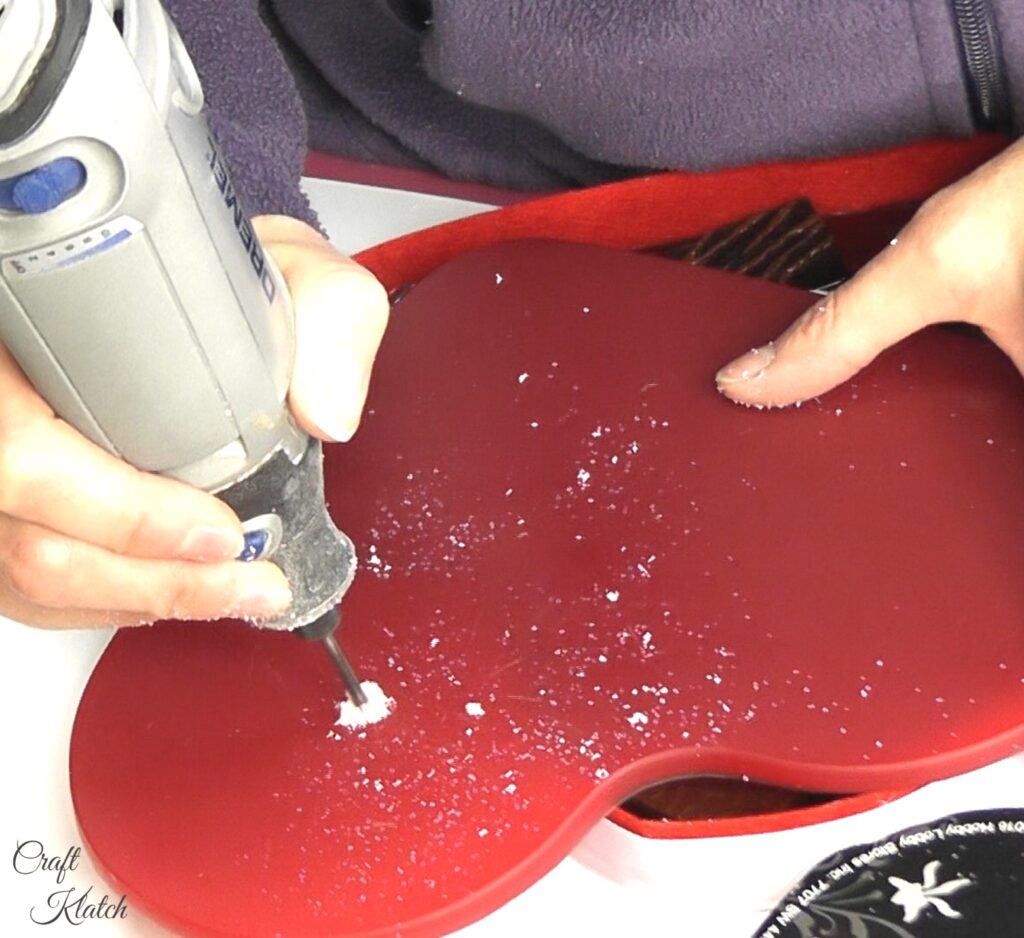
13. If you want to attach the top as I did on mine, decide where you would like the ribbon and bow to be placed. Then, drill a hole in the top, where the bow will be placed, and drill it down through the candy on the bottom. Use a screw to attach it.
I did not have a flat head screw, but if you have a choice, opt for the flat head.

14. Then, glue the ribbon and bow onto the top of lid.
That’s it! Now you have a no calorie box of chocolates!
If you want to take a shortcut, you can use an empty chocolate box and fill it with resin. If you use a cardboard box, be sure to seal it really well before pouring resin into it.
If you like Valentine candy or food related ideas, here are some fun ones!

Thanks for stopping by!
Remember: Life’s too short not to shimmer, so grab your glue gun and your glitter!™ Stay safe!
Mona
Be Sure To Pin It For Later!

Full Video Tutorial:
I get into a lot of detail and all your questions should be answered!