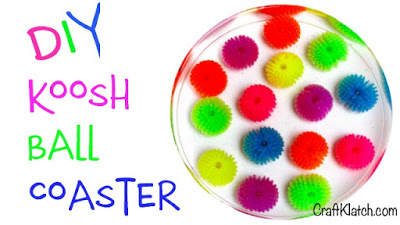
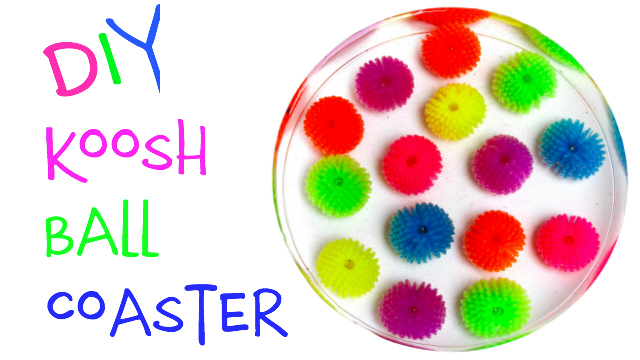
Make an easy resin DIY using a colorful bracelet! It’ll brighten any room with a splash of color and a super fun look!
A friend sent me a cute koosh ball bracelet to incorporate into a craft. I decided it was screaming to be a part of a coaster!!
Of course I thought that!
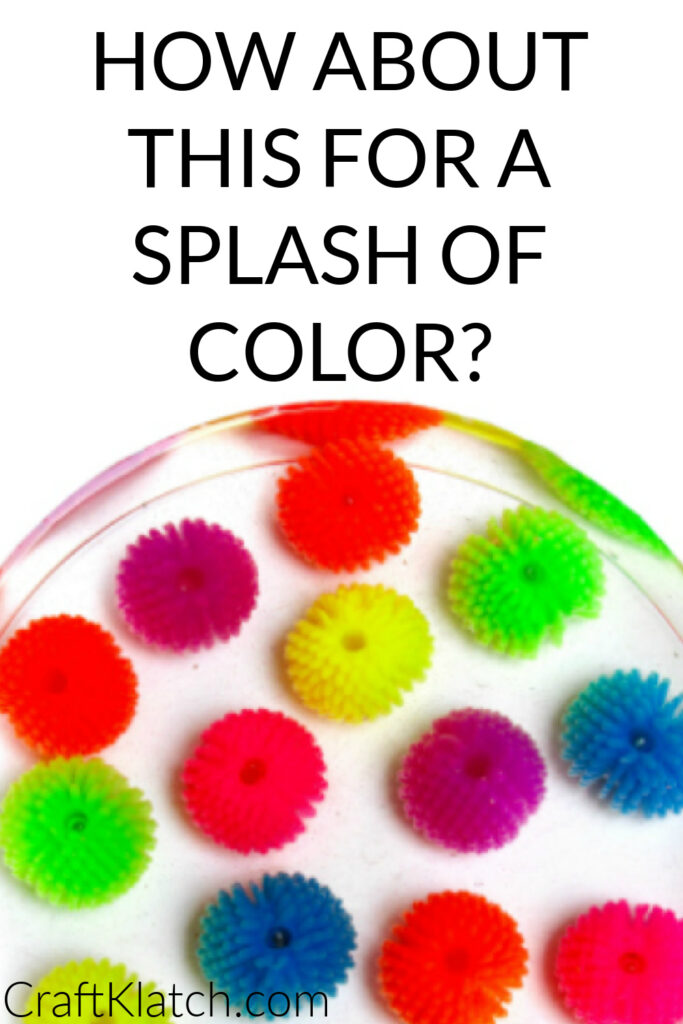
A Splash Of Color
Don’t underestimate what a splash of color can do for your home decor. Even a small splash of color can make a difference!
Here are five home decor projects, DIYs and crafts that add a Splash of Color to Your Home Decor:
- Glitter Heart and Gold Leaf Paperweight
- Even something as small as a paperweight on a desk can make the needed impact.
- Resin Straw Coaster
- This one definitely has a cool effect and will have people asking what it is made of!
- Liquid Rainbow Resin Coaster
- Can you put liquid into a resin DIY? Yes, you can!
- Abstract Resin Art
- Try your hand at resin art! It is so easy and always comes out looking AA-MAZING!
- Outdoor Table Makeover
- Paint a piece of furniture! It’s inexpensive and I went with a fun emoji theme on this one!
Supplies You Will Need For The Splash of Color Resin DIY
- Resin
- When deciding on which resin to use for your coasters, you need to keep in mind whether you want it just for cold cups or for hot ones as well.
- If only for cold drinks, you can be flexible and use whatever brand you like:
- If you want it to work for both hot and cold drinks, you need to look for a heat-resistant resin, like these:
- Stone Coat (Quick coat)
- Stone Coat (Heat resistant)
- FX Poxy ~ According to the manufacturer, this one is heat resistant to 500° F.
Here is the Quick Video Tutorial so you can add a Splash Of Color to your room decor!
Directions for the Splash Of Color Resin Coaster
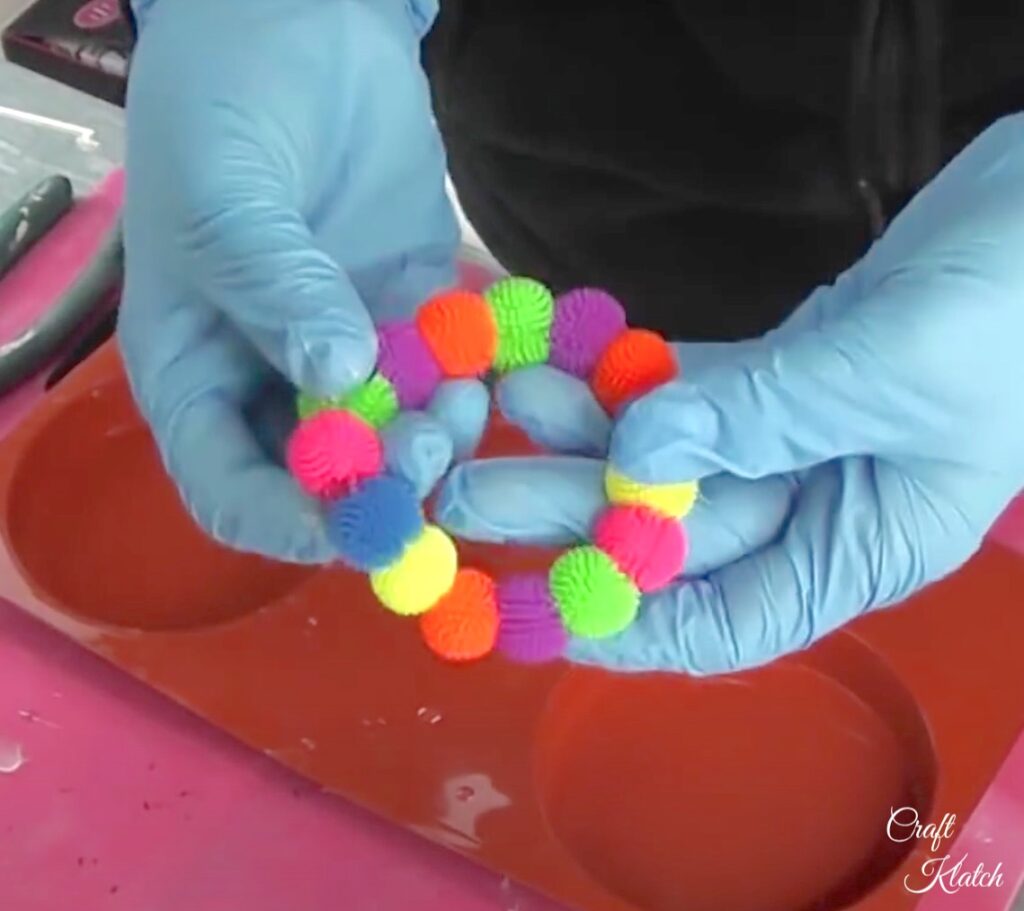
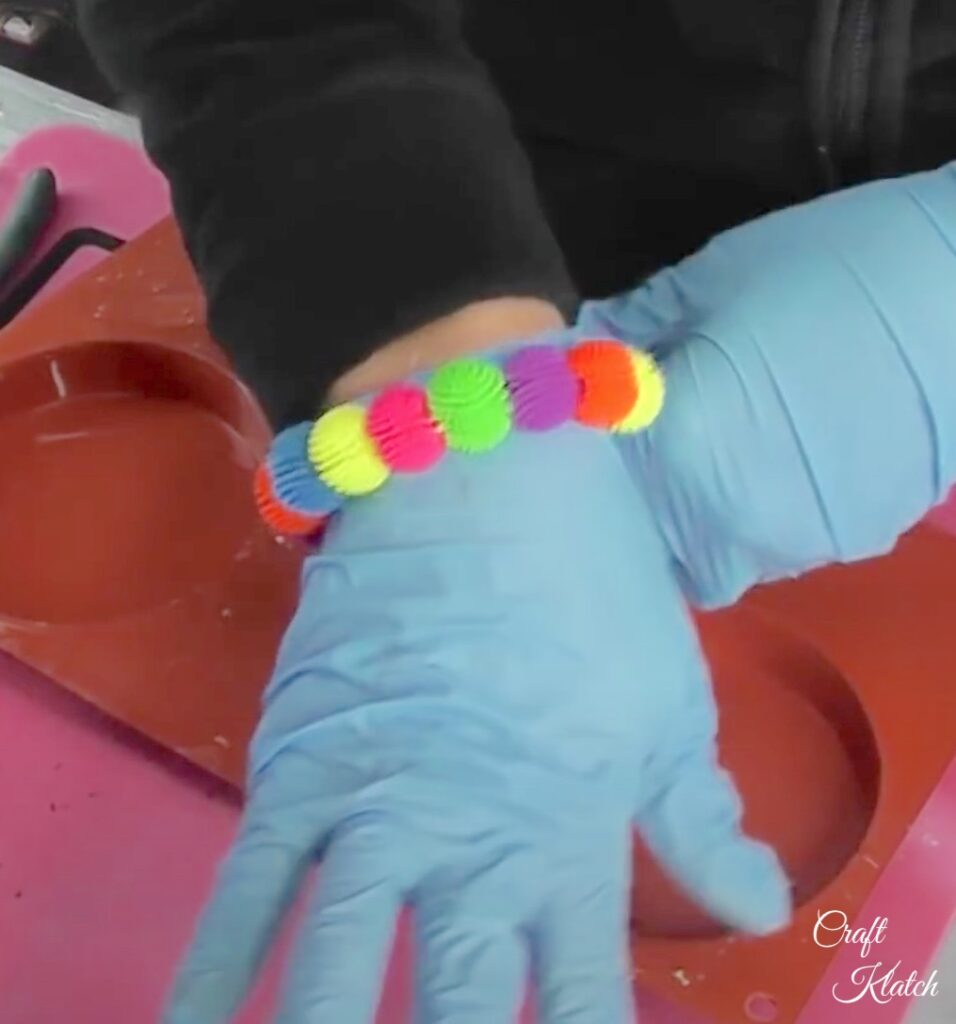
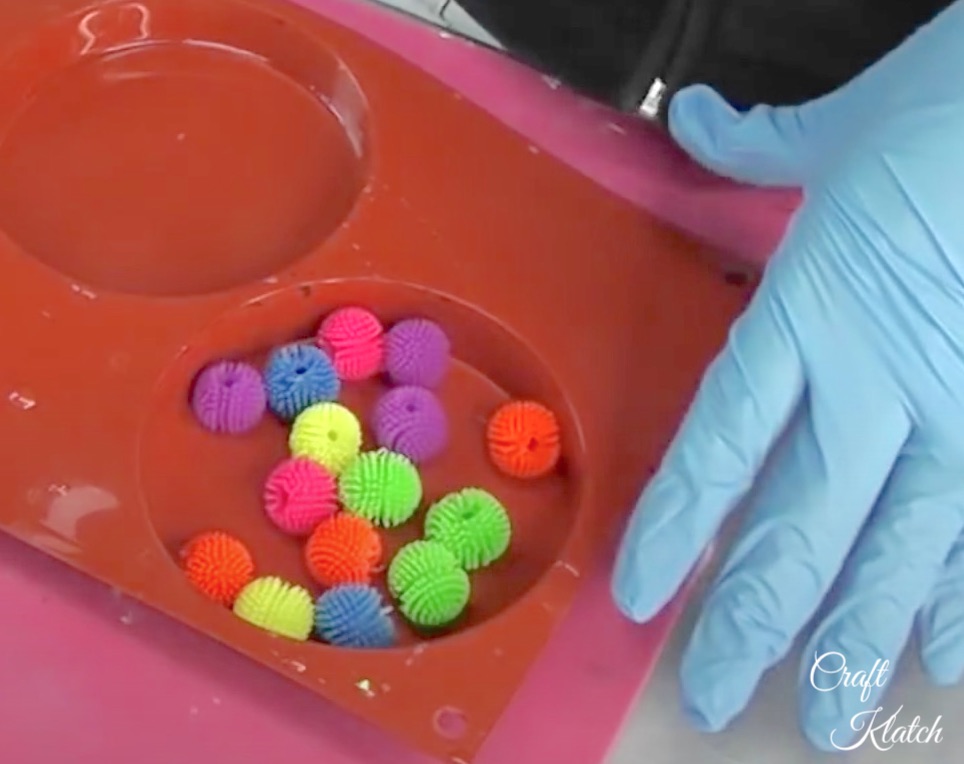
Step 1: Release the Koosh!
Take your scissors and cut the bracelet open. They are attached to elastic so if you just give them a stretch, you can easily cut it without damaging the squishy balls!

Step 2: Time For The Resin
Mix your resin according to the package directions. You need enough to coat the squishy balls. Plan on 1 ounce to get them coated. Mix your Koosh balls into the resin. They will float, so be aware. You only need a small amount of resin to coat the Koosh balls.
*The purpose of coating them is so when you put your next (deeper) layer of resin on, they will have cured in the first layer and won’t float.
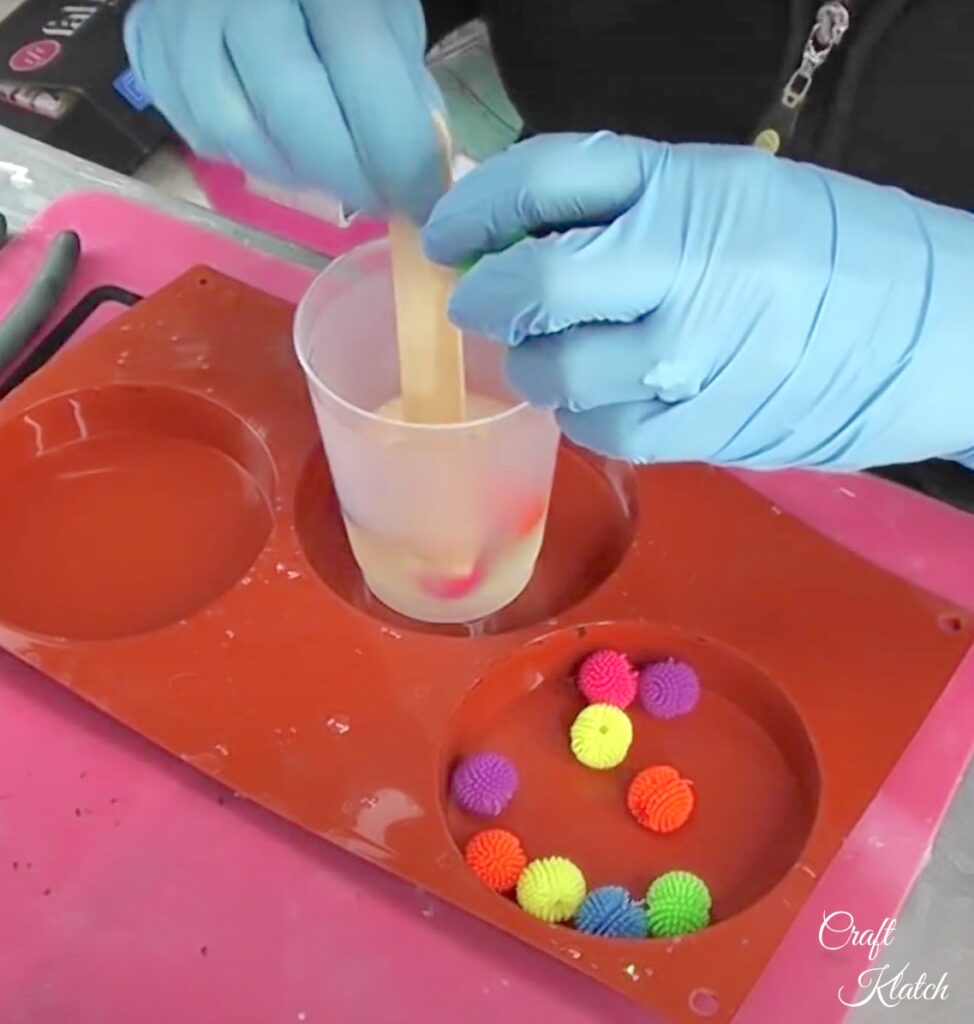
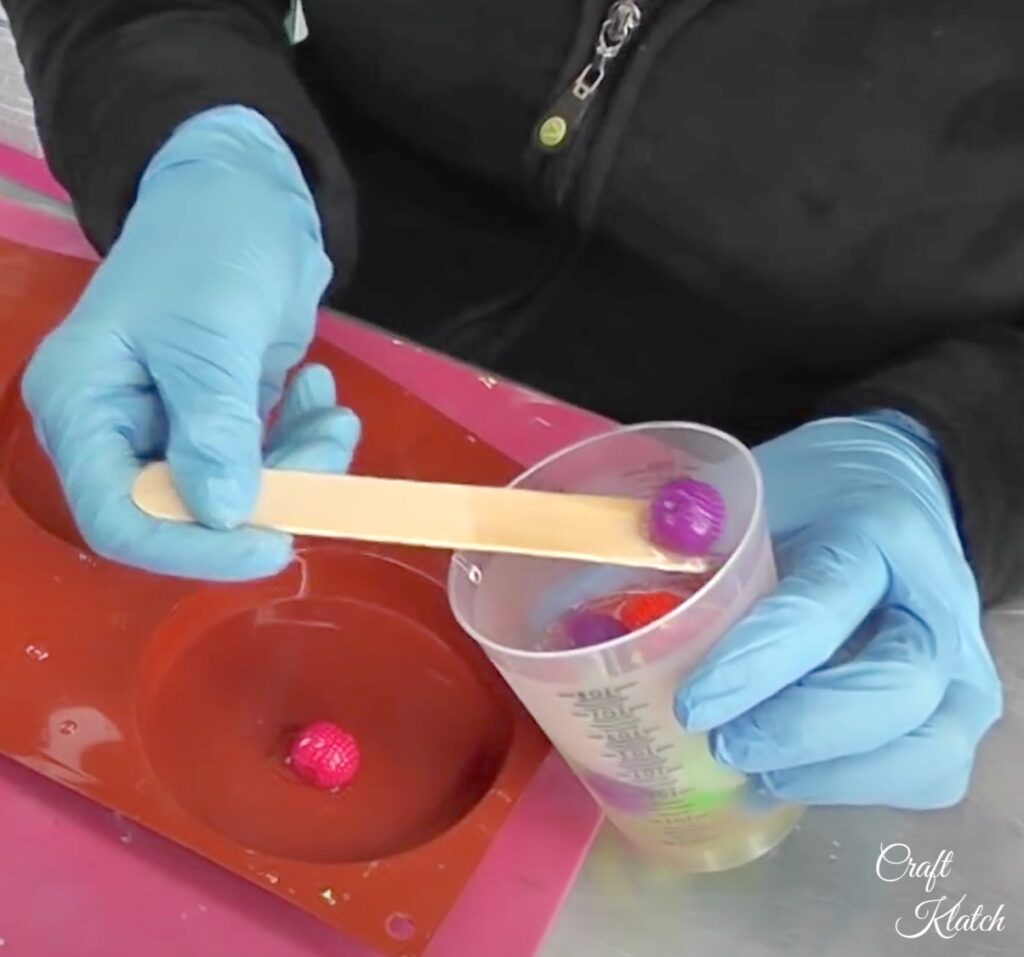
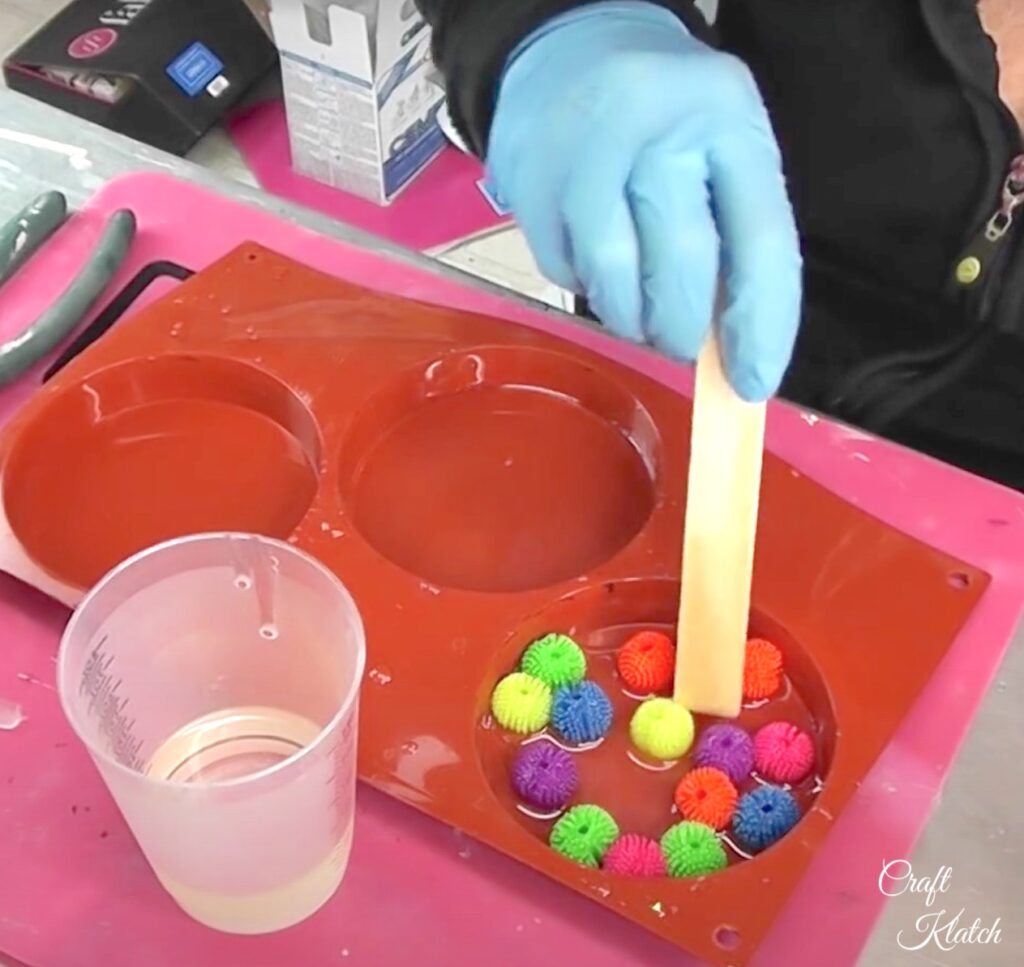
Step 3: Scoop ‘Em
Use your stir stick to scoop out the squishy balls and arrange them in your mold. Excess resin will run off the balls and pool at the bottom of the mold.
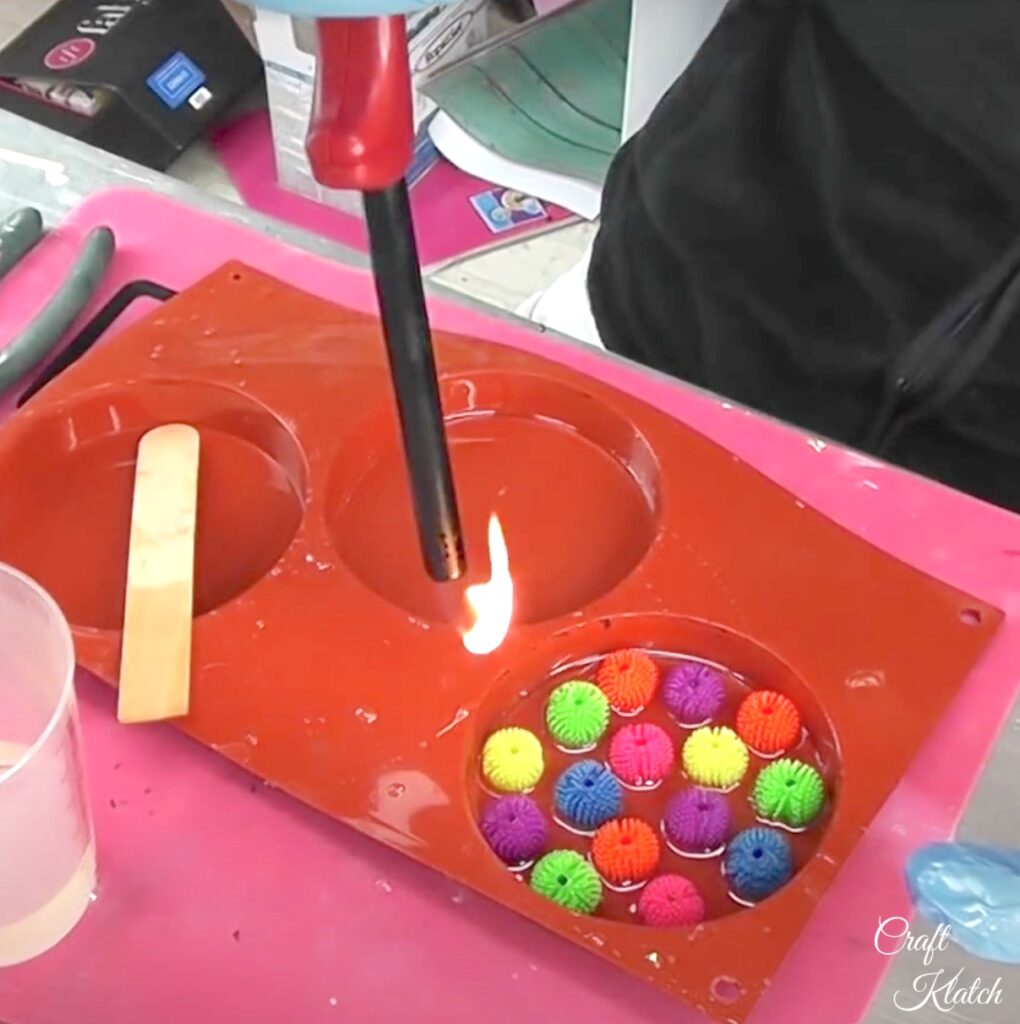
Step 4: Pop The Bubbles
Bubble popping is important. Normally, I use a lighter to pop the bubbles in my coasters. For this coaster, you are going to want to be careful with a lighter and either very, very quickly use it to pop the bubbles. Do not pause AT ALL because you risk melting the squishy balls and that’s no good!
As an alternative, you can use a drinking straw and blow through it to pop the bubbles. That eliminates the danger of melting balls!
Once you pop the bubbles, let it cure a minimum of several hours…or longer. That again is for the resin to set enough so the squishy balls don’t float with the next layer.
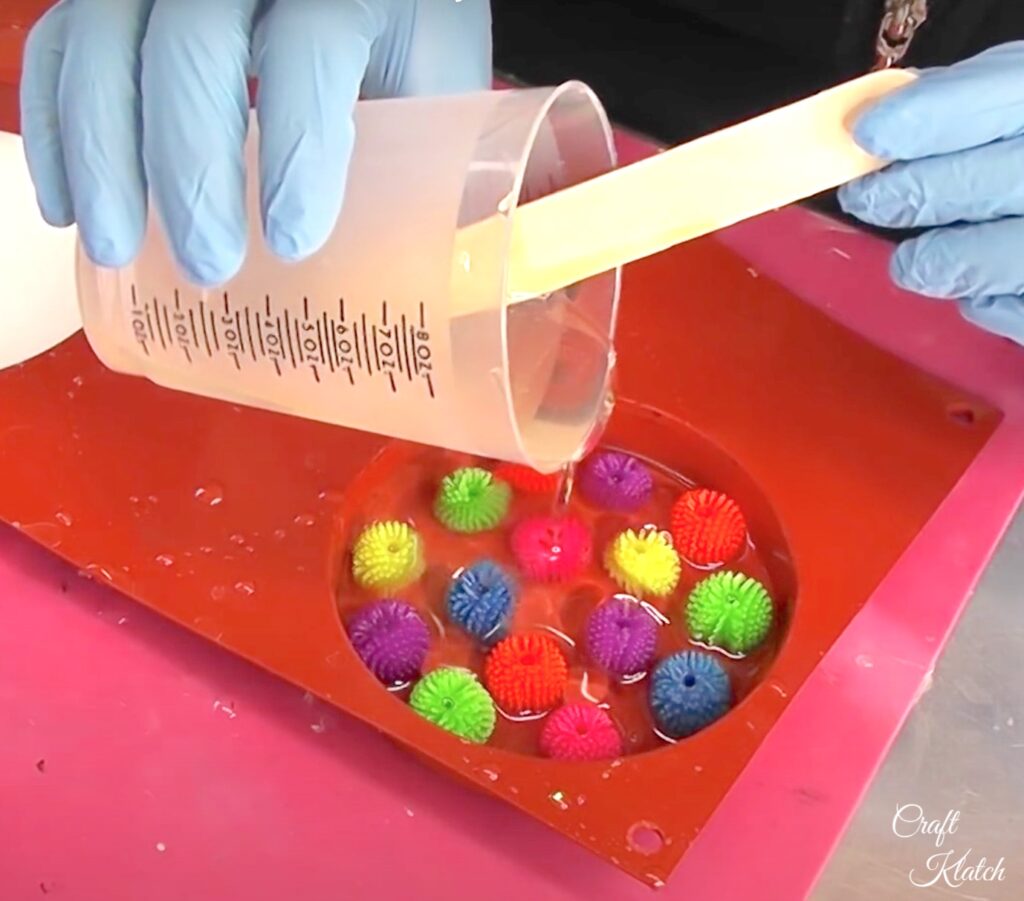
Step 5: More Resin
Now, mix more resin and fill up the rest of the mold. Likely, it will take probably another two ounces. It could take a little more, you just have to see. It depends on how thick your squishy balls are and if you had any floatage.
If they are totally covered, feel free to use your lighter to pop the bubbles. Then, let it cure a minimum of 12 hours.
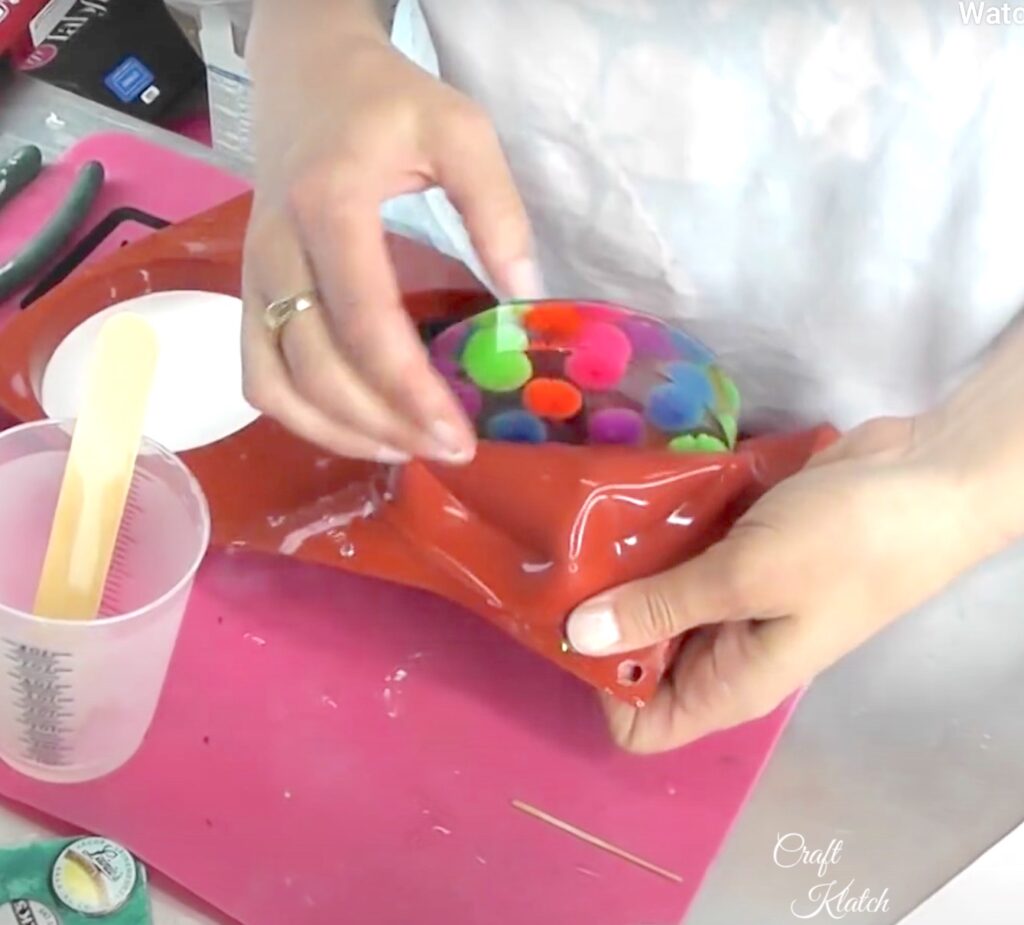
Step 6: Remove It
Once cured, you can remove the coaster from the mold. This will be a nice thick coaster.
The Reveal!
Now, you have an awesome resin DIY coaster that will add whimsy and a splash of color to your room decor!

Total awesome sauce!
This coaster was easy, fun, and totally delivered on adding a splash of color!
For a really easy splash of color project, try making these DIY Beachy Vases! So easy and so pretty!
Thanks for stopping by! Stick around and you will find other great projects!
Remember: Life’s too short not to shimmer, so grab your glue gun and your glitter!™
Stay safe!
Mona
Six Things That Remind Me Of The Koosh That You Might Need In Your Life!