I thought it was time for a craft room/she shed building update! Things are coming along and dreams are coming true!
It’s been a while since the last update. I really thought we’d be finished by now.
We are not…but we are getting close!
Have you noticed that everything always takes longer than you think…or is that just me?
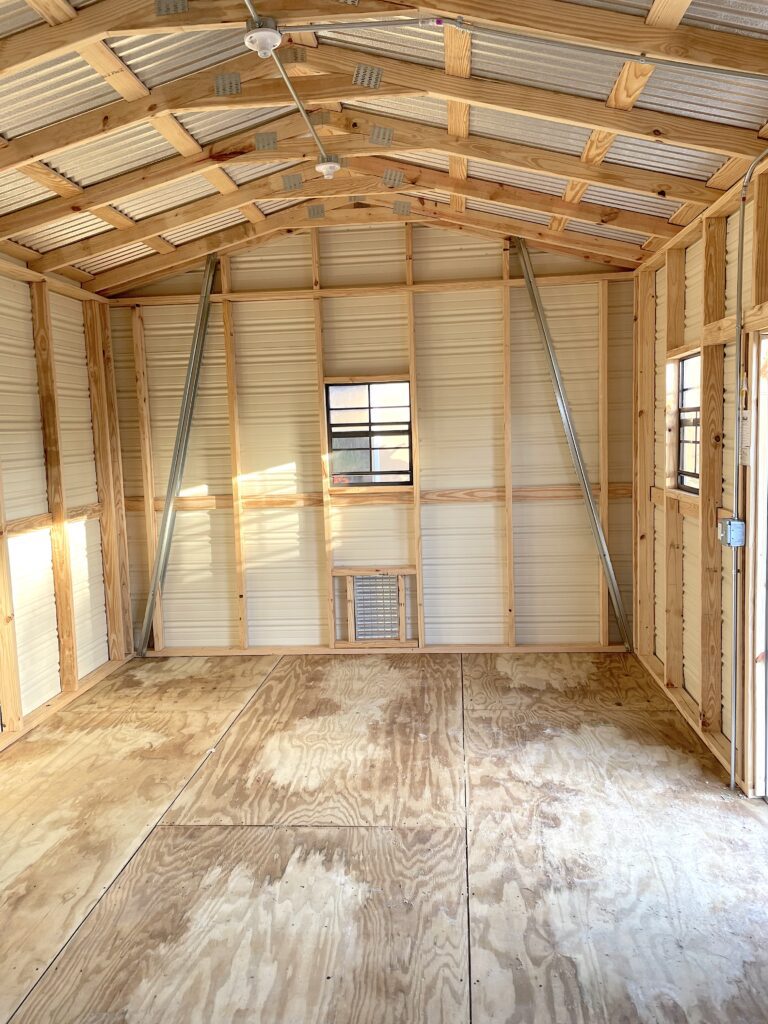
When I last updated, the shed had just been delivered and was a blank canvas…
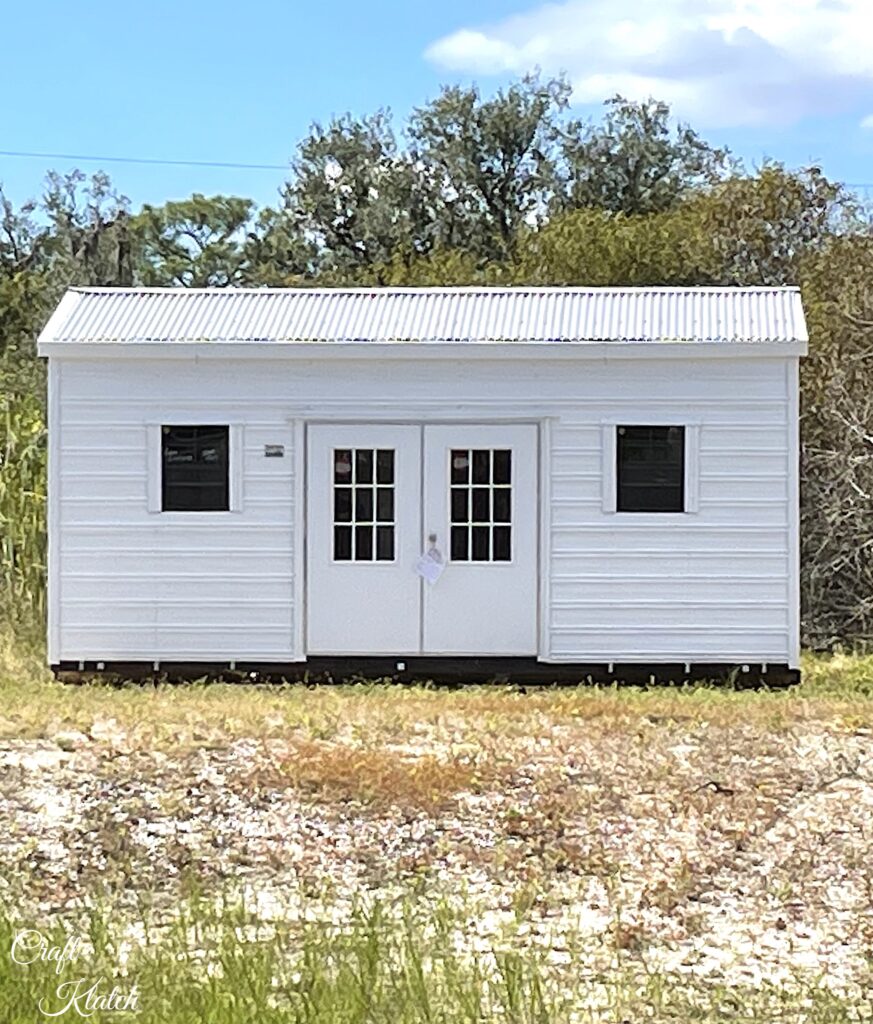
…Inside and out!
My goal was to give it a beach cottage feel.
I’m going to run you through the updates and the selections so far!
* This blog uses affiliate links. As an affiliate, I may earn from qualifying purchases from Amazon and others.
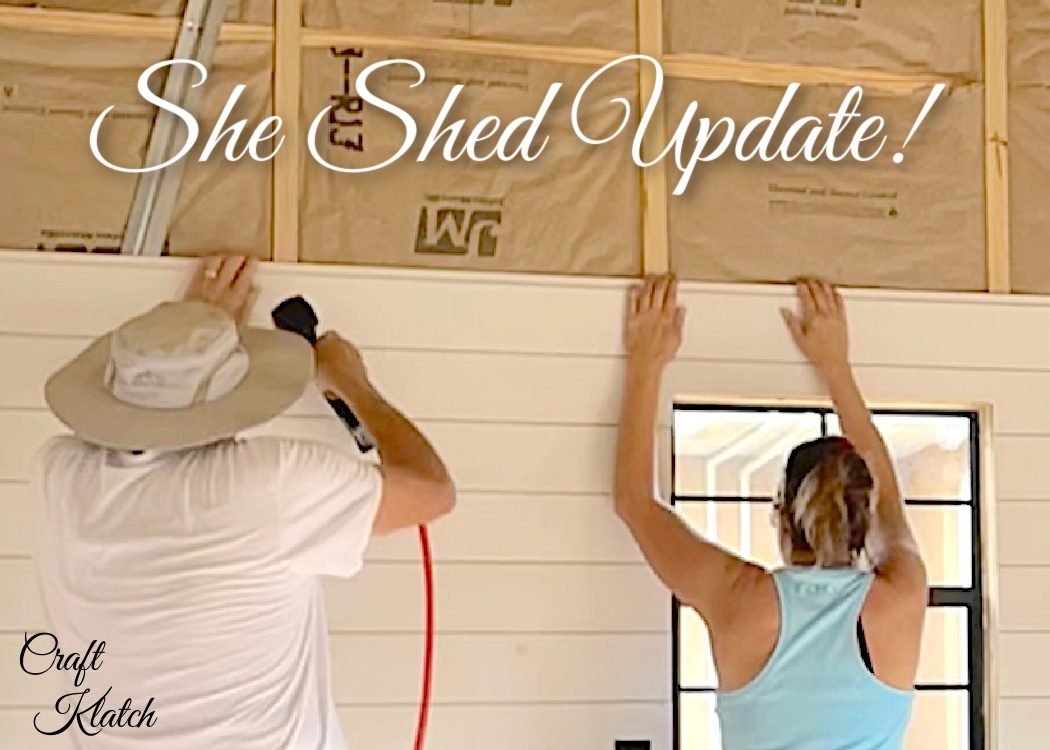
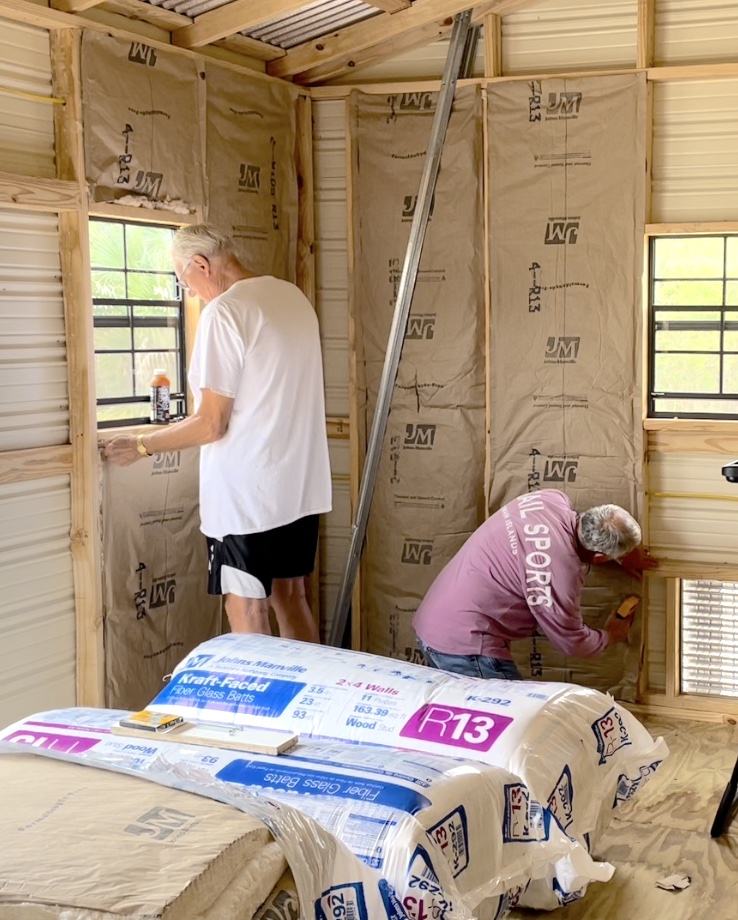
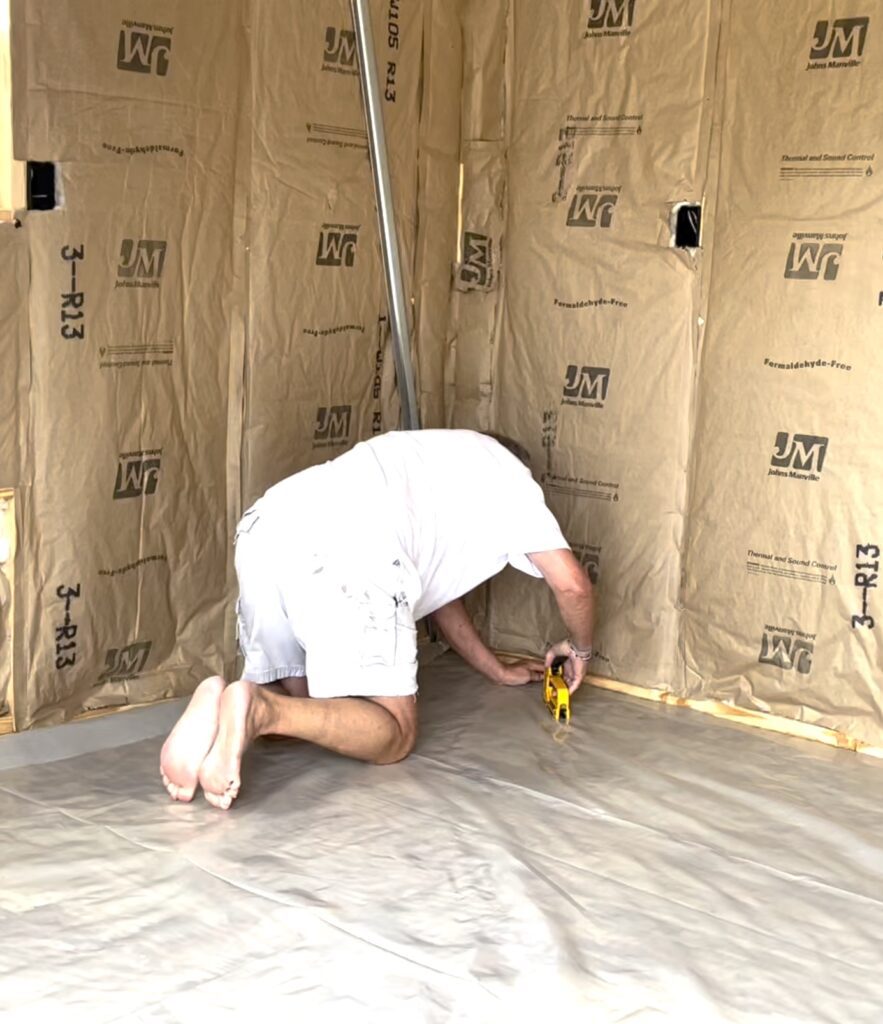
The Shed Building Got Insulation
Because the shed needs to be used year-round and be humidity controlled, it needed to be insulated.
So, Greg and Dad did a bang-up job insulating!

The Flooring
Once the insulation went in, it was time for the flooring.
We went with a waterproof luxury vinyl plank floor. HERE is the exact flooring.
Greg put down plastic sheeting as a moisture barrier before we laid the floor.
We had never laid a vinyl plank floor before, so there was a bit of a learning curve.
Greg and I had creative differences on how to lay the floor, so Dad and I did most of it.
We laid the floor before doing the shiplap walls because we didn’t want to put on any base trim. That way, we would be able to push the furniture flush against the walls for a nice clean look.

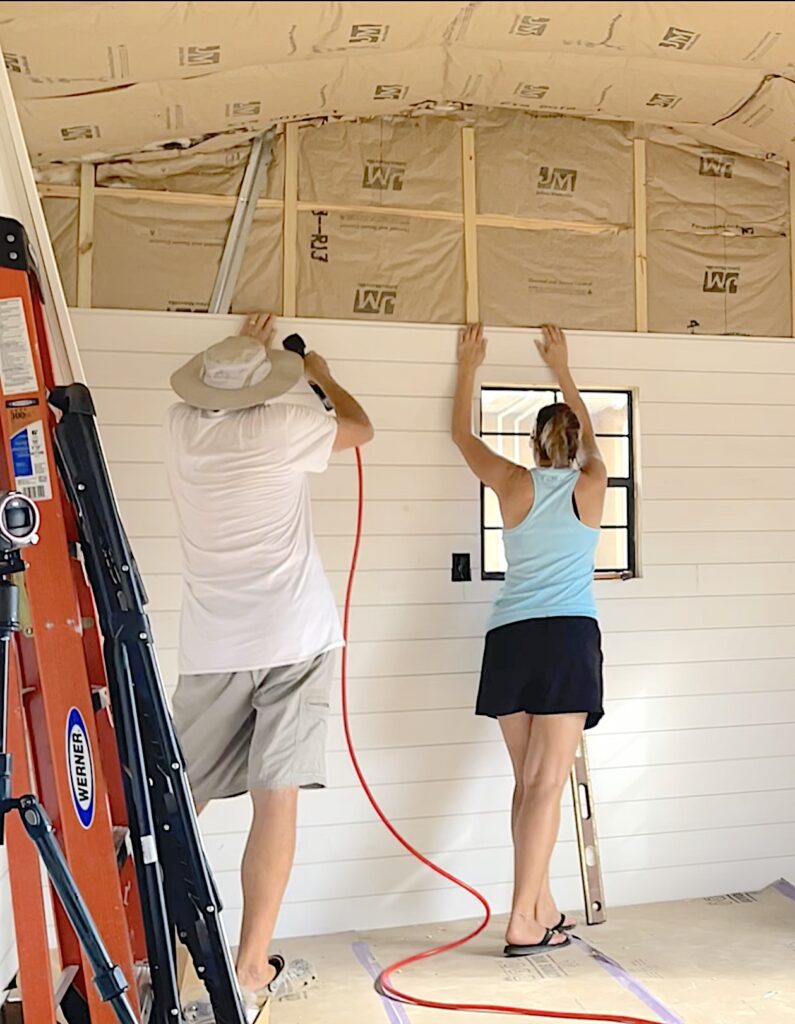
Shiplap Siding for the Shed Building
With the floor complete, it was onto the shiplap siding. It finally started to transform from a generic garden shed building to something better!
Here is the shiplap we used. It came pre-primed. And the way it was cut, it made even grooves.
It was quite a job but so worth it! The ceiling turned out especially cool!
You’ll see…
Did I mention it was 90 degrees out and we had no air conditioning?
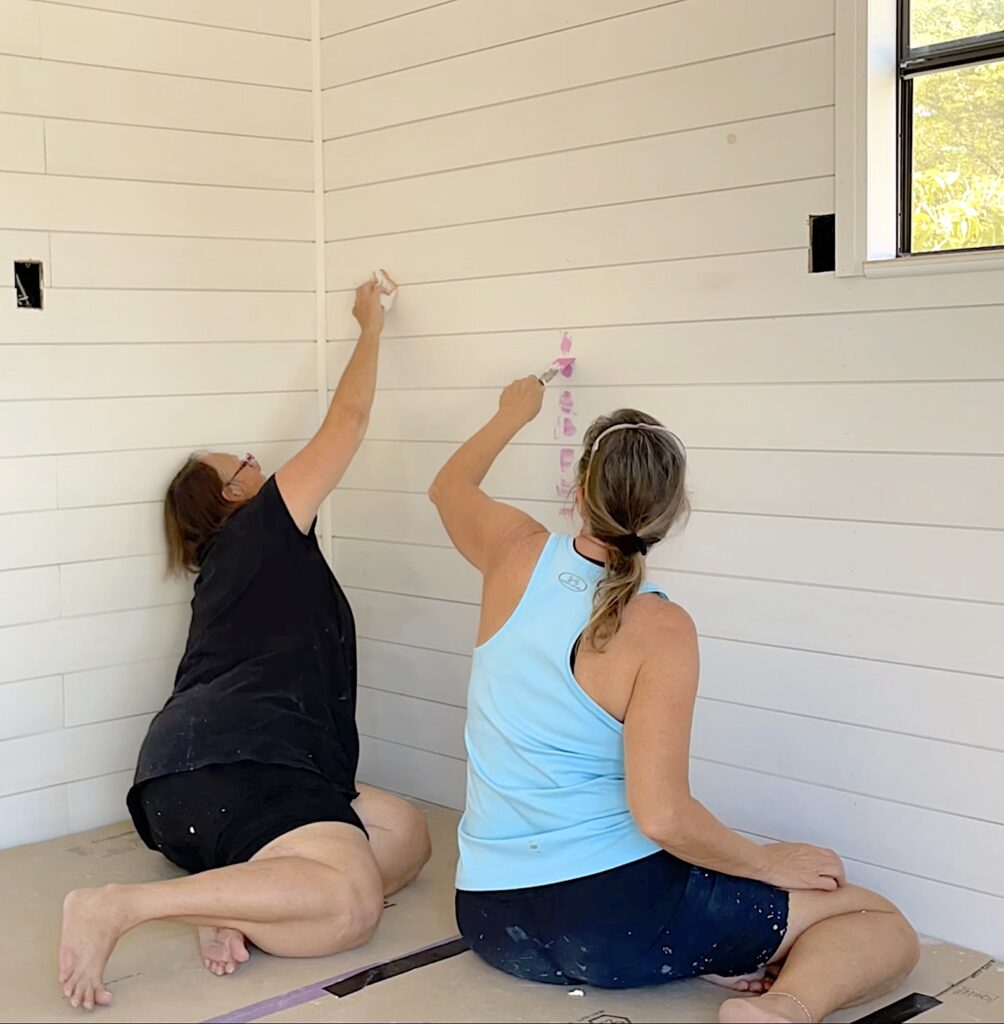
Spackling It!
My sister jumped in and helped me spackle the nail holes and seams on the shiplap siding.
I didn’t need the spackling to be perfect. They just needed to be more subtle.
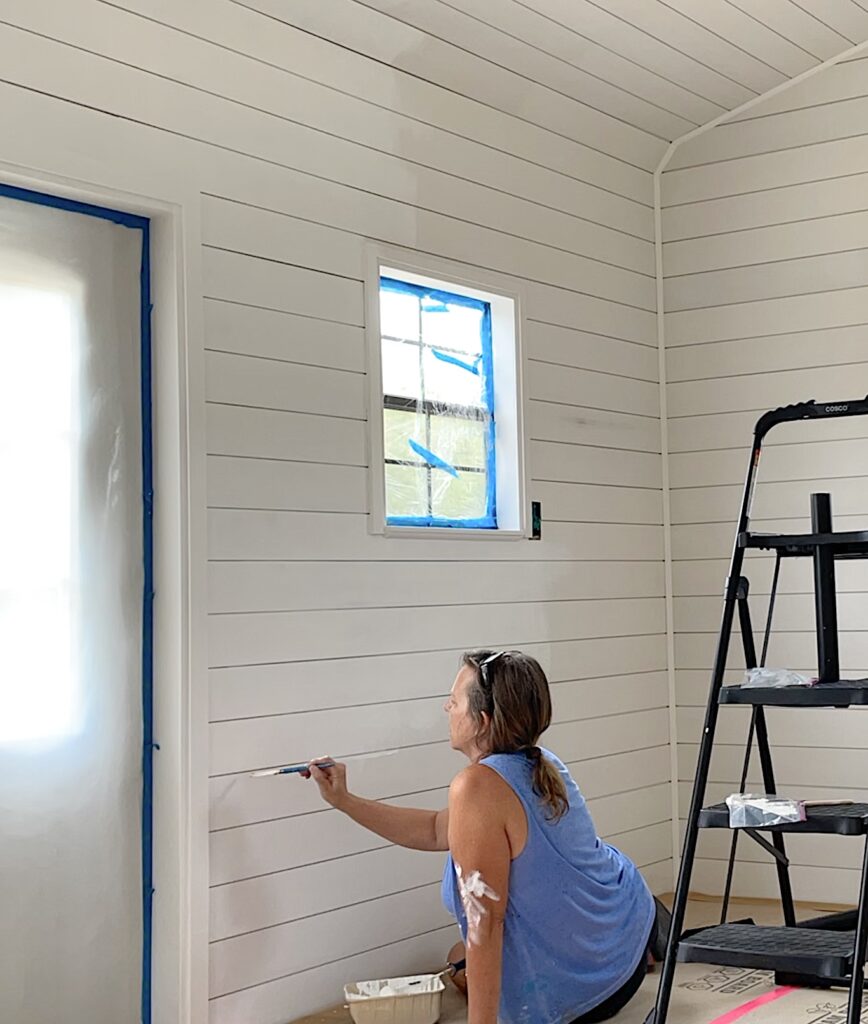
TIME TO PAINT!
This whole process took a looong time! I thought once we got to the paint, I’d see the light at the end of the tunnel…and I kinda did.
I gave a lot of thought to the color, finish, and how to paint the walls.
Because it was shiplap, I wanted to use a paint sprayer for two reasons:
- Shiplap has lots of crevices and would take forever to paint by hand.
- A paint sprayer gives a nice finish.
The good news was I had access to two paint sprayers.
- My sister had one that she had never used before.
- Our friends had dropped off a paint sprayer, in case I wanted to use it.
The bad news: I had never used a paint sprayer.
My sister really wanted to use hers…I was game…but a little nervous. She brought it over. We unpacked her nice new machine.
It actually came with a larger sprayer and a smaller, finer sprayer.
We read the directions and reread them two more times.
Then, we used cardboard to test the sprayer.
I thought we had it…
…but I was still scared.
So, I made her do it. She had never done it either.
It did not go well…
The paint just poured out of the ridges and down the wall…
AAAHHH!!!
Pure panic.
I ran and got brushes and rollers and we spread that paint around and used the brushes to pull the paint out of the ridges.
Not good…
So, I spent 5 hours the next day painting…ONE…WALL.
It took FOREVER because you have to get the paint in ALL the ridges.
There was still no air conditioning in my little metal shed. I had to have the windows and doors closed because there were cotton fuzzies floating through the air outside and I did not want those stuck on my freshly painted walls.
It felt like I was taking part in a sweat bath ceremony and I might start hallucinating at any time.
After finishing up the five hours and doing the math on how long it would take to do the whole shed…twice…I began rethinking the paint sprayer.
I went into the house and talked Greg into helping me figure out the paint sprayer that our friends had left at our house.
After reading the directions, reading again, and thinning the paint…it was time to try again.
IT. WORKED. LIKE. A. CHARM.
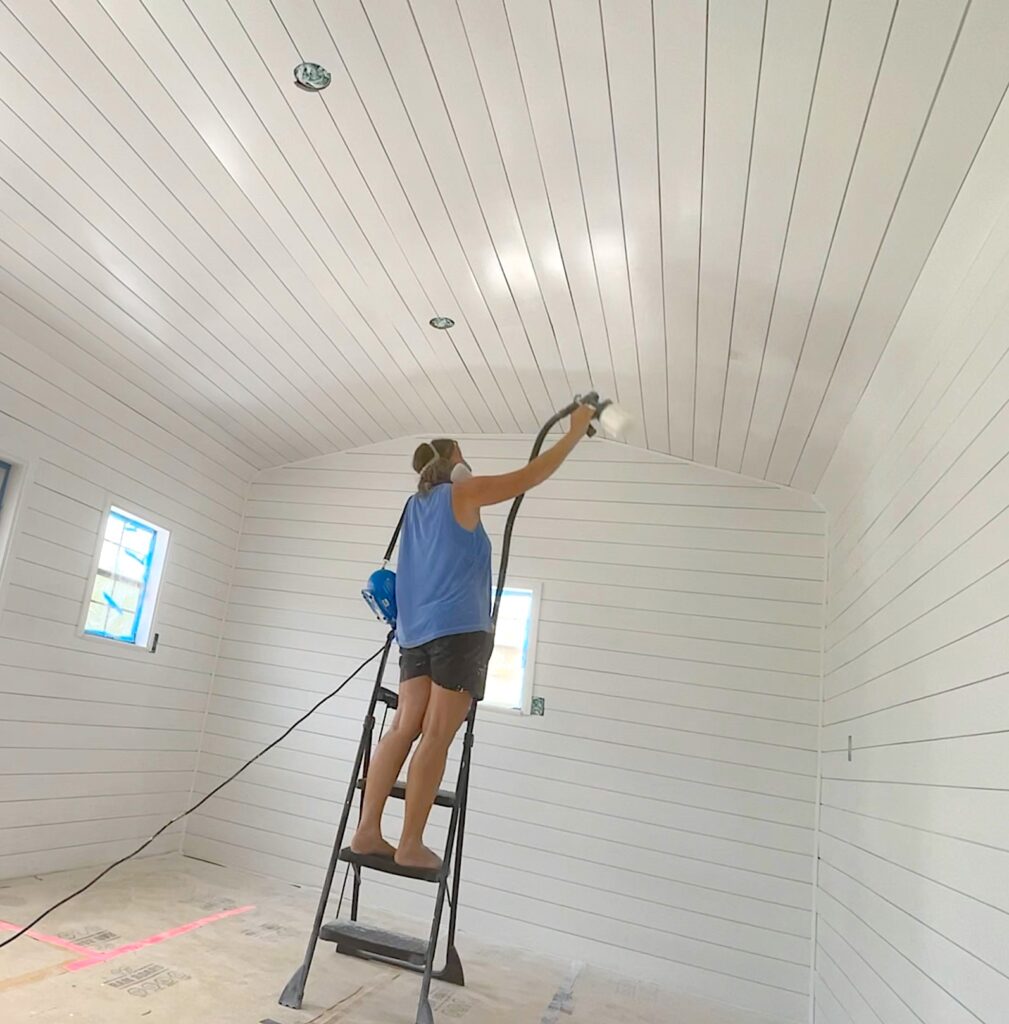
I blew through painting that shed like you would not believe! And the finish was beautiful!
And I used less paint than I would have rolling and brushing.
The white paint gave it such a bright and fresh feel!
You can find the exact paint I used HERE and I had it tinted Highly Reflective White.
Reflecting upon the situation, I think my sister and I selected the wrong sprayer. We definitely should have gone with the finer sprayer, even though the other one said it was for walls.
The one from Pam and Joe was definitely finer. This was the paint sprayer I used and I LOVED it!
Check the paint off the list!
Onto The Lighting
This is when things got fun and the decor started to take shape!
The lighting! I found a beautiful light fixture for inside the shed and it had been sitting and waiting for the right time…
That time was NOW!
I could not have been more excited to have the electrician show up that day!
Giddy is the word that comes to mind.
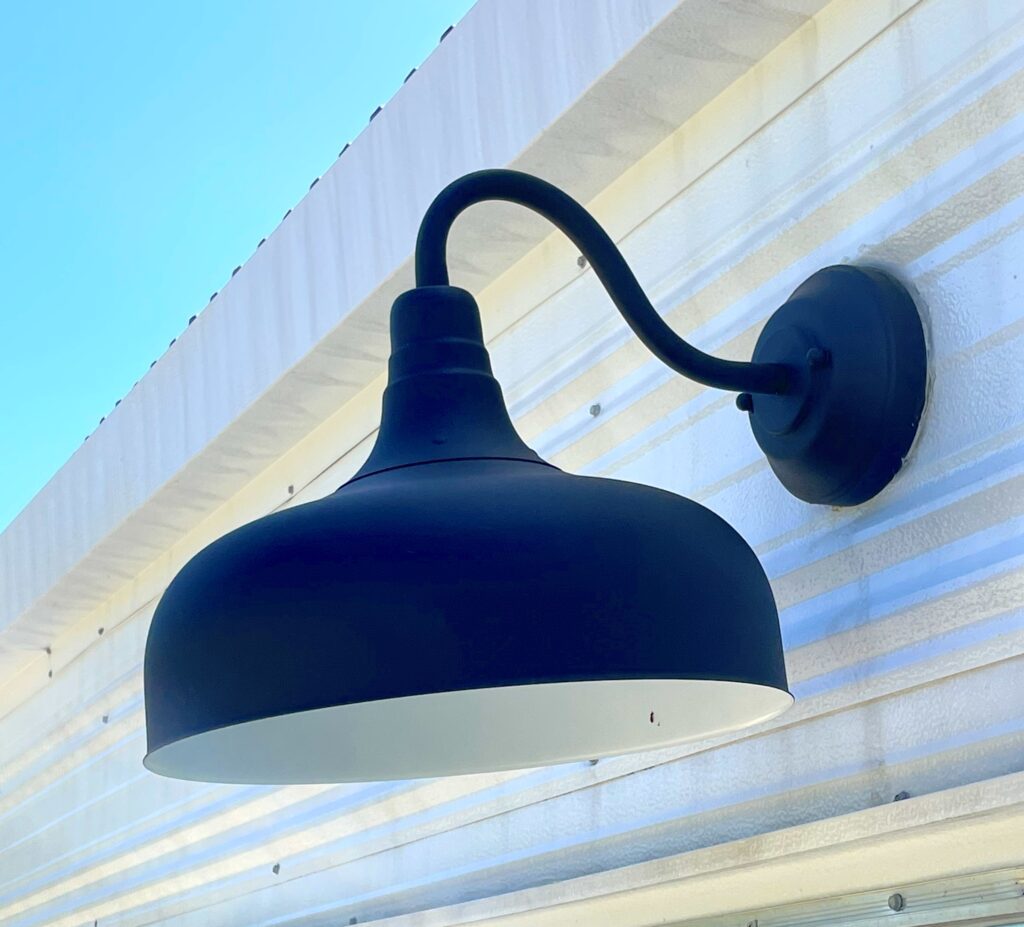
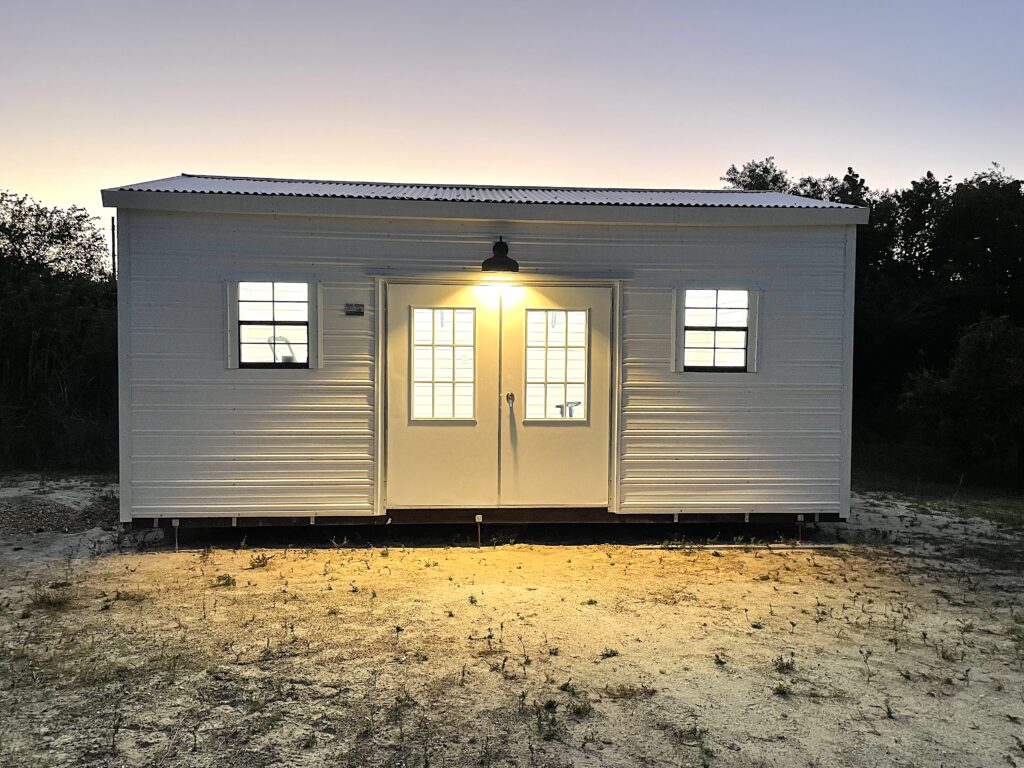
I had a nice LED barn light fixture to be installed over the front door.
Love the look!
Just enough rustic for the exterior.
Then, it was onto the track lighting, so my videos would have good lighting! I liked them because I could move them around and direct the lighting!
PERFECT!
THEN…
The icing on the cake. A little glam for my beach cottage.
I had to put it together.
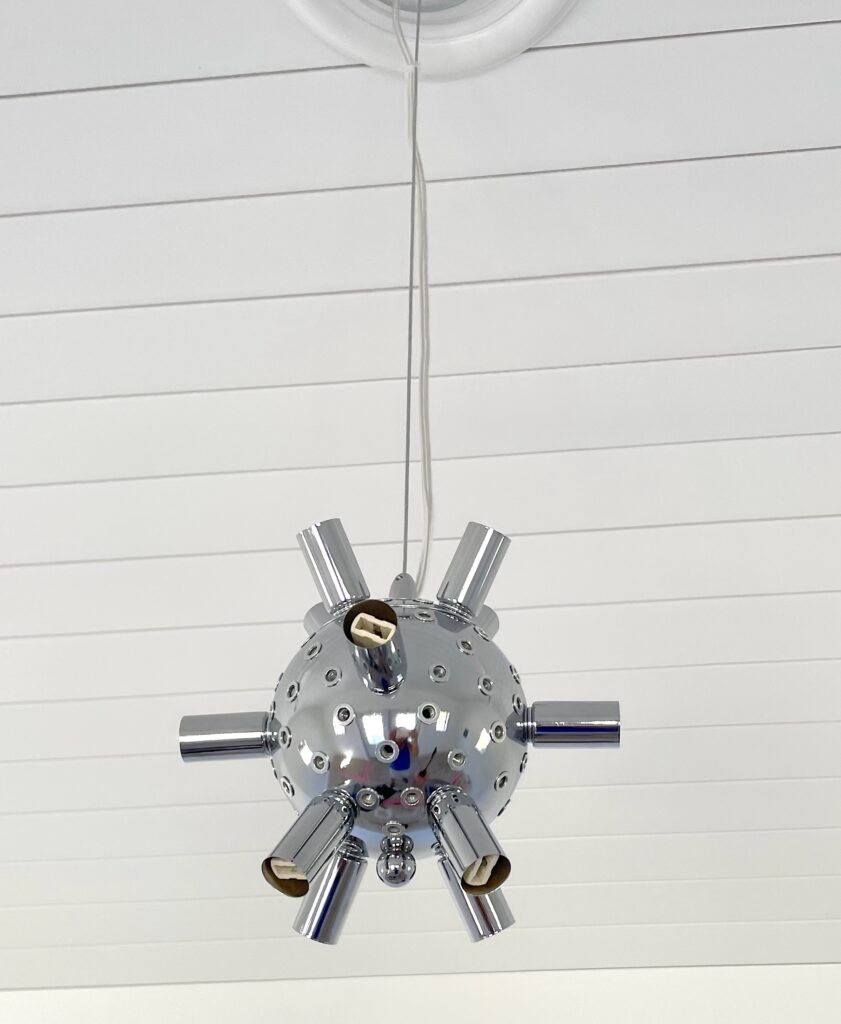
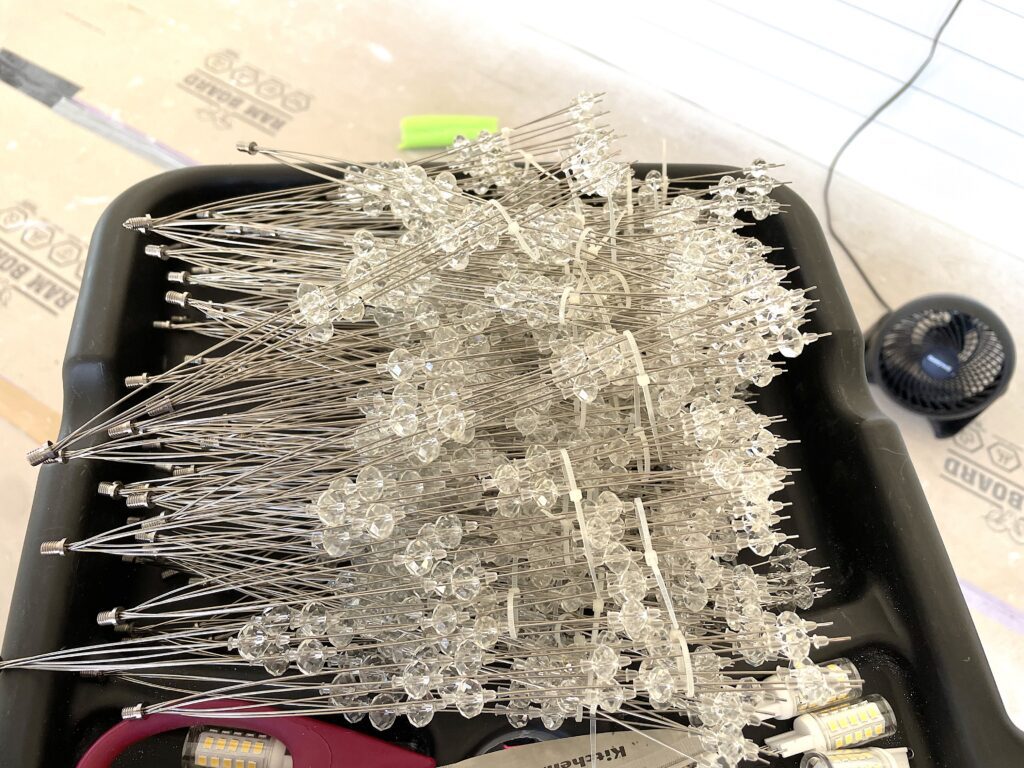
It didn’t take that long and it was so worth it!
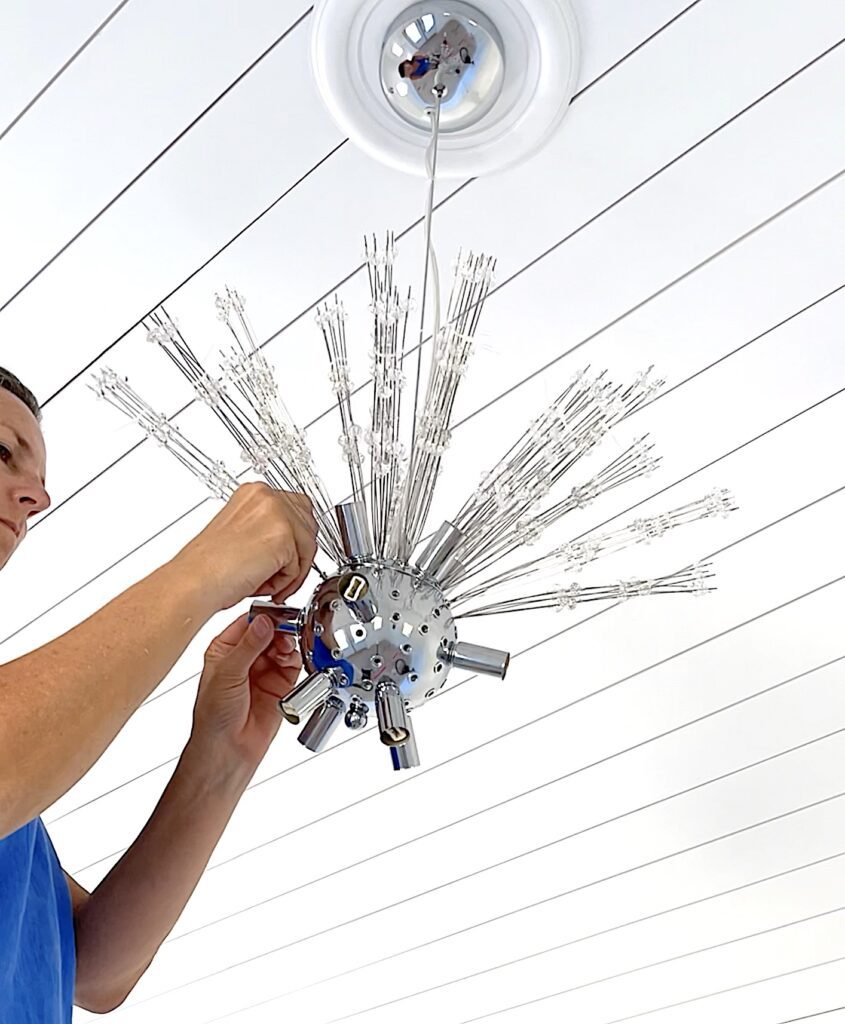
My crystal dandelion light!!

I. COULD. NOT. LOVE. IT. MORE!
It’s technically called a sputnik light, but I think it looks more like a crystal dandelion!
Let’s Get Some Air In This Sweat Lodge!
We had been sweating our butts off working in the shed building for months and had given it the nickname of The Sweat Lodge.
I can honestly say that blood, sweat, and tears went into putting all this together but by far there was more sweat than anything else.
We bought a Pioneer inverter unit and had a heat and air professional come to install it. We just didn’t know enough about it to do it ourselves.
I needed the craft room to be temperature-controlled and humidity-controlled, especially when working with resin.
I did a lot of research and bought this Pioneer unit based on the reviews.
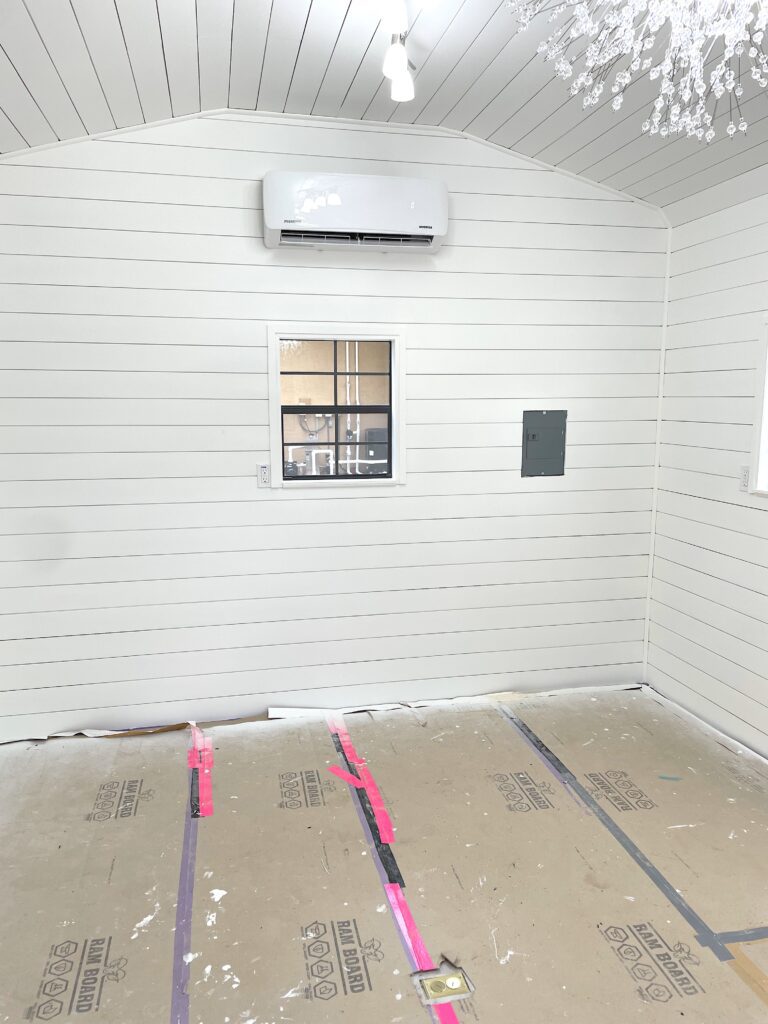
It did not disappoint!
It keeps the temperature steady and it’s amazing how quiet it is!
Really quiet!
Like you don’t even know it’s on quiet!
That was also a must for when I am taping my videos.
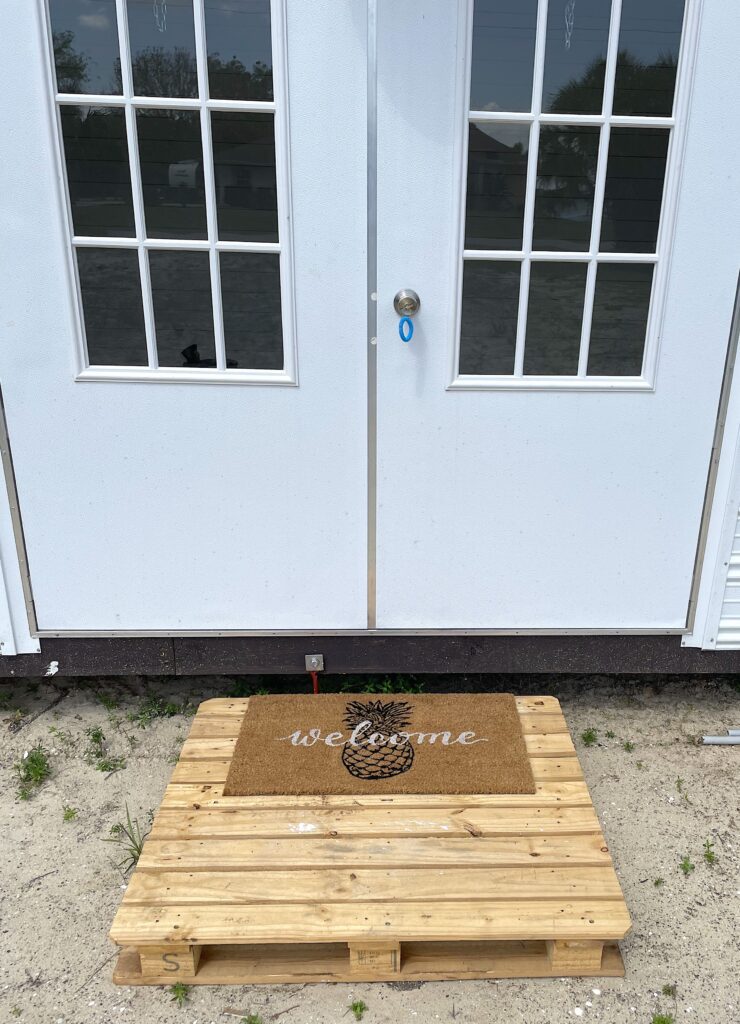
Temporary Front Porch
Eventually, there will be a front deck or front porch, just not covered. However, to make it easier to get in and out and to have a place to wipe my feet, my neighbor suggested using a pallet.
Great idea, Heather!
Here is the inside of the craft room she shed! It is starting to take shape and looks way different than the generic shed building it started out as!
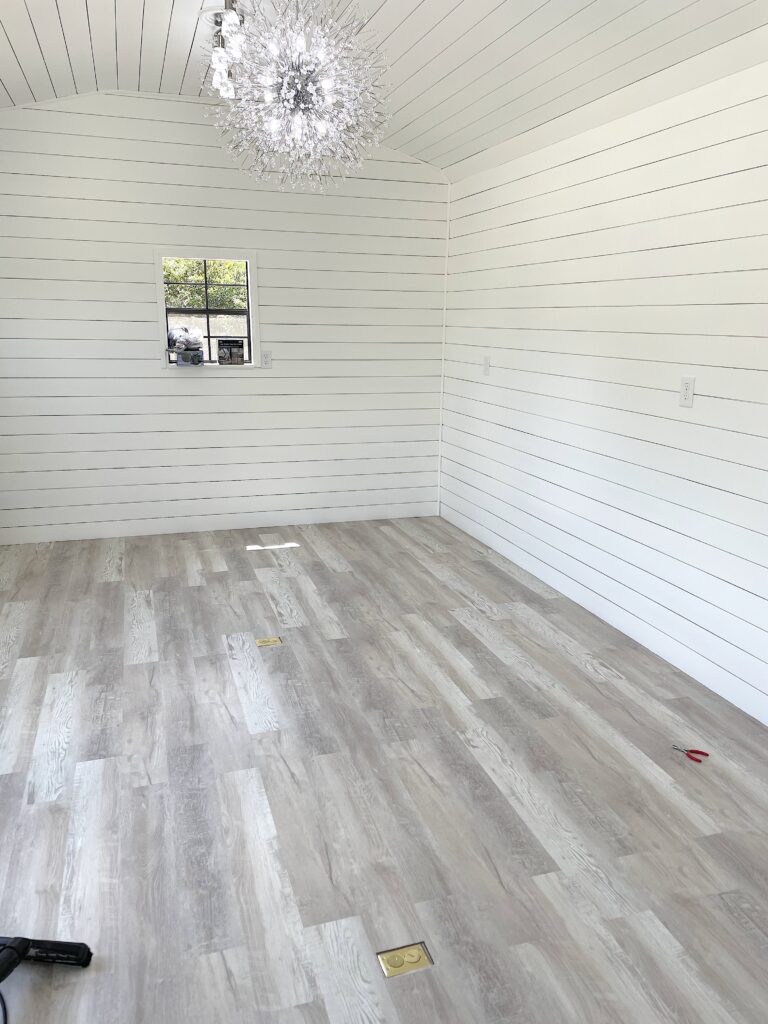
I’m in love already!
And here is a look from the outside at night. It’s definitely lit up!
If you missed my first post about the she shed and my vision…be sure to check it out HERE!
If you are on Facebook, you can see the video progress HERE!
For home decor inspiration posts and DIYs, I think you will enjoy these:
- 5 Garbage Pick Items You Should Always Grab
- Desk Makeover (I have this little beauty in the shed!)
- Paper Clip Coaster
- 11 Garbage to Gorgeous Projects
Thanks for stopping by! Remember: Life’s too short not to shimmer, so grab your glue gun and your glitter!™ Stay safe!
Mona
You have such wonderful idea’s. I enjoy reading and going to enjoy trying some of them myself. Thanks a million.
Thank you so much, Brenda! ❤️
Awesome progress!!!
What a fiasco with the first spray paint thing!! Glad the second one worked much better!! It’s coming along GREAT!!!!!
Thanks, Sylvia! It about gave me a heart attack! I’m pretty excited!
LOVE LOVE IT !!!!!!!!! Totally beautiful. I am also jealous. Cannot wait to get back crafting with you by video.
Thank you, Carolyn! I can’t wait either!
What an awesome job you all are doing (I am so jealous)! Kudos to the construction crew.
Thank you so much, Pat! Yes, they are amazing!
I am so jealous. It is beautiful. We have a camp that we plan on spending a lot more time at. I would love to get something like this that I can go and craft. Not enough room in our cabin to take my craft things to. My son is a carpenter so maybe he can help his dad to build me one.
Thank you, Charlene! I’m very fortunate! I know it’s hard. Craft things take up so much space! Good luck talking your son and husband into it!
A She Shed, oh you lucky lady you! Plus that light fixture is so good.
Thank you, Maria! I’m still in love with that light fixture and I am very lucky!
I have just had my she shed built and looking for ideas on how to complete the inside. I never thought doing floors first. Love your dandelion light. Thanks for giving me ideas.
I’m so glad they were helpful, Rose! Congratulations on your she shed!!!