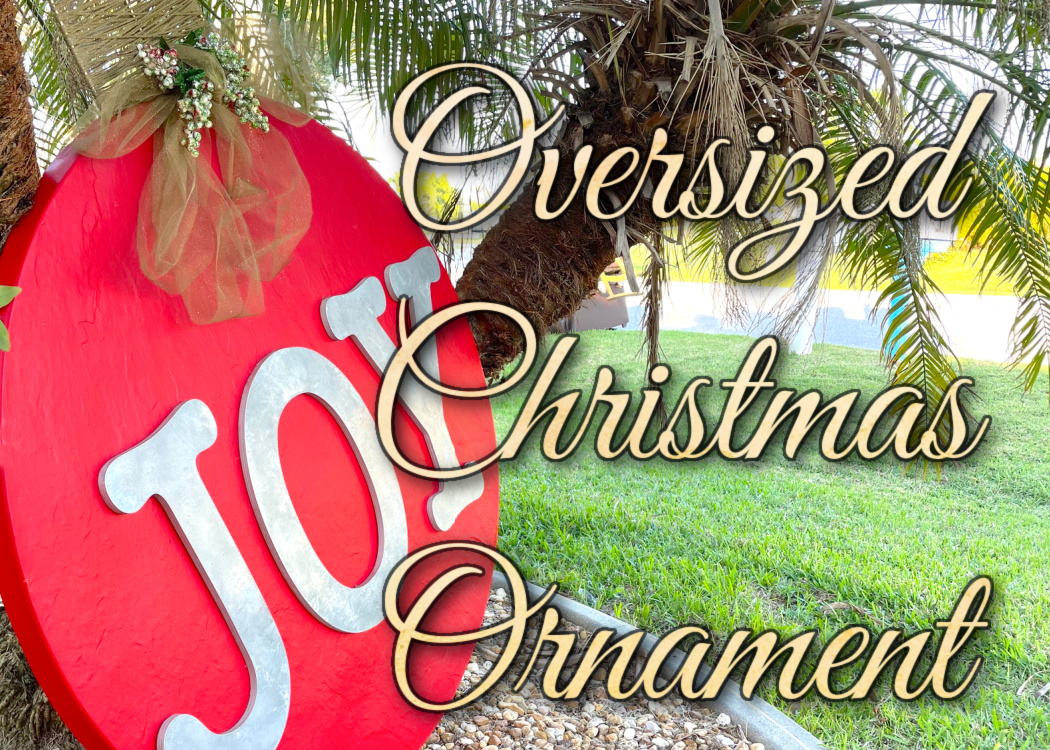
I will show you how to take a damaged, dirty, and waterlogged tabletop and turn it into an outdoor Christmas decorations idea DIY!
Yup, from down and out to overJOYed!!!
Think outdoor oversized ornament!
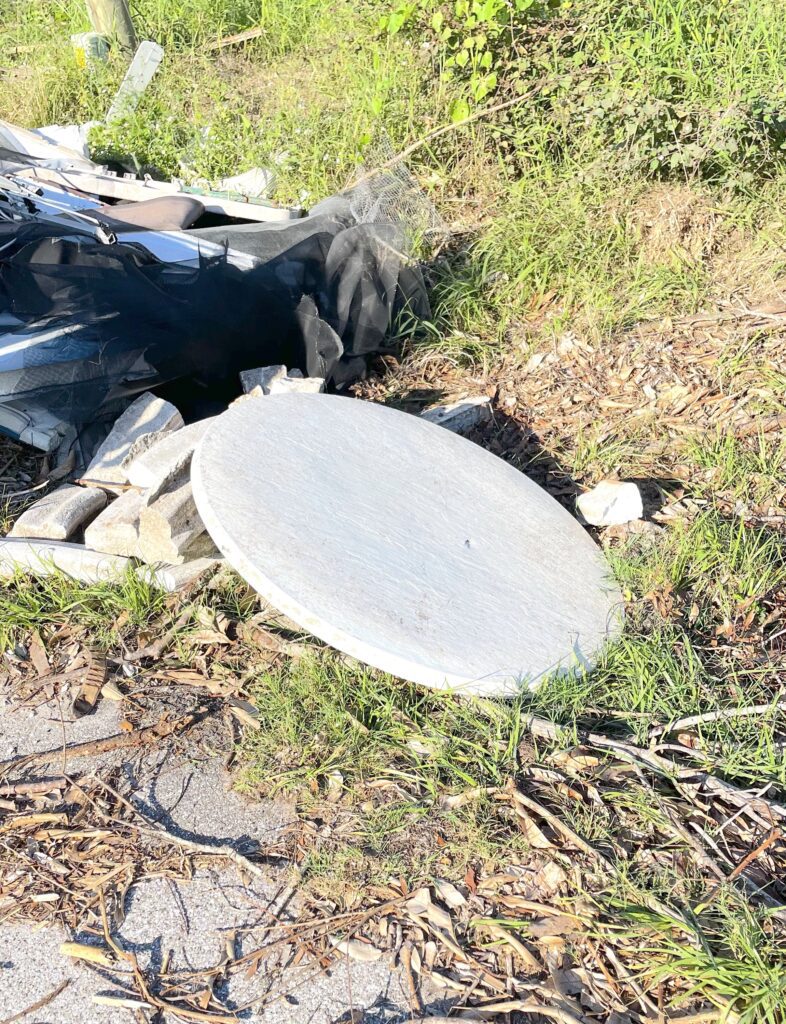
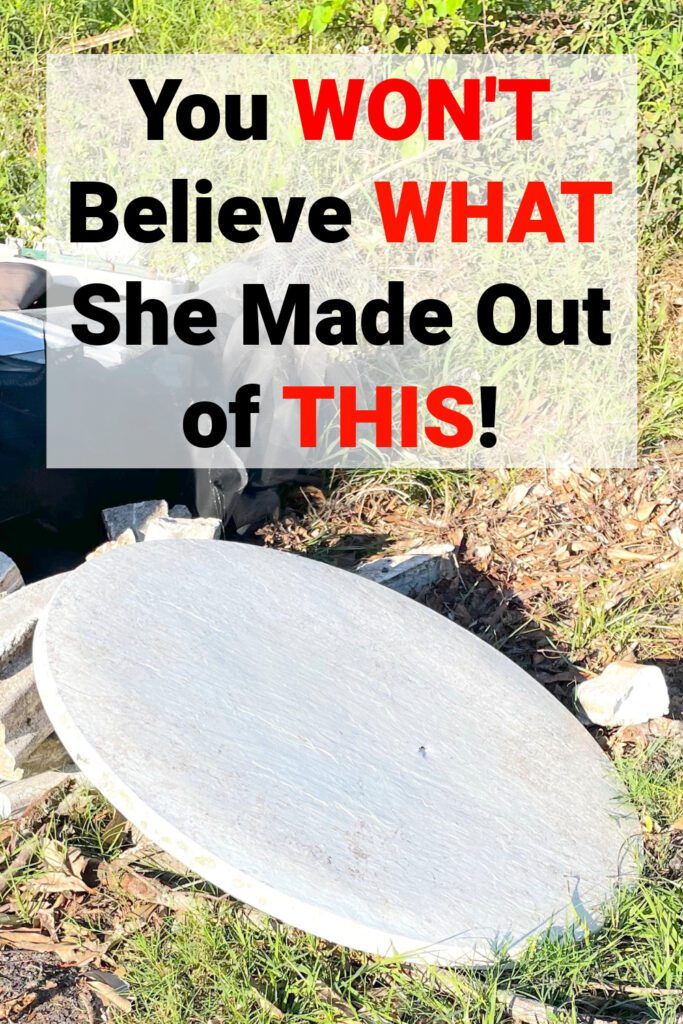
This was a post-hurricane find! I went for a walk and one thing after another just jumped out at me! Greg wasn’t there to stop me, so my mind started racing with fun projects!
Before I knew it, I was running home to get the mini-van!
I found many things that day, but today I am turning my focus to the dirty, holey tabletop!
This project is perfect if you are looking for outdoor Christmas hanging decorations because once I removed the back of the table, it could easily be hung!
I decided to tuck it under the palm trees, but my original thought was to make it part of my outdoor Christmas porch decorations.
I guess it was bound for bigger and greater things.
My favorite thing about this oversized ornament is that it was definitely budget-friendly! You would spend an arm and a leg trying to buy an ornament that large but with a little paint, and leftover other stuff, we have a showstopper!
Here is the Outdoor Christmas Decorations DIY Video Tutorial
If you want to see exactly how I made this oversized Christmas ornament, check out the video!
Materials You Will Need for this Christmas Miracle Makeover!
*Disclosure: This blog uses affiliate links from Amazon and other retailers. I earn a small amount from qualifying purchases at no additional cost to you.
- Red paint
- Silver paint
- Gold paint
- Primer
- Tulle
- White berries: try the dollar store
- Glitter
- Glue
Outdoor Christmas Decorations DIY Directions
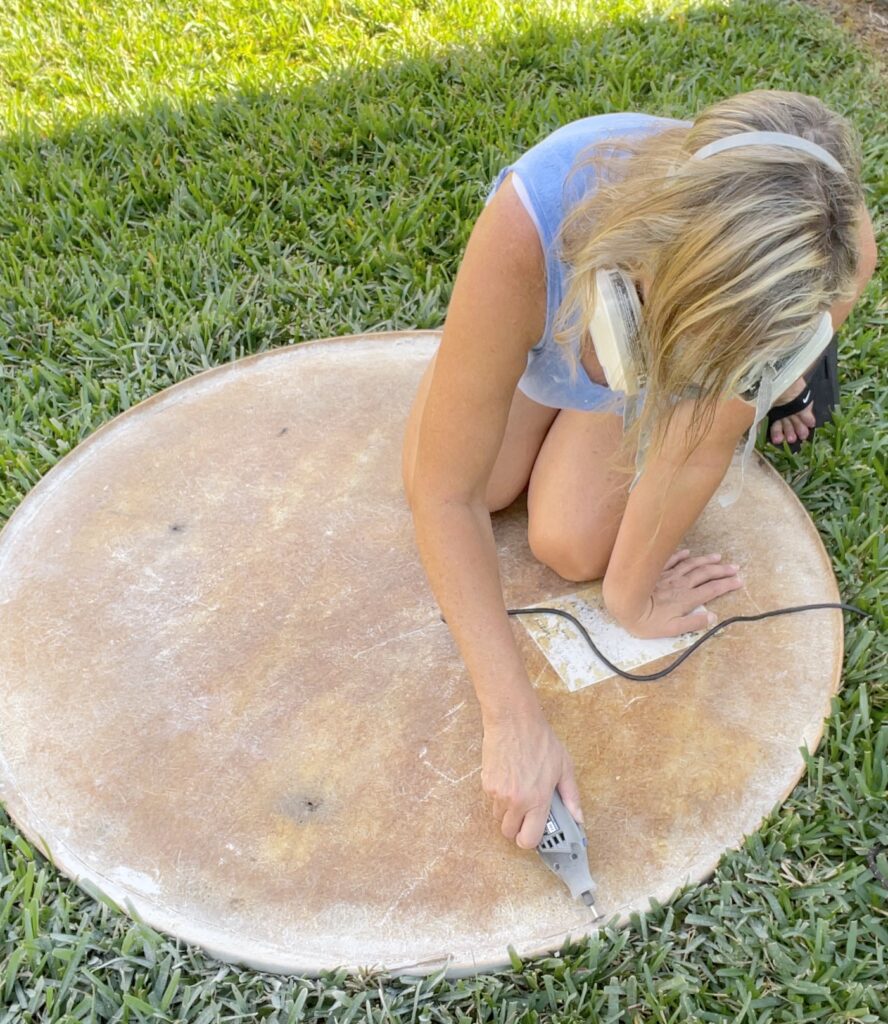
Step 1: Remove the Back
The table had a hole in it and the inside must have gotten waterlogged during the hurricane. If you haven’t seen my scary hurricane experience, you can find it on Instagram HERE!
I used my rotary tool to remove the back of the tabletop.
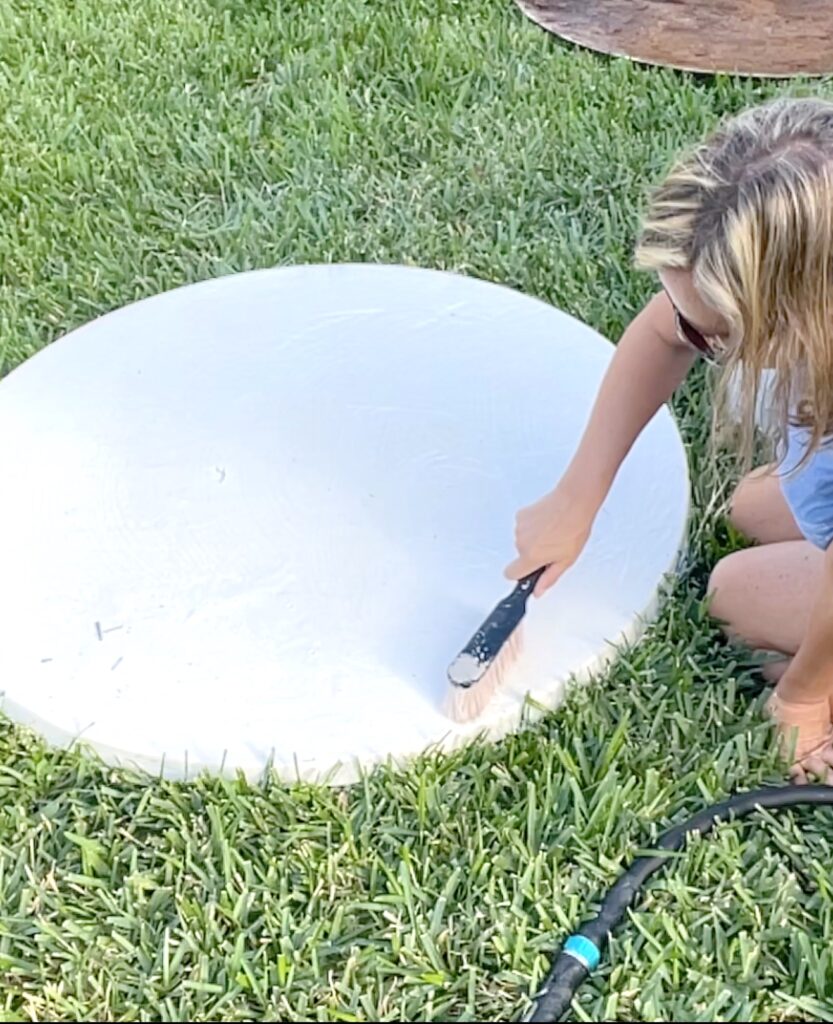
Step 2: Clean and Scrape…Scrape and Clean
Once the back came off, all of the saturated press board fell out in pieces and crumbled.
It was pretty gross.
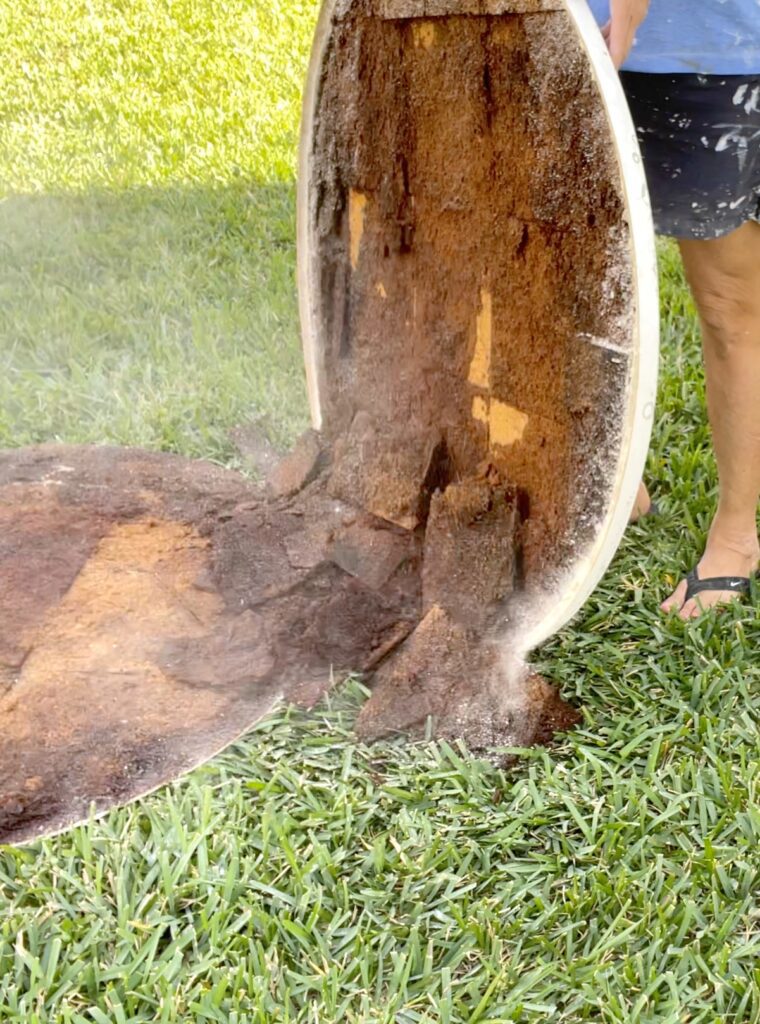
I scraped the inside as best I could and then, scrubbed everything with soap and bleach.
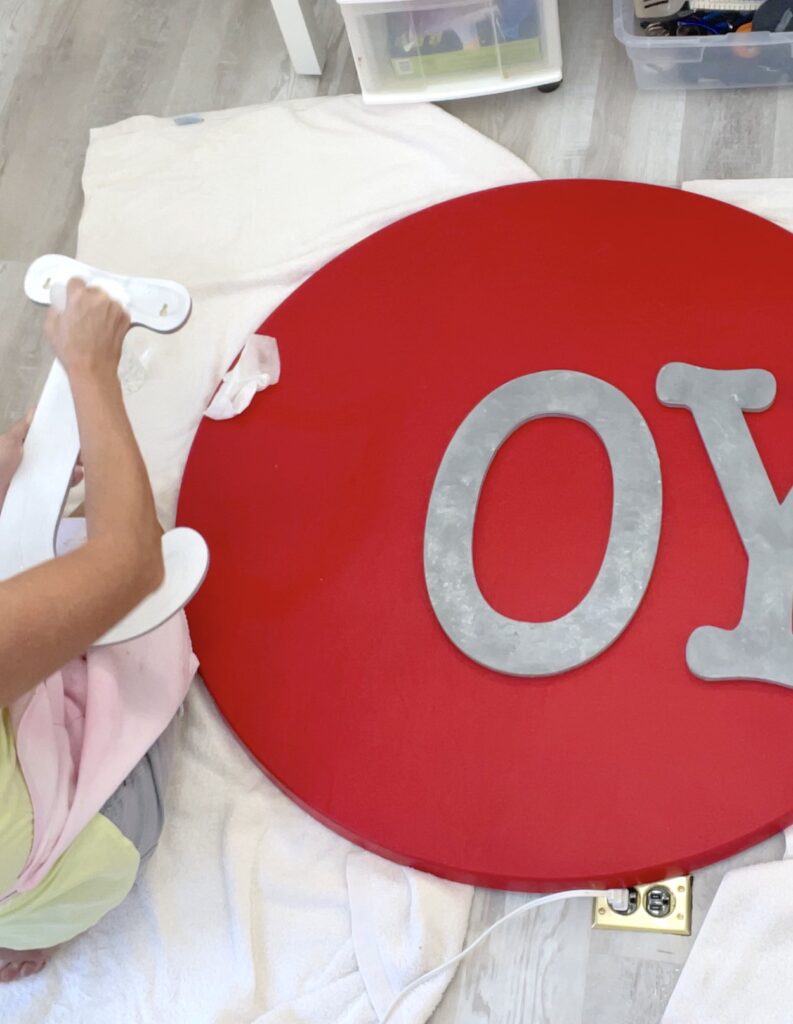
Step 3: Paint
I used a nice bright red paint to give the tabletop a refresh and point it in the direction of Christmas!

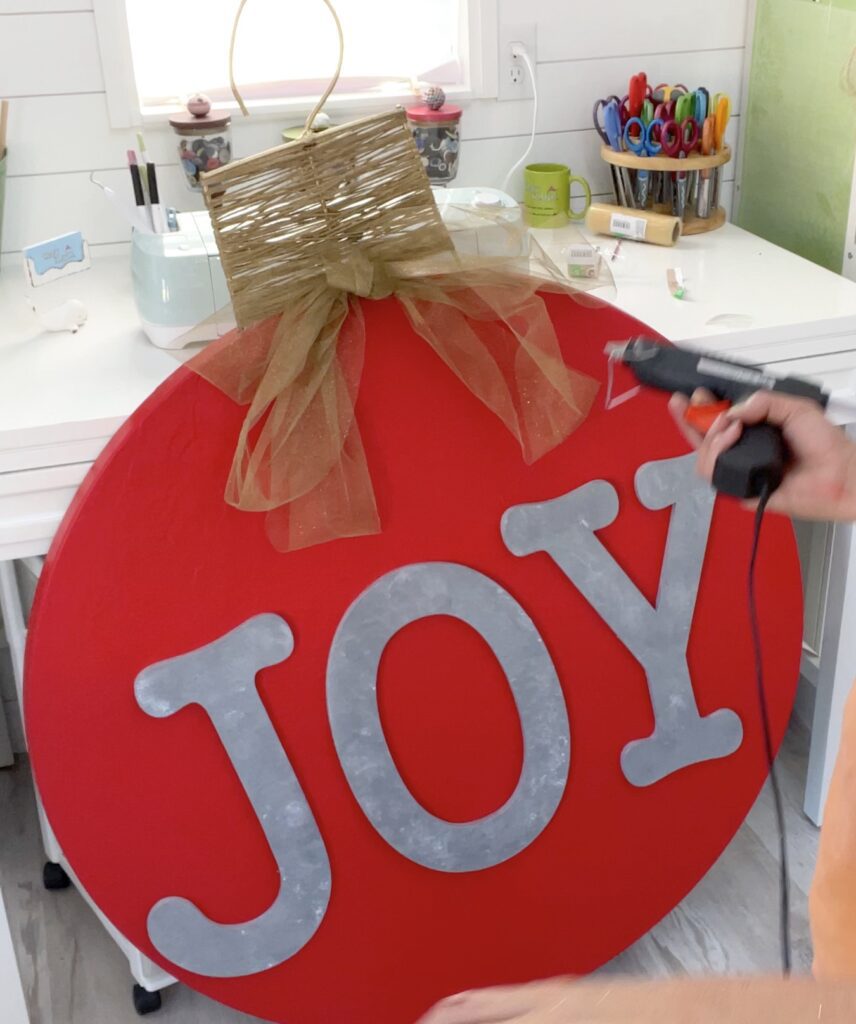
Step 4: Oh JOY!
When making outdoor Christmas decorations, they should make an impact because otherwise, they will get lost in the great outdoors and your landscaping.
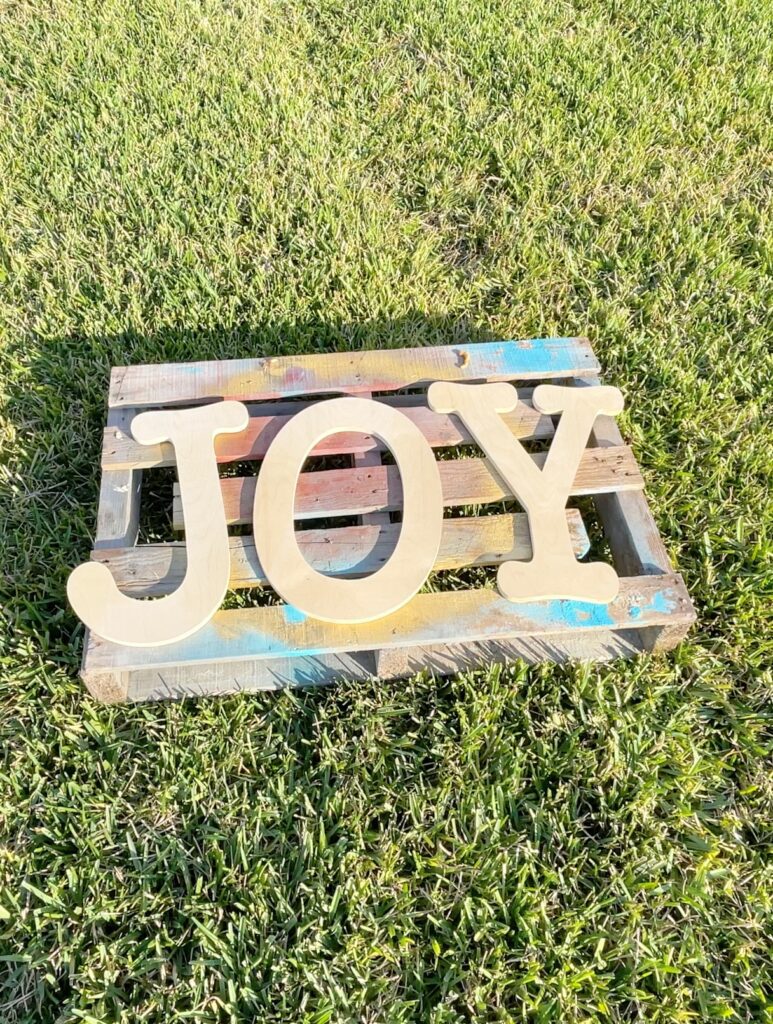
This oversized Christmas ornament needed oversized letters. I used the joy inspiration from this Nail Polish Ornament I made many years ago!
And in true meant-to-be fashion, I just happened to have oversized J-O-Y letters left over from last year. I was floundering on how to use them when this opportunity presented itself!
So, I primed and painted the oversized letters. I mistakenly bought indoor silver paint instead of the outdoor version.
My bad.
To fix that mistake, I was going to spray it with a gloss clear coat. Unfortunately, every bug in the neighborhood decided to sacrifice itself in the clear coat.
Ugh.
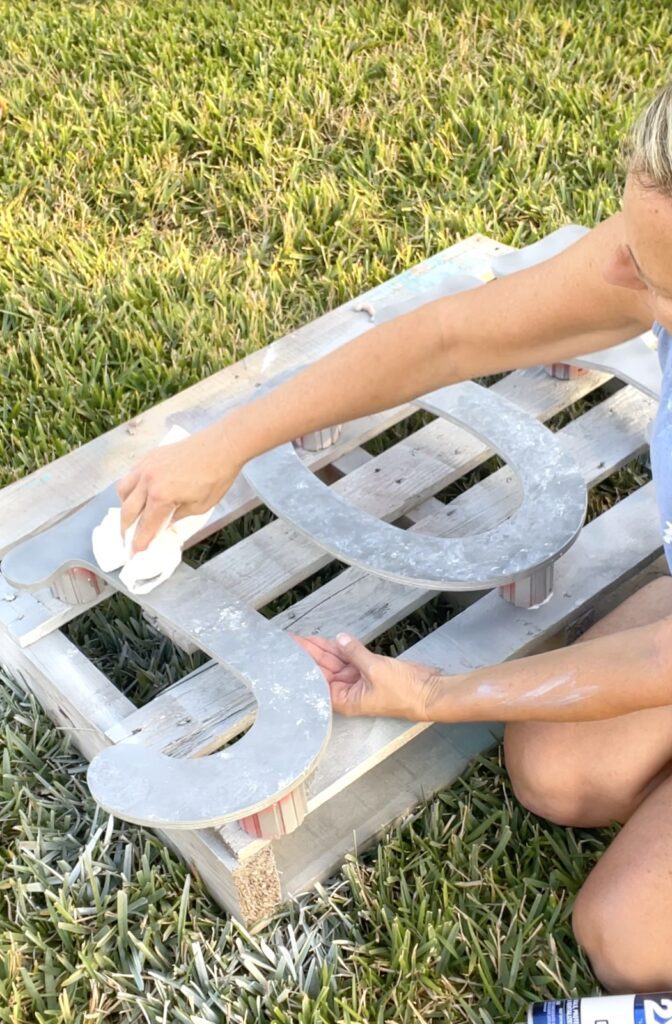
My mistake was trying to pick one out. I couldn’t undo the damage to the finish.
My solution for that was to take a paper towel and mottle the color. Because I did the minimum allowed dry time for each coat, it reactivated or re-wet…or something like that.
It ended up mixing the white with the silver and the clear coat. I think it looks okay, so I didn’t freak.
Let’s be honest, nothing ever goes as planned.
Step 4: Glue
I glued on the letters with glue that will withstand being outside.
Step 5: I Found a Trellis
I hemmed and hawed about what I would use to make the ornament cap. Then, I saw a trellis…also on the side of the road!
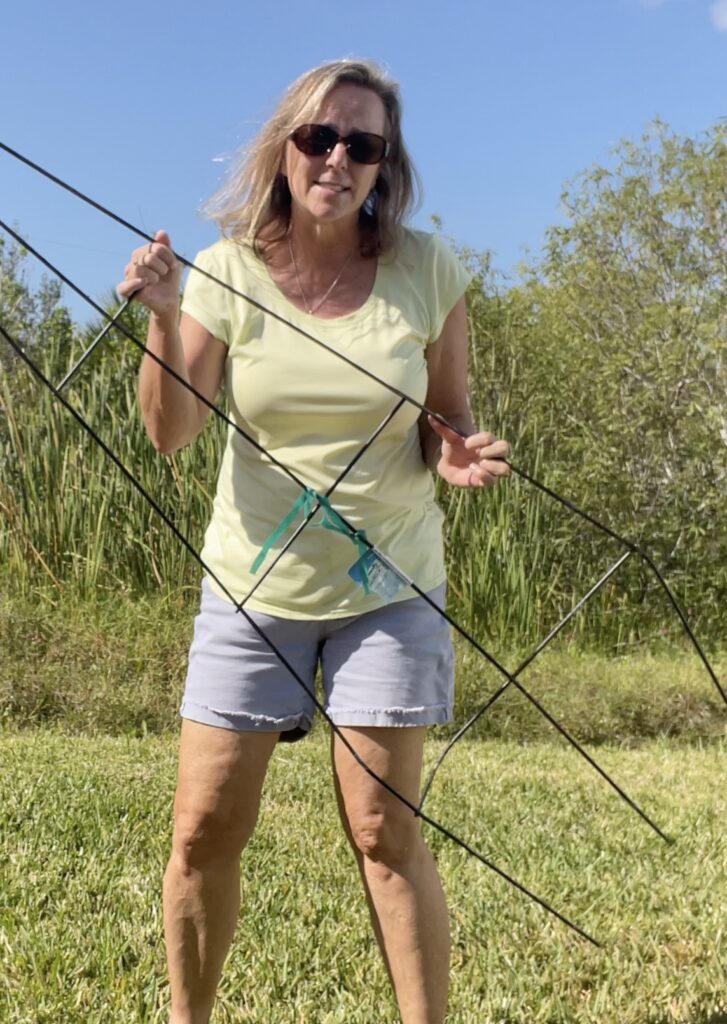
PERFECT!!!
I cut the middle section of the trellis down to size and it was perfect for the cap!
I left the top stem sticking up and bent it for the hook.
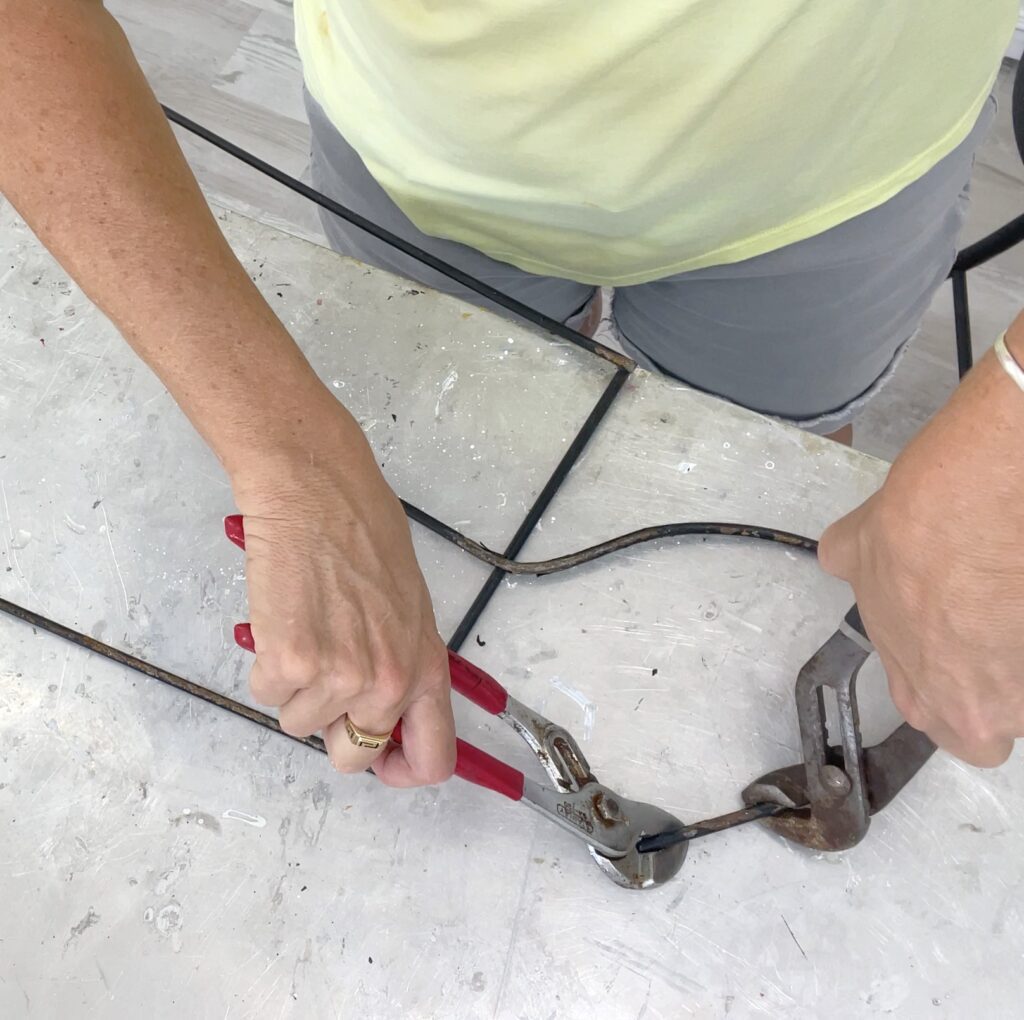
The middle bottom piece I cut shorter than the ends but that was so the ornament wouldn’t fall through when I drilled the holes into the side of the tabletop.
Then, I cleaned it up with a wire brush and sprayed it with a rust reformer and gold paint.
Step 6: Creating the Cap
*This can get a little messy, so be sure to protect your work surface.
Once I bent the hook for the cap, I used liquid starch and the cheapest yarn I could find to create the body of the cap. The color of the yarn does not matter because we are going to paint it, which will make it able to withstand the weather (I hope).
You can see exactly how I did it in the video above, but I simply filled a bowl with liquid starch and put the yarn down in it.
Then, I tied the end of the yarn onto the frame and started wrapping it. It’s important to keep putting yarn into the starch while wrapping.
Once it’s done, it should look something like this.
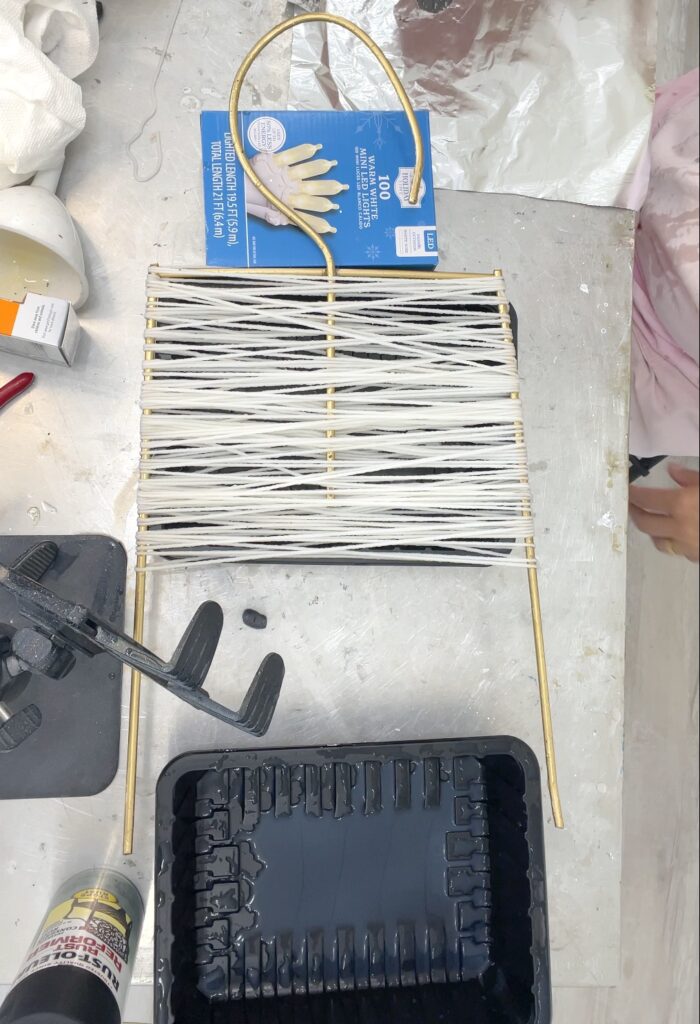
Then, cut the yarn and tie off the other end.
You are going to need to let it dry overnight.
Once dry, I quickly sprayed it with gold spray paint.
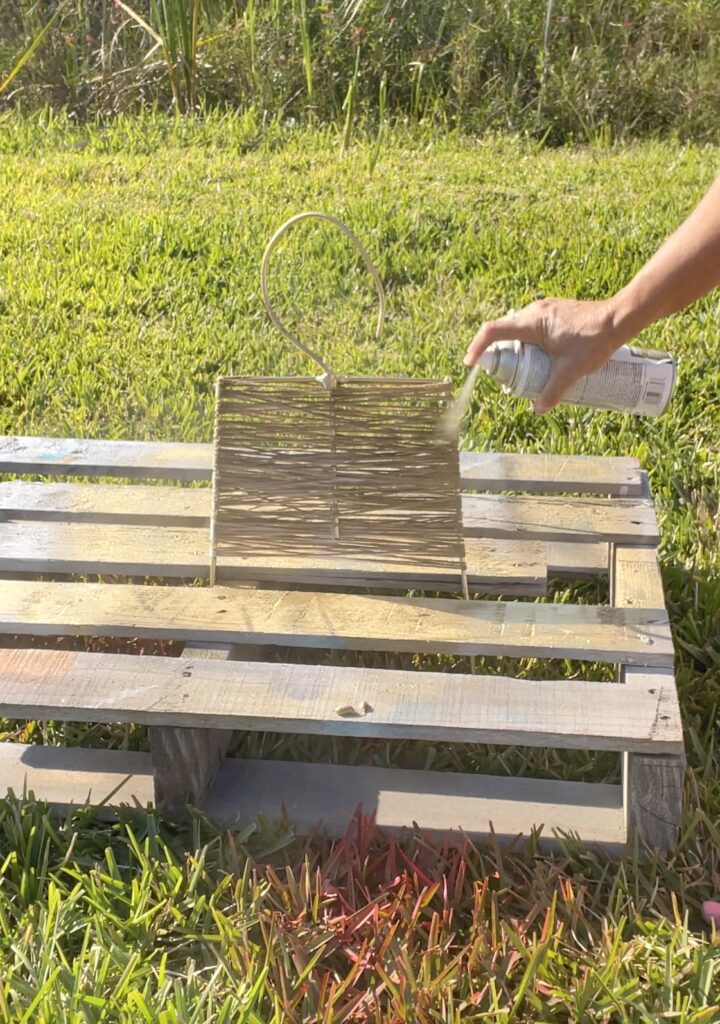
Step 7: Time to Finish
The parts of the outdoor Christmas decoration was really coming together! I drilled holes in the side of the tabletop, so the trellis legs (ornament cap) could slide right in.
The middle leg rested on the edge so there was no pressure on the yarn for it to push down.
I created a bow out of gold tulle from the dollar store and it was a little droopy, so I took it outside and sprayed it with the gold paint before I attached it with a wire.
I like it plain like that…BUT since it was going to be outside, I thought it might need a little something extra.
So I took some white berry fake picks that I had on hand, and added a little glue and glitter for a little sparkle and pizzaz!
Then, I added them to the oversized Christmas ornament, right by the bow.


That’s it! Look at the size of that ornament!
Totally worth the effort!
Now, I could hang it, but I thought our tortoise needed a little holiday cheer! His Santa hat was not enough!
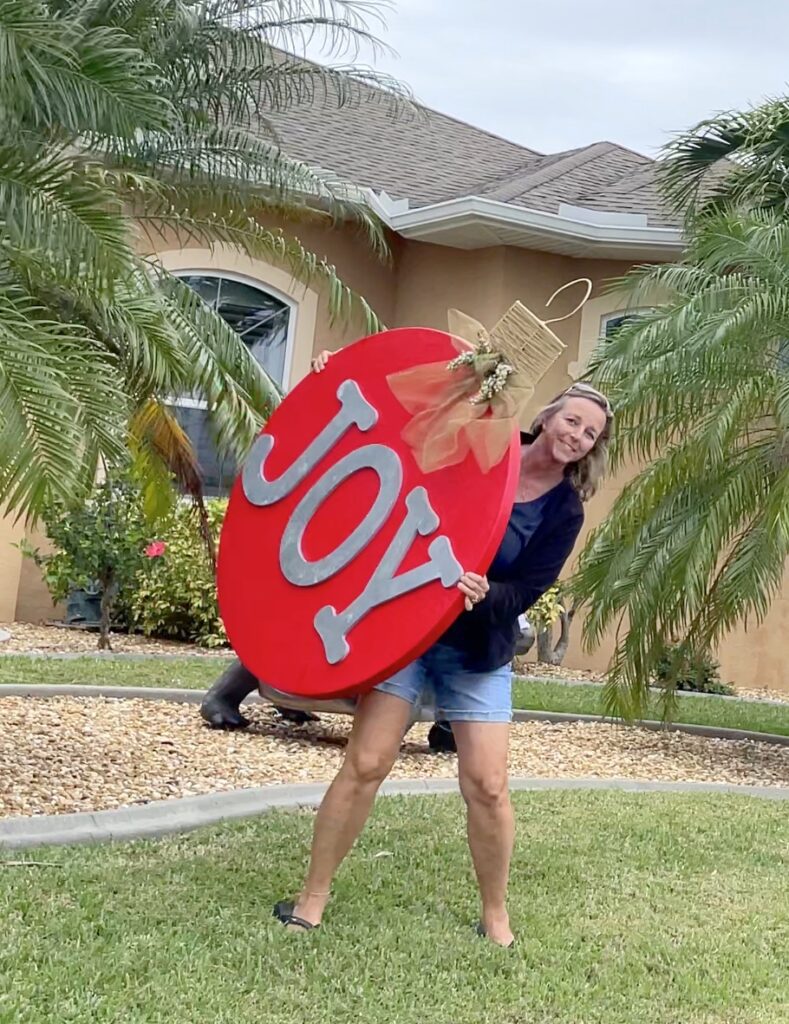
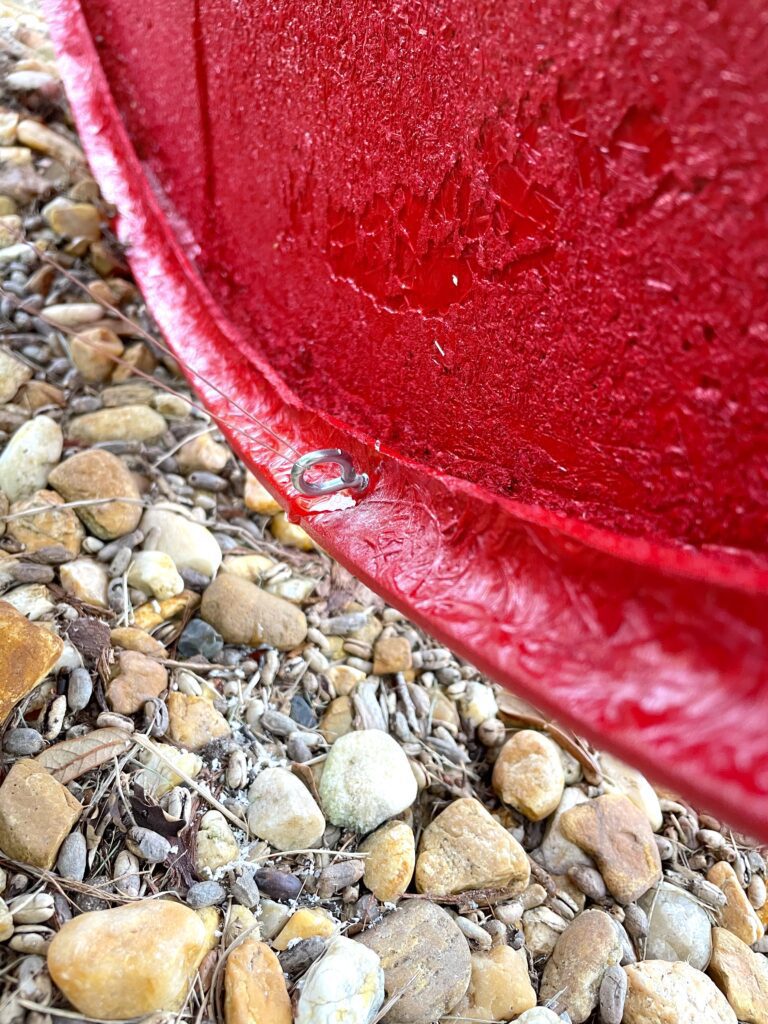
So I put it in front of our shorter palm trees and it was Greg’s idea to add eye hooks and tie it to the trees in case some big winds hit.
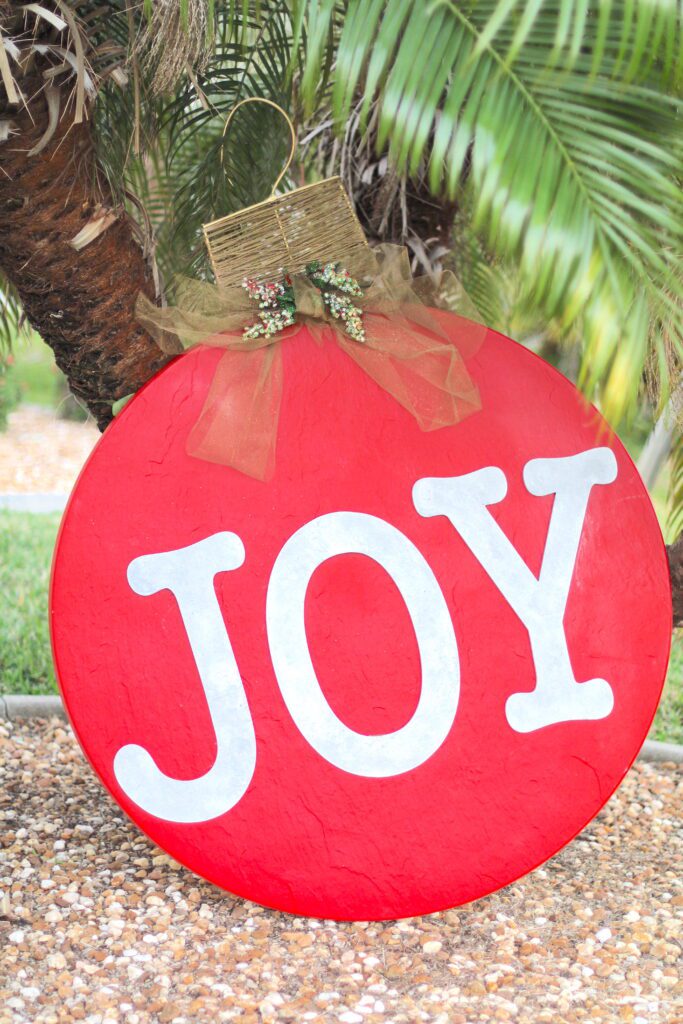
I love the way it turned out! I considered adding lights to it but I wasn’t sure if that would be too much.
Be sure to let me know what you think!
Did you catch my Christmas tree stand project which was also a Garbage to Gorgeous project or my pine cone basket…hello…also a garbage pick!
Of course, I’ve made projects with stuff I just picked out of the yard, like this wreath that can convert to any season!
Tell me if you are ready for the holidays!
Be sure to PIN IT for later!
Hi Mona, that Joy looks great. You are so creative and can look at something and see the possibilities. Me I just see an old damaged table. I with I had the ability to see beyond what is in front of me.
Super fantastic . You do great vision work. Love it.
Love it! Do you have a newsletter that I can subscribe to?
Hi Jody-
Thank you! I just added you to the email list!
Mona