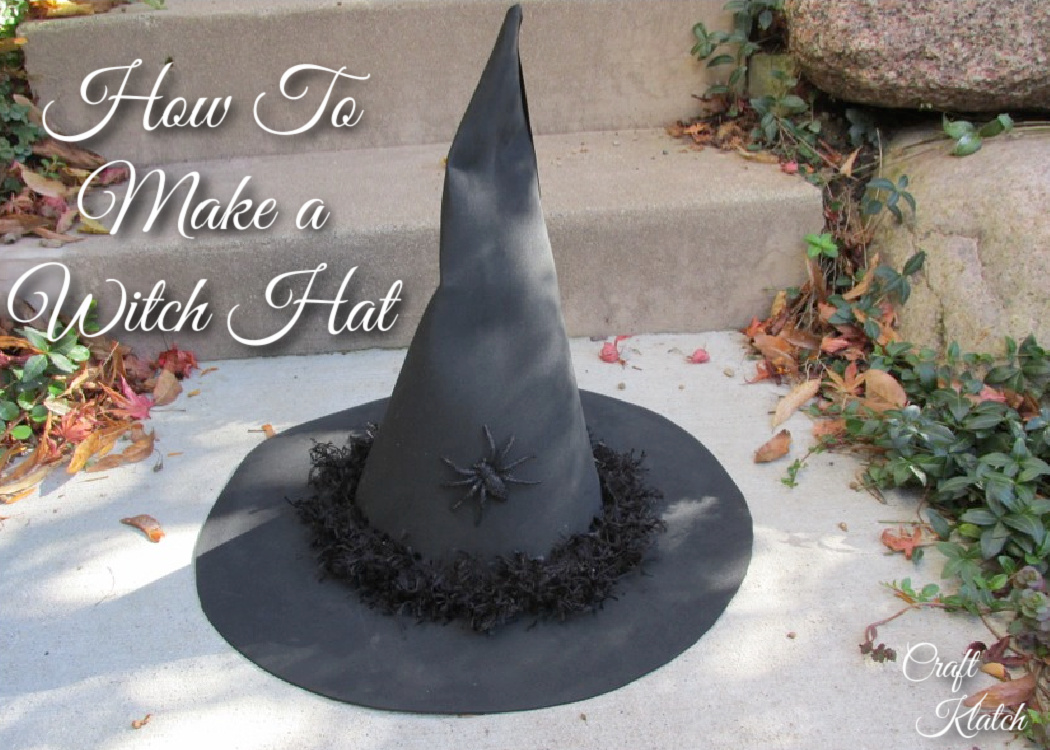
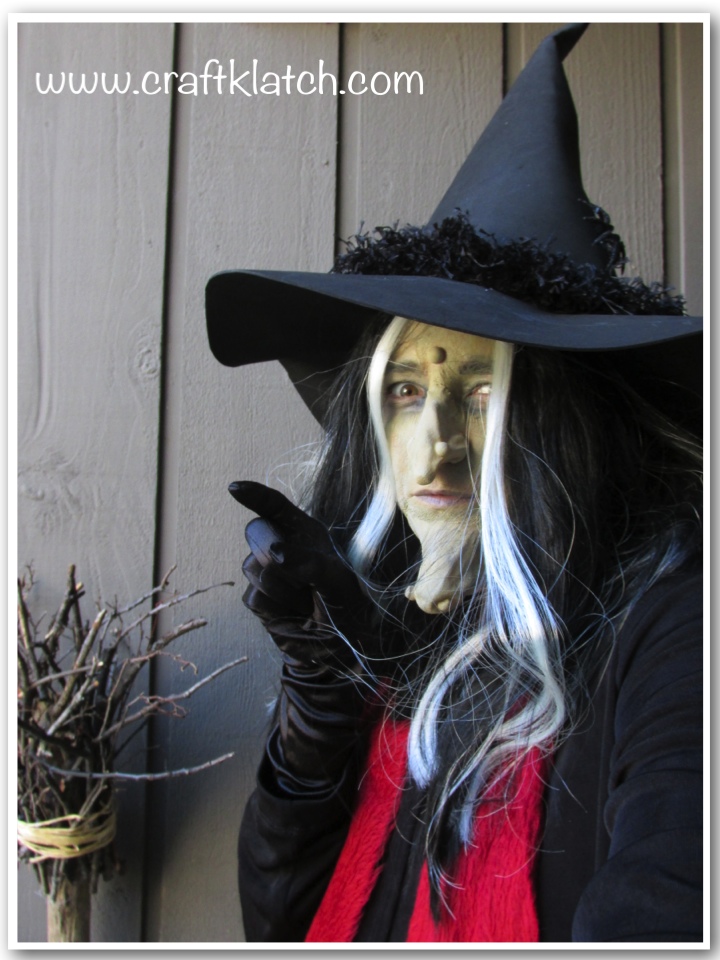
Have you ever wanted to make a witch hat? Now you can! If you like to make your own Halloween costumes or spooky Halloween decorations, this project is for you!
Wear it or use it as part of your Halloween decor!
There is More to a Witch than a Hat!
To complete your witchy look, you are going to need more than just a hat! Be sure to complete your ensemble!
Here are some of the other items you will need and they are easy to make!

Supplies You Will Need to Make the Witch Hat
*This blog uses affiliate links. As an Amazon Associate I earn from qualifying purchases.
- Black craft foam roll: https://amzn.to/2IKqaTT or https://shrsl.com/1nq2t
- Tape (I used duct tape, but this one might be better): https://amzn.to/2RjmjkA
- Hot glue: https://amzn.to/2IN9Od4
- Narrow black ribbon: https://amzn.to/2RpnZco
- Black trim: https://amzn.to/2WLvYkT
- Black glitter spider: https://amzn.to/2IKXev5
- String: https://amzn.to/2Rpoe7i
- Pencil: https://amzn.to/2Rk3DBl
- Scissors: https://amzn.to/2RjnlwS
- Wire: https://amzn.to/2MSUa5d
Here is the Witch Hat Video Tutorial
Witch Hat Directions
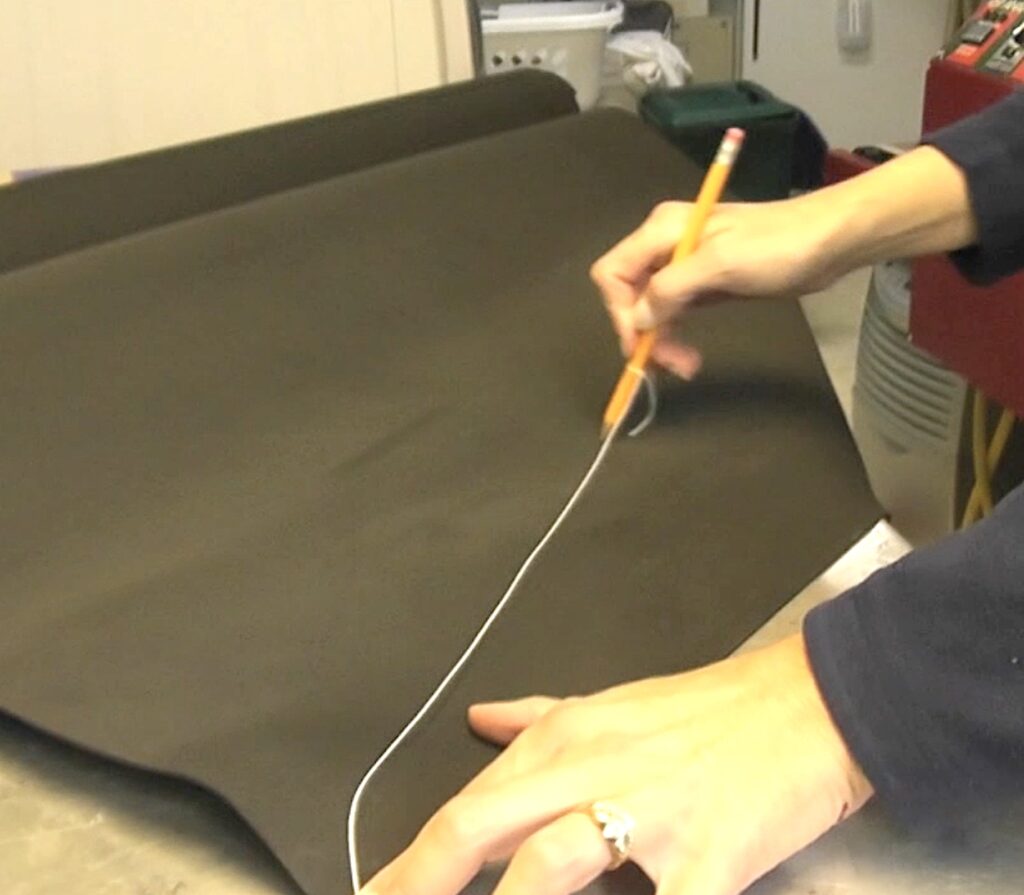
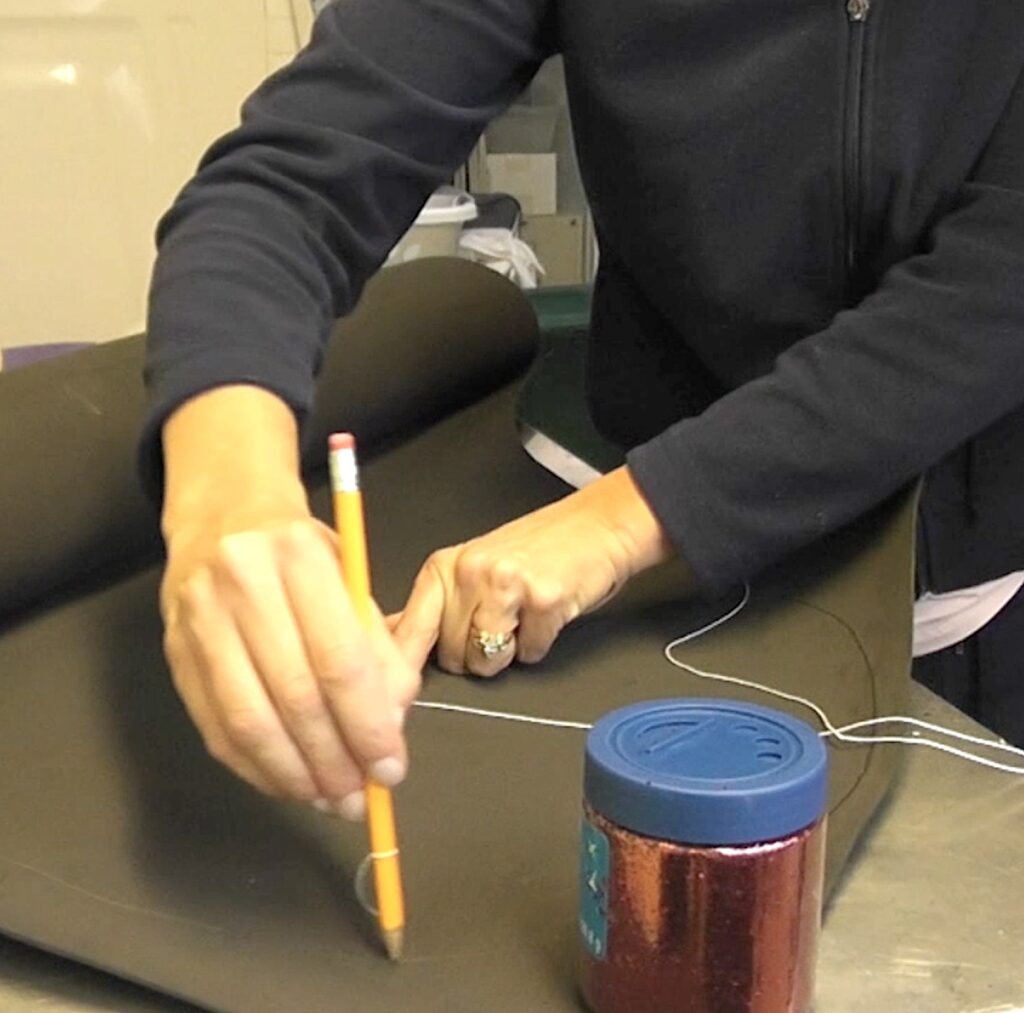
Step 1
Take a string and tie it to a pencil. Make the string as long as you want your hat tall. Working from the corner of your foam, put the free end of the string onto the corner of the foam. Place a finger on it and hold it firmly. Stretch the pencil back, making the string tight and straight. Place the pencil on the foam and draw from one end of the foam to the other. You are drawing a curve.
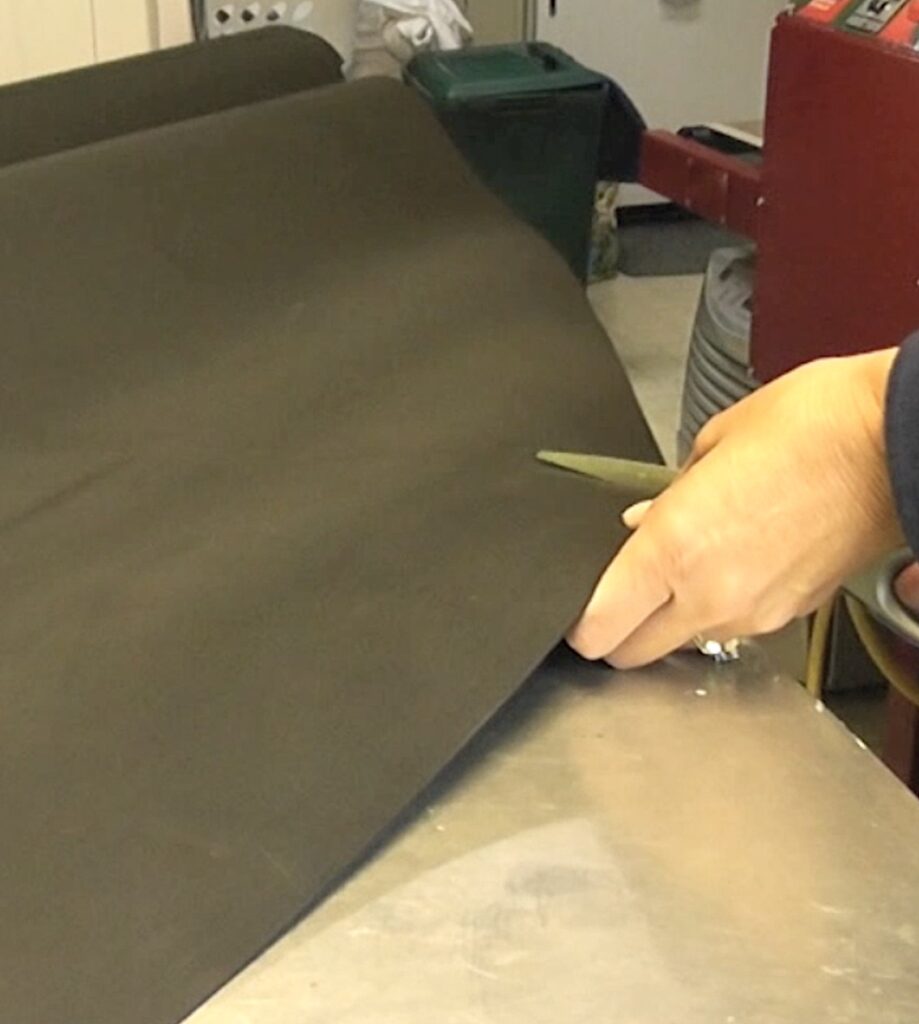
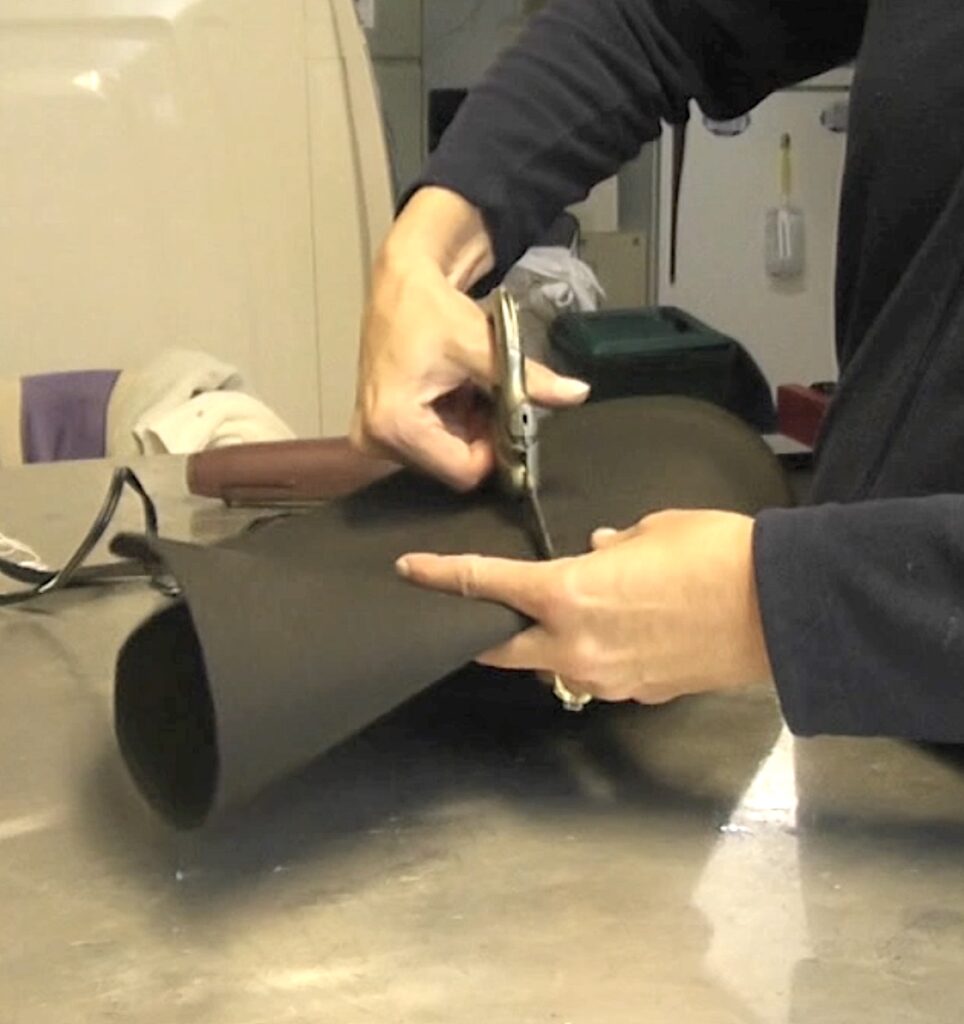
Step 2
Cut it out. The foam cuts easily with regular scissors.
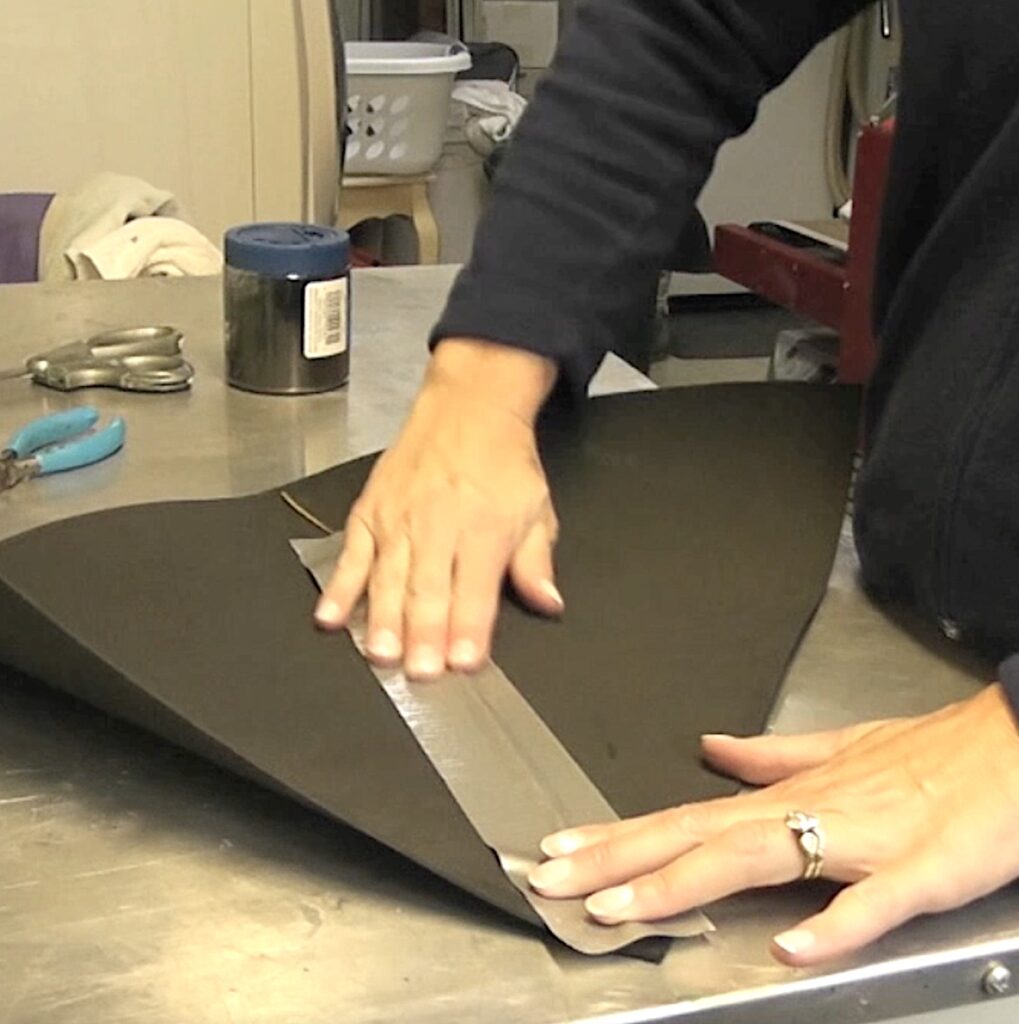
Step 3
If you don’t want your witch hat to be stick straight and you want to be able to bend it to give it character, tape a piece of wire into the cone of the hat. Use bendable wire and duct tape to secure it.
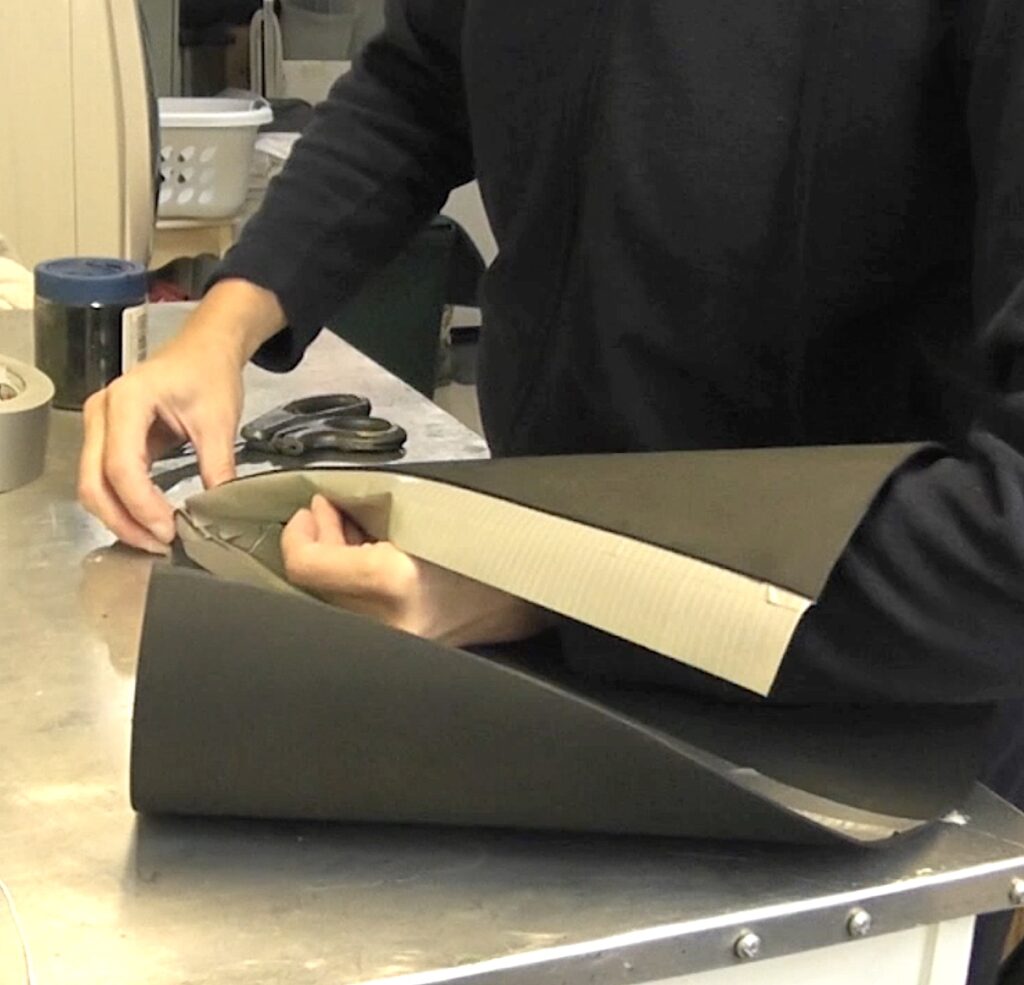
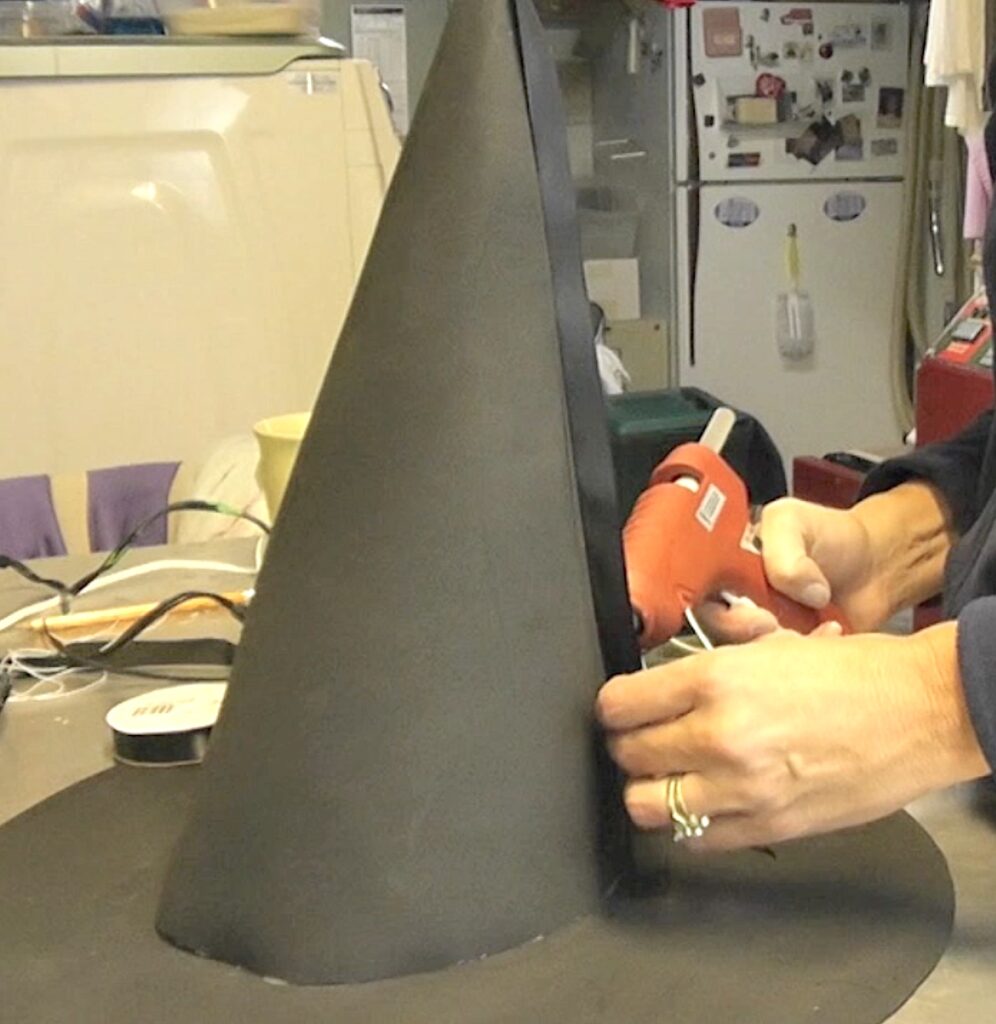
Step 4
Roll the cone portion of the hat together. Put a strip or two of duct tape on one of the straight edges of the foam. Half of the tape will overhang the foam. Roll the cone together – it may take a little doing. The tape should be on the inside of the cone. As you roll the cone, you will use the tape to secure the cone together.
Step 5
Time for the brim! Take your string and make it as long as you want your brim to be wide. Fold the string in half. Put the string in the center of a piece of foam and hold the free end of the string with your finger. Draw a circle with your pencil. Then cut it out.
TIP: If your foam curls (like mine did), lay it flat on a table and apply a little heat. I used my heat gun. Be careful and don’t add too much heat, or you may melt the foam.
Step 6
Fold the brim in half (don’t actually crease it) and cut a hole. Open it up and keep cutting until it fits your head.
TIP: Cut the hole in the brim a little smaller than your head. Then, make small cuts around the inside of the inner hole. That way, it will expand to fit different size heads.
Step 7
Hot glue the cone to the brim of the hat.
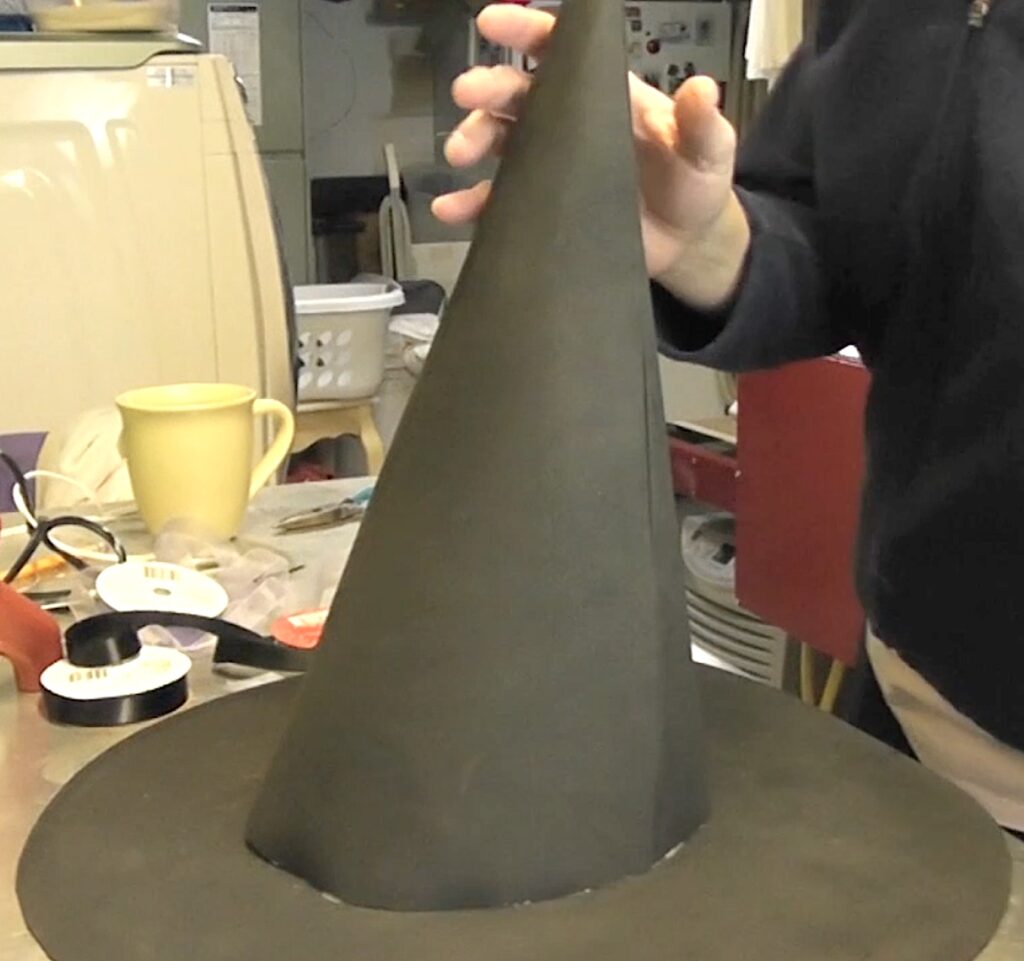
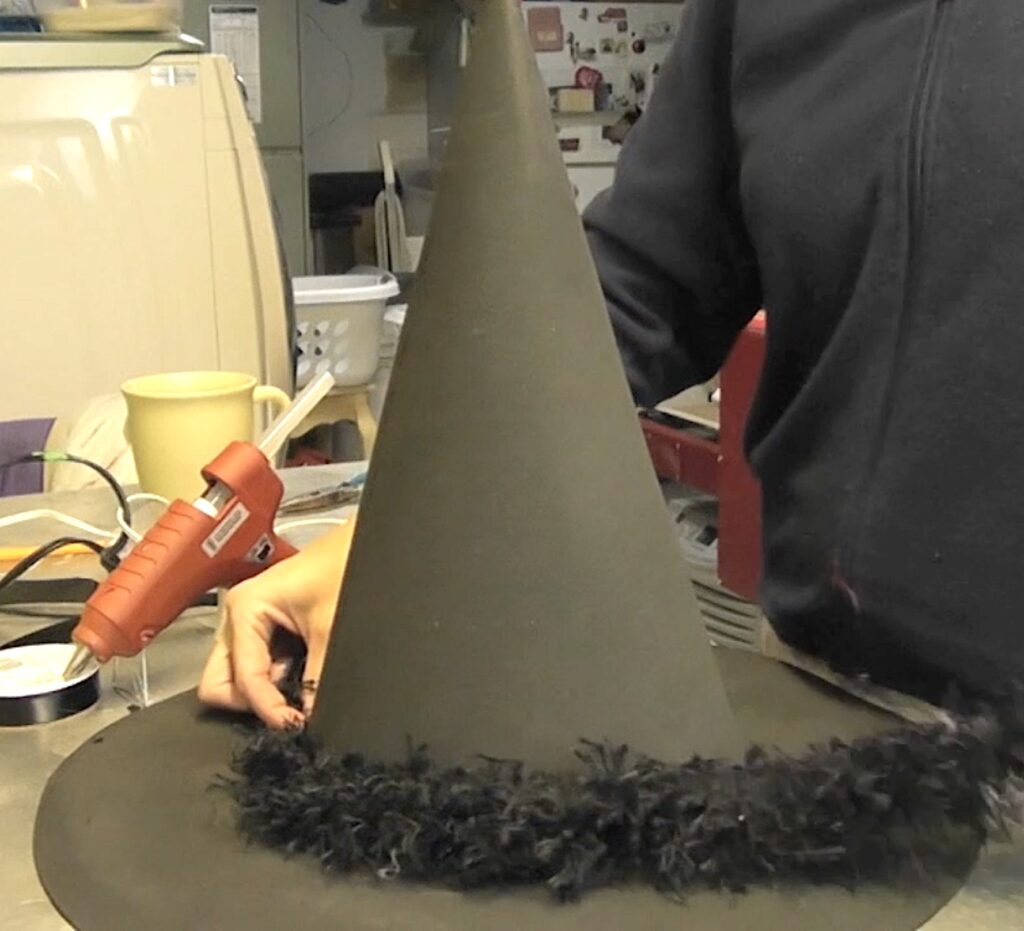
Step 8
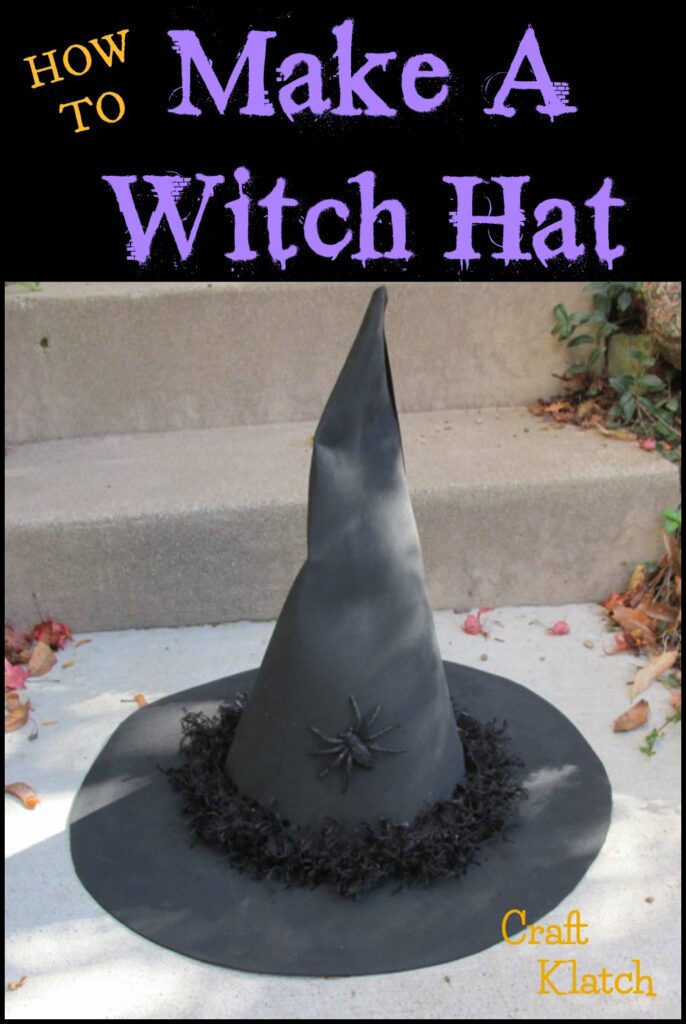
Take a narrow black ribbon and glue it along the seam on the back of the witch hat to hide it.
Step 9
Now is the time to decorate! You can glitter the whole thing. I decided to keep it a little more simple and monochromatic, so I could accessorize with any colors I wanted. I glued trim around the cone and I added a glitter spider.
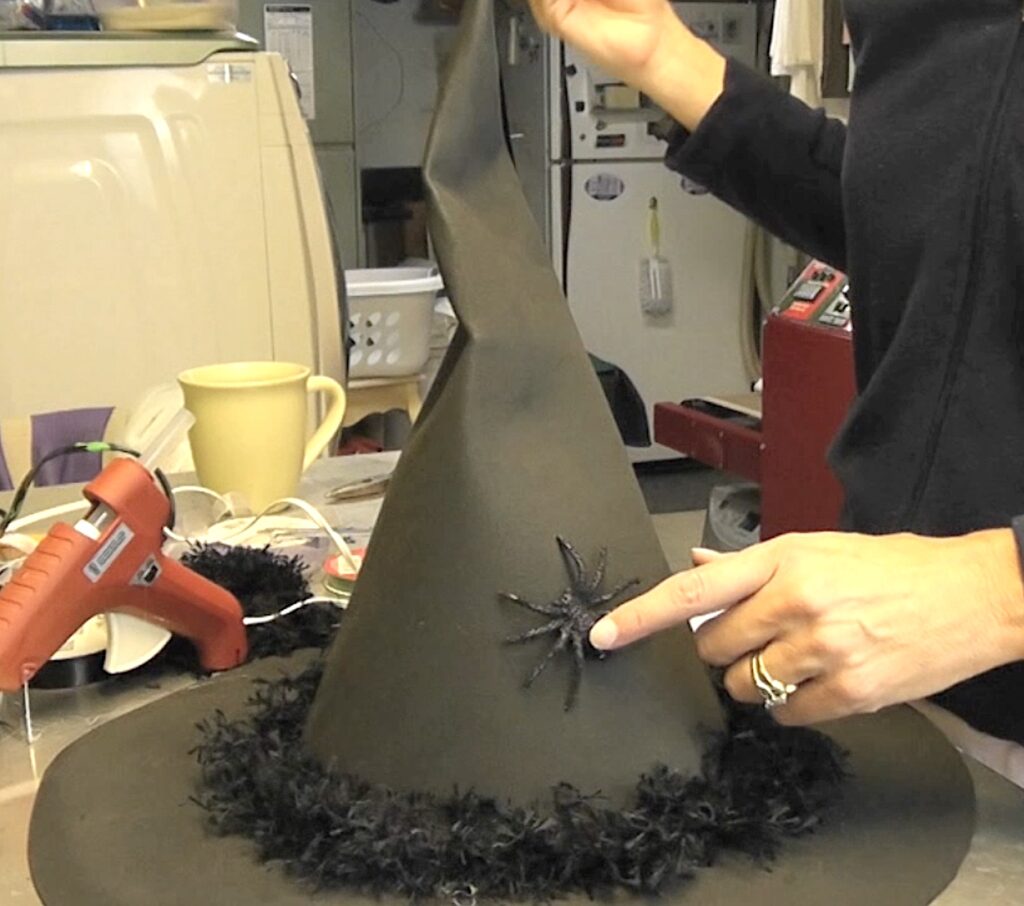
But…
This is an opportunity to let your fun or spooky creativity shine! Go crazy and decorate any way you want!
Again, this makes a great witch hat for Halloween costumes or use it for spooky Halloween decorations!
More Witch Decor!
If witches are your thing, I have a bunch of great witch projects I think you will enjoy!
Here are a few:
- Golf Ball Halloween Witch
- Hocus Pocus Witch Themed Coasters
- Witch Hat Resin Coasters
- Wicked Witch Pumpkin
- Halloween Witch Ornament
If you want to mix it up a little, you can always throw a Zombie Votive into the mix!
Witch Halloween Decor!
Incase you don’t have to make your own hat or other fun spooky witch decor, you can pick up some of these instead!

Thanks for stopping by! Remember: Life’s too short not to shimmer, so grab your glue gun and your glitter!™ Stay safe!
Mona
Be sure to PIN IT for later!
I enjoyed your video and will use the string-pencil technique in future. That will save a lot of time spent measuring. I also like your idea to add wire. That really makes the cone of the hat work. Thank you!
Where is the pattern??